


Playwright, a robust and quick browser automation tool, has become well-known for its smooth cross-browser testing capabilities. Going forward we will discuss how to incorporate Playwright into CI/CD workflows to enable automated, scalable testing that guarantees the delivery of high-quality software. Using Playwright in your CI/CD workflow allows you to do thorough tests on a regular basis, identify problems early, and keep a seamless deployment process at scale.
E2E Testing with Playwright: Key Points
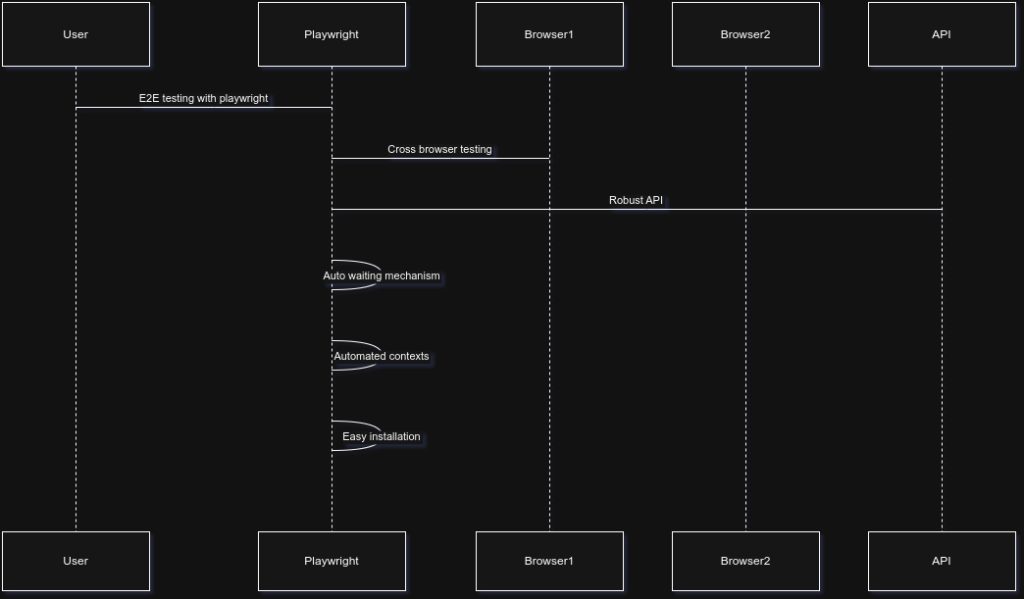
Developers are increasingly choosing Playwright, a robust and adaptable automation framework created by Microsoft, for E2E testing. When using Playwright for your E2E testing requirements, keep the following points in mind:
- Cross-Browser Testing: Playwright enables developers to guarantee consistent behaviour across platforms by supporting all of the major browsers, including as Chromium, Firefox, and WebKit.
- Robust API: Playwright offers extensive control over browser operations, such as clicking, typing, and navigation, through a broad suite of APIs, which makes script development versatile and easy.
- Auto-Waiting Mechanism: Playwright’s integrated auto-waiting mechanism, which only initiates activities when the required conditions are satisfied, is one of its most notable characteristics. This greatly lowers the number of faulty tests brought on by timing problems.
- Automated Contexts: The framework offers a productive method for establishing separate browser contexts. Tests can run more quickly because to this feature’s enhanced resource management and parallel testing capabilities.
- Easy Installation and Setup: Playwright is simple to get started with since npm makes installation simple. Additionally, the thorough documentation helps developers scale up quickly.
Integrating Playwright into CI/CD Pipelines
Incorporating Playwright into your Continuous Integration/Continuous Deployment (CI/CD) pipeline ensures code dependability prior to deployment and improves testing efficiency. This is a brief tutorial on how to accomplish this integration:
- Setup Playwright Environment
- Make sure Playwright is configured in your application before integrating it into the CI/CD workflow. Install Playwright using npm to start your project:
npm init -y
npm init playwright@latest- Setup Project Skeleton
- Playwright will generate the following files and download the required browsers. The tests directory is where you may write your test scripts, which will be run throughout the CI/CD procedure.
playwright.config.ts
package.json
package-lock.json
tests/
  example.spec.ts
tests-examples/
demo-todo-app.spec.ts- Choose CI/CD Tool
- The majority of contemporary CI/CD solutions, including Jenkins, CircleCI, GitHub Actions, and GitLab CI, offer strong support for executing Playwright tests. Select a CI/CD tool that works well for your workflow and make sure it is set up to communicate with your project.
- Configure the CI/CD Pipeline
- Turn on the automatic execution of Playwright tests in your CI/CD pipeline. An example GitHub Actions configuration is shown below:
name: Playwright Tests
on:
  push:
    branches: [ main ]
  pull_request:
    branches: [ main ]
jobs:
  test:
    timeout-minutes: 60
    runs-on: ubuntu-latest
    steps:
    - uses: actions/checkout@v4
    - uses: actions/setup-node@v4
      with:
        node-version: lts/*
    - name: Install dependencies
run: npm ci- Add Browsers and Dependencies
- You might require further browser configuration in CI/CD systems. Set up the required browsers to be installed by Playwright. Include the installation step in your CI/CD setup:
    - name: Install Playwright Browsers
      run: npx playwright install --with-deps
    - name: Run Playwright Smoke tests
      run: npx playwright test --grep "@smoke"
    - name: Run Playwright Acceptance tests
run: npx playwright test- Collect and Analyse Test Results
- To track the test results for your application, gather test results after your tests are complete. For improved analytics, think about integrating reporting tools like Allure or TestRail or exporting data as artifacts.
    - uses: actions/upload-artifact@v4
      if: ${{ !cancelled() }}
      with:
        name: playwright-report
        path: playwright-report/
        retention-days: 30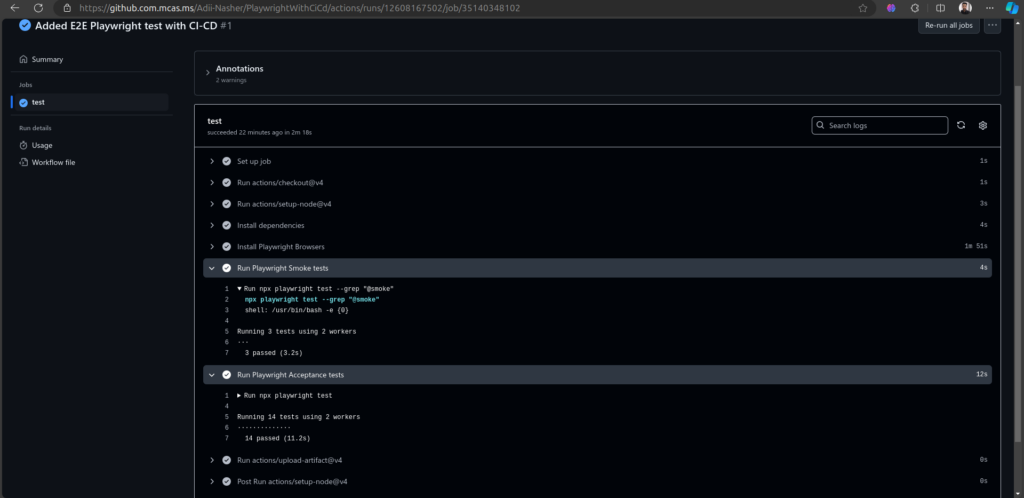
Monitoring Test Results
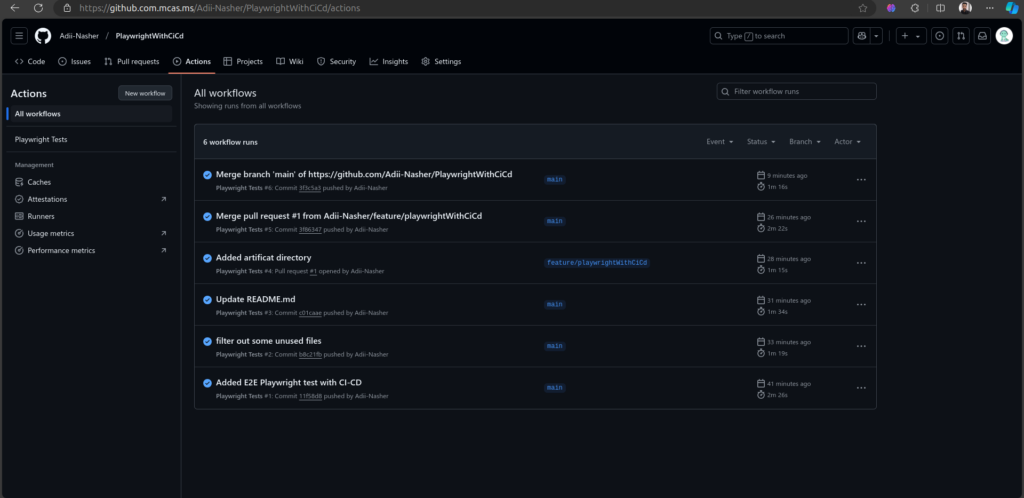
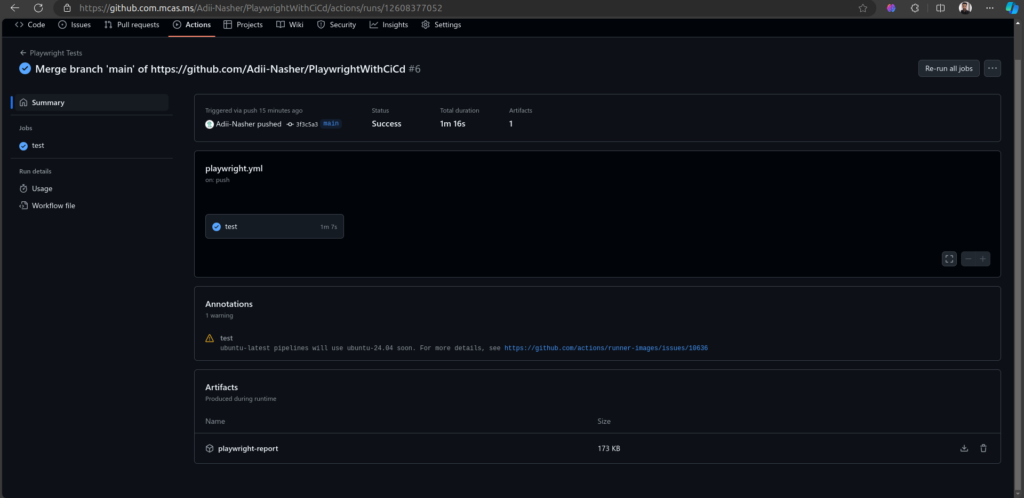
After setting up the workflow, monitoring the results becomes crucial. GitHub Actions provides a user-friendly interface for reviewing the outcomes of your tests:
- View the Workflow Run: Proceed to your repository’s “Actions” tab. A list of workflow runs connected to your pull requests or commits will be displayed to you.
- Monitor Workflow Logs: Regularly review logs generated during test runs in GitHub Actions. Detailed logs can aid in diagnosing issues and optimizing test performance.
- Access Artifacts Post-Run: From there, select the specific workflow run to view the uploaded artifacts, which can be downloaded for review.
Conclusion
There are several aspects to the outcome of using Playwright tests in a CI/CD architecture. First of all, it promotes a culture of quality assurance in which testing is not an afterthought but rather a crucial step in the development process. Secondly, it enables quick feedback loops, which enables engineers to take swift, well-informed decisions. Last but not least, it helps lower the expenses related to errors, greatly enhancing software dependability and efficiency.