


In the last blog, we covered how to create and manage virtual machines (VMs) using the Google Cloud Console and the gcloud CLI. In this blog, we will take things to the next level by using Terraform to create a VM with advanced configurations. Terraform is a powerful tool for infrastructure automation, and in this tutorial, we’ll go through how to set up a VM with:
- A specific service account for secure operations,
- Serial port access for debugging,
- SSH key injection for secure access,
- A static external IP to make sure your VM has a fixed IP,
- A firewall rule for opening SSH access,
- Startup scripts for automated VM initialization.
Prerequisites:
Before starting, ensure you have:
- Terraform installed.
- Access to a Google Cloud account with the necessary permissions (Compute Admin, Service Account User).
- A service account JSON file for authentication.
- A public SSH key for secure login to your VM.
Step 1: Initialize Your Terraform Project
In your Terraform configuration directory, you should have the following files:
main.tf: Defines the resources (VM, firewall, etc.).variables.tf: Declares all variables.provider.tf: Specifies the Google Cloud provider configuration.terraform.tfvars: Sets values for the variables defined invariables.tf.startup.sh: Custom script that runs when the VM starts.output.tf: Outputs to show essential details such as IP addresses and SSH connection commands.
Step 2: Writing the Terraform Configuration
Here’s a breakdown of the core Terraform configuration that you can use to create your VM with all the features mentioned above.
main.tf
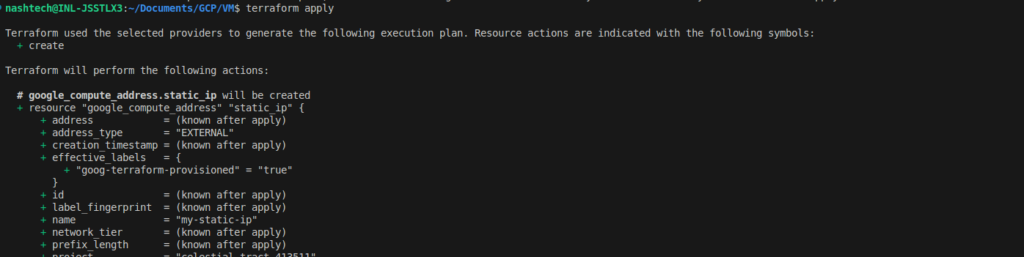
resource "google_compute_address" "static_ip" {
name = "my-static-ip"
region = var.region
}
resource "google_compute_instance" "vm_instance" {
name = "my-vm"
machine_type = "e2-micro"
zone = var.zone
tags = ["allow-ssh"]
boot_disk {
initialize_params {
image = "debian-cloud/debian-11"
}
}
network_interface {
network = "default"
access_config {
nat_ip = google_compute_address.static_ip.address
}
}
metadata = {
serial-port-enable = "1"
ssh-keys = "${var.ssh_user}:${file(var.ssh_public_key_path)}"
startup-script = file("startup.sh")
}
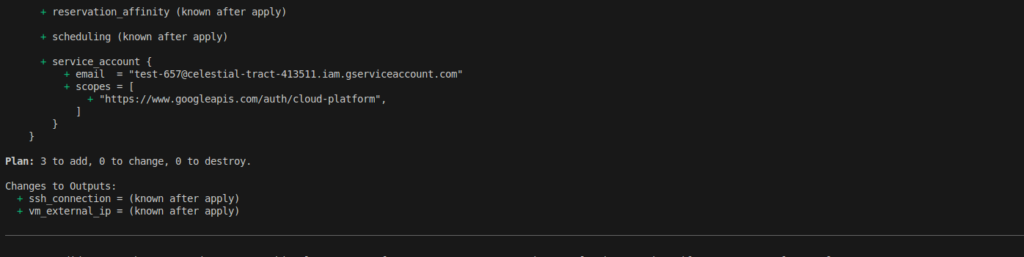
service_account {
email = var.service_account_email
scopes = ["https://www.googleapis.com/auth/cloud-platform"]
}
}
resource "google_compute_firewall" "ssh" {
name = "allow-ssh"
network = "default"
allow {
protocol = "tcp"
ports = ["22"]
}
source_ranges = ["0.0.0.0/0"]
target_tags = ["allow-ssh"]
}Explanation:
- Static IP: The
google_compute_addressresource creates a static external IP to be assigned to the VM. - VM Creation: The
google_compute_instanceresource defines the VM, including boot disk settings, network interfaces, metadata (for serial port access and SSH key injection), and startup script. - Service Account: The VM uses a service account with the required permissions to interact with Google Cloud.
- Firewall Rule: The
google_compute_firewallresource opens port 22 for SSH access from anywhere (0.0.0.0/0).
variables.tf
variable "project_id" {
  type        = string
  description = "The GCP project ID"
  default     = "celestial-tract-413511"
}

variable "region" {
  type    = string
  default = "us-central1"
}

variable "zone" {
  type    = string
  default = "us-central1-c"
}

variable "credentials_file" {
  type        = string
  description = "Path to service account key file"
  default     = "/home/nashtech/Downloads/celestial-tract-413511-becfe2019156.json"
}

variable "service_account_email" {
  type        = string
  description = "Service account to attach to the VM"
  default     = "test-657@celestial-tract-413511.iam.gserviceaccount.com"
}

variable "ssh_user" {
  type    = string
  default = "nashtech"
}

variable "ssh_public_key_path" {
  type    = string
  default = "~/.ssh/google_compute_engine.pub"
}
terraform.tfvars
project_id            = "celestial-tract-413511"
region                = "us-central1"
zone                  = "us-central1-c"
ssh_user              = "nashtech"
ssh_public_key_path   = "~/.ssh/google_compute_engine.pub"
service_account_email = "test-657@celestial-tract-413511.iam.gserviceaccount.com"
provider.tf
provider "google" {
  credentials = file(var.credentials_file)
  project     = var.project_id
  region      = var.region
  zone        = var.zone
}
startup.sh
#!/bin/bash
echo "Hello from startup script" > /var/log/startup-script.log
sudo apt update && sudo apt install -y nginx
output.tf
output "vm_external_ip" {
  description = "The external IP address of the VM"
  value       = google_compute_instance.vm_instance.network_interface[0].access_config[0].nat_ip
}

output "ssh_connection" {
  description = "SSH connection string"
  value       = "ssh ${var.ssh_user}@${google_compute_instance.vm_instance.network_interface[0].access_config[0].nat_ip}"
}
Terraform.tf
terraform {
  required_providers {
    google = {
      source  = "hashicorp/google"
      version = ">= 4.0"
    }
  }

  required_version = ">= 1.3"
}
Step 3: Running Terraform
Once you have all the configurations set, follow these steps:
- Initialize Terraform:
Runterraform initto initialize the working directory and download the required provider plugins.

- Plan the Infrastructure:
Runterraform planto see the resources Terraform will create, modify, or destroy.
- Apply the Configuration:
Runterraform applyto provision the resources defined in your Terraform files. Terraform will prompt you to confirm before creating the resources.
- Verify the Outputs:
After the Terraform apply is complete, verify the output values to check the external IP and the SSH connection string:
terraform output vm_external_ip
terraform output ssh_connection
Step 4: Access the VM
Once the VM is up and running, you can connect to it using SSH. The command will be displayed in the output of your terraform output command.
Example:
ssh -i <key-file> nashtech@<external-ip>
You can also use the serial port connection:
gcloud compute connect-to-serial-port my-vm –zone=us-central1-c
Step 5: Verifying Nginx Installation and Startup Script Execution
Once your VM is created and running, you can verify that:
- The startup script executed successfully.
- Nginx was installed by the script.
✅ Check the startup script log
Then, check the content of the log file created by the startup script:
cat /var/log/startup-script.logIf the script executed successfully, you should see:

✅ Check if Nginx is installed
You should see that the service is active (running). If not, you can start it manually:
Run:
sudo systemctl status nginx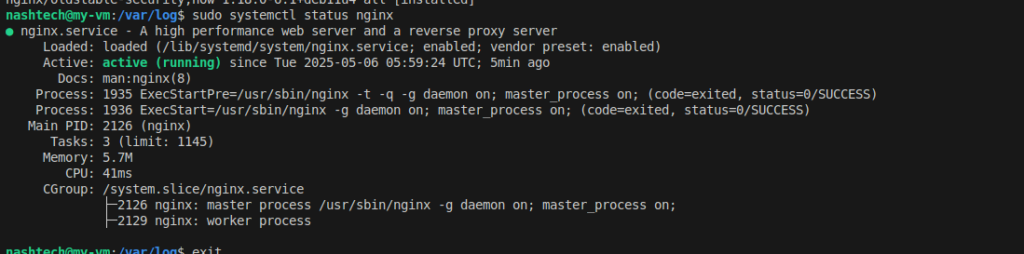
Final Thoughts
By verifying both the script execution and Nginx setup, you ensure that your VM is not just deployed—but also correctly bootstrapped to run services right from launch. This is especially powerful for setting up real-world environments where automation is key.
Conclusion
In this blog, we’ve demonstrated how to use Terraform to create a Google Cloud VM with the following configurations:
- Specific service account with necessary permissions.
- Serial port enabled for debugging.
- SSH key injection for secure access.
- Static external IP for persistent access.
- Firewall rule to allow SSH traffic.
- Startup script for automated VM setup.
With these steps, you now have a fully automated and secure VM deployment pipeline using Terraform, which is ideal for production environments.
In the next blog, we’ll explore how to automate the process of scaling and managing your infrastructure with Terraform. Stay tuned!