


In today’s world of microservices and cloud-native applications, deploying applications in containers has become the norm. Spring Boot makes this process easier thanks to its built-in server and convention-based setup. In this blog, we’ll explore how to containerise a Spring Boot application using Docker and then orchestrate it with Kubernetes. This guide walks you through deploying your Spring Boot application in a way that ensures scalability, reliability, and cloud readiness, using real-world strategies and industry-recommended practices.
Why Containerise the Spring Application?
Containerization packages your application with everything it needs to run JDK, dependencies, and configurations, into a single image. This image can run consistently across development, staging, and production environments.
Benefits:
- Platform independence
- Easier scaling and management
- Environment parity (no more “it works on my machine”)
- Fast and repeatable deployments
Prerequisites
Before diving into the deployment steps, ensure the following tools are installed and properly configured:
- JDK 17 or higher – Required to build and run the Spring Boot app.
- Maven or Gradle – Used for building your project.
- A running Spring Boot application – A backend project must be complete & in a running state.
- Docker Desktop (or Docker CLI) – Needed to build and run container images.
- Minikube for local Kubernetes cluster – Creates a local Kubernetes cluster.
- Kubectl – A CLI utility that lets us control and interact with our Kubernetes clusters and resources.
- Docker Hub account – Required for uploading and retrieving container images from the Docker Hub registry.
Ensure Docker and Minikube are running before executing any commands.
1. Build the App Locally
Once the Spring Boot app is ready, compile it locally using Maven to generate the executable .jar file.
./mvnw clean packageEnsure the .jar file is generated in the target/ directory.
Explanation: This command cleans the previous builds and compiles the Spring Boot app into a .jar file, placing it in the target/ directory.
2. Create a Dockerfile for the Application
In the project root, create a Dockerfile:
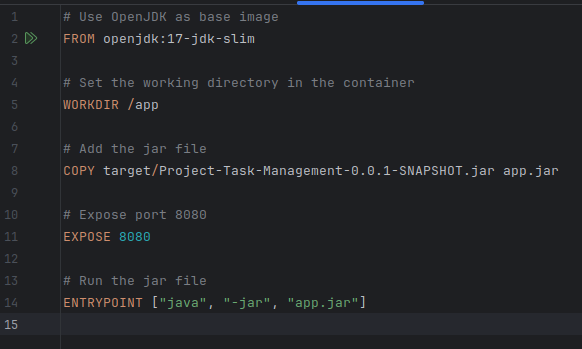
Explanation: This defines how the app will be containerised, it uses a Java base image, copies the app .jar, and specifies how to run it on a particular port.
3. Build the Docker Image
Run the Docker build command:
docker build -t project-task-management-app .Check the image:
docker imagesExplanation: This command reads instructions from the Dockerfile to build a new container image. The -t option assigns a tag (or name) to the image for easier identification and usage.
4. Run the Docker Container Locally
Run the image:
docker run -p 8080:8080 project-task-management-appVisit http://localhost:8080 in your browser to test.
Explanation: Runs the image in a container, exposing port 8080 so the app is accessible at http://localhost:8080.
5. Push Docker Image to Docker Hub
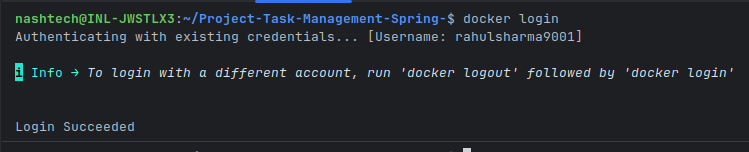
Log in to Docker:
docker loginIt will look like this
Tag and push the image:
docker tag project-task-management-app <docker-username>/project-task-management-appdocker push <docker-username>/project-task-management-appExplanation:
- docker login authenticates you.
- docker tag renames the image so it’s linked to our Docker Hub repo.
- docker push uploads it so Kubernetes can pull it later.
6. Install and Configure Minikube
Install Minikube:
sudo apt install minikube Start Minikube:
minikube startExplanation: Installs and starts a local Kubernetes cluster to test the deployments.
7. Write Deployment YAML
Create a file task-deployment.yaml
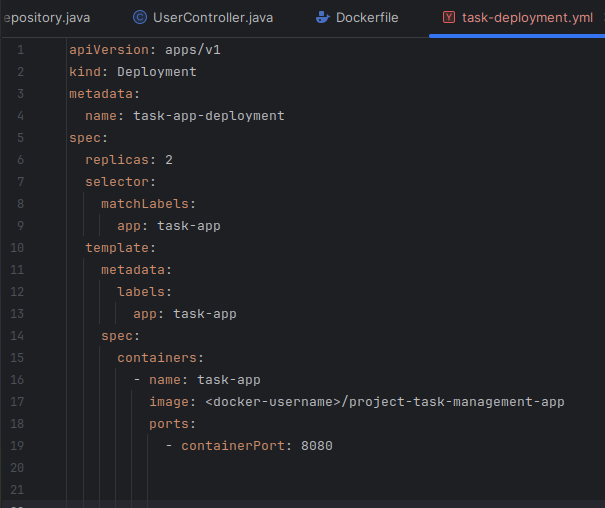
Explanation: This Kubernetes manifest tells the cluster to create 2 instances (replicas) of our Dockerized app.
8. Write Service YAML
apiVersion: v1
kind: Service
metadata:
  name: task-app-service
spec:
  type: NodePort
  selector:
    app: task-app
  ports:
    - protocol: TCP
      port: 8080
      targetPort: 8080
nodePort: 30036Explanation: This service exposes our app to the outside world using NodePort. It routes traffic to our pods on port 8080.
9. Apply Kubernetes Resources
Apply both manifests:
kubectl apply -f task-deployment.yaml
kubectl apply -f task-service.yamlExplanation: These commands deploy the app and service definitions to the Kubernetes cluster.
Check pods and services:
kubectl get podskubectl get svcExplanation: Checking the status of application pods and services.
10. Access the Spring App in Kubernetes
Expose the app:
minikube service task-app-serviceExplanation: This opens the service URL in the browser using Minikube’s IP.
Or manually go to:
http://<minikube-ip>:30036Find the Minikube’s IP:
minikube ip11. Scale the Deployment
To scale pods:
kubectl scale deployment spring-deployment --replicas=5Explanation: This command increases the number of running pods to 5 for higher availability or load handling.
Conclusion
In simple terms, we’ve learned how to take our Spring Boot project, wrap it in a Docker container, and run it using Kubernetes. This means our app is now easier to deploy, update, and scale without worrying about setup issues or where it’s running. By following these steps, we’re now ready to move our project from our laptop to a production-ready environment with ease.