


1. Introduction
1.1. Mobile Development Before Expo
Not so long ago, if you wanted to build a mobile app, you had to choose between Swift/Objective-C for iOS and Java/Kotlin for Android. Two different platforms, two different languages, and a lot of duplicated effort. Then came React Native, which allowed developers to write cross-platform apps using JavaScript and React — one codebase, two platforms.
But there was still a catch. React Native, in its pure form, often required setting up Xcode or Android Studio, configuring native dependencies, and dealing with platform-specific quirks. That’s where Expo enters the picture. Think of it as your friendly tour guide that handles all the heavy lifting of native setup, so you can just focus on building your app.

1.2. What is Expo?
Expo is an open-source framework built on top of React Native. It’s designed to make mobile development faster and easier, especially for newcomers. You can think of it as “React Native with batteries included.”

With Expo, you get a suite of prebuilt APIs, instant previews on your phone, cloud builds, and minimal native setup. It supports both JavaScript and TypeScript and lets you run your app on iOS and Android without touching Xcode or Android Studio.
1.3. Why Expo Exists?
React Native is powerful, but the initial setup can be intimidating — installing big IDEs, configuring native code, and handling platform-specific dependencies. For web developers dipping their toes into mobile development, this can be overwhelming.
Expo solves this by handling the native complexity for you — letting you focus on your app’s features, not on native setup.
2. How Expo Works & Workflows
2.1. How Expo Works?
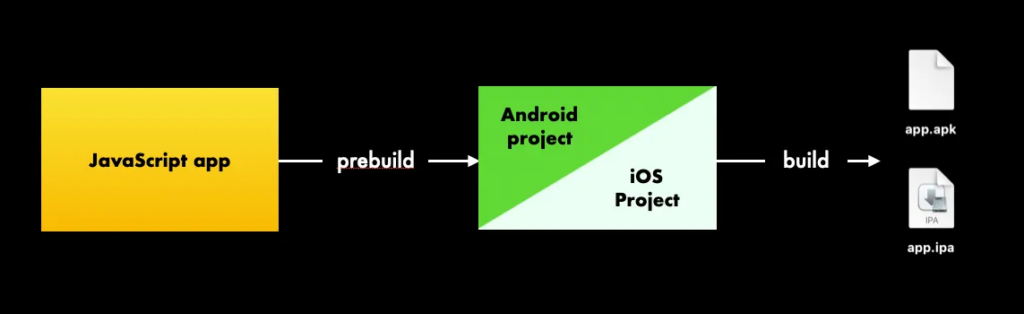
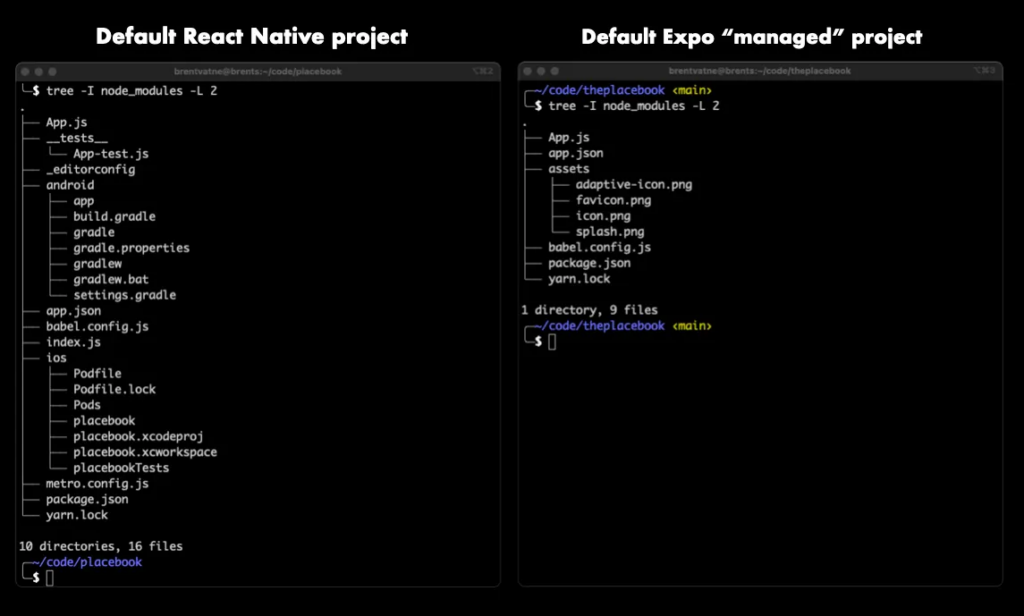
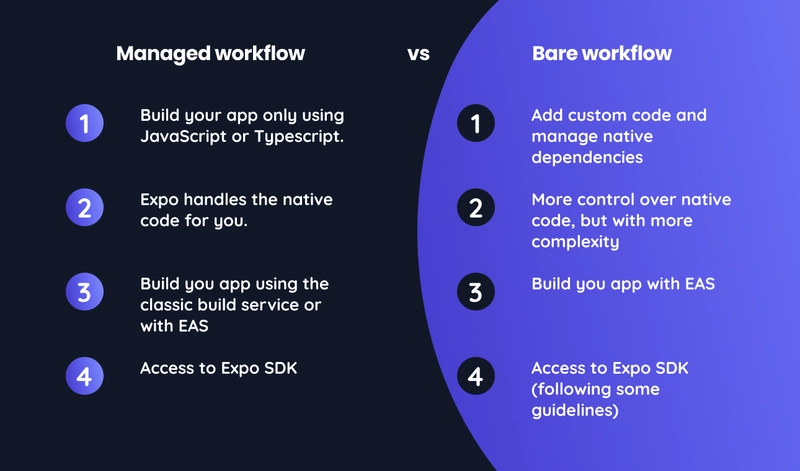
Expo wraps around React Native to create a managed environment. When you start a project, you’re usually in the Managed Workflow: no native code to worry about, your app runs inside the Expo Go app during development, and you can preview it instantly on a real device by scanning a QR code.
When you’re ready to go live, Expo offers EAS Build to compile your app in the cloud. If you ever need full control over the native side, you can switch to the Bare Workflow, which is more like working with React Native CLI.
2.2. Expo Workflows
The Managed Workflow is great for rapid prototyping or small-to-medium projects. You just write JavaScript or TypeScript, use Expo’s APIs, and preview instantly with Expo Go. It’s perfect for quick ideas like an event check-in app with Camera and Notifications.
The Bare Workflow gives you full native access, letting you write Swift, Objective-C, Java, or Kotlin. It’s closer to pure React Native but still lets you use some Expo services, which is handy for apps that need custom hardware integration — for example, a fitness app that works with specialized sensors.
3. Key Features
Expo Go
- Run your app instantly on your phone by scanning a QR code.
- Supports Fast Refresh for quick iteration.
Prebuilt APIs
- Camera, Location, Notifications, File System, Sensors — all without native setup.
EAS Build & EAS Submit
- Build for iOS and Android in the cloud.
- No Mac? No problem — you can still build iOS apps.
- Submit directly to App Store / Google Play.

👉 Read here: EAS Build & EAS Submit
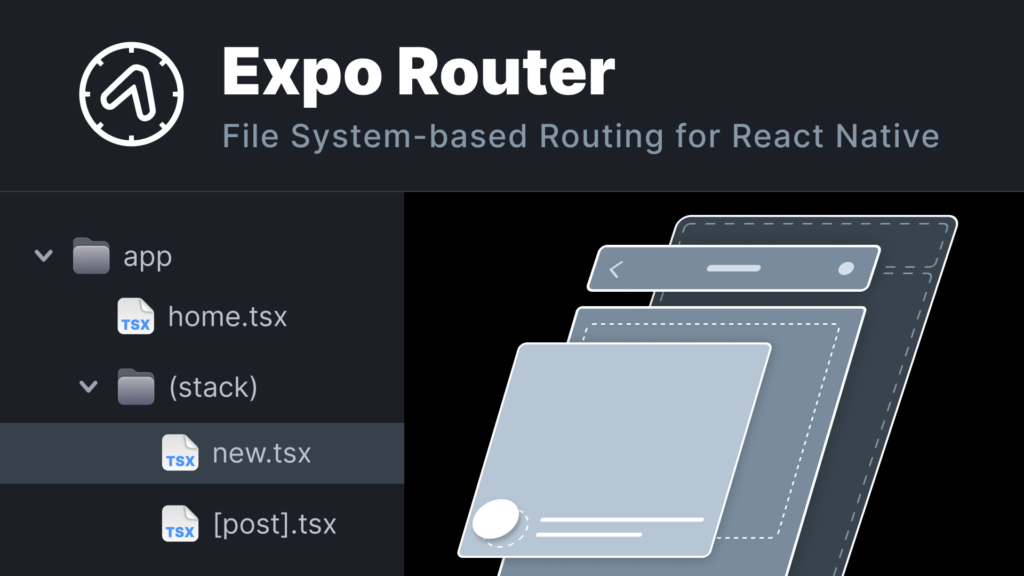
Expo Router
- File-based routing like Next.js.
- Deep linking and nested navigation made easy.
4. Expo vs React Native CLI & Pros/Cons
4.1. Quick Comparison
| Feature | Expo | React Native CLI |
|---|---|---|
| Setup | Quick, no native tools required | Manual setup with Android Studio/Xcode |
| Build Tools | Expo Go, EAS Build, EAS Submit | Android Studio, Xcode |
| Native Access | Limited in Managed Workflow | Full access to native code |
| Learning Curve | Beginner-friendly, great for web devs | Steeper, requires native platform knowledge |
| Use Case | MVPs, small/medium apps, rapid prototyping | Complex apps, custom native integrations |
4.2. Pros and Cons of Expo
| Pros | Cons |
|---|---|
| Super-fast setup → running an app in minutes | Limited native flexibility in Managed Workflow |
| Rich prebuilt APIs for common features | Larger app size due to bundled libraries |
| Cross-platform by default | Might need to eject for advanced native features |
| Great for MVPs and prototypes | Dependency on Expo updates for latest native features |
| Expo Go + Hot Reload = fast iteration |
4.3. When to Choose Expo or React Native CLI
Use Expo if you’re just starting with React Native, building an MVP, or developing without a Mac. It’s also ideal when you don’t need complex native integrations.
Go with React Native CLI if your app is complex, needs high performance at the native level, or requires fine-grained control over native code.
5. Hands-on Demo: Building a Simple App with Expo
Let’s quickly build a “Hello Expo” app with live reload on your phone.
Step 1 — Install Expo CLI
npm install --global expo-cliStep 2 — Create a New Project
expo init expo-demo
cd expo-demo
Choose either a blank JavaScript or TypeScript template.
Step 3 — Start the App
expo startA browser tab will open with a QR code.
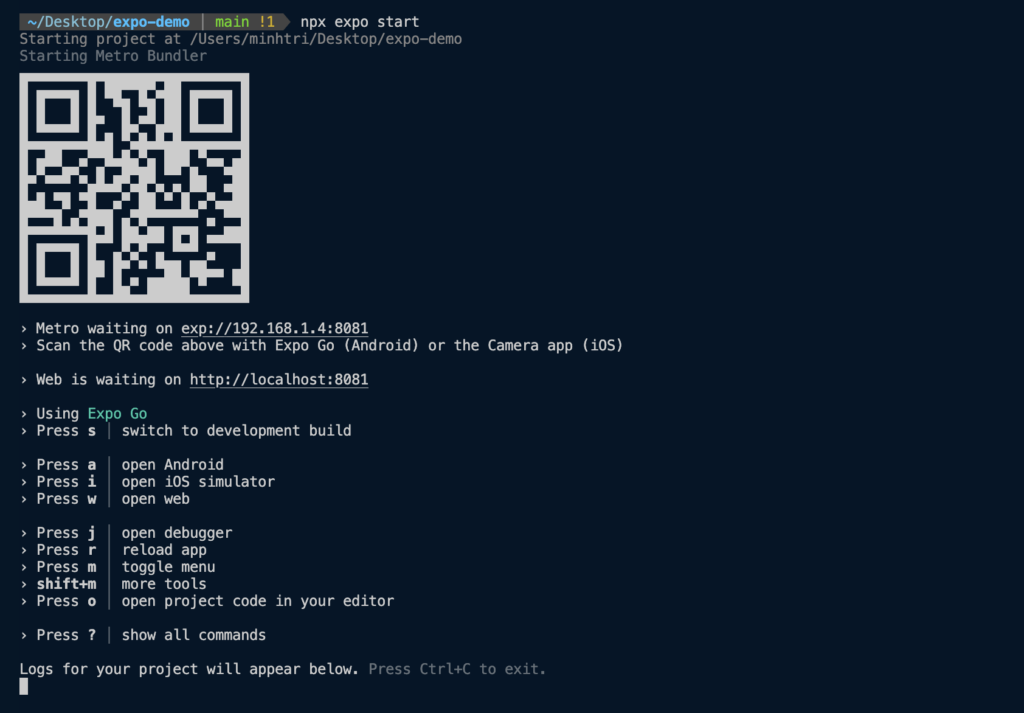
Step 4 — Preview on Your Phone
Download Expo Go from the App Store or Google Play, scan the QR code, and your app appears instantly.
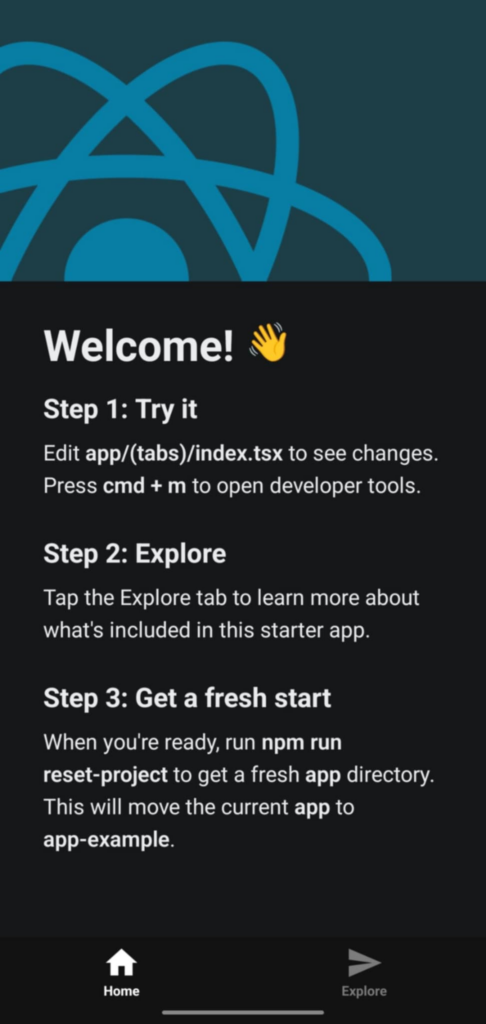
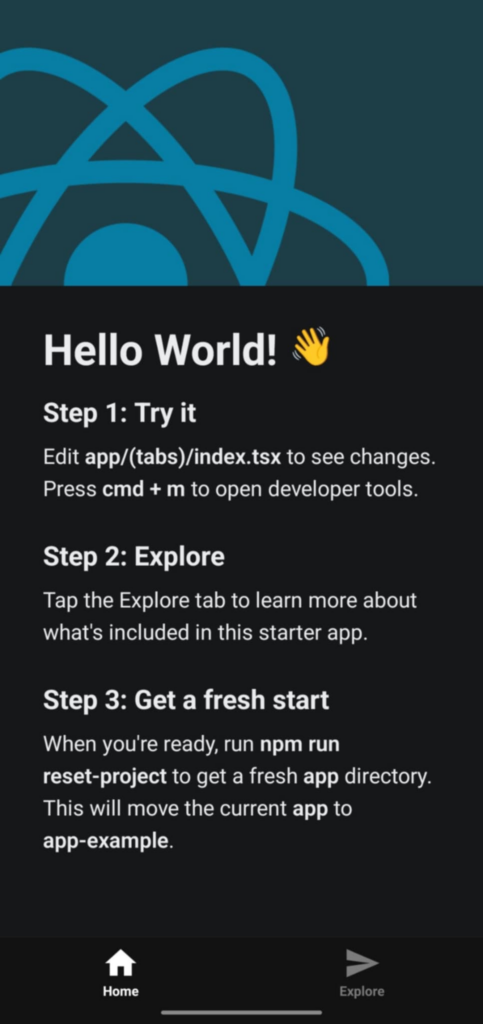
Step 5 — Edit index.tsx
Update the title to “Hello World!”. Save your changes → Changes appear instantly on your phone.
6. Conclusion
Expo is an excellent choice for web developers moving into mobile development, or for anyone who wants to prototype quickly without wrestling with native setup. It’s beginner-friendly but powerful enough for many production apps.
However, if you need deep native integrations or are building a performance-critical app, React Native CLI (or Expo’s Bare Workflow) might be a better starting point.