


It’s not that hard to build a code-editing agent.
No really, believe me. You might think that there must be black magic inside an agent that edits files, running commands, resolving compiler errors, yadda yadda, but it’s just code: An LLM, a loop, and enough tokens. And our willingness to build one.
And it’s not going to be super challenging. We’re going to build a minimal but functional coding agent powered by Anthropic’s Claude, and this agent will serve as a foundation that we can expand upon later. Think of it as your first step into the world of AI-powered development tools.
Please, try to follow along. You might think that reading the code is enough, but I want you to get that pride from what we are going to achieve with just how little the code is.
So, what are we going to build?
Our goal right now is simple – we create a terminal-based coding agent that:
- Takes user input from the terminal
- Sends it to the LLM for processing via Software Development Kits (SDKs)
- Displays the LLM’s response back in the terminal
That’s basically most of it. A basic conversational loop, but it’s the core of any AI agent interaction.
We might need to set up a few things before diving in:
Side note: Feel free to choose whatever LLM provider’s SDK (OpenAI, Gemini, etc.) and programming language of your preferences. I use Anthropic SDK and TypeScript as they are the quite well-developed compared with the rest.
- Bun installed on your system (a fast JavaScript/TypeScript runtime – You can read more about it in Behind The Scenes of Bun Install). Refer to the installation on Bun homepage
- Anthropic SDK for TypeScript (see it on here)
- An Anthropic API key (you can get one from console.anthropic.com)
- Basic knowledge of TypeScript and async/await
Here we go!
We started with a Bun project, which is super lean:
smolagent/
├── agent.ts          # Main application file
├── package.json      # Dependencies and scripts
We also need the official Anthropic SDK for TypeScript. This SDK handles all the complexity of communicating with Claude’s API:
bun install @anthropic-ai/sdk
bun install -D @types/node # Provides TypeScript definitions for Node.js built-in modules like readline.
bun add -d @types/bun # Provides Bun runtime APIs
We still have the Claude API key, so bear with me:
# On Windows (PowerShell):
$env:ANTHROPIC_API_KEY="your-api-key-here"

# On Windows (Command Prompt):
set ANTHROPIC_API_KEY=your-api-key-here

# On macOS/Linux:
export ANTHROPIC_API_KEY="your-api-key-here"
Our package.json will probably look like this at this point:
// package.json
{
  "name": "smolagent",
  "version": "1.0.0",
  "type": "module",
  "scripts": {
    "start": "bun run agent.ts"
  },
  "dependencies": {
    "@anthropic-ai/sdk": "^0.65.0"
  },
  "devDependencies": {
    "@types/bun": "^1.2.23",
    "@types/node": "^24.6.2"
  }
}
Now, off we go! In agent.ts we set up the Claude client:
// agent.ts

import Anthropic from '@anthropic-ai/sdk';

const client = new Anthropic({
  apiKey: process.env.ANTHROPIC_API_KEY,
});
The SDK will automatically look for the ANTHROPIC_API_KEY environment variable (Psss! This is a security best practice – never hardcode API keys in your source code)
Now let’s write the heart of our agent, the runInference function:
// agent.ts

const messages: Anthropic.MessageParam[] = [
  { role: 'user', content: userMessage },
];

async function runInference(userMessage: string): Promise<void> {
    messages.push({ role: 'user', content: userMessage });

    try {
        let message = await client.messages.create({
            model: 'claude-3-7-sonnet-latest',
            max_tokens: 1024,
            messages: messages
        });
        // The response comes back as an array of content blocks. We check if the first block is text and display it.
        let response = message.content[0];
        if (response.type === 'text') {
            console.log('\nClaude:', response.text);
        }
        messages.push({role: 'assistant', content: message.content})
    } catch (error) {
        console.error('Error:', error);
    }
}
What are we forgetting? Oh yeah, a way to interact with the agent, duh! Let’s add the missing interactive() function so we have a simple interface to chat with the agent:
// agent.ts

import * as readline from 'readline';

const rl = readline.createInterface({
  input: process.stdin,
  output: process.stdout,
});

function interactive(): void {
  rl.question('\nYou: ', async (input) => {
    if (input.toLowerCase() === 'exit' || input.toLowerCase() === 'quit') {
      console.log('Goodbye!');
      rl.close();
      return;
    }

 // The `interactive()` function is recursive - after each response, it calls itself again to wait for the next input. This creates a continuous conversation loop.
    await runInference(input);
    interactive();
  });
}

console.log('Simple Coding Agent - Type "exit" to quit\n');
interactive();
Wait, where did the readline.createInterface() come from? I will spare you the technical detail, but if you insist: The readline.createInterface() creates an interface for reading data from a readable stream (like process.stdin – the terminal input) one line at a time. In detail:
- Line-by-line input: Without readline, reading from
process.stdinwould give us raw bytes or chunks. Readline buffers input until the user presses Enter, giving us complete lines. - Cross-platform compatibility: The readline module handles different line endings (
\non Unix,\r\non Windows) automatically. - Asynchronous input handling: The
question()method lets us wait for user input without blocking, which is essential for our async conversation flow. - Clean exit: The
rl.close()method properly closes the input stream and cleans up resources when the user exits.
Phew, yeah, so that’s basically pretty much of it. Now, feast your eyes: A simple agent that receives our input and prints the response, in just about 40 lines of Typescript code.
// agent.ts

import Anthropic from '@anthropic-ai/sdk';
import * as readline from 'readline';

const client = new Anthropic({
    apiKey: process.env.ANTHROPIC_API_KEY,
});

const rl = readline.createInterface({
    input: process.stdin,
    output: process.stdout,
});

const messages: Anthropic.MessageParam[] = [];

async function runInference(userMessage: string): Promise<void> {
    messages.push({ role: 'user', content: userMessage });

    try {
        let message = await client.messages.create({
            model: 'claude-3-7-sonnet-latest',
            max_tokens: 1024,
            messages: messages
        });

        let response = message.content[0];
        if (response.type === 'text') {
            console.log('\nClaude:', response.text);
        }
        messages.push({role: 'assistant', content: message.content})
    } catch (error) {
        console.error('Error:', error);
    }
}

function interactive(): void {
    rl.question('\nYou: ', async (input) => {
        if (input.toLowerCase() === 'exit' || input.toLowerCase() === 'quit') {
            console.log('Goodbye!');
            rl.close();
            return;
        }

        await runInference(input);
        interactive();
    });
}

console.log('Simple Coding Agent - Type "exit" to quit\n');
interactive();
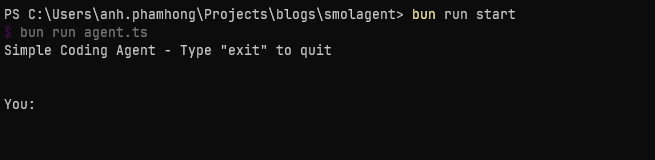
Let’s give it a spin. Execute bun run start in your favorite terminal, and you should see
Seems like it’s working. We can just talk to Claude now:

It’s working! Give it a few more things:
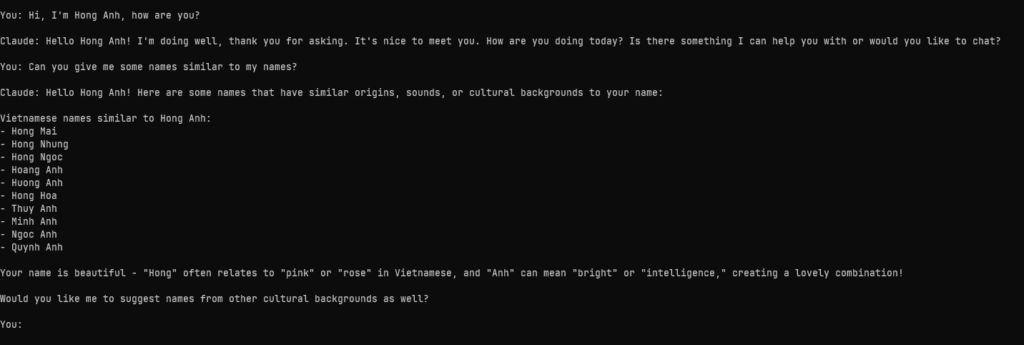
Okay, I did not expect that. But notice that we kept the same conversation going over multiple turns. The messages array grows as we input more. And since Anthropic’s server is stateless, it’s up to us to maintain the messages array.
Hooray! We are … not done. Now, bear with me, since what we have now is no more a simple chatbot. What would make it an agent? An LLM with access to tools, giving it the ability to modify something outside the context window.
With that, we are ready for the next step…
Tools – like arms but for agents
Now this is the real game-changer. But wait, what’s a “tool”? Think of it as an extension for your agent. At some point we might want the agent to interact with things we provide it with, and the agent thus needs some ways to do so. And guess what? We can craft the tools with our code!
Here is the basic idea: You send a prompt to the model, saying that it should reply in a certain way if it wants to use “a tool”. The agent will, well, execute the tool on behalf of us, then reply with the result of the tool call. Imagine it like “in the following conversation, wink if you want me to raise my arm”. Weird thing to say, but an easy concept to grasp.
The models are very eager to use the tools, mark my words. By now, 2025, they kinda “know” that they don’t know everything and can use tools to get more information.
But enough chitchatting, let’s build our first tool: The read_file tool.
The read_file tool
We’re going to use the types that the Anthropic SDK suggests, but a small note: Under the hood, this will all end up as strings that are sent to the model. Think of it like “wink if you want me to use read_file“.
Each tool will require the following fields:
- A name
- A description to tell the model what the tool does, when to use it, when to not use it, what it returns and so on
- An input schema that describes, as a JSON schema, what inputs this tool expects and in which form
- A function that actually executes the tool with the input the model sends to us and returns the result
That’s said, here is the structure of our tool:
type ToolDefinition = Anthropic.Tool & {
  func: (input: unknown) => Promise<string>;
};

const tools: ToolDefinition[] = [
  {
    name: 'read_file',
    description: 'Read the contents of a file from the file system. Use this when you need to examine code or read file contents.',
    input_schema: {
      type: 'object',
      properties: {
        path: {
          type: 'string',
          description: 'The path to the file to read (relative to current directory or absolute path)',
        },
      },
      required: ['path'],
    },
    func: async (input: unknown) => {
      if (typeof input === 'object' && input !== null && 'path' in input) {
        return await executeReadFile(input.path as string);
      }
      return 'Error: Invalid input for read_file';
    },
  },
];

async function executeReadFile(filePath: string): Promise<string> {
  try {
    const resolvedPath = resolve(filePath);
    const file = Bun.file(resolvedPath)

    if (file.size > 100 * 1024) {
      return `Error: File is too large (${file.size} bytes). Maximum size is 100KB.`;
    }

    return await file.text();
  } catch (error) {
    if (error instanceof Error) {
      return `Error reading file: ${error.message}`;
    }
    return 'Error reading file: Unknown error';
  }
}
We define a ToolDefinition type, which uses Anthropic SDK’s type for tools, and the only field will be the function the agent will invoke to handle tool-related requests. The tools constant will act as a tool registry where we register our tools following the structure we’ve just discussed. For our executeReadFile tool function, we call some Bun APIs to help us handle file I/O operations as fast as possible.
Now we define the executeTool function for the agent to invoke. The idea is that the agent will look through the tool registry to find the right tool for the right job.
async function executeTool(toolName: string, toolInput: unknown): Promise<string> {
  const tool = tools.find(t => t.name === toolName);
  if (!tool) {
    return `Error: Unknown tool '${toolName}'`;
  }

  return await tool.func(toolInput);
}
Now, buckle up! Here come some major changes for the runInference function:
async function runInference(userMessage: string): Promise<void> {
  messages.push({ role: 'user', content: userMessage });
  try {
    while (true) {
      const response = await client.messages.create({
        model: 'claude-3-7-sonnet-latest',
        max_tokens: 1024,
        tools: tools,
        messages: messages,
      });

      if (response.stop_reason === 'tool_use') {
        const assistantContent: Anthropic.ContentBlock[] = response.content;
        messages.push({ role: 'assistant', content: assistantContent });

        const toolResults: Anthropic.ToolResultBlockParam[] = [];

        for (const block of response.content) {
          if (block.type === 'tool_use') {
            console.log(`\n[Using tool: ${block.name}]`);
            const result = await executeTool(block.name, block.input);

            toolResults.push({
              type: 'tool_result',
              tool_use_id: block.id,
              content: result,
            });
          }
        }

        messages.push({ role: 'user', content: toolResults });
        continue;
      }

      const textBlock = response.content.find(
        (block): block is Anthropic.TextBlock => block.type === 'text'
      );

      if (textBlock) {
        console.log('\nClaude:', textBlock.text);
      }

      break;
    }
  } catch (error) {
    console.error('Error:', error);
  }
}
It’s not some of the best code I have written (pardon me, I’m not really fluent in TypeScript) but it works and, IMHO, quite readable. And I understand your confusion: Why is there a while(true) loop? What are the block things? And why do we concern ourselves with their types? Probably many things more, and I assure you, my readers, that I will try my best to explain things. But first, shall we give it a run? Let’s tell it to read the content of agent.ts
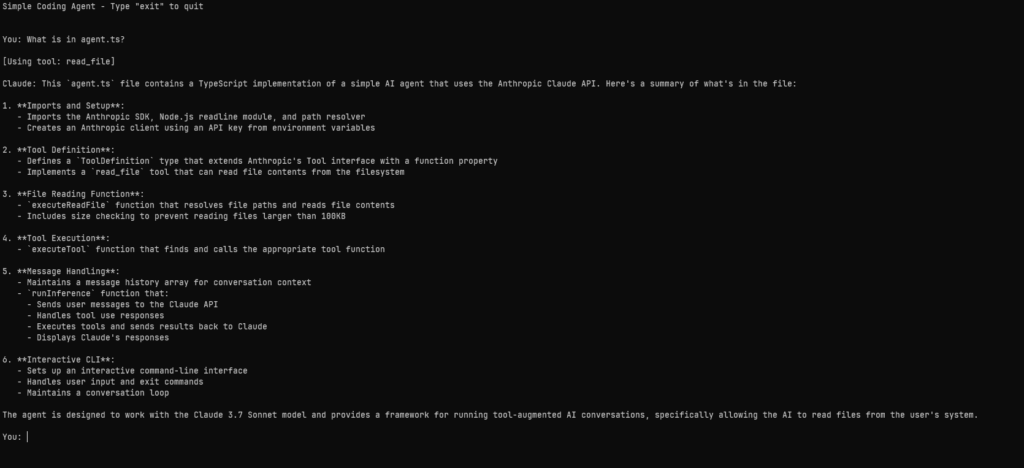
Ho ho, would you look at that. We finally get Claude to use the read_file tool. And it did so quite effortlessly. Here’s what’s happened:
- The
while (true)loop is the secret sauce. The loop will continue indefinitely until we reach thebreakstatement, and that is when the agent is done processing the output. But why is it here? And how do we know when it is done with the processing? You see, the input we send our query to the model, and the output the model responds, all of them are pushed into and stored in themessagesarray. The model will keep poking into thatmessagesarray for data, and the indefinite loop is here to tell the model that: “Hey buddy, you keep processing the output you have just made as your next input, and when your output is ofTextBlocktype, stop and print the output, okay?”. But what is aTextBlock? That brings us to the second point. - The Anthropic SDK treats the content of the messages as an array of blocks, as you can see with the variable
assistantContentbeing of typeAnthropic.ContentBlock[]. And like I said before, Claude treats everything as a string, so each block will have a field that stores the block’s content as a string, and each message will have different types of blocks varying between “text”, “tool_use” and “tool_result”. - Each content, as an array of blocks, will be made by either the “user” – us the programmers and the “assistant” – Claude. The flow: We make a
textcontent as the “user” and send it Claude -> Claude receives thetextcontent and sends us thetool_usecontent, telling us that it will use this particular tool -> Claude executes the tool (on behalf of us), it receives thetool_resultcontent, processes it to produce the finaltextcontent (made by Claude), ends the loop and prints out the result.
It’s confusing, I know. But try with a few more prompts. Here I made a secret-file.txt to tell the agent to read it.
echo 'what animal is the most disagreeable because it always says neigh?' >> secret-file.txt # Add the riddle to secret-file.txt
Remember: we didn’t say anything about “if a user asks you about a file, read the file”. We also didn’t say “if something looks like a filename, figure out how to read it”. No, none of that. We say “help me solve the thing in this file” and Claude realizes that it can read the file to answer that and off it goes. Beautiful, isn’t it?
But it cannot be a code-editing agent if it cannot, you know, edit things? Now let’s move on to our next tool.
The edit_file tool
At this point, I hope plugging a new tool to the agent gets easier. We just need to call the Bun APIs to write to files and some lines of TypeScript:
const tools: ToolDefinition[] = [
 // [...read_file code...]
  {
    name: 'edit_file',
    description: 'Write content to a file. This will overwrite the entire file with the provided content. Use this to create new files or completely replace existing file contents.',
    input_schema: {
      type: 'object',
      properties: {
        path: {
          type: 'string',
          description: 'The path to the file to write (relative to current directory or absolute path)',
        },
        content: {
          type: 'string',
          description: 'The complete content to write to the file',
        },
      },
      required: ['path', 'content'],
    },
    func: async (input: unknown) => {
      if (typeof input === 'object' && input !== null && 'path' in input && 'content' in input) {
        return await executeEditFile(input.path as string, input.content as string);
      }
      return 'Error: Invalid input for edit_file - requires path and content';
    },
  },
];

async function executeEditFile(filePath: string, content: string): Promise<string> {
  try {
    const resolvedPath = resolve(filePath);
    const file = Bun.file(resolvedPath);
    const exists = await file.exists();

    await Bun.write(resolvedPath, content);

    if (exists) {
      return `Successfully updated ${filePath} with ${content.length} characters`;
    } else {
      return `Successfully created ${filePath} with ${content.length} characters`;
    }
  } catch (error) {
    if (error instanceof Error) {
      return `Error writing file: ${error.message}`;
    }
    return 'Error writing file: Unknown error';
  }
}
This just in: We use string replacement to edit files. You might not believe it, but Claude loves replacing strings, so we’re going to implement edit_file by telling Claude it can edit files by replacing existing text with new text. Note some checking: We tell Claude to read the file (or creates it if it does not exist) and overwrites its content. We also register the new tool to the tools constant too.
Alright, let’s tell the agent to write a FizzBuzz function.
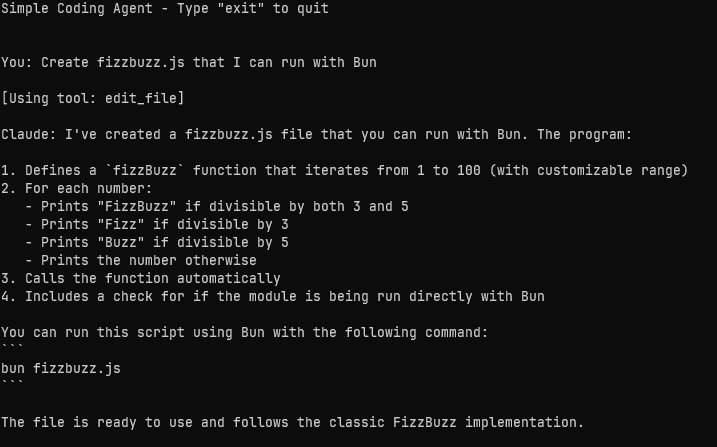
Working as expected isn’t it? Now let’s run fizzbuzz.js:
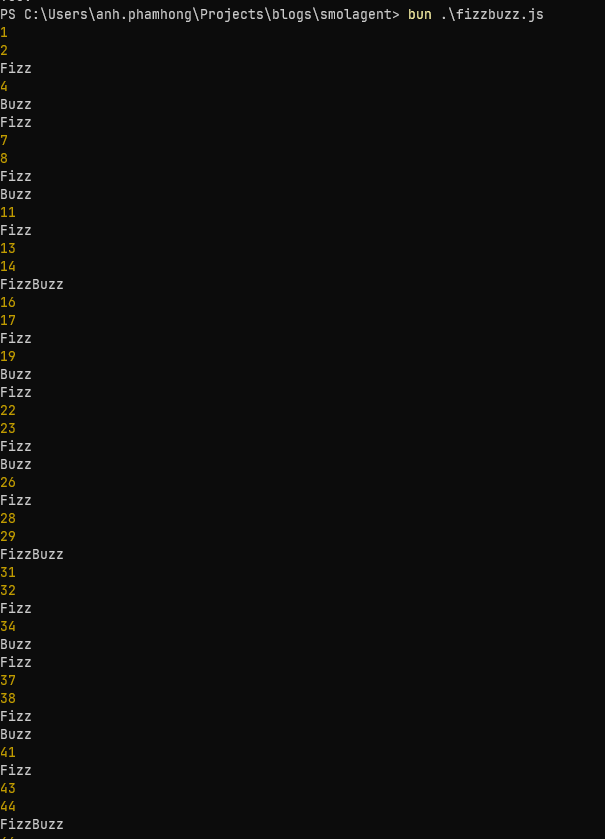
Wonderful, isn’t it? Let’s tell Claude to update it:
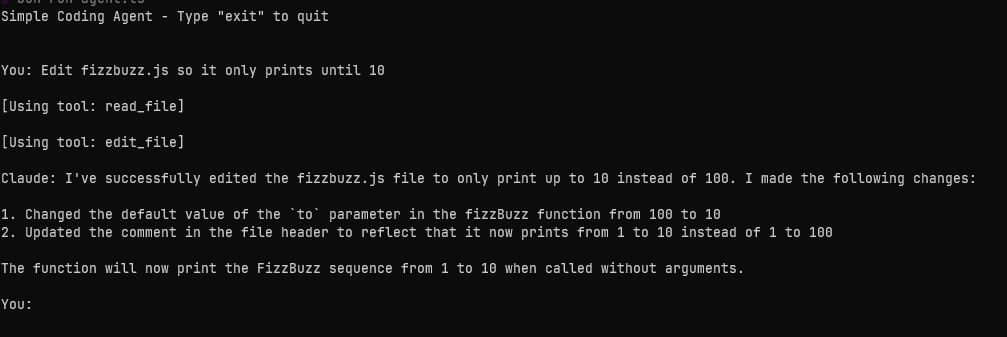
It reads the file, it edits the file to change the how long it runs, and then it also edits the file to update the comment at the top.
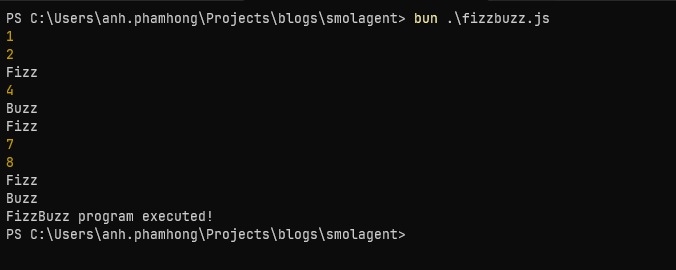
It works, again!
The end?
Nearly 200 lines of code, plus some spacing for readability here and there, and we got ourselves a code-editing agent. Yes, that’s basically the essence of an agent: A loop, a set of tools and now you’re to be able to talk to an alien intelligence that edits your code. Sure, we have plenty of things more to do: Tweak the system prompt, giving it a nice UI, switching between models, and so on – but that might be for the future. For now, we made it! And I encourage you to try how far you can get with this.
Now, go build!
(You can see the source code here)