


Frontend development has evolved significantly over the past decade. Frameworks like React, Angular, and Vue have become the standard for building modern web applications, each offering its own approach to component-based development and state management.
Svelte introduces a different philosophy.
Rather than shipping a large framework runtime to the browser, Svelte shifts much of the work to the build process. During compilation, Svelte transforms your components into highly optimized JavaScript, eliminating the need for a Virtual DOM and reducing the amount of code that runs in the browser.
The result is a framework that is lightweight, performant, and remarkably simple to work with.
In this article, you’ll build your first Svelte application using Visual Studio Code and learn the core concepts behind Svelte.
Prerequisites
Before getting started, install the following software:
- Node.js 20 or later
- npm (included with Node.js)
- Visual Studio Code
Verify your installation by opening a terminal and running:
node --version
npm --version
Step 1 – Create a New Svelte Project
Open Visual Studio Code.
From the menu, select Terminal → New Terminal.
Create a new Svelte project using Vite:
npm create vite@latest hello-svelte -- --template svelteNavigate to the project folder:
cd hello-svelteInstall the project dependencies:
npm installOpen the project in Visual Studio Code:
code .Your project is now ready for development.
Step 2 – Install the Svelte Extension
To improve your development experience, install the Svelte for VS Code extension from the Extensions Marketplace.
- Syntax highlighting
- IntelliSense
- Error checking
- Auto-completion
- Formatting support
- Navigation between components
Although optional, it significantly improves productivity when working with Svelte applications.
Step 3 – Run the Application
In the integrated terminal, start the development server:
npm run devYou’ll see output similar to:
VITE v7.x.x ready

➜ Local: http://localhost:5173/
Hold Ctrl (or Cmd on macOS) and click the URL to launch the application in your browser.
Step 4 – Create Your First Component
In the Explorer panel, open:
src/App.svelteReplace the contents with:
<script>
    let message = "Hello World!";
</script>

<h1>{message}</h1>

<p>Welcome to your first Svelte application.</p>
Save the file.
Thanks to Vite’s Hot Module Replacement (HMR), Visual Studio Code saves the file and the browser updates automatically.
Understanding the Component
A Svelte component combines three familiar technologies into a single file:
- JavaScript
- HTML
- CSS
The <script> section contains your application logic:
<script>
    let message = "Hello World!";
</script>
The markup renders the variable using curly braces:
<h1>{message}</h1>Whenever message changes, Svelte automatically updates the DOM.
Reactivity
One of Svelte’s defining features is automatic reactivity.
<script>
    let message = "Hello World!";

    function changeMessage() {
        message = "Welcome to Svelte!";
    }
</script>

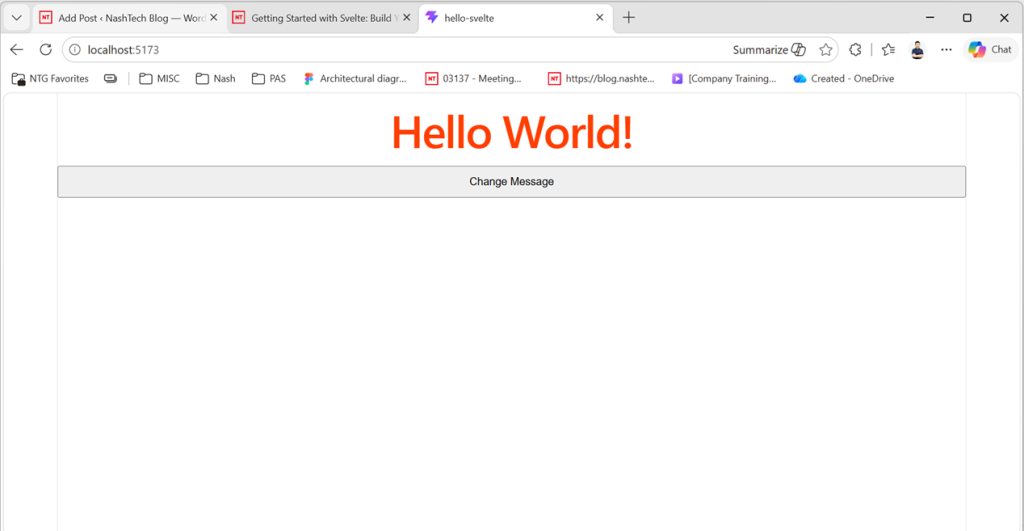
<h1>{message}</h1>

<button onclick={changeMessage}>
    Change Message
</button>
Click the button.
The UI updates immediately without calling setState(), triggering change detection manually, or managing immutable state objects.
Styling Components
Svelte supports component-scoped CSS.
<style>
h1 {
    color: #ff3e00;
    text-align: center;
}

button {
    padding: 10px 20px;
    cursor: pointer;
}
</style>
These styles apply only to the current component.
Project Structure
hello-svelte
│
├── src
│   ├── App.svelte
│   ├── main.js
│   └── assets
│
├── public
├── package.json
├── vite.config.js
└── node_modules
Advantages
- Lightweight runtime
- Excellent performance
- No Virtual DOM
- Built-in reactivity
- Component-scoped CSS
- Minimal boilerplate
- Excellent developer experience
- Seamless integration with ASP.NET Core Web APIs
Limitations
- Smaller ecosystem than React and Angular
- Fewer enterprise-ready component libraries
- Smaller community
- Less common in large enterprise organizations
Conclusion
You’ve successfully created your first Svelte application using Visual Studio Code, explored the structure of a Svelte component, and learned how its reactive programming model works.
Although this example is simple, it demonstrates the core principles that make Svelte unique: compile-time optimization, automatic reactivity, and minimal boilerplate.
In the next article, we’ll explore components, props, and events to build reusable and maintainable user interfaces.