


In my previous post Docker & ASP.NET Core: Part 1 – Overview, we learned about what is Docker, Docker Image, Dockerfile and Docker Container. In this post, we continue learn the way to setup ASP.NET Core application, install Docker and how to dockerize a web app.
Benefits of using Docker with ASP.NET Core
Running your ASP.NET Core in a Docker container has benefits below.
Portability
Docker allows you to package your ASP.NET Core application and its dependencies into a self-contained and isolated container. These containers can run consistently across different environments, such as development machines, testing servers, and production servers. This portability simplifies deployment and reduces the chances of environment-related issues.
Scalability
Docker makes it easy to scale ASP.NET Core applications with the help of a container orchestration platform such as Kubernetes. You can automatically scale the number of containers based on application demand. This flexibility allows applications to efficiently handle different workloads.
Debugging Support in Containers
You can debug ASP.NET Core applications running in Docker containers using Visual Studio or Visual Studio Code. Debugging in a container allows you to step through your code and diagnose problems in your container environment.
Container Registries Integration
ASP.NET Core projects can be published to container registries such as Docker Hub and Azure Container Registry to store and distribute Docker images. This way the application can be easily shared with others or deployed in different environments.
Dependency Management
Docker simplifies dependency management for ASP.NET Core projects. You can specify required dependencies and their versions in the Dockerfile to ensure consistent and reproducible builds. This helps avoid conflicts and compatibility issues between the various components of your application.
Docker Compose Integration
Docker Compose provides a way to orchestrate multiple containers that work together. ASP.NET Core projects can use the Docker Compose file to describe the services, networks, and volumes required for your application and any dependencies. This simplifies the process of running multiple containers together.
Environment Specific Configurations
ASP.NET Core projects often use environment variables and configuration providers to dynamically configure an application based on the environment in which it is deployed. If you are working with Docker then you can set these environment variables at container creation time or via Docker Compose, making it easy to configure your application for different environments.
Multi-stage Builds
ASP.NET Core supports multi-stage builds, so you can optimize your Docker image size. You can compile your application with a different build image and copy only the desired output files into the final runtime image.
DevOps Integration
Docker fits well into a DevOps workflow, enabling continuous integration and continuous deployment (CI/CD) using some of the popular CI/CD tools and platforms like Jenkins, GitLab CI/CD, and Azure DevOps. Developers can automate the build, test, and deployment processes using Docker images for faster and more reliable deployments.
Version Control
Docker images can be added to the version control system along with ASP.NET Core projects. This means that changes to Dockerfiles and application dependencies can be tracked, making it easy to roll back to previous versions if necessary. It also enables you to consistently rebuild and deploy your applications at any time.
Security and Isolation
Docker containers provide isolation between your ASP.NET Core application and the host environment, making it more difficult for vulnerabilities and misconfigurations to affect the underlying system. Containers are also resource-constrained and appropriate security measures can be configured to mitigate risk.
Installing Docker on Windows 11
If you want to use Docker, you can install Docker Desktop as a standalone application or integrate it with Windows. Your system must meet the following requirements to successfully install Docker Desktop on Windows.
- WSL version 1.1.3.0 or above.
- Windows 11 64-bit: Home or Pro version 21H2 or higher, or Enterprise or Education version 21H2 or higher.
- Windows 10 64-bit: Home or Pro 21H2 (build 19044) or higher, or Enterprise or Education 21H2 (build 19044) or higher.
- Hyper-V and Containers Windows features must be enabled.
- 4GB system RAM
- BIOS-level hardware virtualization support must be enabled in the BIOS settings.
To install Docker Desktop, you can follow the steps below:
- Visit the Docker website and download the installer on your machine.
- Double-click Docker Desktop Installer.exe to run the installer.
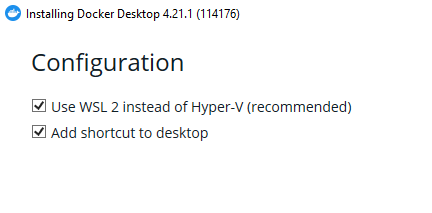
- On the Configuration dialog, make sure that the Use WSL 2 instead of Hyper-V (recommended) option is selected.
- The installer will start unpacking files and this process may continue for a few minutes.
- After a few minutes, the wizard will start the installation and it can take a few minutes to complete.
- When the installation is completed, you may be asked to restart Windows to complete the installation process.
- Click the Close and restart button to restart your computer.
- You may be asked to accept the Docker Subscription Service Agreement.
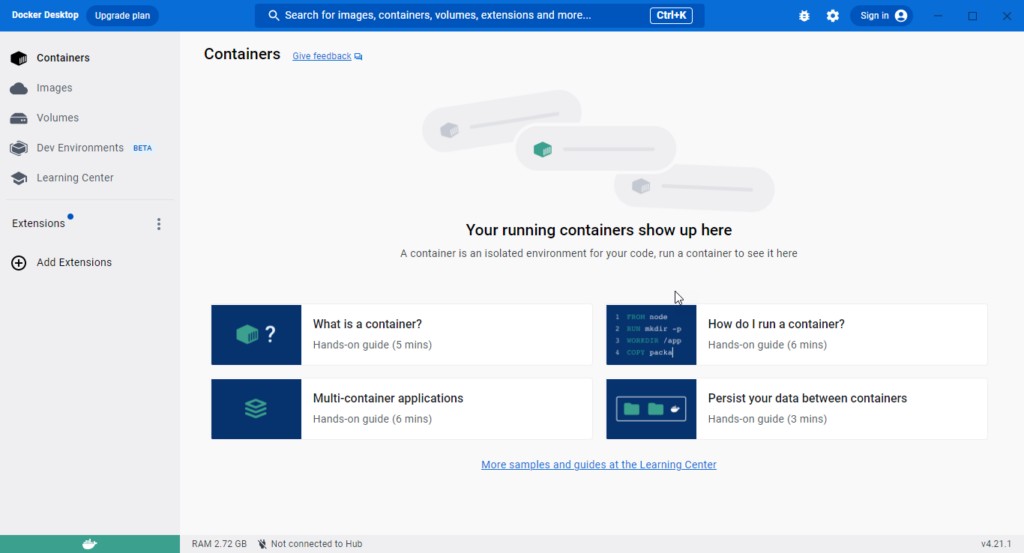
- To start Docker Desktop, you can click the Docker Desktop on your computer desktop and you will see the Docker Desktop application like the one shown below.
Dockerizing a new ASP.NET Core Application
In this section, we will learn how to dockerize a new ASP.NET Core application in Visual Studio 2022 using a Dockerfile. We will also learn the syntax and the basic commands available in Dockerfile.
- Open Visual Studio 2022 and go to File > New > Project.
- Select the ASP.NET Core Web App template from the Create a new project dialog and click the Next button.
- Profile project name as AspNetCoreDockerDemoApp and select the Location where you want to create an application and click the Next button.
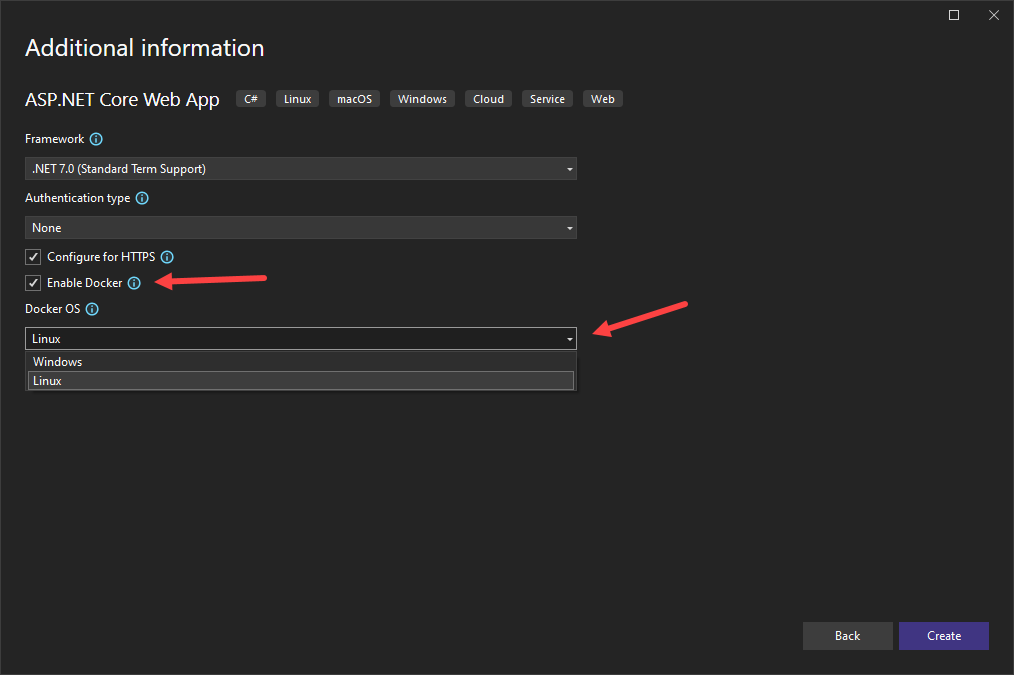
- In the Additional information dialog, you need to check the Enable Docker support checkbox. This will enable the Docker OS dropdown from where you can select Windows and then click on the Create button.
- If you see the following message, you need to switch to Windows containers. This is because you have probably kept the default container setting for Docker as Linux:
- You can also use the Switch to Windows container… option to switch to Windows containers if you right click Docker icon in the taskbar.
- Once the application is created, you will see the following project setup in Solution Explorer. A Dockerfile is automatically added to your application along with a package Microsoft.VisualStudio.Azure.Containers.Tools.Targets that enable Visual Studio tooling for Docker files.
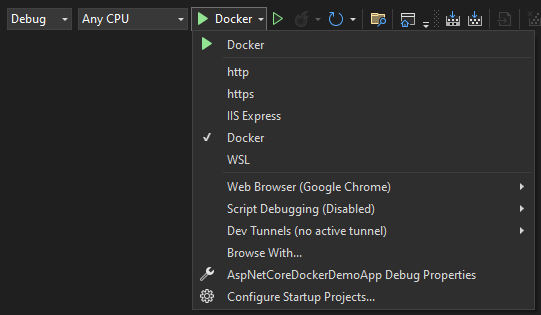
- You will also notice that the Run button is now replaced with the Docker button and a menu with a lot of Docker related options.
- Click the Docker button to debug your ASP.NET Core application and you will notice some Docker commands in the Output window. After a few minutes, the browser will open and you will see the ASP.NET Core application running inside of a Windows Docker container.
- You will also see the following Containers window at the bottom of Visual Studio 2022. On the left, you’ll see a list of containers on your local computer. The containers associated with the solution are displayed under Solution Containers. The right side shows an area with tabs for Environment, Label, Port, Volume, Log, and File. You can learn more about the usage of the containers window at Microsoft official docs here.
- If you will open the Docker Desktop at this point, you will also see our containers in the list of containers. You can also start, stop and manage containers using Docker Desktop.
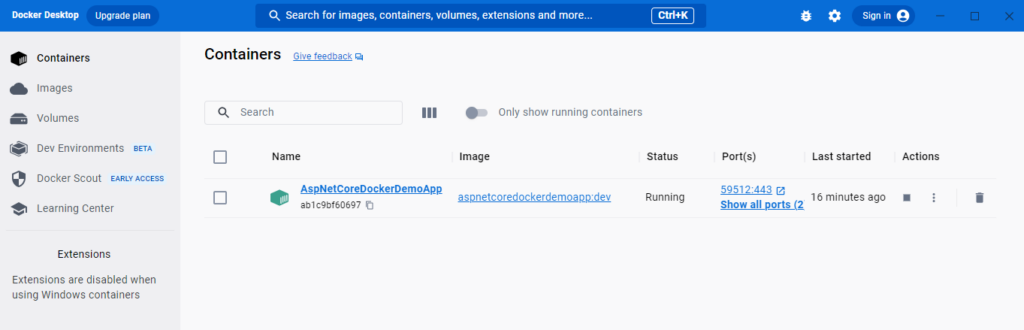
You can see how easy to start a new ASP.NET Core application with container support. Next, we will learn how to Dockerize an existing ASP.NET Core application.
Adding Docker Support in existing ASP.NET Core Application
If you have an existing ASP.NET Core application and you want to add Docker support you can follow the steps below:
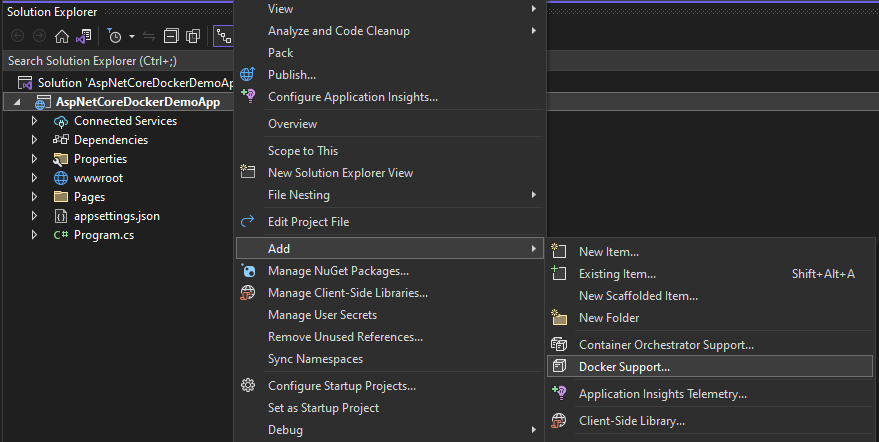
- Right-click on your project in Solution Explorer
- Click on the Add menu item
- Click on Docker Support… menu option
- Visual Studio will show you the Docker File Options dialog in which you need to select the target operation system. You can choose either Windows or Linux as per your application requirements.
- Click the OK button and Visual Studio will start adding Docker support to the application. The Docker file with default configurations will be added automatically along with the package Microsoft.VisualStudio.Azure.Containers.Tools.Targets.

To be continued…