


In today’s digital environment, web applications update constantly. While this can be a good thing, it often leads to locator changes. In this article, we’re going to review a library called Healenium. It is an AI-powered open-source library for improving the stability of Selenium-based tests, handling changes of updated web and mobile elements automatically. We’re going to mention the benefits of using AI in testing and a step-by-step tutorial on setting it up in your local environment with Selenium – Java.
1. Healenium Introduction
1.1. What is healenium?
Healenium is an open-source testing framework extension that improves the stability of Selenium-based test cases by handling updated web and mobile elements. Web and mobile applications are updated constantly every sprint, which may lead to a locator change. Healenium uses a type of machine-learning algorithm to analyze the current page state for changes, handle NoSuchElement test failures, and fix broken tests at runtime by replacing the failed locator with a new value that matches the best and performs an action with the new element successfully. After the test run, Healenium provides detailed reporting with the fixed locators and screenshots. In addition, it supports advanced features like a parallel test run, remote test run, iFrames, actions, selenide integration.
All of that helps to reduce the effort to create reliable Selenium tests and reduces the number of test cases that failed due to non-product issues. In addition, it changes the focus on regressions instead of test maintenance.
1.2 Benefits of Healenium
In summary, Healenium could bring the following benefits to automation test projects:
-
Improve Stability of Selenium-Based Automated Test: Replace broken locator value with one that best matches & fixes tests in runtime
-
Minimize Maintenance Time: Reduce the amount of non-product related test failures, Healenium also provides a plugin for IntelliJ IDEA IDE for updating the codebase with the new values of the locators.
2. Healenium integration
We will use Java with Maven to set up a simple test project using the Page Object Pattern and integrate Healenium to test its functionality.
Pre-requisites
In order to practice with healenium, we will need to set up the following things:
- Java (>= 1.8 ) with Eclipse IDE.
- Docker Desktop (feel free to use the Docker CLI only, we use it here because it’s more user-friendly for beginners)
Integrating set up
First of all, we will need to create an automation script. We will apply POM as usual with a Check Out screen with various input fields. Let’s start.
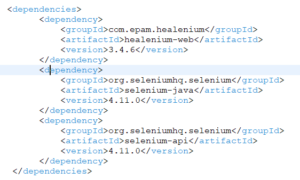
Create a Java Maven project and add the following dependencies
Create a sample selenium script.
In this example, we will use a simple order screen which you can download via this link and save in src/test/resource/sample-web folder within the project
- This is what the website looks like:

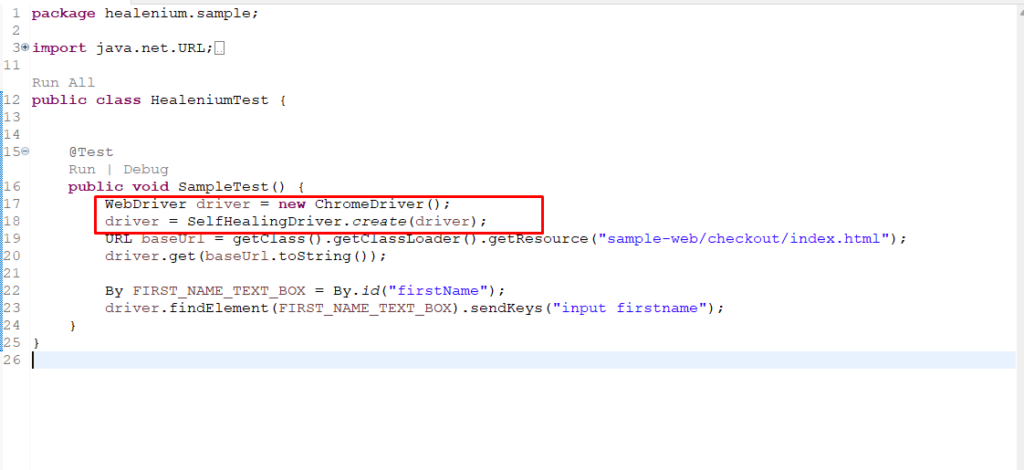
- Sample script for handling the form:
In our code, we just wrap the Selenium WebDriver with the SelfHealingDriver. We don’t need to update other existing code because SelfHealingDriver extends the Selenium WebDriver and has all the methods and properties of Selenium WebDriver. In our code, we go to the place where we initialize the Selenium WebDriver and define the SelfHealingDriver as below.
Install healenium and set up healenium in the project
- Download healenium docker-compose from this link
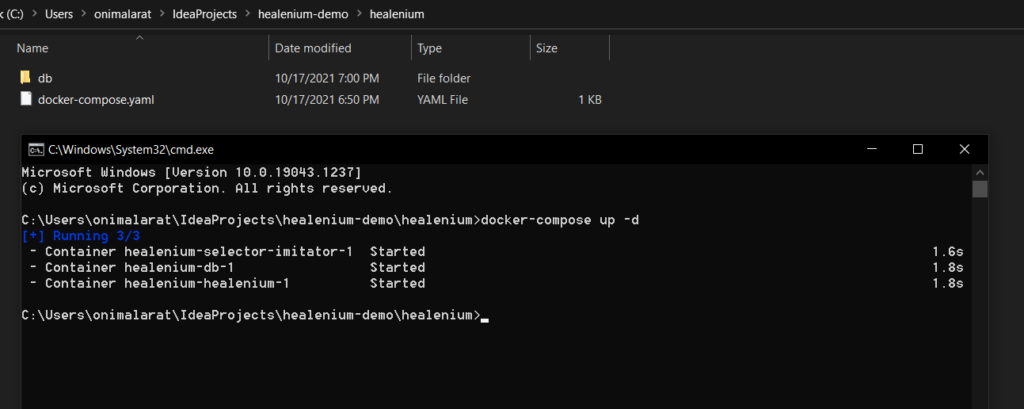
- Make sure that your docker desktop is updated and running. Then, you can start healenium with the command line:
docker compose -f path/to/your/docker-compose.yml up -d
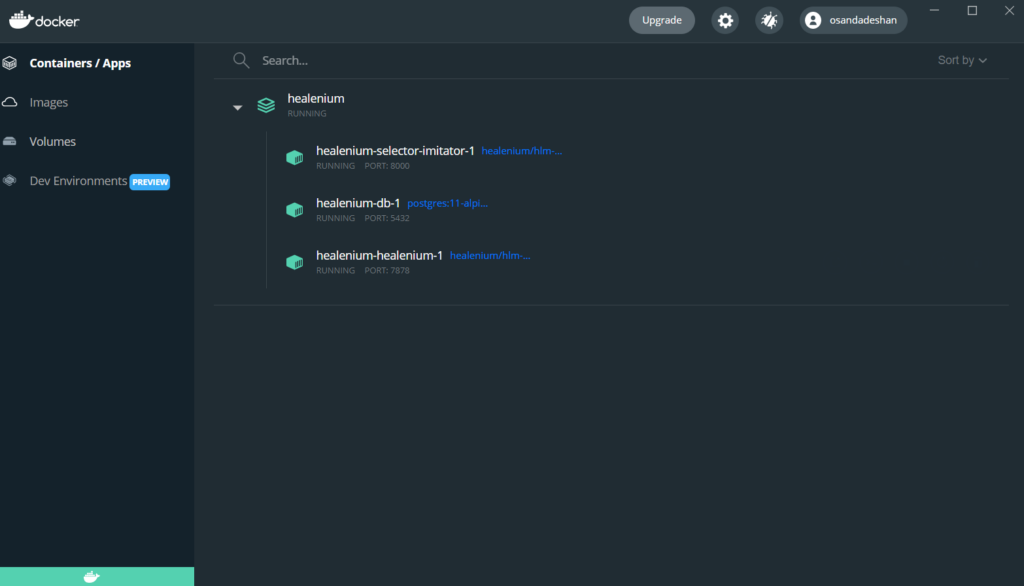
- After the deployment is finished, you can access the Healenium portal in the browser via localhost:7878
- Create the healenium.properties with the following content and add it to the src/test/resources folder.-
-
- Please make sure that the URLs are matched with the information defined in the docker-compose file in the installation step.
-
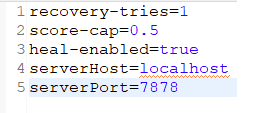
recovery-tries – The number of times the algorithm will try to discover a matched locator.
score-cap – The minimum matching score required for the detected locator to be accepted (50% is represented by the number 0.5).
heal-enabled – A toggle switch that turns healing on or off. True and false are the accepted values.
serverHost – The URL of the Docker Container server that we established while setting up the backend.
serverPort – The above-mentioned server’s port
—————————————————————————————–
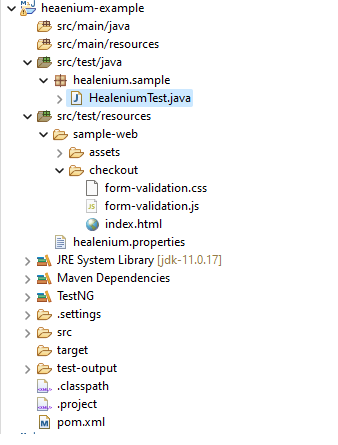
Finally, your project should look like this:
Execution
In order to test the self-heal ability of healenium, we need to make our test pass at least once. So lets run the test script above. It would be passed without any problem.
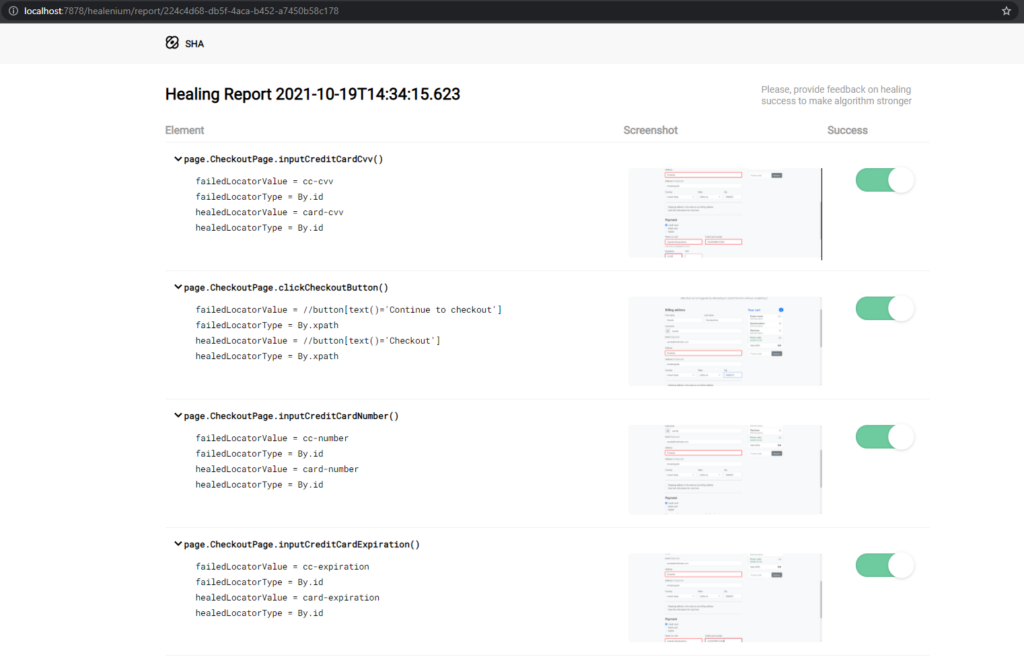
Now, get into the file src/test/resources/sample-web/checkout/index.html and edit some locator within that html file. You can edit any locator that you want, but in this example, we will just edit the firstName element. Let’s edit id = “firstName1” and re-run the test.
Normally, this would cause the locators to malfunction because they rely on exact matches. The test will pass because the self-healing driver is used, and it will heal the locators during runtime. Looking into the report in localhost: 7878, you will see some information about healed locator during the test as below:
3. Conclusion
Healenium is a powerful tool for creating auto-healing test cases that can adapt to changes in the UI. By setting up Healenium in your project and using its API to identify and fix broken elements, you can save time and effort in maintaining your automated tests.
If you’re interested in learning more about Healenium, be sure to check out the official documentation and resources on the Healenium website. You can also join the Healenium community on GitHub to get support and share your experiences with other users.