


In this blog, we will delve into the world of project management with Azure Devops Boards. In this guide, we’ll take you through the steps to create and effectively utilise Azure DevOps Boards for your software projects.
What is Azure Devops?
Azure Devops Boards are more powerful tools designed to help teams plan, track, and discuss work across their software projects. Imagine it as a virtual whiteboard in your office, where you can sit with your team, organise tasks, set priorities, and visualise progress.
Getting Started with Azure Devops
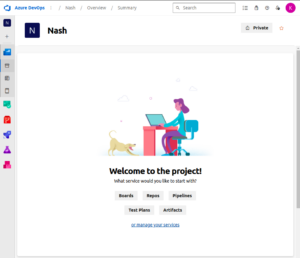
Sign in to your Azure DevOps and navigate to your project.
Lets create a project called Nash.
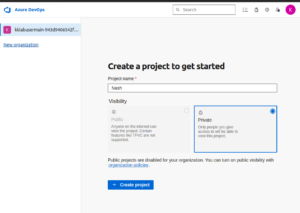
Click on Create project.
Select a process template:
Choose between Agile, Scrum, or CMMI based on your project’s methodology.
First, lets create the basic process dashboard.
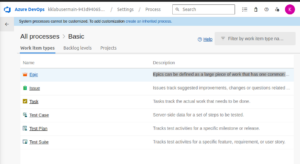
Some important terminology in Azure Devops Boards
1. Epics: Epics can be defined as a large piece of work that has one common objective. Use an Epic to track the progress of complex features.
2. Issue: Issues track suggested improvements, changes or questions related to the project. Issues can also be used to break down an Epic into smaller chunks of work.
3. Task: Tasks track the actual work that needs to be done.
4. Test Case: Server-side data for a set of steps to be tested.
5. Test Plan: Tracks test activities for a specific milestone or release.
6. Test Suite: Tracks test activities for a specific feature, requirement, or user story.
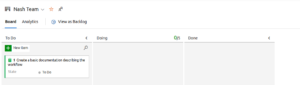
Lets create a board now.
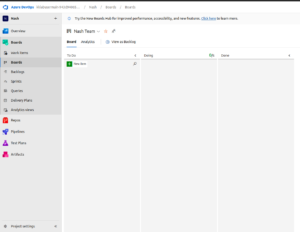
Create a new item, by clicking on the New Item button.
Lets open this issue item which is created.
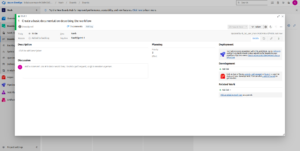
We will add more relevant information to the ticket so that the person who gets assigned to this ticket can work accordingly.
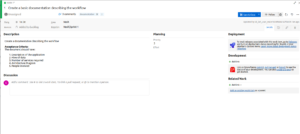
Similarly, we can create other tickets/tasks as well with detailed description and add sub-tasks and tests for the correct implementation process. They are usually check boxes and we can mark them done by clicking on it.
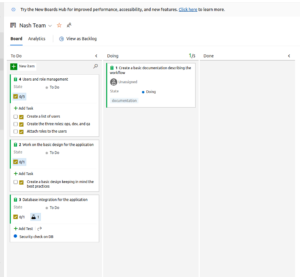
To manage your work items, you can drag and drop work items across columns to reflect progress. You can also utilise filters tags, and queries to organise and locate specific work items. It is also suggested to collaborate with team members by mentioning them in work item comments.
This is how you can create a basic project in Azure Devops Boards an utilise it for seamless collaboration features, and bring valuable insights into team performance. If you have any questions/feedbacks regarding this blog, I am reachable at vidushi.bansal@nashtechglobal.com. You can find more of my blogs here.