


As a manual tester, you recognize the significance of thorough testing. But wouldn’t it be great to free yourself from repetitive tasks and achieve faster test execution? Testerum, with its seamless integration with Selenium, empowers you to automate your manual test cases, saving time and effort while enhancing test coverage. This guide will provide you with the knowledge to convert your manual tests into automated ones using Testerum and Selenium, including configuring and setting up hooks for optimal execution.
I. Prepare Your Manual Test Cases
- Review and Refine: Before diving into automation, ensure your manual test cases are clear, concise, and well-structured. They should outline specific steps, expected results, pre-conditions, and post-conditions. Refer to the post for guidance on creating manual test cases on Testerum: Testerum: Your Guide to Simplifying Manual Testing – NashTech Insights (nashtechglobal.com)
II. Identify Automation Candidates
- Prioritize Repetitive Tasks: Not all tests are ideal for automation. Focus on repetitive, regression-critical test cases that benefit from faster execution. For the demonation purpose, I use the test “Successful login” to convert to automation test.
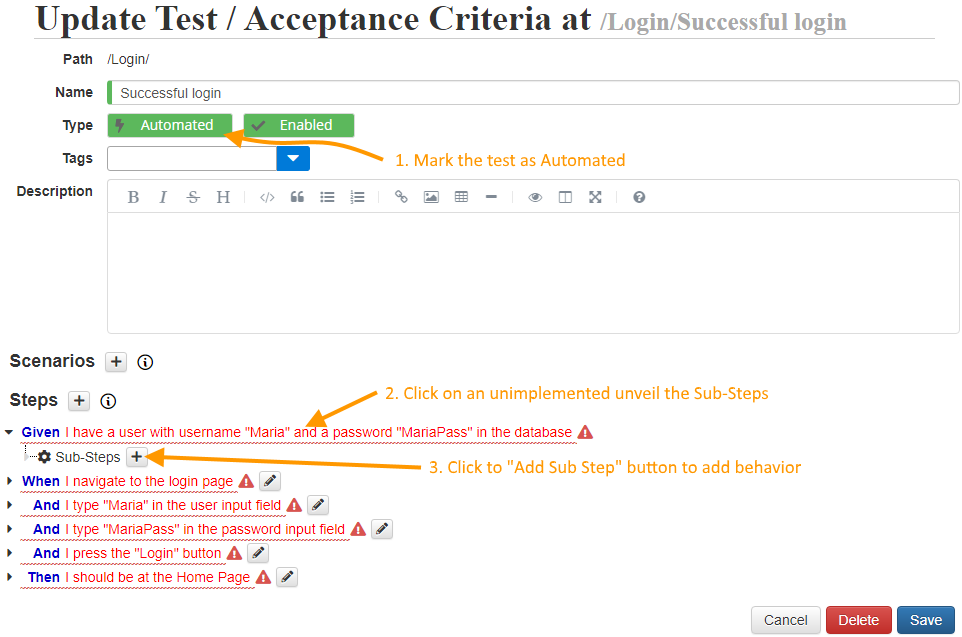
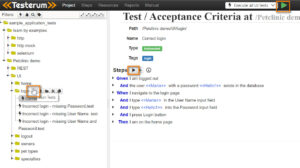
Given you have a manual test defined like below:
-
- First, you need to mark the test as Automated
- All the steps will be red. This is because the behavior of the steps is not implemented.
To implement the step behavior click on the step to see the “Sub-Steps” node. - Hover the mouse over the “Sub-Steps” node and click the + (Add Sub Step) button

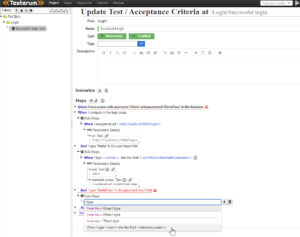
- Now, an input box was added as a Sub Step.
In here, if you know the name of the sub-step that you need to implement the parent behavior you can type the keyword to get the suggestions.
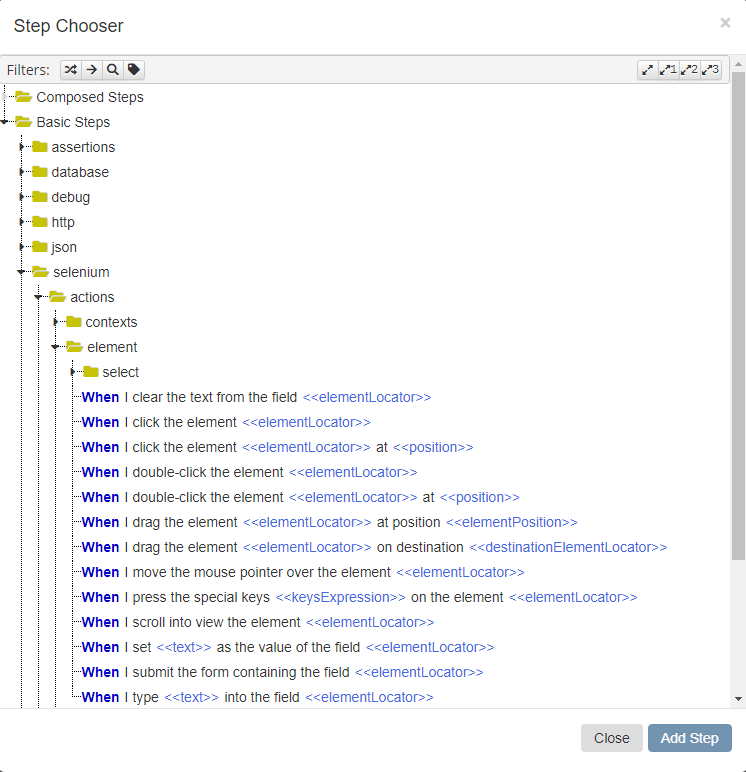
If you don’t, press the + button to select the step from the Step Chooser pop-up screen.
- In the Step Chooser there are two main steps categories:
- Composed Steps are the steps defined by you that reflect your business needs
- Basic Steps are predefined steps that allow you to interact with different technologies.
Using these steps you can:- interact with a browser using the Selenium integration
- make and verify HTTP calls
- initialize and verify databases
- mock 3rd Party APIs
- etc.
Choose the steps that you need to implement the action you want and press the Add Step button.

- Add sub-steps for the present steps. If you want to ignore any manual steps, hover on the step and click on the button “Disable”. It will be strikethrough and not execute when running automation test. After you’re done adding your steps, save the test.


III. Variables, Parameters, and Scenarios
Testerum allows you to define variables, parameters, and scenarios within your test cases. This functionality can help you create reusable test case components, reducing code duplication.
a. Variables definition
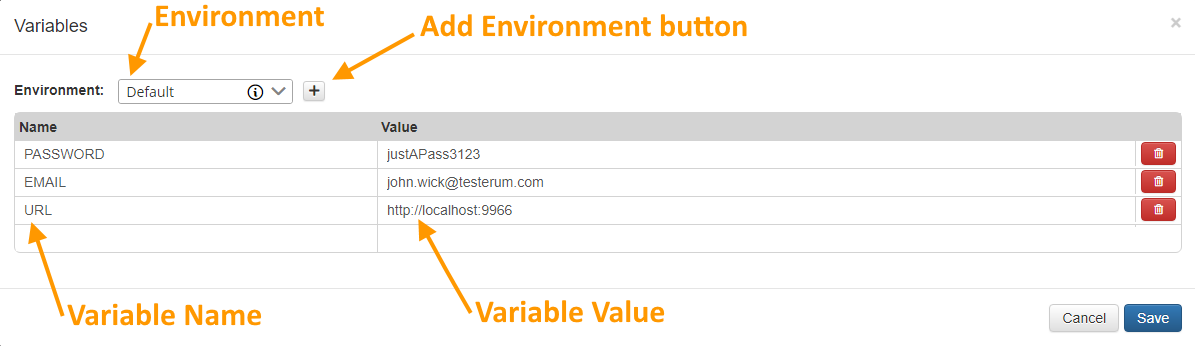
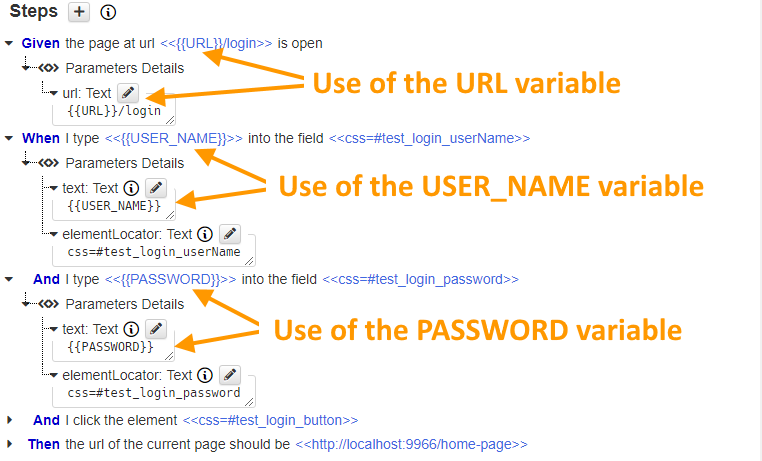
b. How to use variables
A variable can be used with the following pattern: {{variable_name}}
- Refer to the documentation for detailed instructions about variables, parameters and scenarios: https://testerum.com/documentation/ui/variables-parameters-and-scenarios/
IV. Locators in Testerum
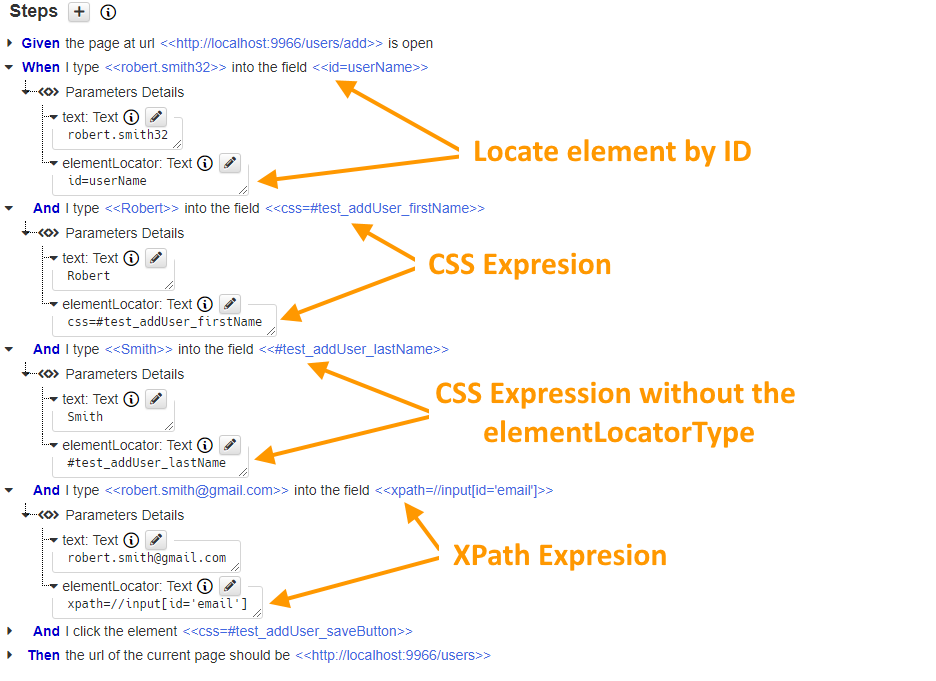
Testerum offers a user-friendly UI for building these locators, allowing you to easily define how elements should be found. The platform supports various locator strategies such as ID, XPath, name, CSS selectors, and link text, enabling you to choose the most efficient and reliable method for each element.
V. Leverage Testerum’s HTTP Requests to test API
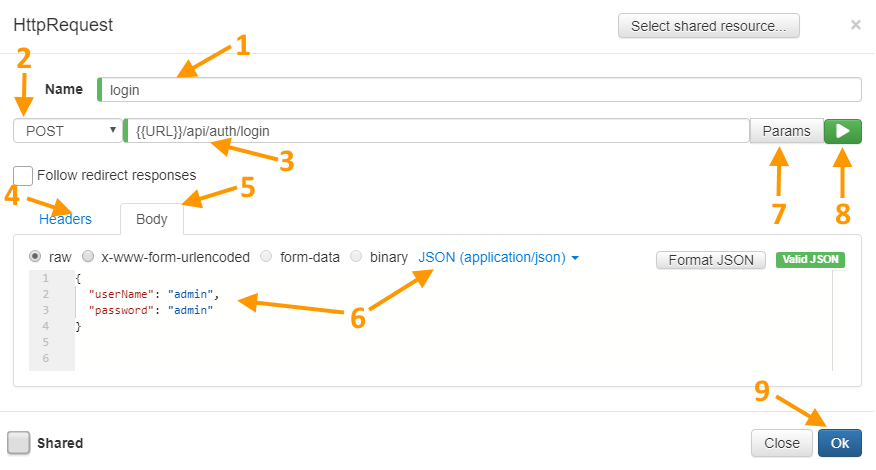
API Testing: If your manual test cases involve interacting with APIs, Testerum’s built-in HTTP Request functionality allows you to automate those interactions as well.
a. Create a new API test
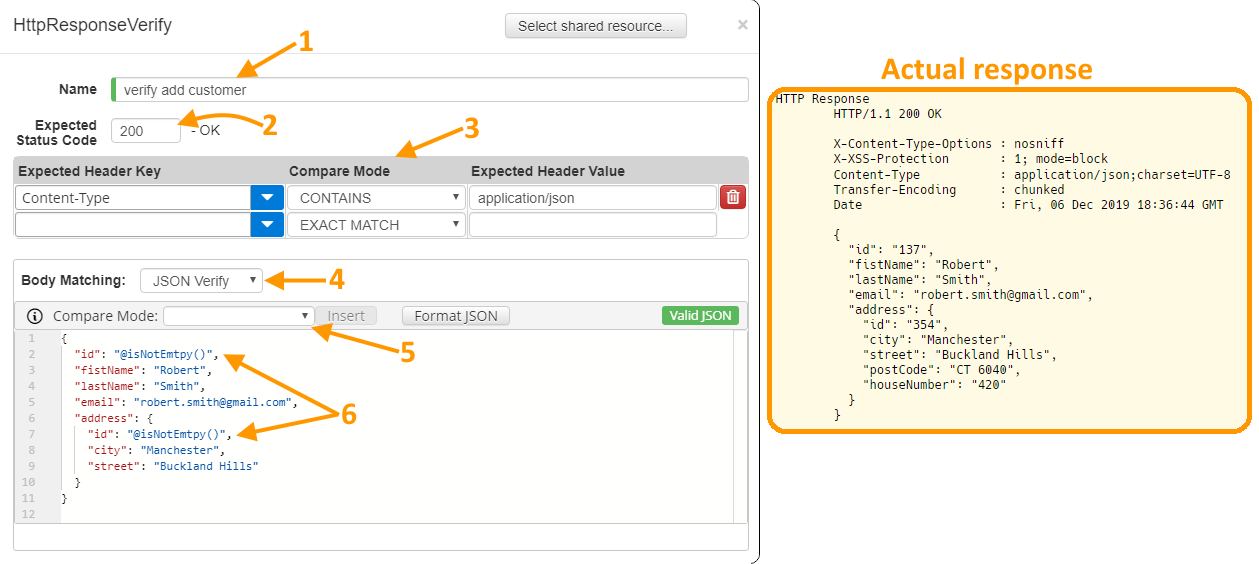
b. HTTP Verify
HTTP Mocks: We can utilize the Testerum HTTP Mocks to simulate the response which will serve you desired responses to particular requests (stubbing) .
Refer to the documentation for details: https://testerum.com/documentation/ui/http
VI. Hooks and Configure Run Settings
a. Pre- and Post-Test Actions (Hooks)
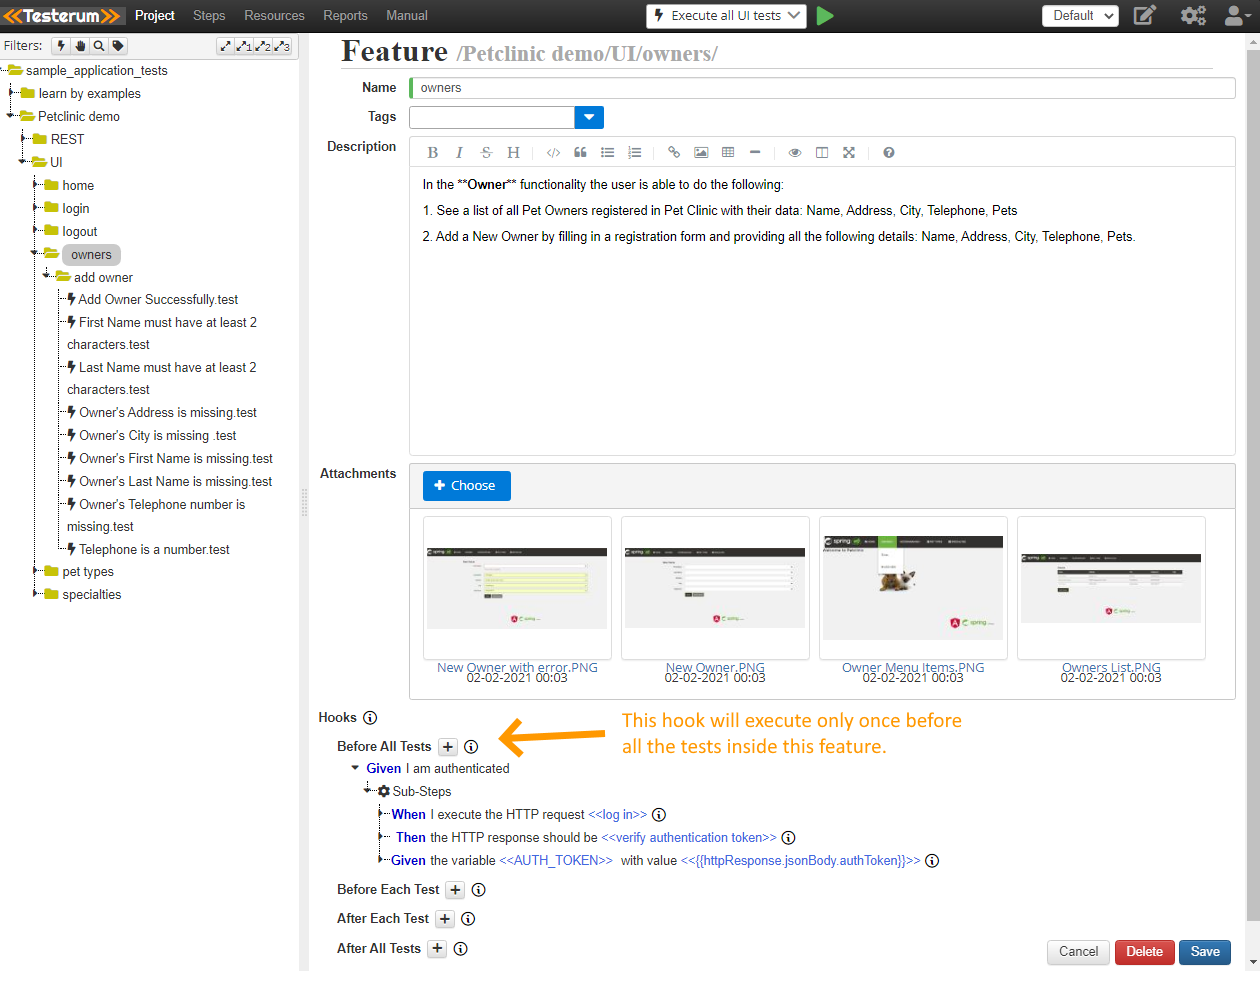
Testerum’s Hooks functionality allows you to execute custom code before and after each test case or test suite. This can be helpful for tasks like setting up test data or cleaning up after tests. Testerum supports 4 different hooks, you can add hooks for test, child and parrent features.
- @BeforeAllTests: will execute once before any tests are executed
- @BeforeEachTest: will execute before each test
- @AfterEachTest: will execute after each test
- @AfterAllTests: will execute once after all the tests have been executed
b. Run Configuration
Testerum offers run configurations to define how your automated tests will be executed. You can configure aspects like browsers, test set, and wait timeout for your test runs.
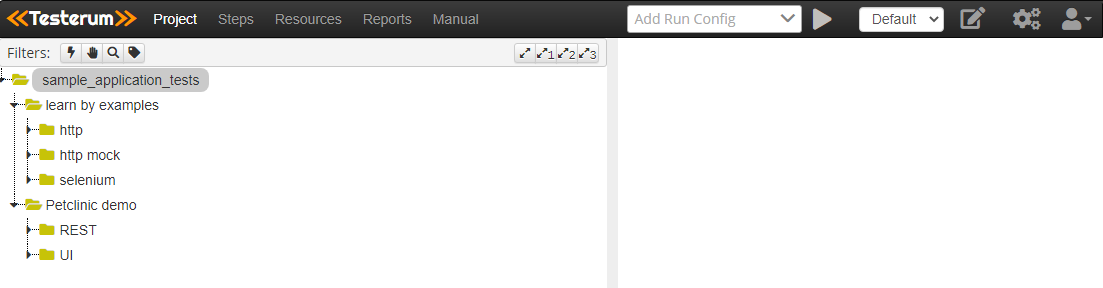
A new run configuration can be created by clicking on the “Add Run Config” item from the menu item.
c. Select the tests you want to execute
Creating a new run configuration is pretty straight-forward. You give a name to your new run configuration, for eg. “Execute all UI tests” and then you can specify which tests to be included by the their tags or select manually from the directory tree.

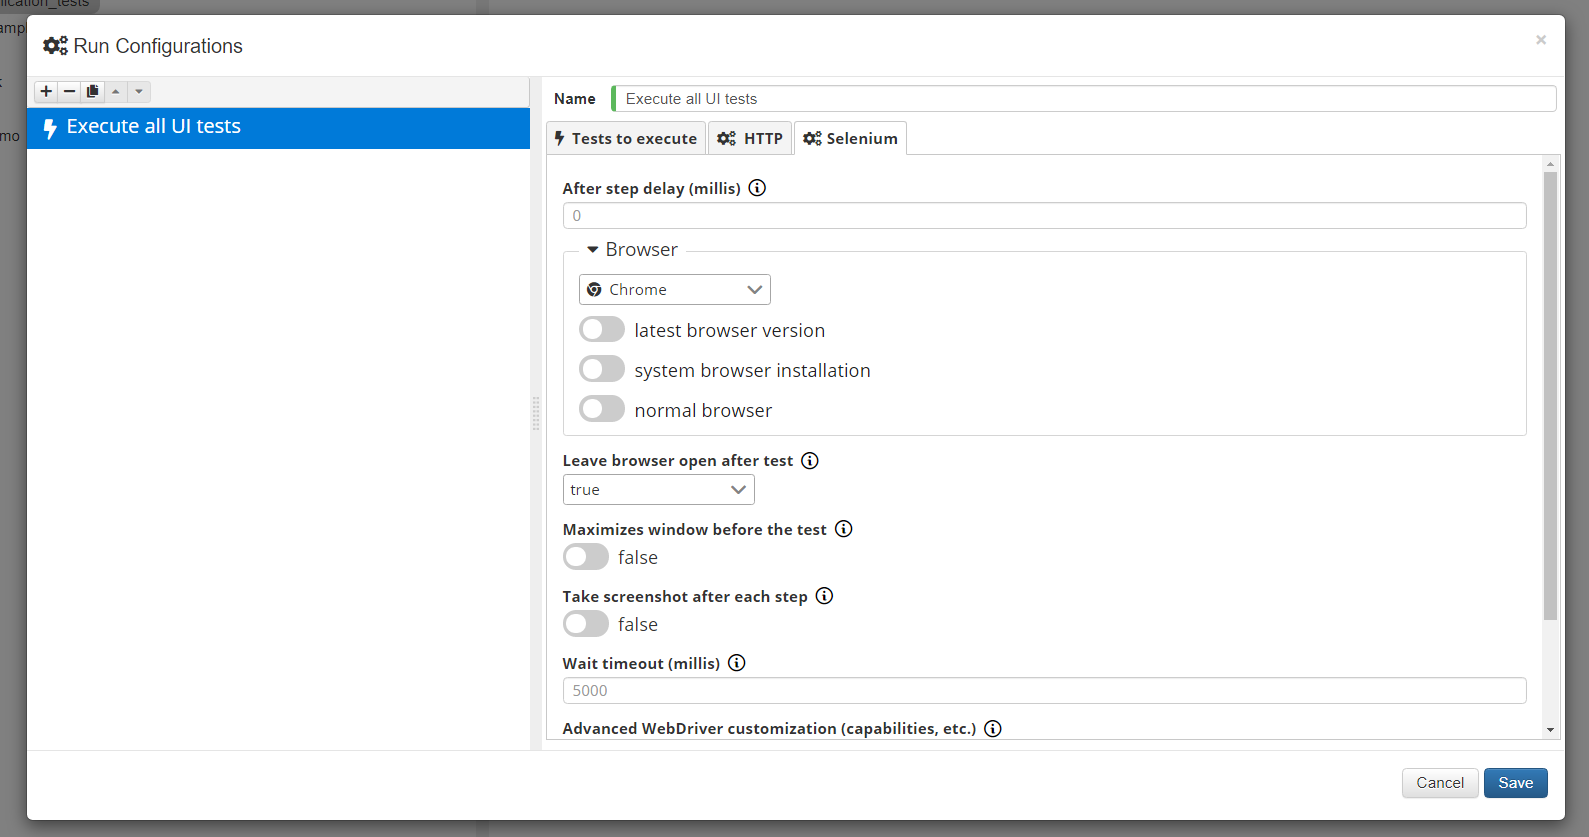
d. Configure your settings
In each run configuration you can set up your own settings. For the API tests, you can set a connection timeout in milliseconds or a socket timout. For your UI tests, In Selenium settings tab you can configure more options such as browser type, delay between steps etc.
e. Run the tests using a run configuration
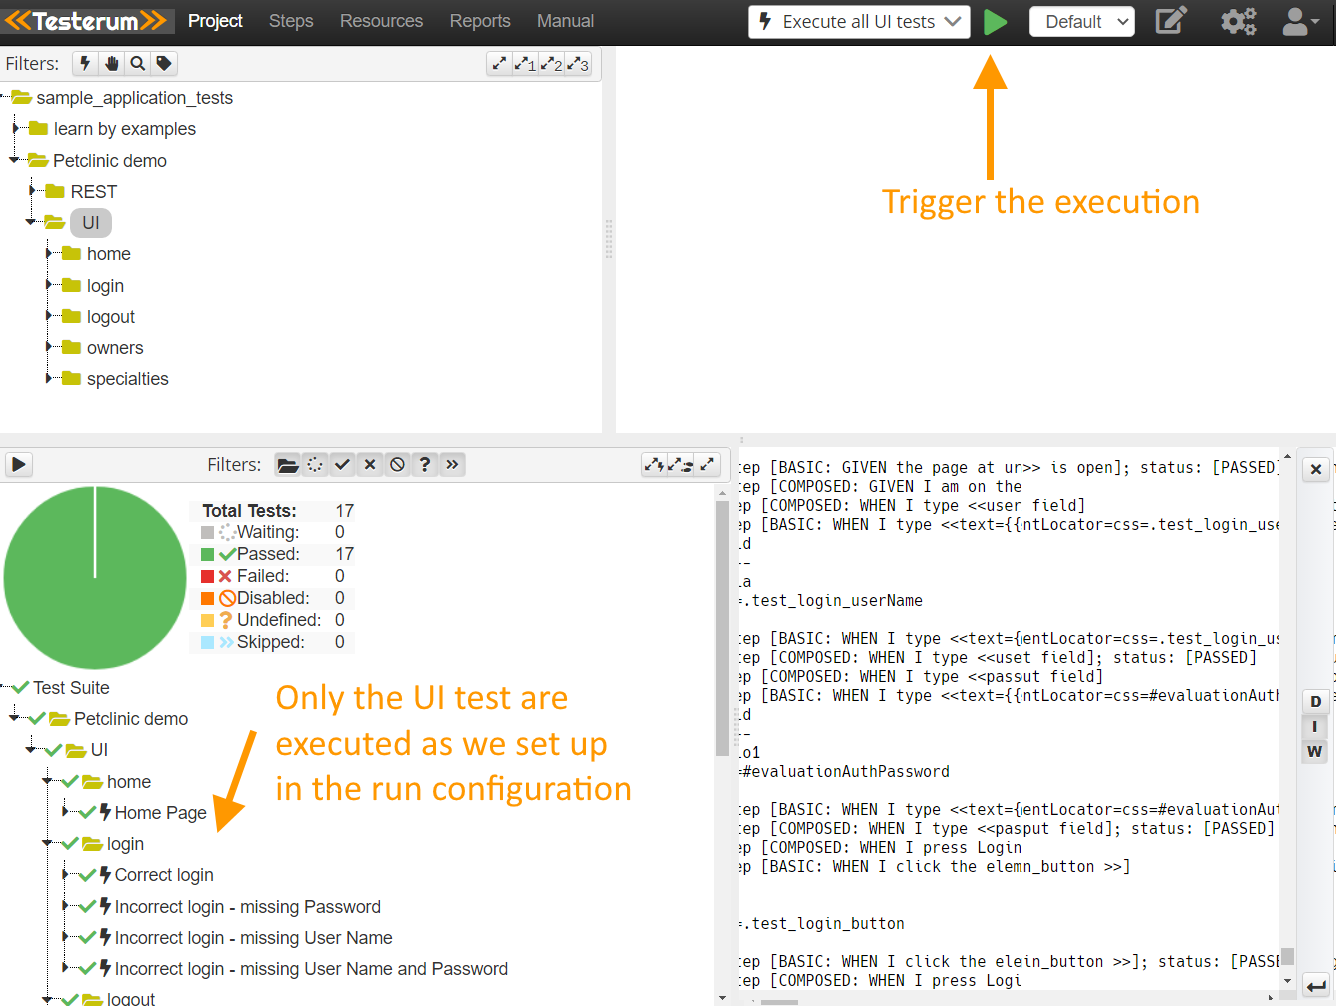
After you set up your first run configuration you will see a green execute icon close to your new configuration. Once you press on the green icon, all your tests and settings configured inside the run configuration will be executed.
VII. Running Your Automated Tests
Once you’ve transformed your manual tests into automated ones using Testerum and Selenium, and configured your run settings and hooks, you’re ready to execute them! Testerum provides a user-friendly interface for launching and monitoring your automated test suite.
Beside the running test using the run configuration above, you can click on “Play” button next to each test or feature to run all tests on the feature.
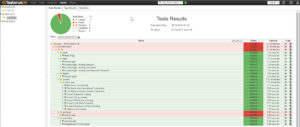
After running the test, access to the ‘Reports’ menu on the top to see the reports.
Benefits of Automating with Testerum and Selenium:
- Reduced Manual Effort: Free yourself from repetitive tasks and focus on exploratory testing and other high-value activities.
- Improved Efficiency: Execute tests faster, allowing for more frequent test cycles and faster feedback loops.
- Enhanced Accuracy: Automation helps to minimize human error in test execution.
- Increased Test Coverage: Automate more test cases, leading to more comprehensive test coverage.
VIII. Ready to Take Your Testing to the Next Level?
By leveraging Testerum’s features and Selenium’s capabilities, you can transform your manual test cases into automated ones, streamlining your testing process and achieving faster, more efficient testing cycles. Remember, this guide provides a foundational overview. As you delve deeper into automation, explore Testerum’s extensive documentation and the vast resources available for Selenium to further enhance your skills!
Reference:
- https://testerum.com/documentation/ui/selenium
- Testerum: Your Guide to Simplifying Manual Testing – NashTech Insights (nashtechglobal.com)