


In this tutorial, we will gonna learn how to load data from files in your local file system into a table.
Introduction
In this tutorial, you’ll learn how to:
- Create named file format objects to describe your data files.
- Create named stage objects.
- Upload your data to the internal stages.
- Load your data into tables.
- Resolve errors in your data files.
Please note that this tutorial covers loading both CSV and JSON data.
Prerequisites
Before starting, ensure you have:
- A Snowflake account with a user role that grants necessary privileges.
- SnowSQL installed.
- Download the sample files provided for this exercise from here : data-load-internal.zip
- Unzip the sample files. The tutorial assumes you unpacked files in to the following directories:
- Linux/macOS:
/tmp/load- Windows:
C:\tempload
The data files include sample contact data in CSV and JSON formats.
Creating the Database, Tables, and Warehouse
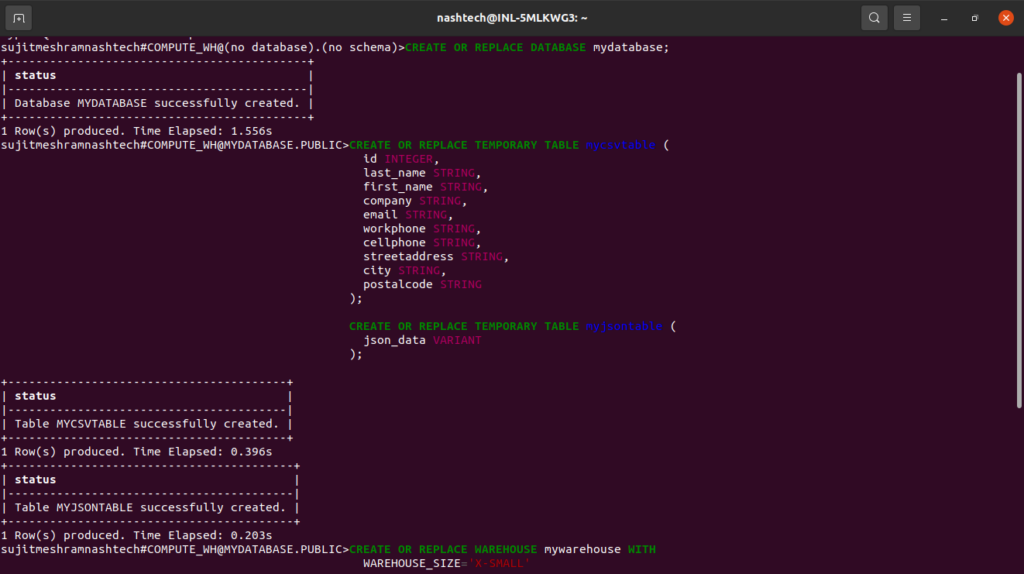
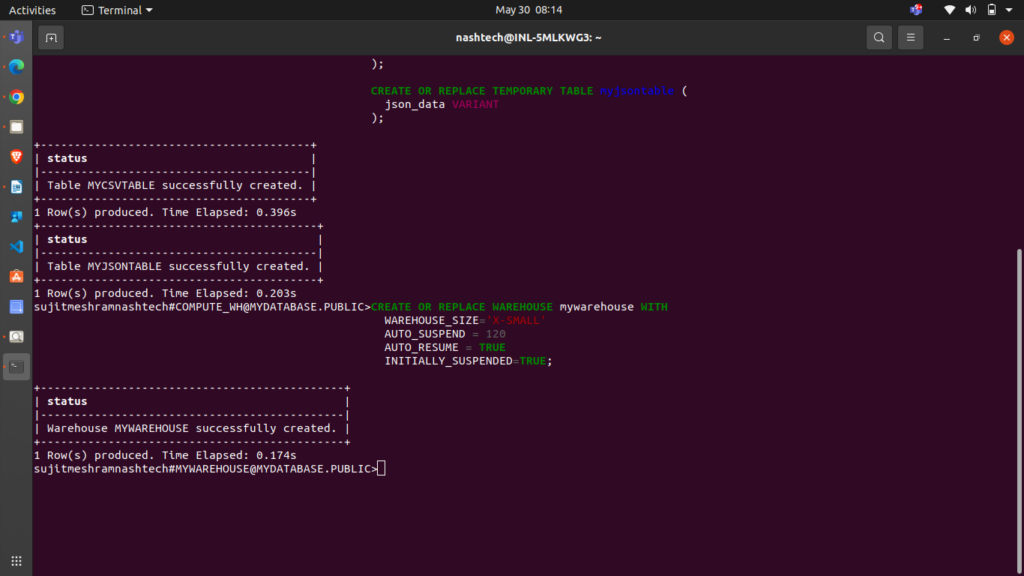
Execute the following statements to create a database, two tables (for CSV and JSON data), and a virtual warehouse needed for this tutorial:
CREATE OR REPLACE DATABASE mydatabase;

CREATE OR REPLACE TEMPORARY TABLE mycsvtable (
id INTEGER,
last_name STRING,
first_name STRING,
company STRING,
email STRING,
workphone STRING,
cellphone STRING,
streetaddress STRING,
city STRING,
postalcode STRING);

CREATE OR REPLACE TEMPORARY TABLE myjsontable (
json_data VARIANT);

CREATE OR REPLACE WAREHOUSE mywarehouse WITH
WAREHOUSE_SIZE='X-SMALL'
AUTO_SUSPEND = 120
AUTO_RESUME = TRUE
INITIALLY_SUSPENDED=TRUE;
Step 1. Create File Format Objects
Before loading data from a file into a table, describe the file’s format. You can create named file format objects using the CREATE FILE FORMAT command.
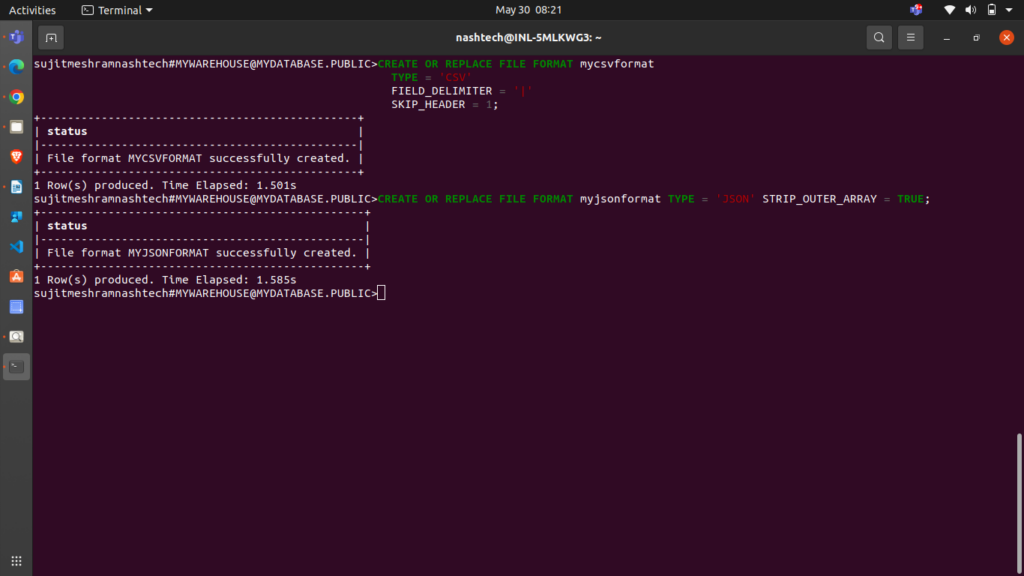
For CSV data, create the mycsvformat file format:
CREATE OR REPLACE FILE FORMAT mycsvformat
TYPE = 'CSV'
FIELD_DELIMITER = '|'
SKIP_HEADER = 1;
- The setting FIELD_DELIMITER = ‘|’ specifies that the character ‘|’ is used to separate fields. By default, fields are separated by ‘,’.
- SKIP_HEADER = 1 indicates that the source file contains a single header line. When using the COPY command to load data, this header line is skipped. The default value is 0.
For JSON data, create the myjsonformat file format:
CREATE OR REPLACE FILE FORMAT myjsonformat
TYPE = 'JSON'
STRIP_OUTER_ARRAY = TRUE;
Note: STRIP_OUTER_ARRAY = TRUE directs the COPY command to exclude the root brackets ([]) when loading data to the table.
Step 2. Create Stage Objects
A stage specifies where data files are stored for loading into a table. Create named stages for the different types of sample data files.
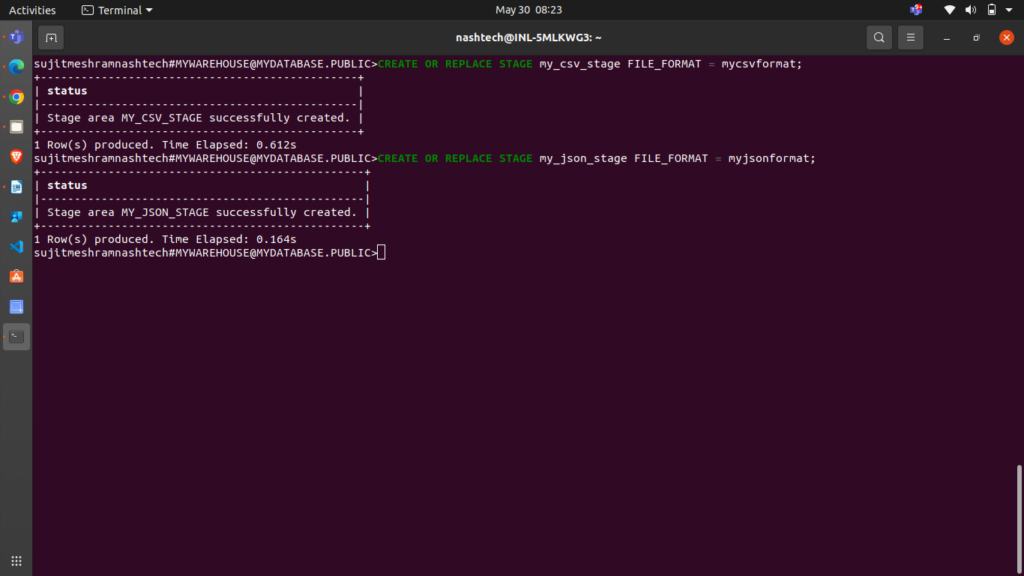
For CSV data files, create the my_csv_stage stage:
CREATE OR REPLACE STAGE my_csv_stage
FILE_FORMAT = mycsvformat;
Note that you don’t need to repeat the FILE_FORMAT option in the COPY command if you’ve already specified it when creating the stage.
For JSON data files, create the my_json_stage stage:
CREATE OR REPLACE STAGE my_json_stage
FILE_FORMAT = myjsonformat;
Step 3. Stage the Data Files
please note that, for staging, I have provided the sample files in prerequisites section and you have to unzip that files to the mentioned temp location as per your operating system.
Staging the CSV Sample Data Files
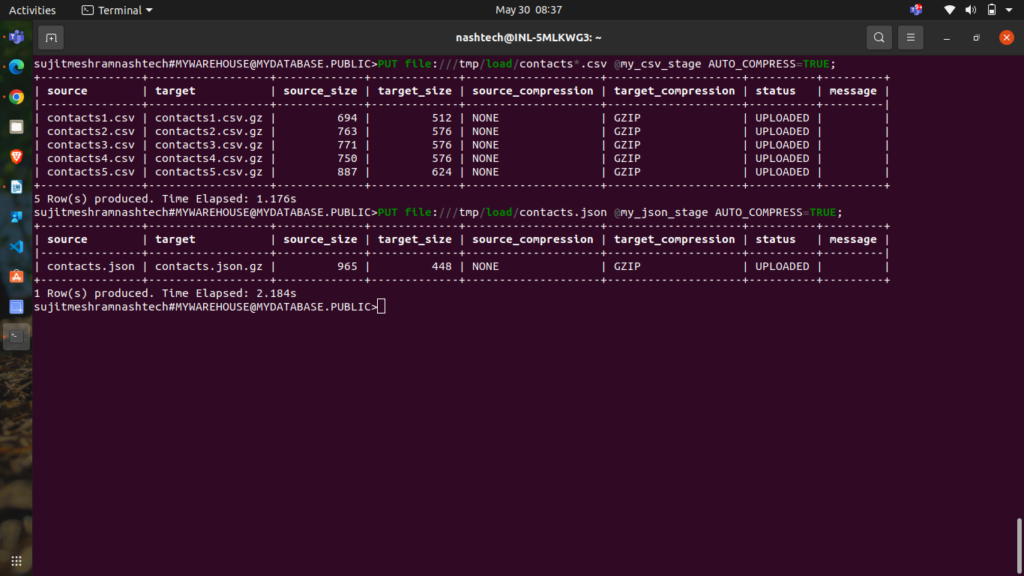
To upload the CSV files from your local file system, execute the PUT command:
-
Linux or macOS:
PUT file:///tmp/load/contacts*.csv @my_csv_stage AUTO_COMPRESS=TRUE;
-
Windows:PUT file://C:\temp\load\contacts*.csv @my_csv_stage AUTO_COMPRESS=TRUE;
Let’s break down the command:
file://<file-path>[/]contacts*.csvspecifies the full path and names of the files on your local machine to be staged. File system wildcards are supported.@my_csv_stageindicates the stage where the data will be uploaded.AUTO_COMPRESS=TRUEinstructs the command to compress the data during staging. This is the default behavior.
Staging the JSON Sample Data Files
To upload the JSON file from your local file system to the named stage, execute the PUT command:
-
Linux or macOS:
PUT file:///tmp/load/contacts.json @my_json_stage AUTO_COMPRESS=TRUE;
-
Windows:
PUT file://C:\temp\load/contacts.json @my_json_stage AUTO_COMPRESS=TRUE;
The command returns the following output, showing the staged files:
Listing the Staged Files (Optional)
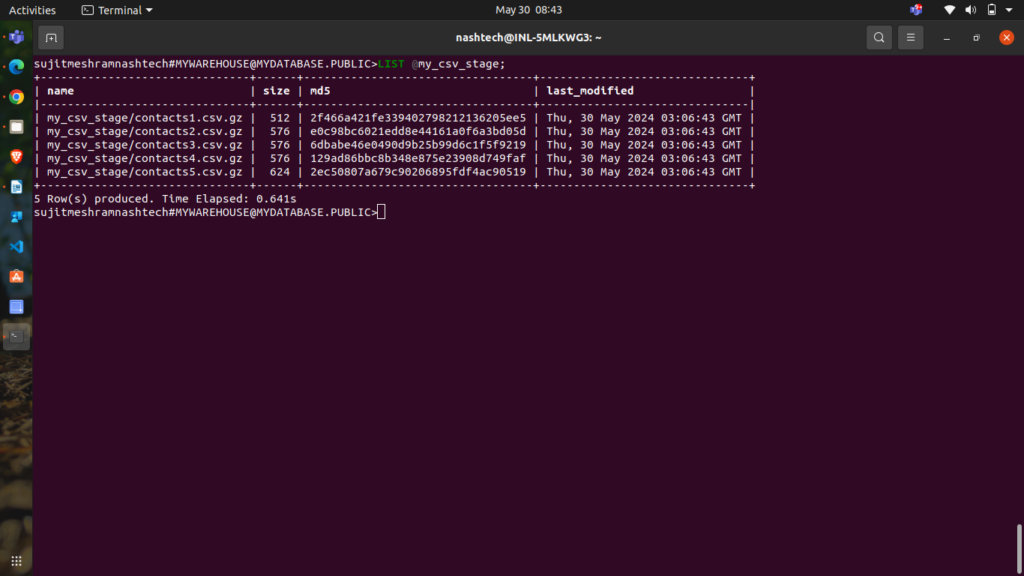
You can list the staged files using the LIST command:
-
CSV:
LIST @my_csv_stage;
Snowflake returns a list of your staged CSV files.

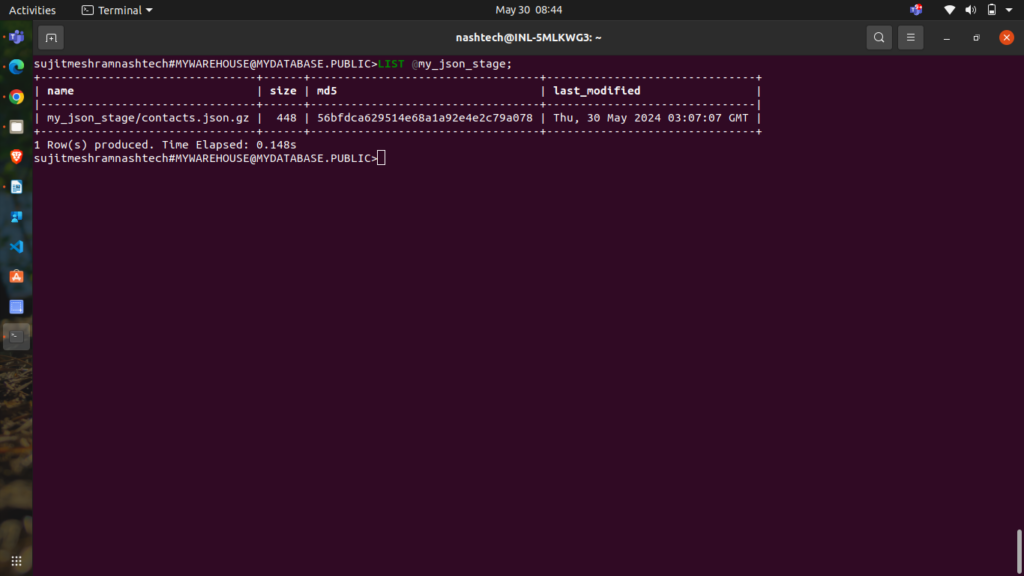
- JSON:
LIST @my_json_stage;
Snowflake returns a list of your staged JSON files.
Step 4: Load Data into Target Tables
To load data into the target tables, use the COPY INTO <table> command to import staged data.
Loading CSV Data
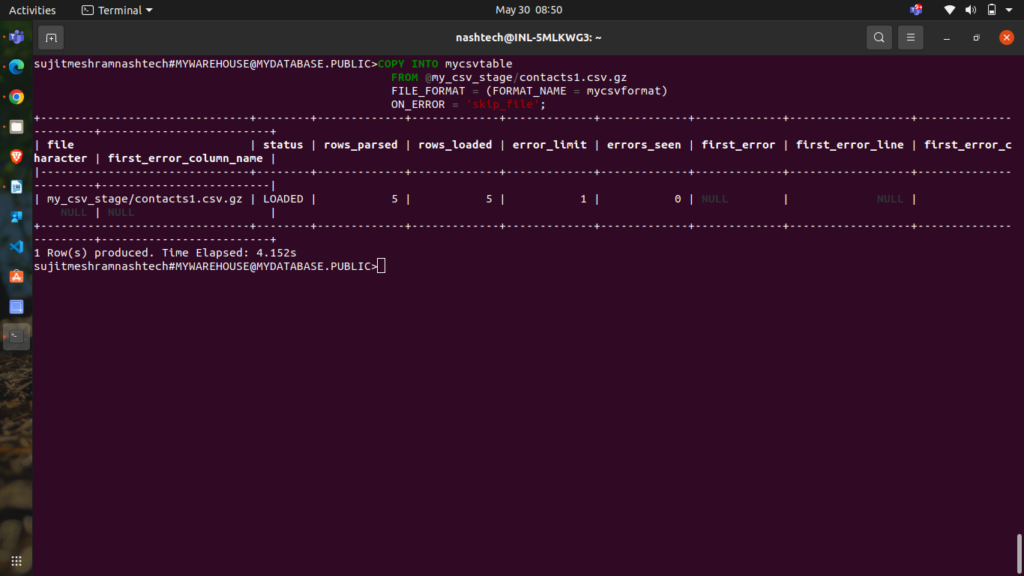
To begin, load data from a specific CSV file (e.g., contacts1.csv.gz). Execute the following command:
COPY INTO mycsvtable FROM @my_csv_stage/contacts1.csv.gz FILE_FORMAT = (FORMAT_NAME = mycsvformat) ON_ERROR = 'skip_file';
Here:
- The
FROMclause indicates the location of the staged file (combining the stage name and file name). - The
ON_ERRORclause specifies that if theCOPYcommand encounters any errors, it should skip the problematic file and continue with the next one. This is just for demonstration; none of the files used in this tutorial contain errors.
Next, load data from the remaining files in the mycsvtable table using pattern matching to target multiple files:
COPY INTO mycsvtable FROM @my_csv_stage FILE_FORMAT = (FORMAT_NAME = mycsvformat) PATTERN='.*contacts[1-5].csv.gz' ON_ERROR = 'skip_file';
Here, the PATTERN clause specifies the regular expression to match filenames (.*contacts[1-5].csv.gz), ensuring all relevant files are loaded.
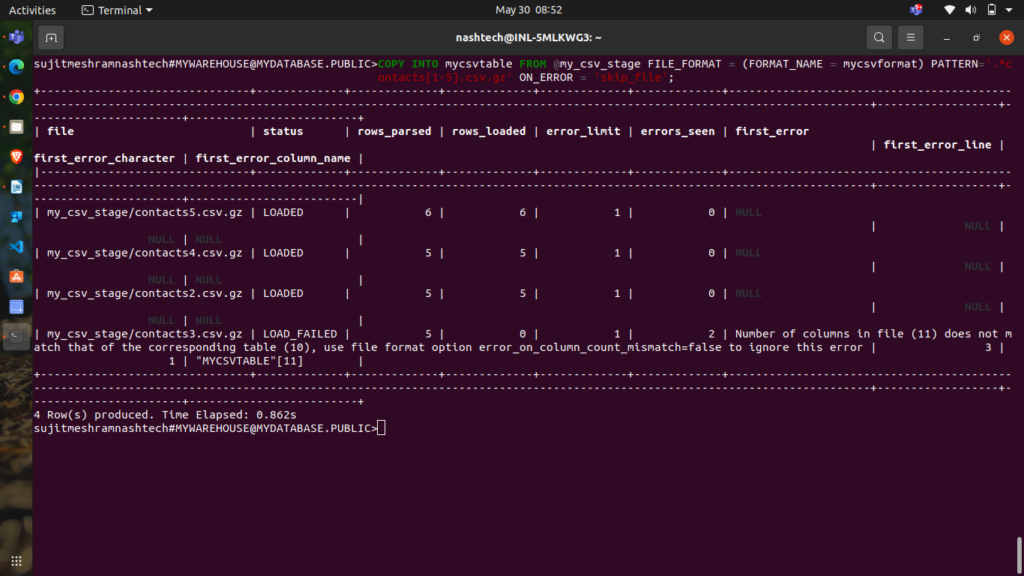
Note:
contacts1.csv.gzdata is ignored as it was already loaded.- Files
contacts2.csv.gz,contacts4.csv.gz, andcontacts5.csv.gzwere loaded successfully.
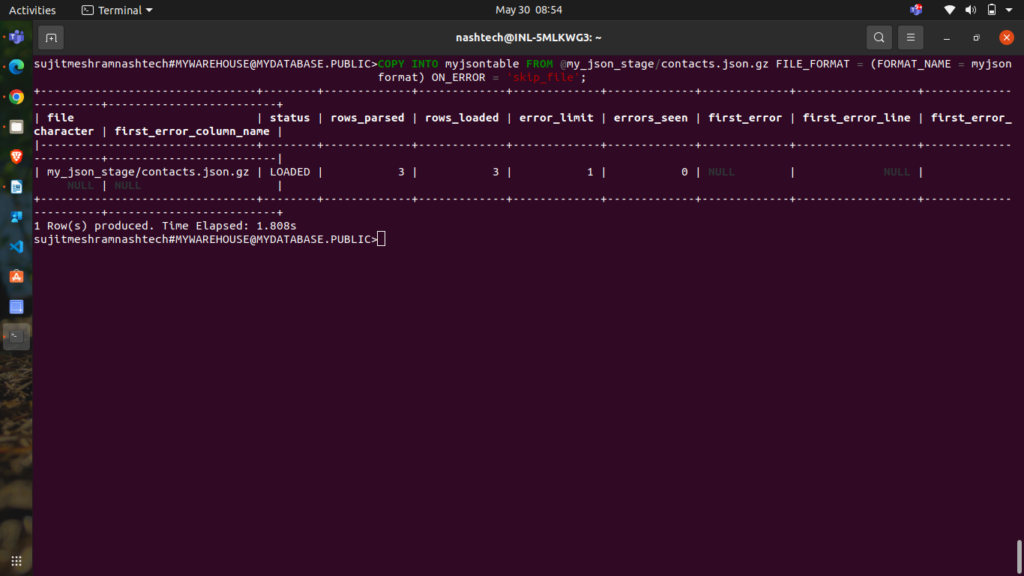
Loading JSON Data
To load the JSON file contacts.json.gz into the myjsontable table, execute the following command:
COPY INTO myjsontable FROM @my_json_stage/contacts.json.gz FILE_FORMAT = (FORMAT_NAME = myjsonformat) ON_ERROR = 'skip_file';
The command returns a result set indicating the file loaded and related details:
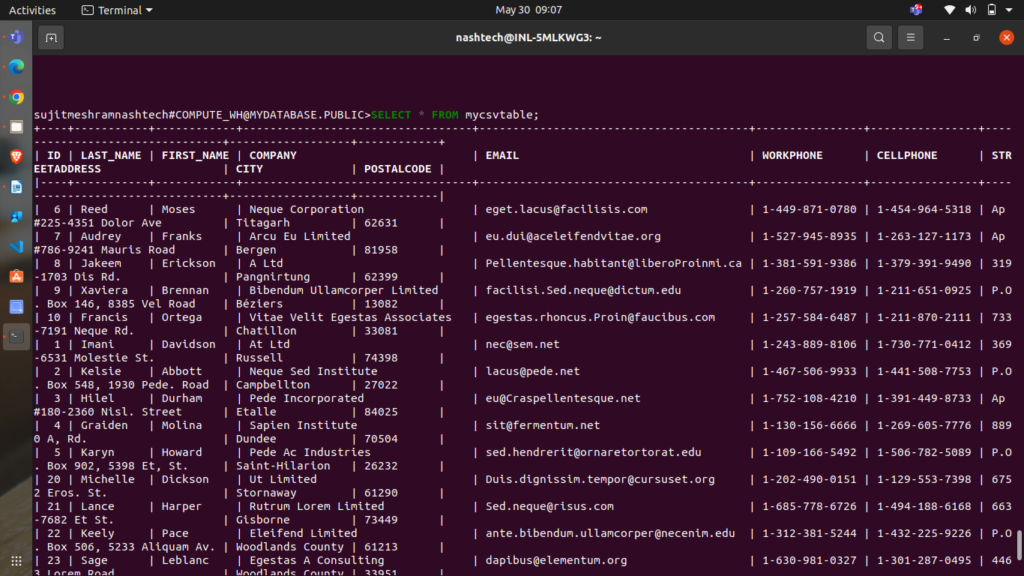
Step 5: Validate the Loaded Data
To confirm that the data has been successfully loaded, execute a SELECT query.
Run the following query to check the contents of the mycsvtable table:
SELECT * FROM mycsvtable;
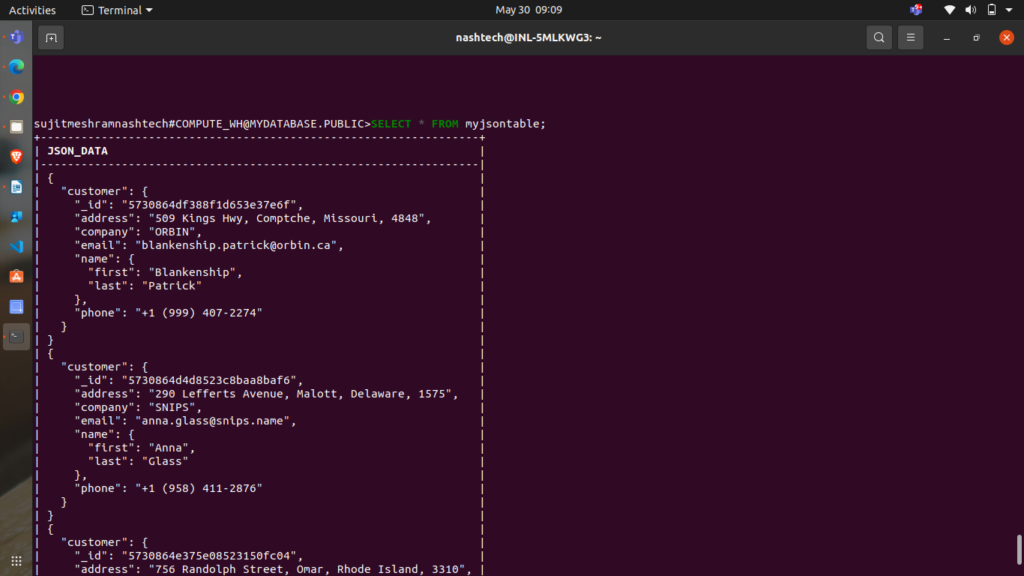
Verifying JSON Data
Run the following query to check the contents of the myjsontable table:
SELECT * FROM myjsontable;
The query returns the following data:
Step 6: Delete Successfully Copied Data Files
Once you have verified that the data has been successfully copied from the stage into the tables, you can delete the data files from the internal stage to save on storage costs. Use the REMOVE command for this purpose.
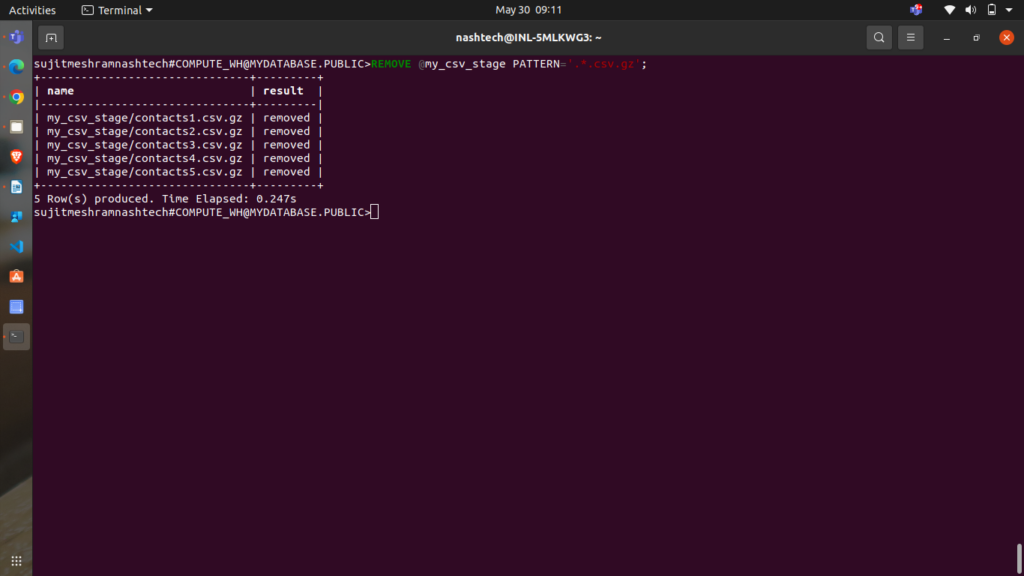
To remove CSV files from the stage, use:
REMOVE @my_csv_stage PATTERN='.*.csv.gz';
This command returns the following results:
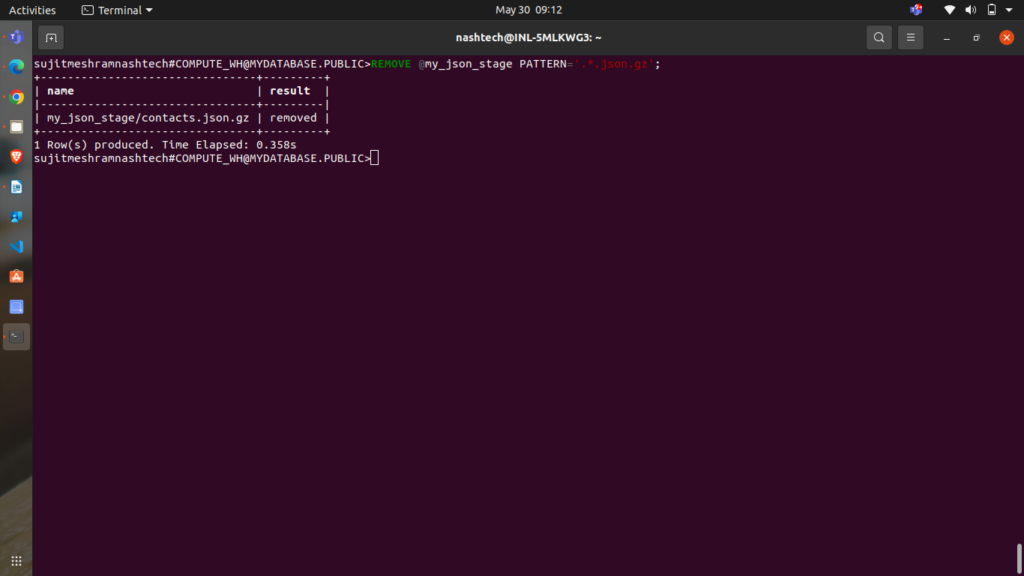
To remove JSON files from the stage, use:
REMOVE @my_json_stage PATTERN='.*.json.gz';
This command returns the following results:
Step 7: Clean Up
Congratulations on successfully completing the tutorial!
Tutorial Clean Up (optional process)
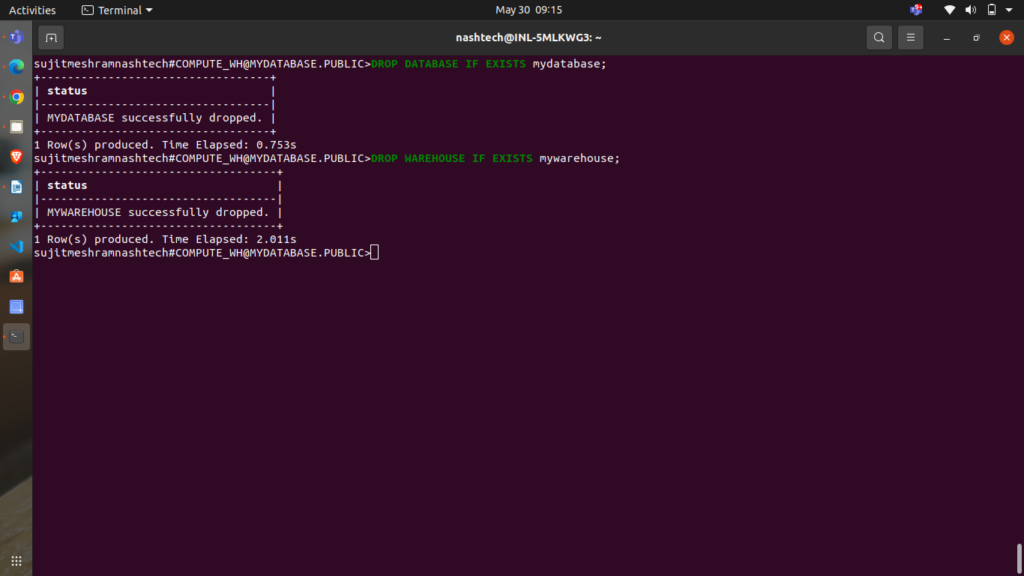
If you wish to revert your system to its pre-tutorial state, execute the following DROP commands:
DROP DATABASE IF EXISTS mydatabase;
DROP WAREHOUSE IF EXISTS mywarehouse;
Dropping the database will also automatically delete all associated objects, such as tables.
Conclusion
By following this tutorial, you have learned how to load data from local files into Snowflake tables, handle CSV and JSON formats, and manage staging and file formats. You have also seen how to verify the loaded data and clean up resources to maintain an efficient data environment.