


Introduction
This tutorial is using the Snowflake command line client, SnowSQL, to introduce essential concepts and tasks, including:
- Creating Snowflake objects: You will create a database and a table to store data.
- Loading data: You will load small sample CSV files into the table.
- Querying: You will explore sample queries.
Learning Outcomes
In this tutorial, you will learn how to:
- Create Snowflake objects: a database and a table for storing data.
- Install SnowSQL: the Snowflake command line query tool.
- Loading CSV data files: using various methods to load data into tables from CSV files.
- Write and execute sample queries: using the newly loaded data.
Prerequisites
You need a database, table, and virtual warehouse to load and query data. A Snowflake user with the necessary access control privileges is required to create these objects and SnowSQL is needed to execute SQL statements in the tutorial. Finally, CSV files with sample data are required.
You can use existing Snowflake objects and local data files, but we recommend using the provided data and objects. Before starting, complete the following setup:
Step 1: Create a User
Log in as a Snowflake user with the role to create the necessary objects. Log in with the user created for the account. If you don’t have a Snowflake user or the required role, ask someone with ACCOUNTADMIN or SECURITYADMIN roles to create the user for you.
Step 2: Install SnowSQL
You have to install SnowSQL from official website,
for reference: https://docs.snowflake.com/en/user-guide/snowsql-install-config
Step 3: Download Sample Data Files
Download and unzip the sample employee data files in CSV format provided by Snowflake. We will gonna use given sample files to explore for this tutorial,
Download sample files from here: getting-started.zip
Save and unzip the files to the following directories:
- for Linux/macOS:
/tmp - for Windows:
C:\\temp
unzipping the downloaded files in above correct location is important for staging sample data files, so follow above step carefully.
Each file has five data records using a comma (,) as the field delimiter.
for example record:
Althea,Featherstone,afeatherstona@sf_tuts.com,"8172 Browning Street, Apt B",Calatrava,7/12/2017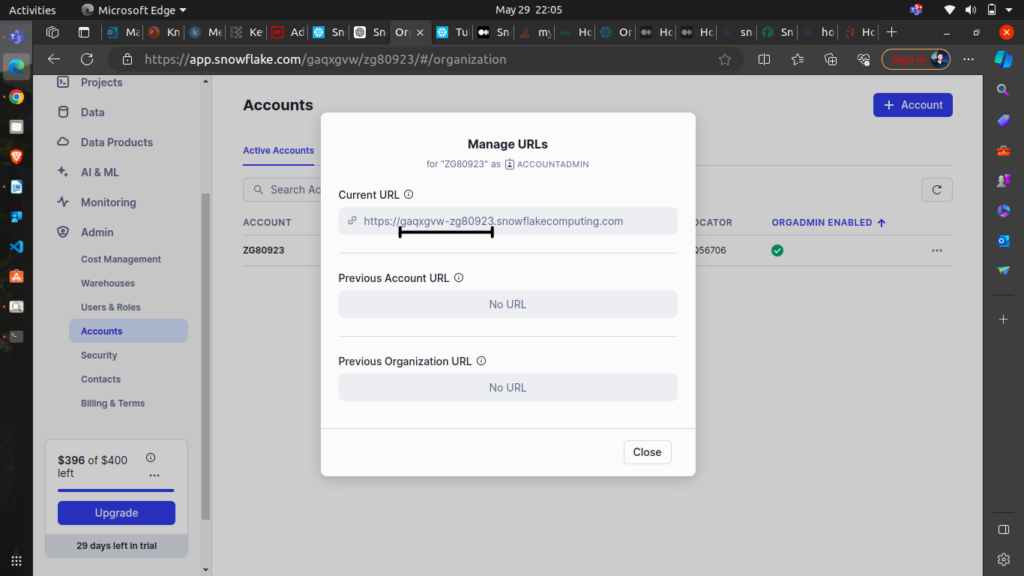
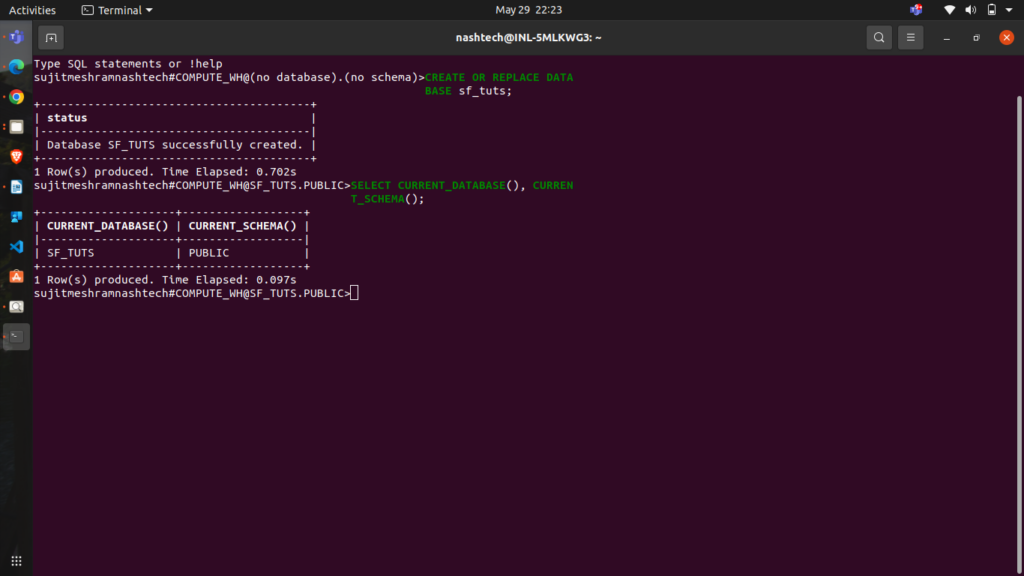
 note that, your
 SELECT CURRENT_DATABASE(), CURRENT_SCHEMA();
Create a Table
Create the emp_basic table:
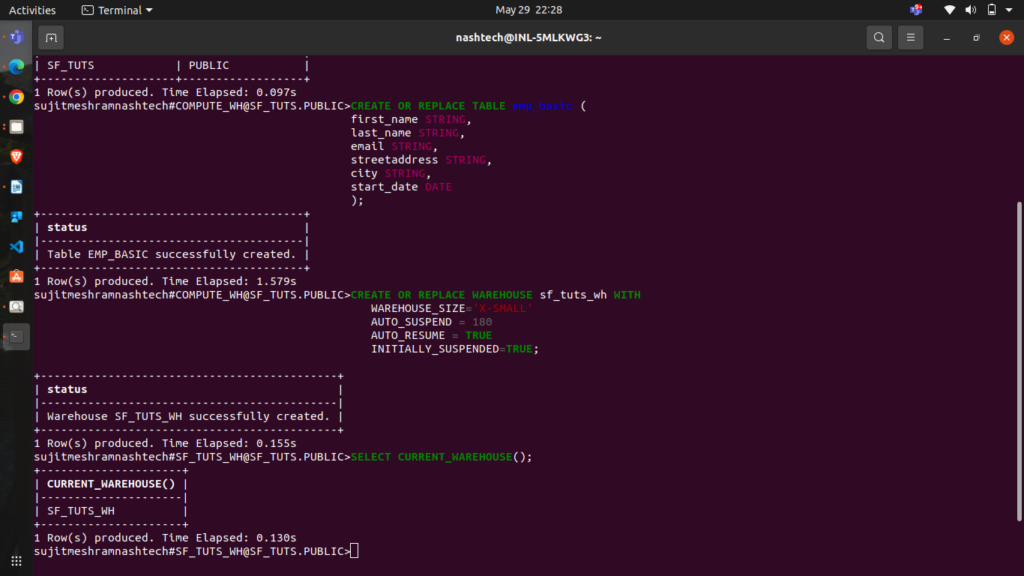
CREATE OR REPLACE TABLE emp_basic (
first_name STRING,
last_name STRING,
email STRING,
streetaddress STRING,
city STRING,
start_date DATE
);
Create a Virtual Warehouse
Create an X-Small warehouse named sf_tuts_wh:
CREATE OR REPLACE WAREHOUSE sf_tuts_wh WITH
WAREHOUSE_SIZE='X-SMALL'
AUTO_SUSPEND = 180
AUTO_RESUME = TRUE
INITIALLY_SUSPENDED=TRUE;
The warehouse automatically resumes when SQL statements are executed. Retrieve the warehouse name using
SELECT CURRENT_WAREHOUSE();
Example result:
Staging Data Files
Snowflake stages are locations in cloud storage used for loading and unloading data from a table. Snowflake supports internal and external stages (Amazon S3, Google Cloud Storage, or Microsoft Azure).
Stage Sample Data Files
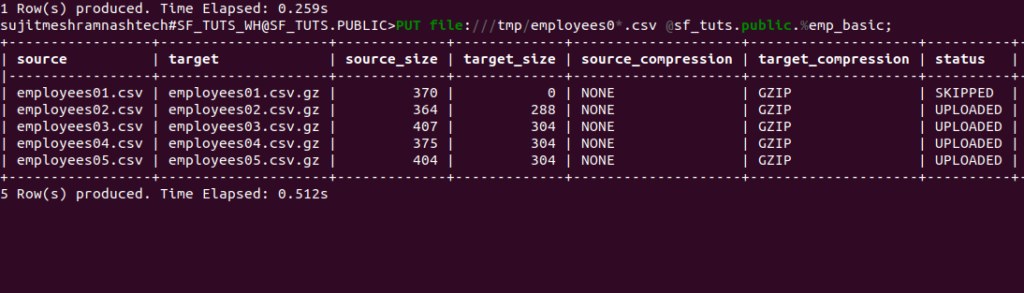
remember we downloaded sample files earlier as mentioned in the Prerequisites section, Upload the sample data files to the internal stage for the emp_basic table using the PUT command:
PUT file://<file-path>/employees0*.csv @sf_tuts.public.%emp_basic;
For example:
- Linux/macOS:
PUT file:///tmp/employees0*.csv @sf_tuts.public.%emp_basic; - Windows:
PUT file://C:\temp\employees0*.csv @sf_tuts.public.%emp_basic;
Command details:
file://<file-path>/employees0*.csv: Full directory path and names of local files to stage.@<namespace>.%<table_name>: Specifies the stage for theemp_basictable.
The command returns the staged files:
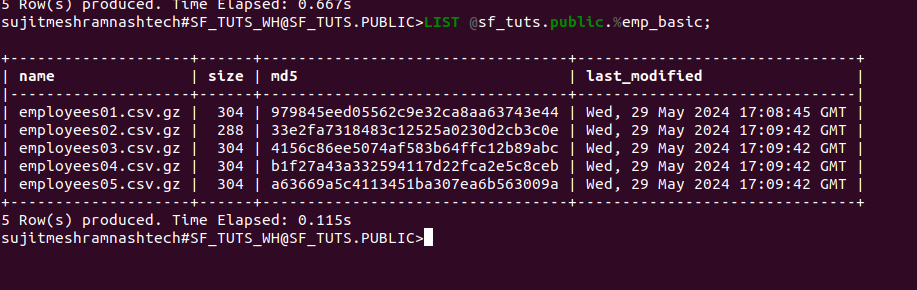
and then to list the staged files:
LIST @sf_tuts.public.%emp_basic;
Copying Data into Target Tables
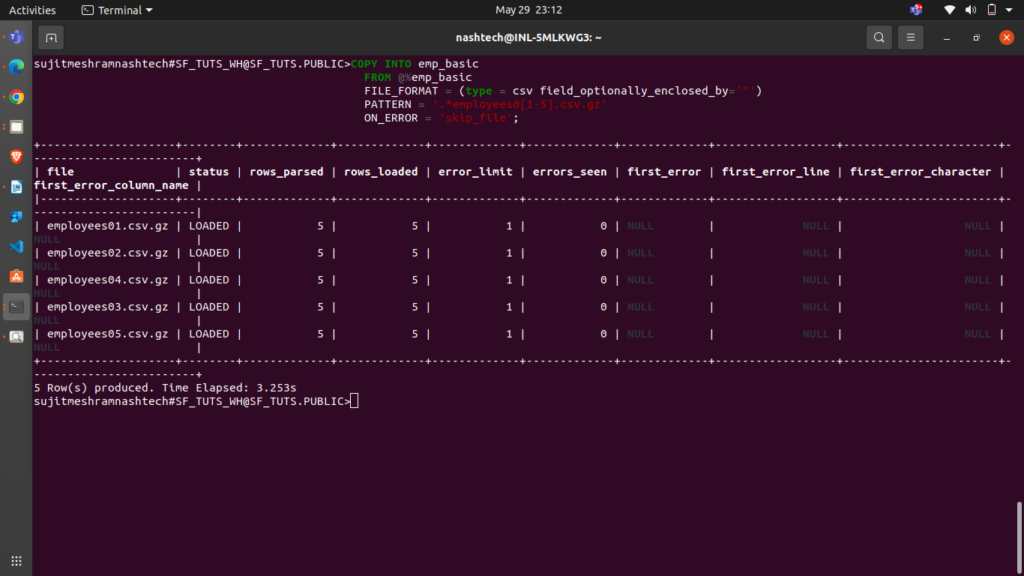
Load your staged data into the target table using the COPY INTO <table> command:
COPY INTO emp_basic
FROM @%emp_basic
FILE_FORMAT = (type = csv field_optionally_enclosed_by='"')
PATTERN = '.*employees0[1-5].csv.gz'
ON_ERROR = 'skip_file';
FROM: Specifies the location of the data files (the internal stage for the table).FILE_FORMAT: Specifies the file type as CSV and double-quote (“) for strings.PATTERN: Loads data from filenames matching the regular expression.ON_ERROR: Skips files containing errors.
The command returns the loaded files:
Querying loaded data
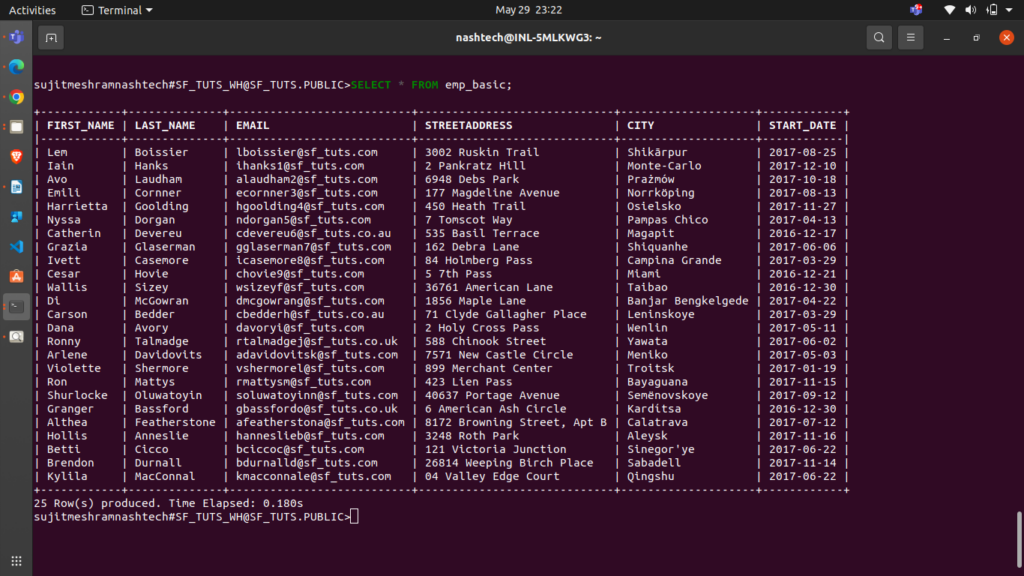
To verify the data load:
SELECT * FROM emp_basic;
we can do multiple operations on it as well,
for ex. 1 – Query rows based on email address
SELECT email FROM emp_basic WHERE email LIKE '%.uk';

ex. 2 – Query rows based on start date
SELECT first_name, last_name, DATEADD('day',90,start_date) FROM emp_basic WHERE start_date <= '2017-01-01';
Don’t forget to clean up: Delete the sf_tuts database to avoid ongoing storage costs:
DROP DATABASE IF EXISTS sf_tuts;
This concludes the quick start with Snowflake! You now have the foundational knowledge to explore Snowflake further and to use its powerful data warehousing capabilities.