


Prerequisites
Before you begin with Buildpack, ensure you have the following tools installed:
Set up your environment
First, we’ll create a sample nodeJS app that you can use when developing your buildpack:
mkdir node-js-app
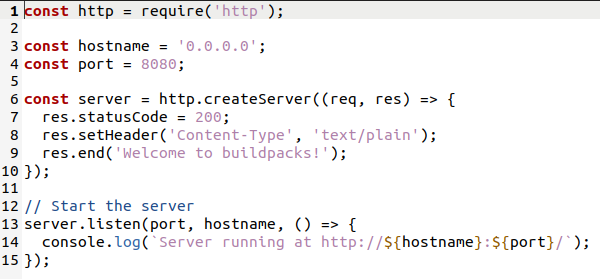
Create a file in the current directory called node-js-app/app.js with the following contents:
Create a package.json file with the following contents:
{
“name”: “example-application”
}
Make sure your local Docker daemon is running using docker version command.
Create the buildpack
Create a directory for your buildpack first:
The buildpack new <id> command will create a directory named for the buildpack ID. Make sure to run this command outside the node-js-app directory created previously.
Example:
pack buildpack new sample/node-js \
–api 0.10 \
–path nodejs_buildpack \
–version 0.0.1 \
–stacks io.buildpacks.samples.stacks.jammy
This command will create nodejs_buildpack directory which contains buildpack.toml, bin/build, bin/detect files.
buildpack.toml
We have nodejs_buildpack/buildpack.toml in your buildpack directory to describe our buildpack.
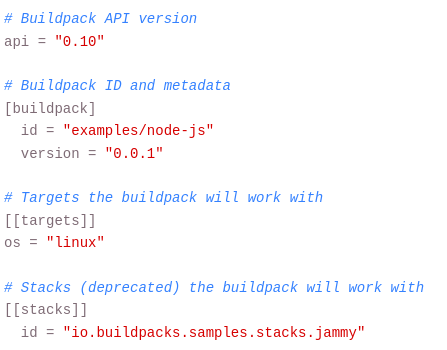
The buildpack ID is the way you will reference the buildpack when you create buildpack groups, builders, etc. Targets identifies the kind of build and run base images the buildpack will work with. The stack ID (deprecated) uniquely identifies a build and run image configuration the buildpack will work with. This example can be run on Ubuntu Jammy.
Modify detect and build script
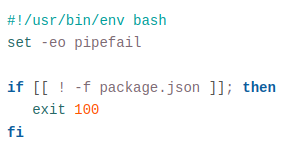
Update your nodejs_buildpack/bin/detect file and copy the following contents:
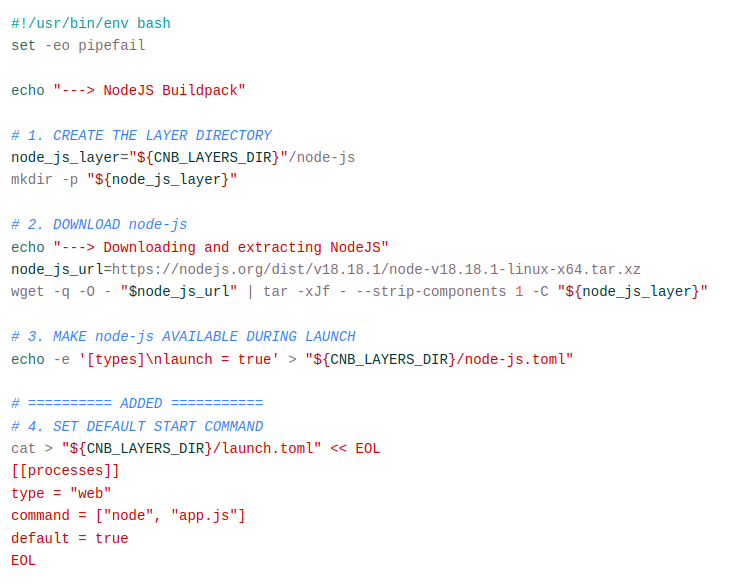
Also update your nodejs_buildpack/bin/build file and copy the following contents:
Build your application
Build you application using this command:

pack build node-js-app --path ./node-js-app --buildpack ./nodejs_buildpack

Now your image should be created!
Run your image
docker run --rm -p 8080:8080 node-js-app

You will see the server log output:

Server running at http://0.0.0.0:8080/
Thats it! you have just created your first buildpack for nodejs