


In this blog, we will understand how an AWS WAF works and create a WAF rule for our nginx application. Web application firewall is a service provided by AWS that restricts traffic to our applications.
We will create a networking setup, configure nginx application in an instance and create a load balancer ahead of it. We will then add WAF in front of it and apply a custom rule to block a certain traffic.
Networking setup for AWS WAF
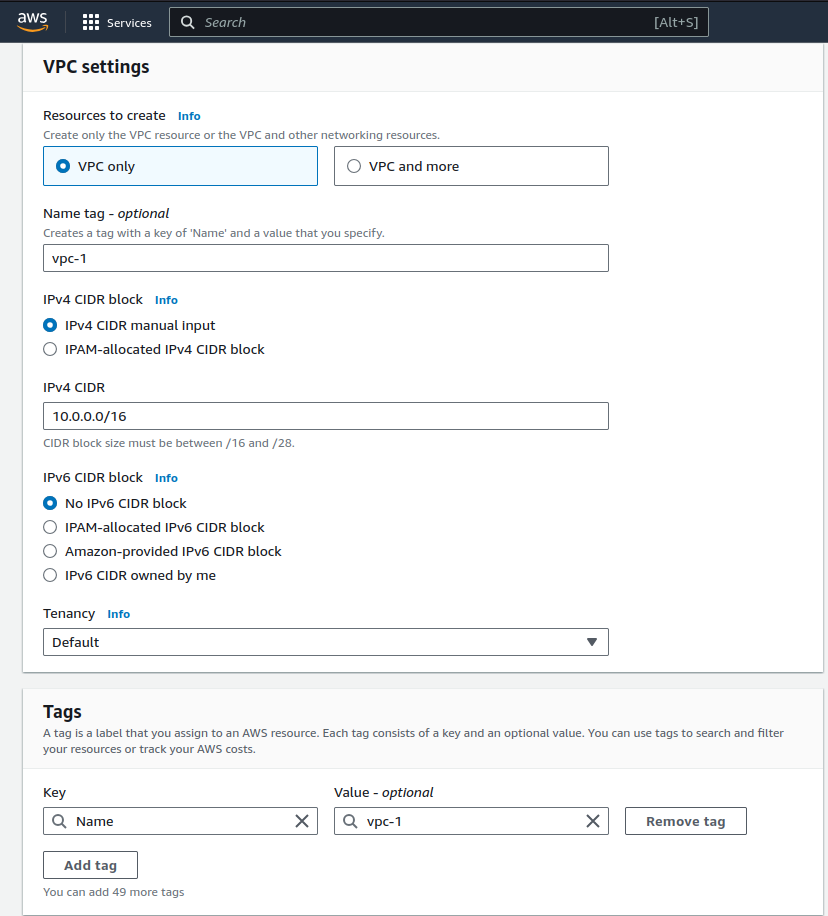
- Creating a VPC
We will create a VPC as a part of networking setup with a CIDR: 10.0.0.0/16
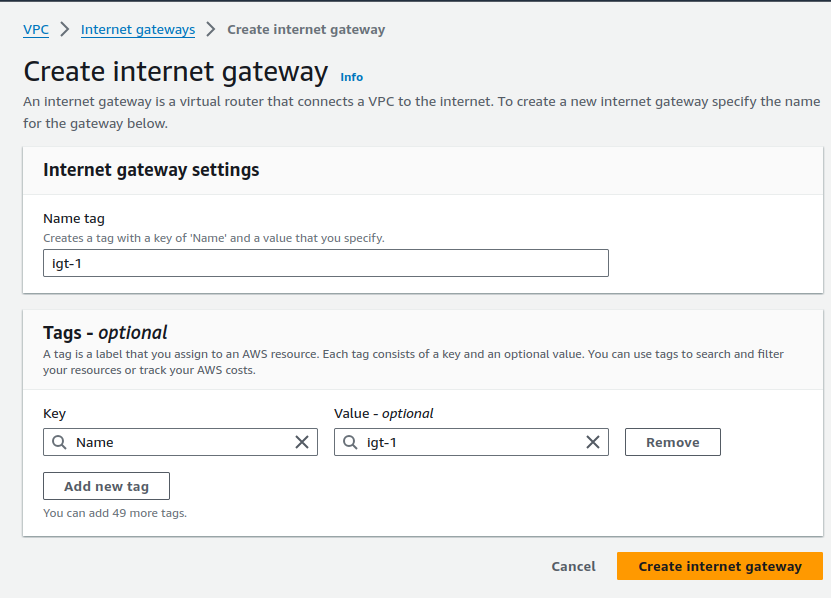
2. Creating an Internet Gateway
We will then create an internet gateway to manage internet access to our instance.
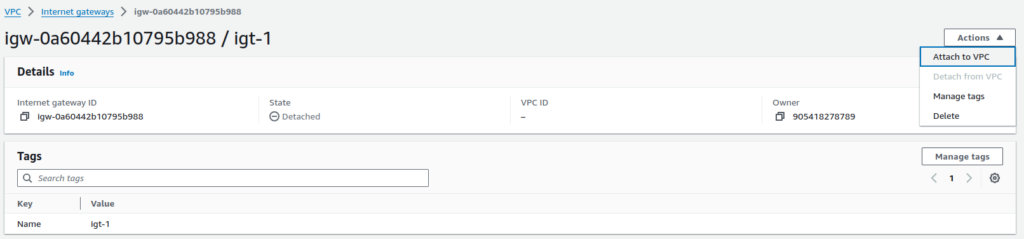
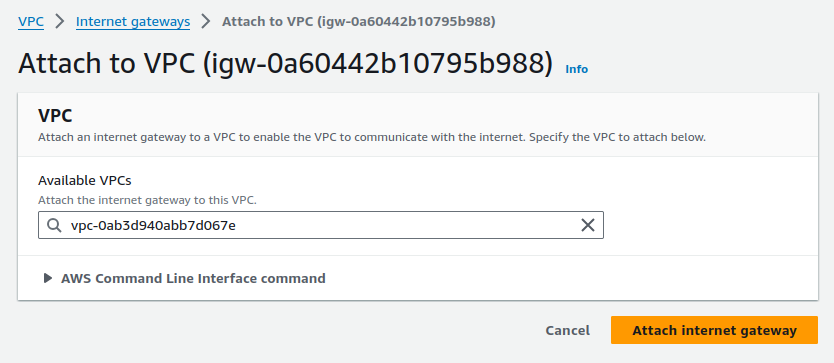
3. Attaching the internet gateway to VPC
Click on Actions > Attach to VPC
Add your VPC configurations
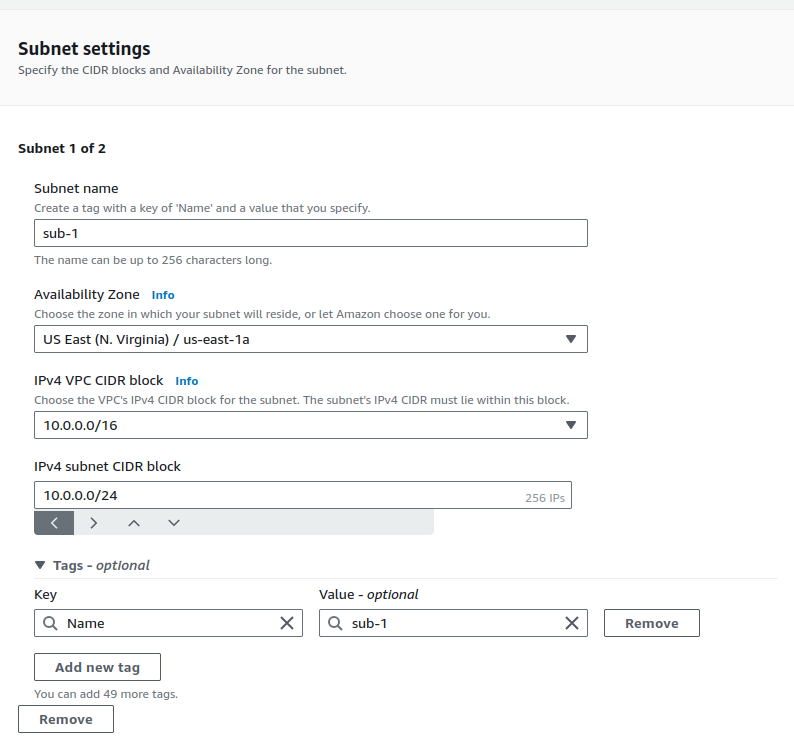
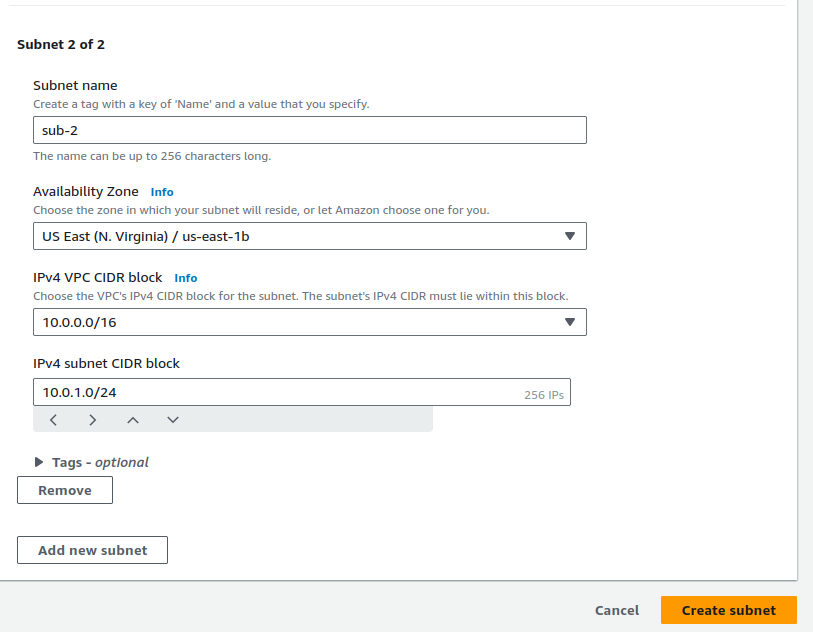
4. Creating subnets in the VPC
We will create 2 subnets in different regions as a part of application deployment design to make it highly available and reduce latency.
Creating subnet 2
5. Creating route table
We will create a route table to create routes for our instance.
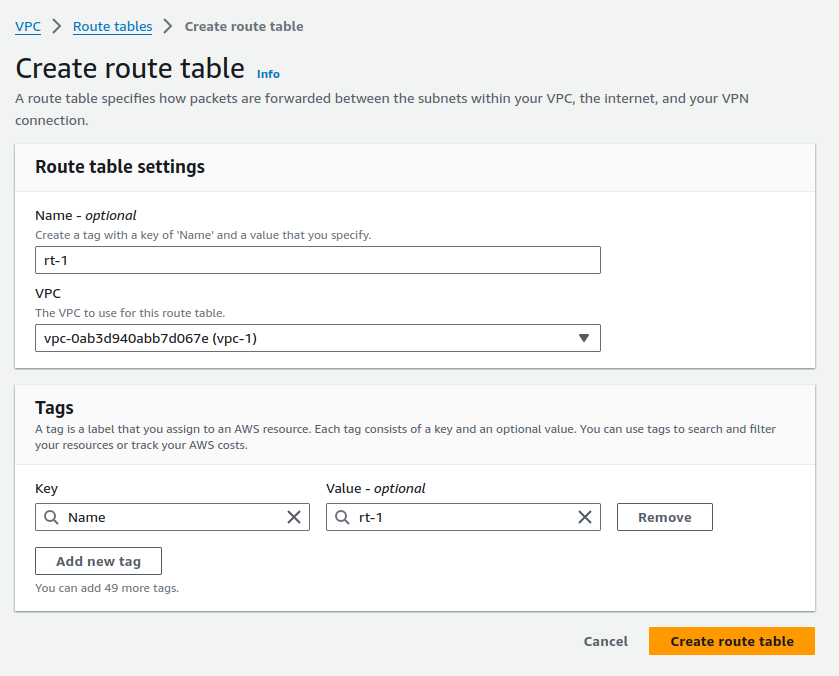
Route table is created.
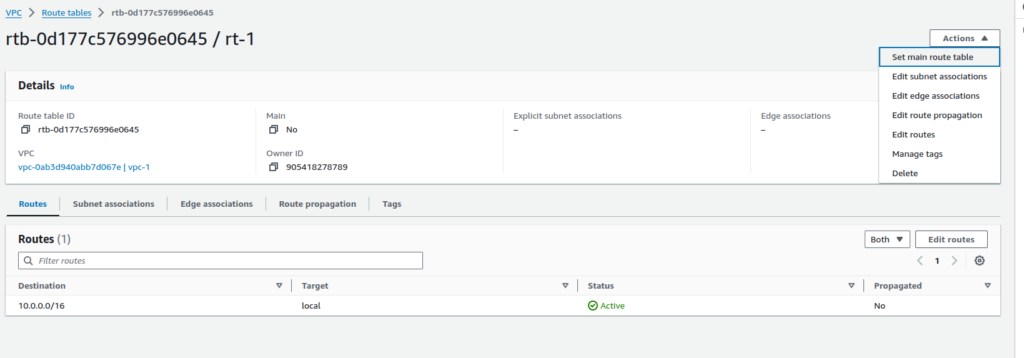
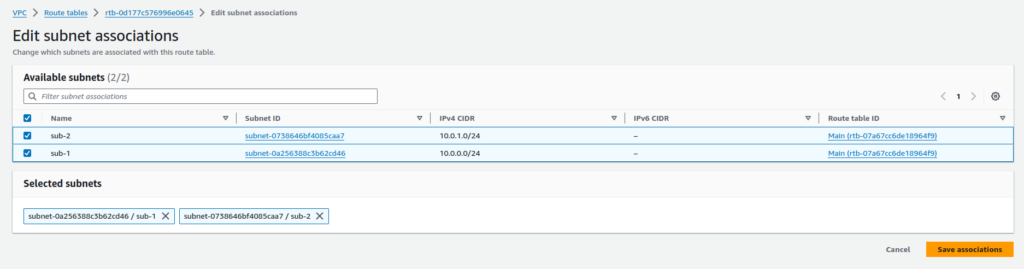
Adding subnet associations to the route table
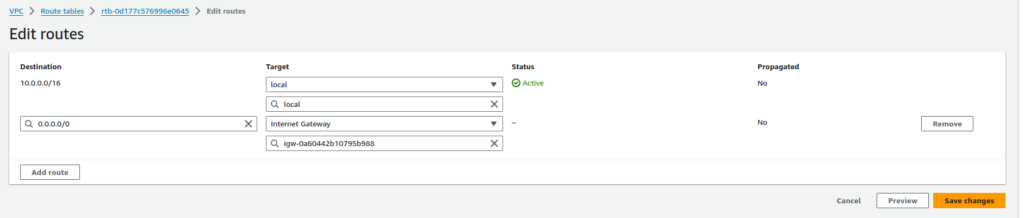
6. Adding route to internet gateway
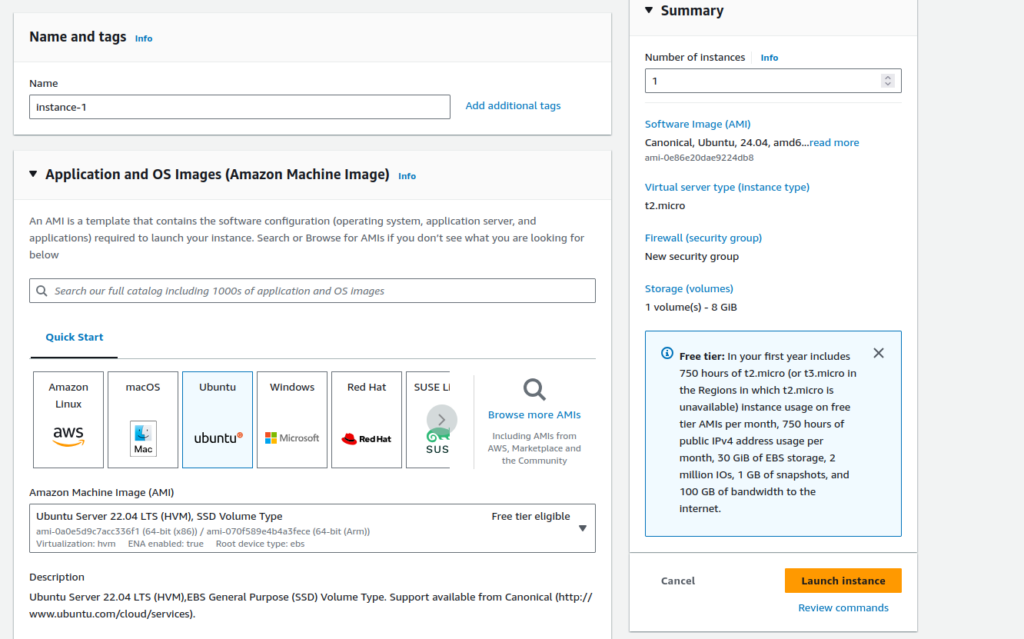
7. Creating an instance
I will create an instance with Ubuntu OS as it is easy to operate.
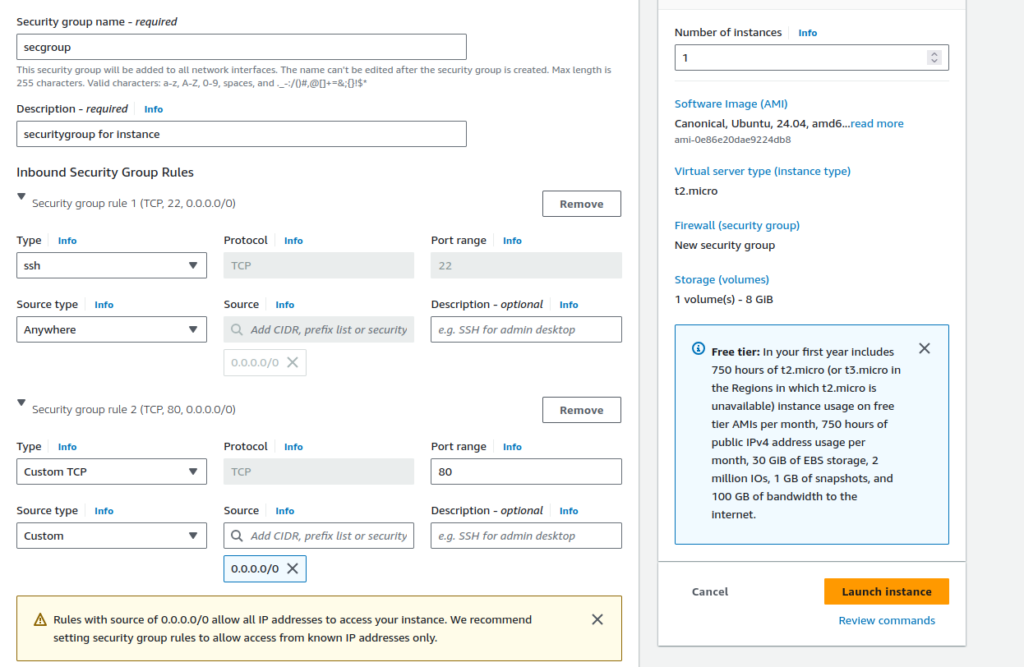
Adding security group configurations: Open port 22 for ssh connections and port 80 for nginx
8. Installing nginx in the EC2 instance
ssh into the instance and install nginx:
sudo apt update
sudo apt install nginx -y
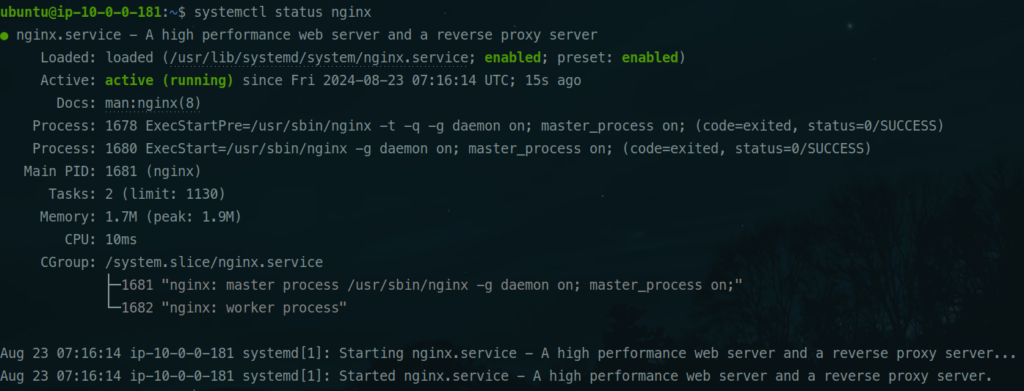
systemctl status nginx
Check the status of nginx
systemctl status nginx
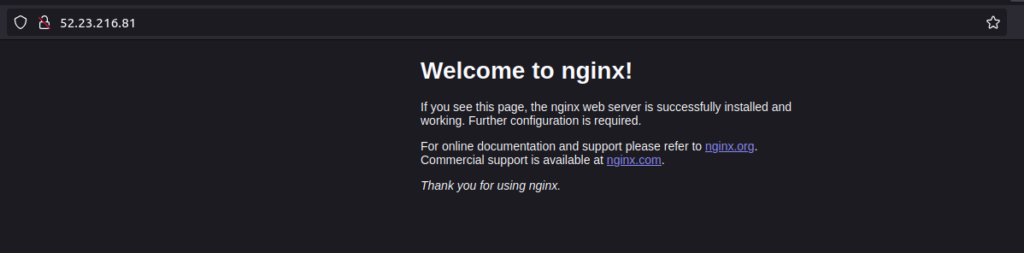
Opening the public IP of the instance
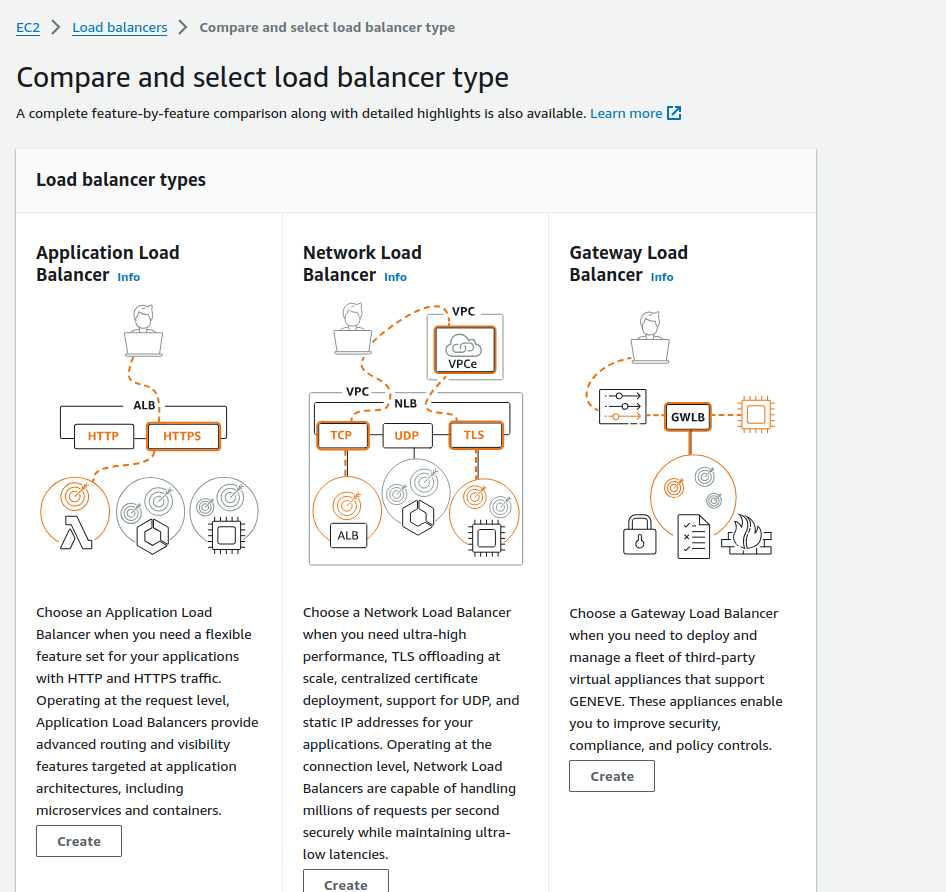
9. Creating load balancer
We will create an Application Load Balancer.
Click on Create. Add the target groups as instances
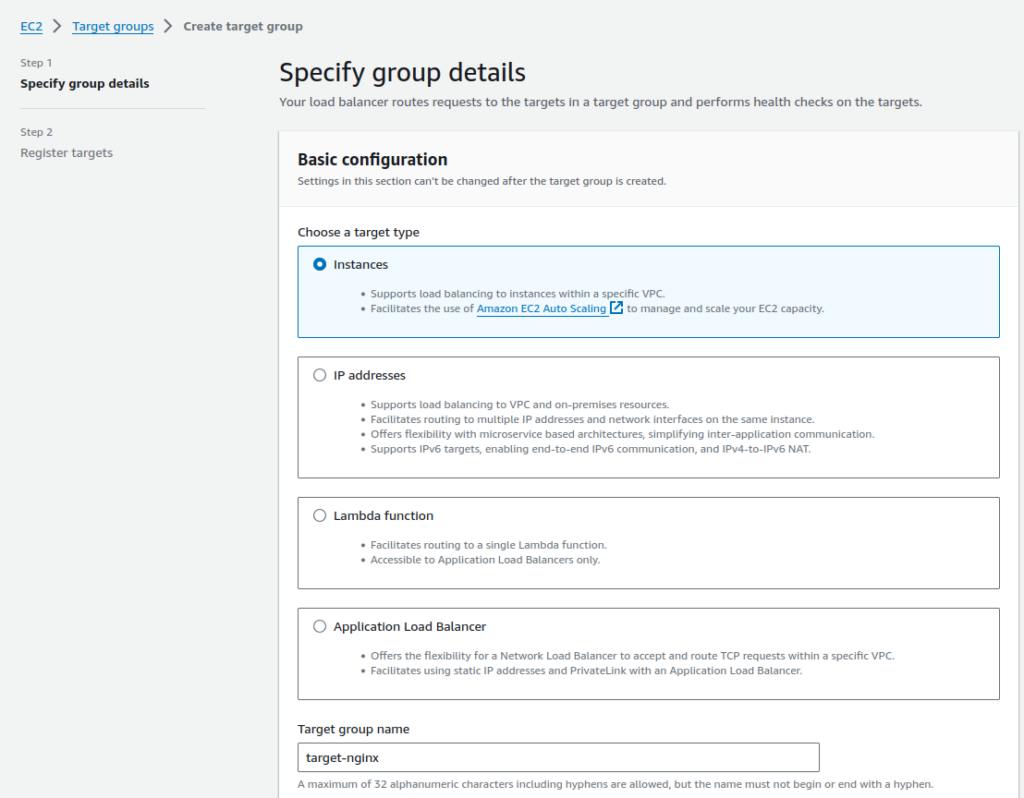
Add the target instances to the target group.
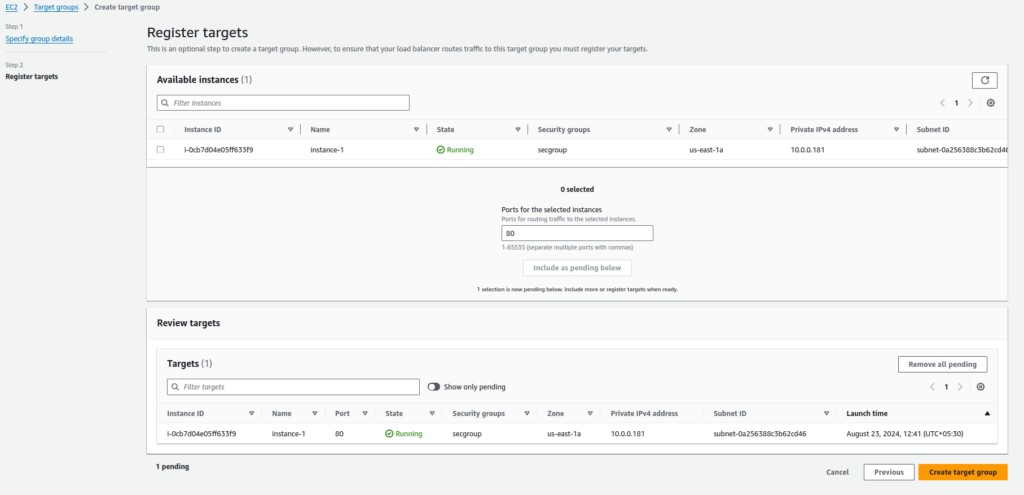
Click on Create target group.

Target group is created and targets are also configured.
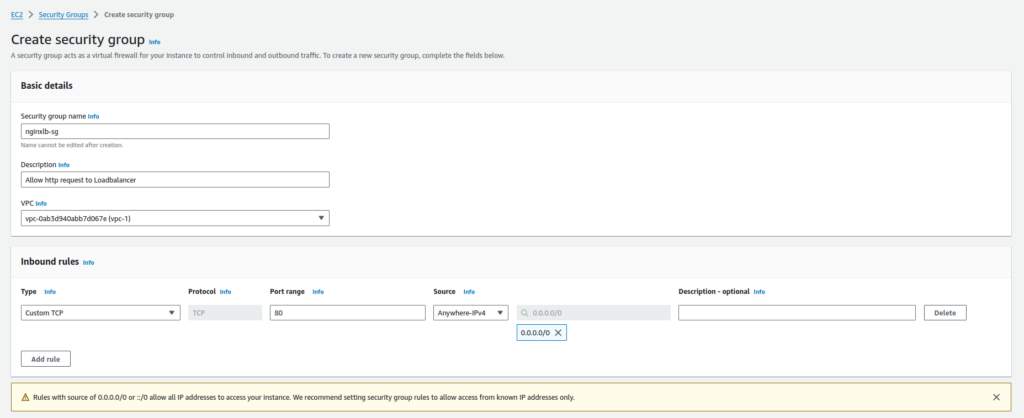
Create a security group for load balancer.
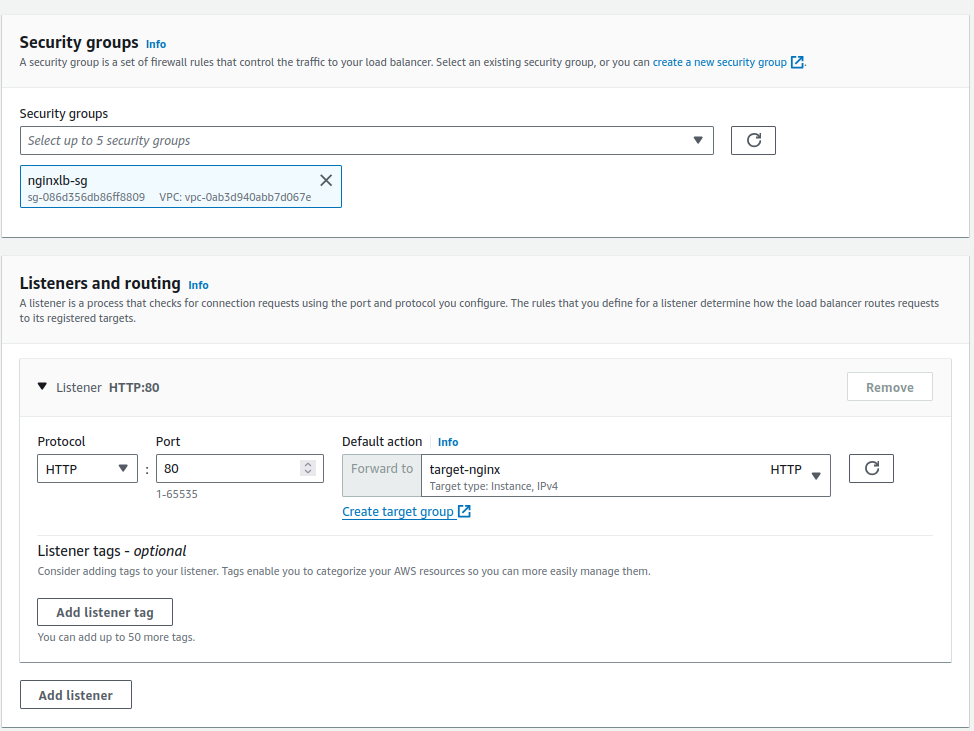
Add the security group to the load balancer.
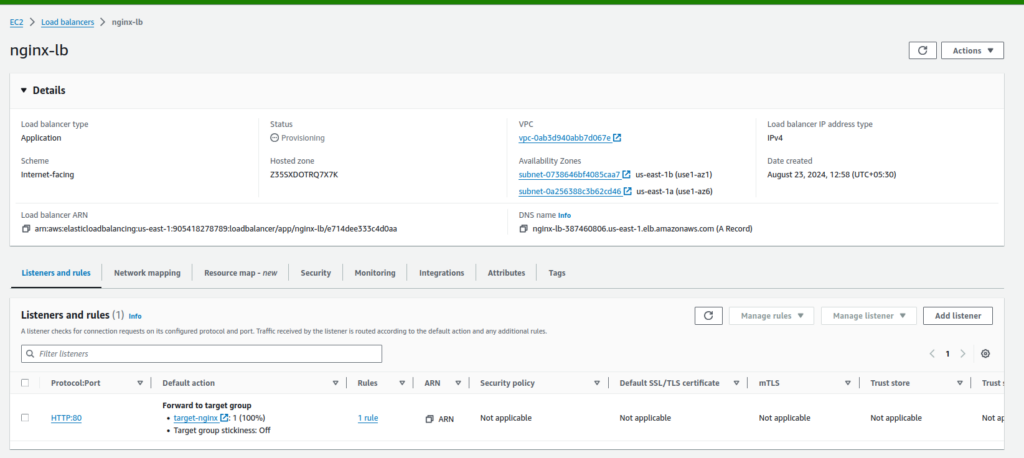
Load balancer is created.
10. Open the load balancer endpoint.
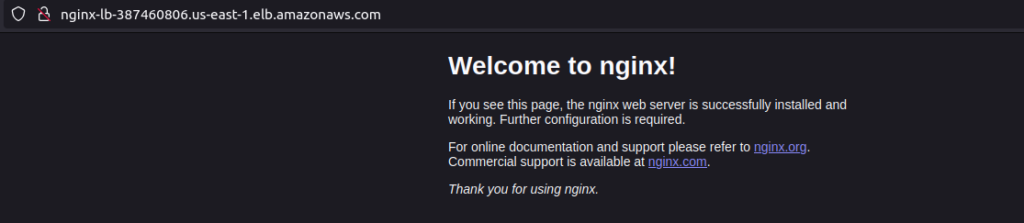
It is resolving to the instance correctly. Our traffic is open for all connections. We will now use WAF to restrict the incoming traffic to our application.
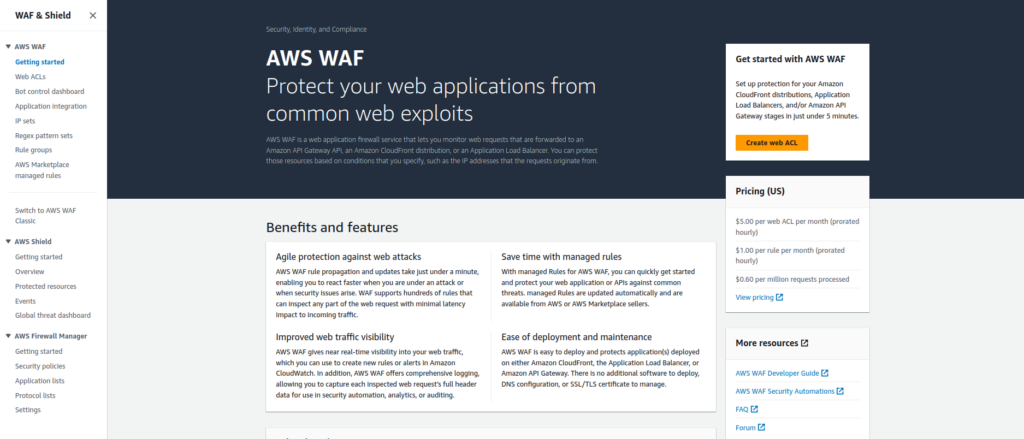
Create a Web Application Firewall (WAF)
Open WAF and click on Create web ACL
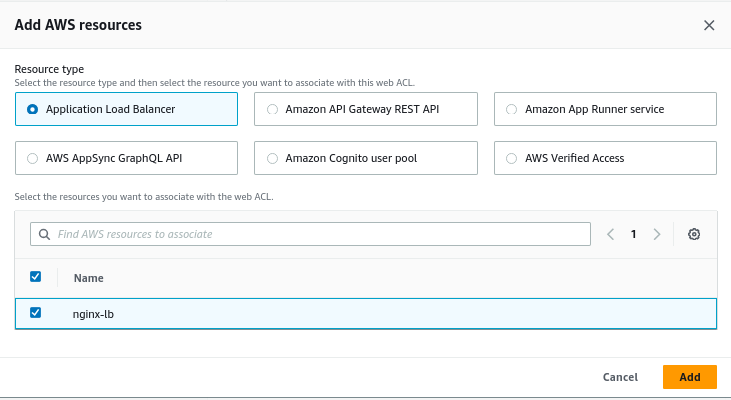
Add AWS resource details to create a WAF for. We will use the Application Load balancer that we created earlier – nginx-lb.
Add name and other details

Click on Next.
Create IP sets to allow or restrict traffic from certain IPs.
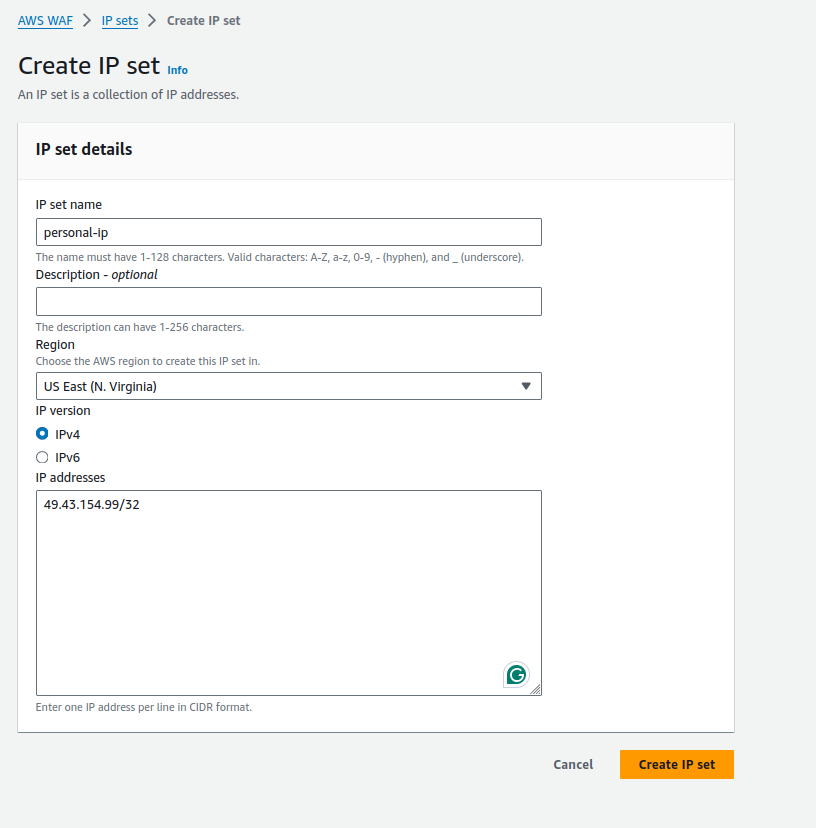
Add your IP in the IP addresses block. Click on Create IP set.
Add a custom rule that will determine how it should behave when the request to access the application comes from the IP mentioned in the IP set.
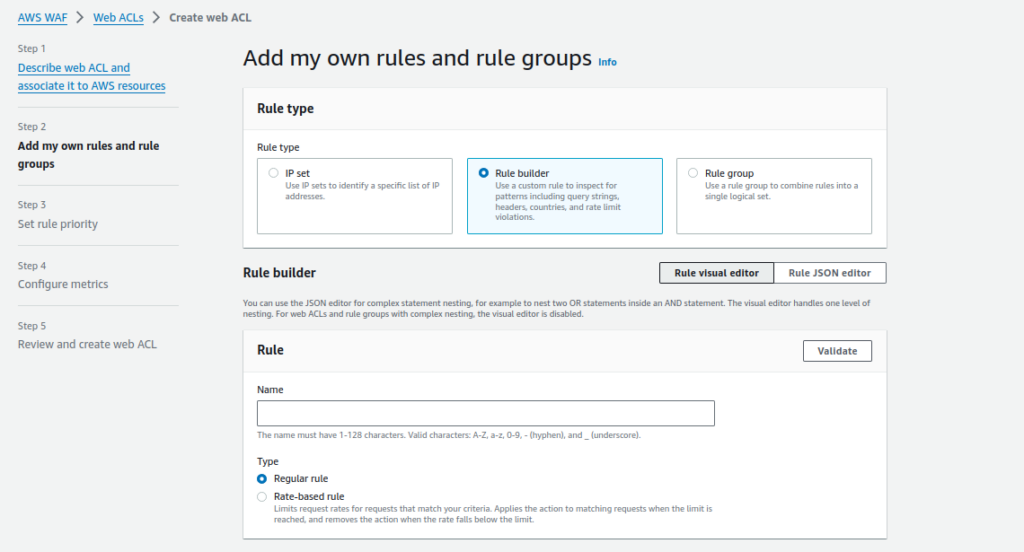
Add a conditional statement. For example, I will add a condition that says block all traffic originating from India.
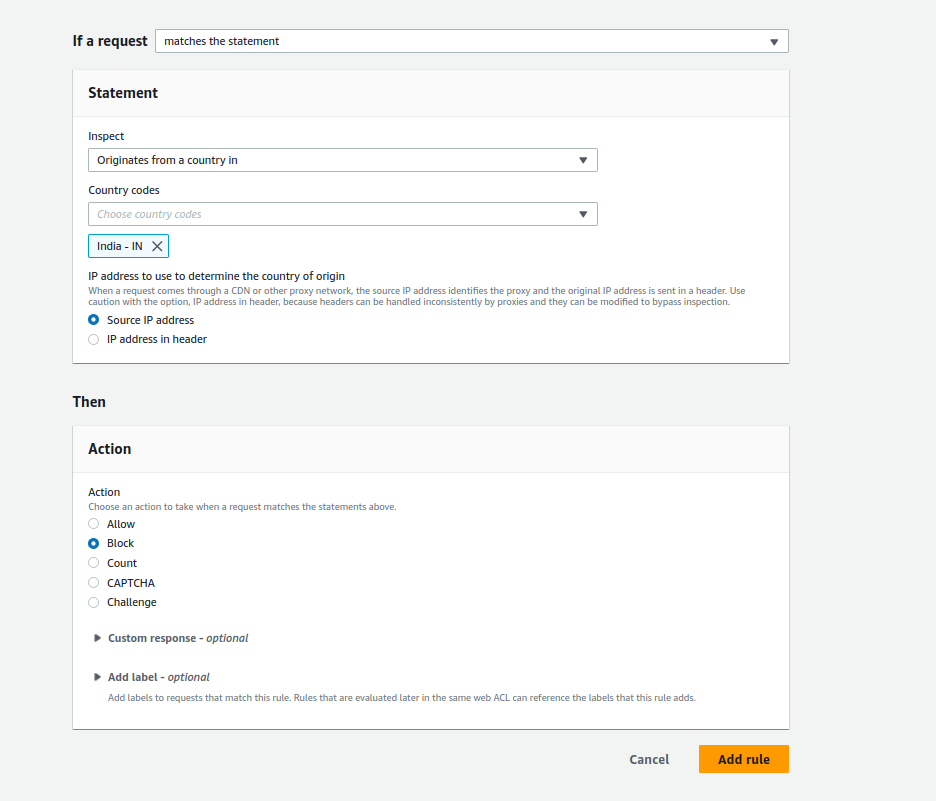
Click on Add rule.
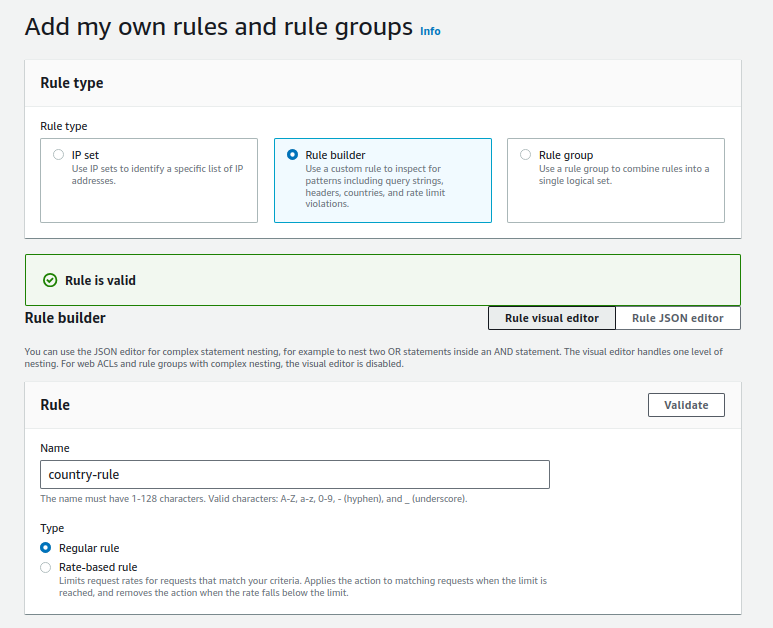
Validate the rule.

Set the rule Priority in case you have added multiple rules to determine precedence.
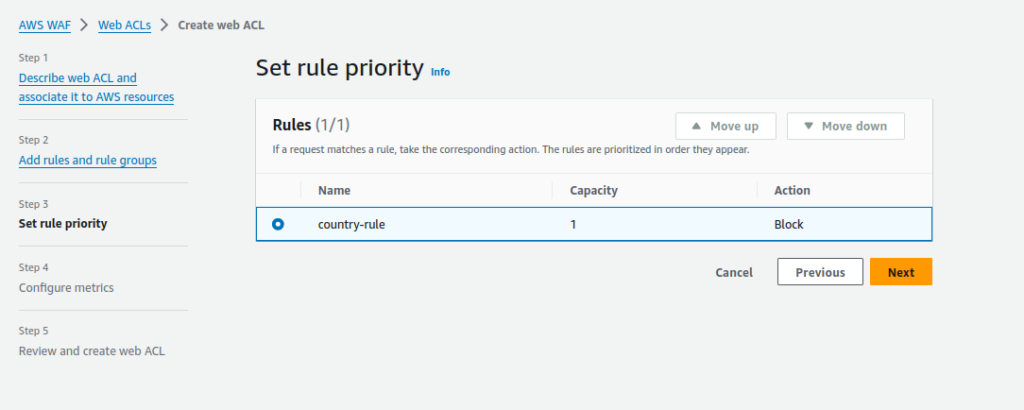
Click on Next and create the WAF.
Try opening the same loadbalancer endpoint. It will not display anything now if you are located in India.