


Introduction
Managing dependencies between various components of an application is crucial for maintaining clean, modular, and testable code. Dependency Injection (DI) is a design pattern that addresses this challenge by decoupling components and promoting reusability and maintainability. In .NET Core, leveraging the built-in dependency injection container offers a robust solution for managing object dependencies seamlessly.
Understanding Dependency Injection
Dependency Injection is a design pattern where objects receive their dependencies from an external source rather than creating them internally. This approach promotes loose coupling between components, making it easier to replace dependencies and test components in isolation.
In .NET Core, the built-in DI container simplifies the process of managing object dependencies by providing a centralized mechanism for registering and resolving dependencies throughout the application.
Using .NET Core’s Dependency Injection Container
Let’s explore how to effectively use .NET Core’s built-in DI container to manage object dependencies.
1. Service Registration
The first step in utilizing DI in .NET Core is to register services and their corresponding implementations with the DI container. This is typically done in the Program.cs class.
builder.Services.AddSingleton<IService, ServiceImplementation>();
2. Constructor Injection
Once services are registered, they can be injected into the constructors of dependent classes. This allows the DI container to resolve dependencies automatically.
public class MyService
{
    private readonly IService _service;

    public MyService(IService service)
    {
        _service = service;
    }
}
3. Scoped, Transient, and Singleton Lifetimes
.NET Core’s DI container supports different lifetimes for registered services:
- Scoped: Services are created once per request.
- Transient: Services are created each time they are requested.
- Singleton: Services are created once and shared throughout the application’s lifetime.
services.AddScoped<IService, ServiceImplementation>();
services.AddTransient<IOtherService, OtherServiceImplementation>();
services.AddSingleton<ICommonService, CommonServiceImplementation>();
4. Injecting Dependencies into Controllers
In ASP.NET Core, dependencies can be injected directly into controllers, facilitating the development of clean and testable MVC applications.
public class MyController : Controller
{
    private readonly IService _service;

    public MyController(IService service)
    {
        _service = service;
    }
}
Benefits of Dependency Injection
- Modularity: DI promotes modular code by decoupling components, making it easier to maintain and extend the application.
- Testability: Components can be tested in isolation by mocking dependencies, leading to more reliable and maintainable unit tests.
- Flexibility: DI enables the swapping of dependencies at runtime, allowing for easy configuration changes and supporting different environments.
Example: Implementing Logging in a .NET Core Application with Dependency Injection
Let’s consider a scenario where we need to implement a logging service in a .NET Core application to log messages. We will implement this functionality using Dependency Injection.
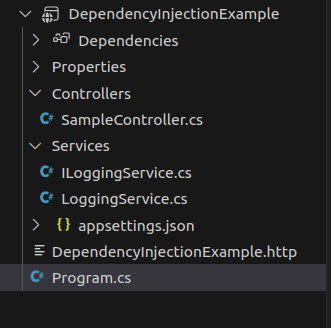
Here is the folder structure for this example:
Step 1: Create Interfaces and Implementations
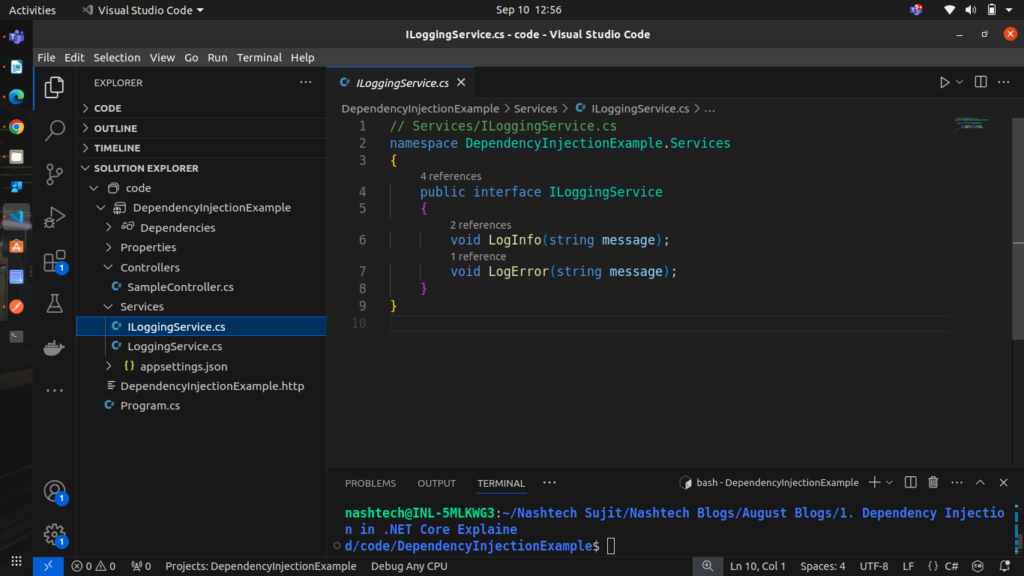
First, let’s define an interface for our logging service
// ILoggingService.cs
public interface ILoggingService
{
    void LogInfo(string message);
    void LogError(string message);
}
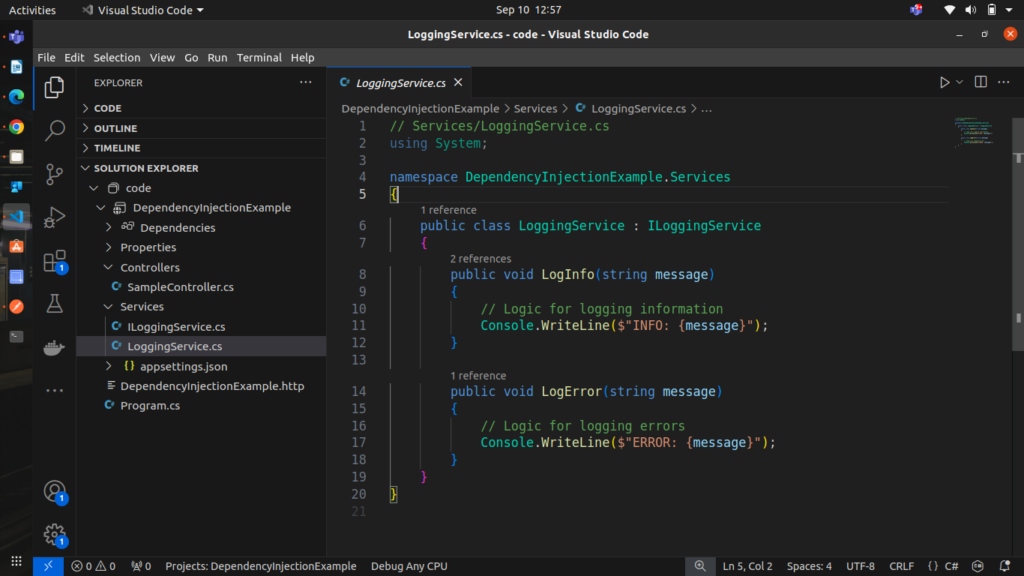
Next, we’ll create an implementation of the logging service.
// LoggingService.cs
public class LoggingService : ILoggingService
{
    public void LogInfo(string message)
    {
        // Logic for logging information
        Console.WriteLine($"INFO: {message}");
    }

    public void LogError(string message)
    {
        // Logic for logging errors
        Console.WriteLine($"ERROR: {message}");
    }
}
Step 2: Configure Dependency Injection
In the Program.cs file, register the logging service with the DI container.
builder.Services.AddSingleton<ILoggingService, LoggingService>();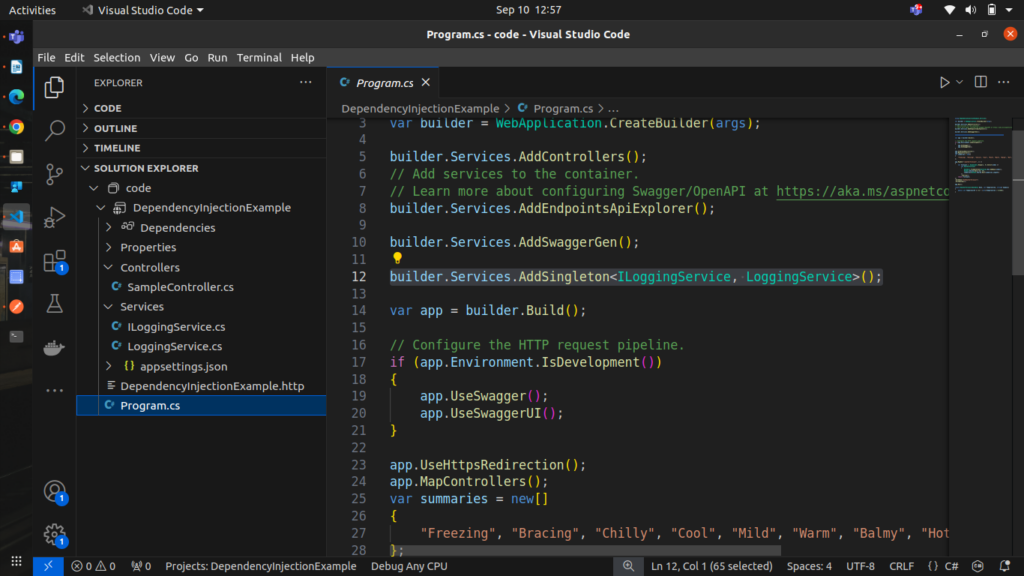
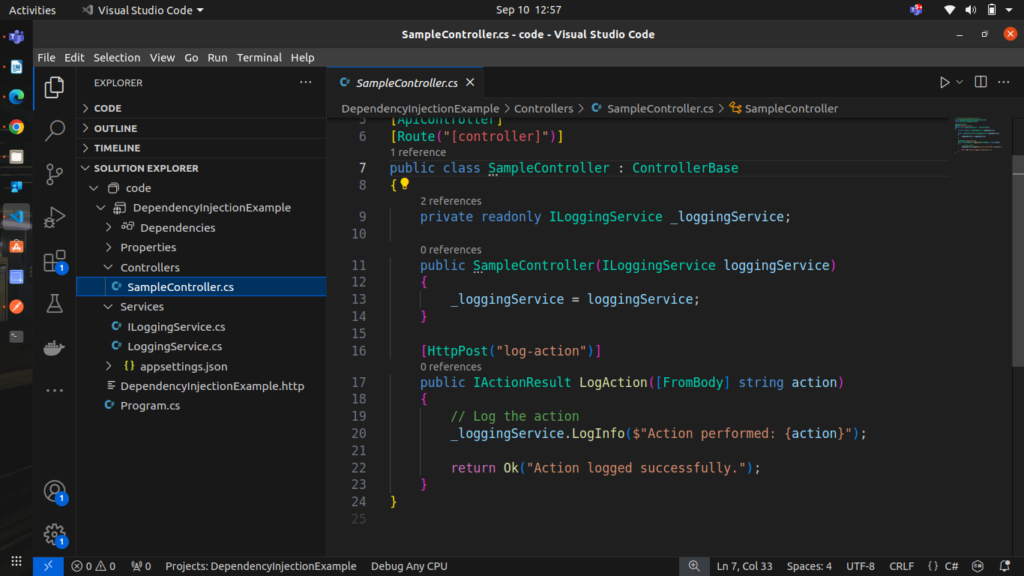
Step 3: Use Dependency Injection in Controllers
Now, let’s use the logging service in a controller to log messages when actions are performed.
// SampleController.cs

[ApiController]
[Route("[controller]")]
public class SampleController : ControllerBase
{
    private readonly ILoggingService _loggingService;

    public SampleController(ILoggingService loggingService)
    {
        _loggingService = loggingService;
    }

    [HttpPost("log-action")]
    public IActionResult LogAction([FromBody] string action)
    {
        // Log the action
        _loggingService.LogInfo($"Action performed: {action}");

        return Ok("Action logged successfully.");
    }
}
Step 4: Test the Application
Run the application and test the logging functionality by sending a request to the LogAction endpoint. The LogAction method in the SampleController will be invoked, which will use the injected ILoggingService to log the action.
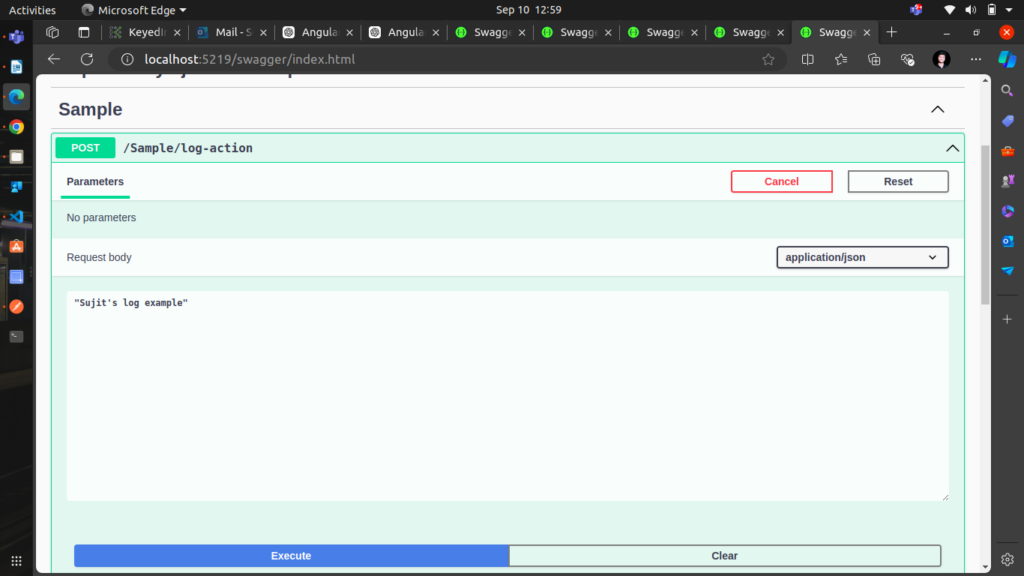
testing it using swagger and sending some data to log
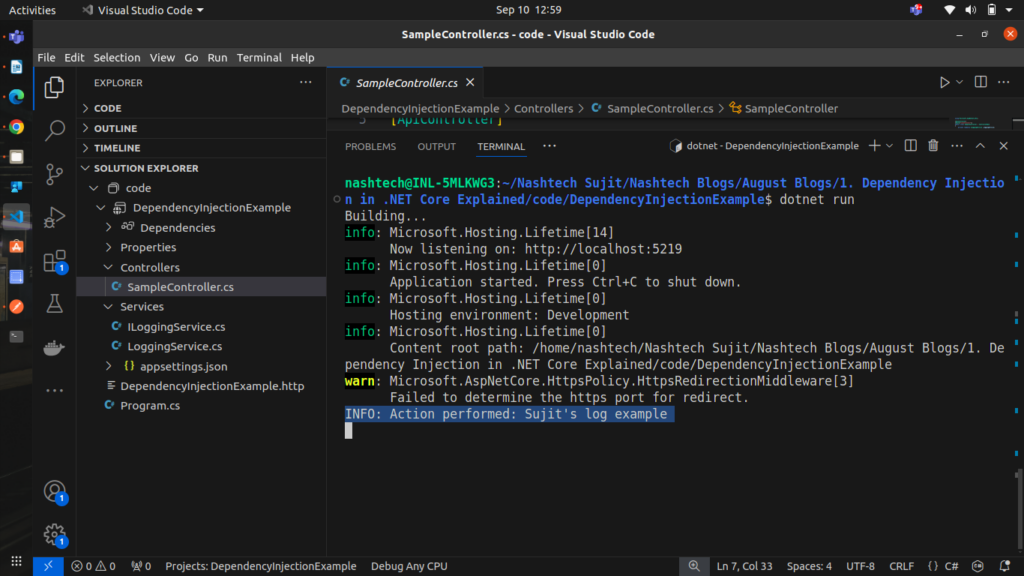
able to log the data as result.
you can access the above given example code in GitHub repository from here.
Conclusion
In this example, we’ve demonstrated how to use Dependency Injection in a .NET Core application to manage object dependencies effectively. By decoupling the logging service implementation from the controller, we’ve made the code more modular, testable, and maintainable.
This approach allows us to easily swap out the logging service implementation without modifying the controller code, making it flexible and adaptable to future changes. To explore more about Dependency Injection in .NET Core and dive into advanced scenarios, check out the official Microsoft documentation here.
By applying similar patterns throughout your application, you can build robust, scalable, and maintainable .NET Core applications with ease.