


1. Introduction
Nowadays, APIs (Application Programming Interfaces) play a crucial role in enabling different software systems to communicate with each other. Postman is a powerful tool designed to make working with APIs more accessible and efficient. It provides a user-friendly interface for sending API requests, examining responses, and managing your API interactions. This post will introduce you to the process of sending API requests via Postman, detailing each step with practical examples for each type of API requests.
2. Steps to send the API requests with Postman
2.1. Download Postman Desktop application
Go to Postman web site and click ‘Windows 64 bit’ if you are using Windows computer. Then run download file & finish set up Postman

2.2. Create your first collection
To create a collection, click + button, Blank collection. Then change name of ‘Blank collection’ to your specific collection such as “API Collection”

2.3. Configure and send an API request
- Open a New Tab:
- Click on the “+ New Tab” button (usually located next to existing tabs) to open a new request tab.
- Enter Request Details:
- URL: In the “Enter request URL” field, type the URL of the API endpoint you want to test.
- Method: Select the HTTP method for your request. Common methods include
- GET: Retrieve data from the server.
- POST: Send data to the server.
- PUT: Update data on the server.
- DELETE: Remove data from the server.
- Configure Request Parameters (Optional)
- Add URL Parameters
- Click on the “Params” tab below the URL field if you need to include query parameters.
- Enter key-value pairs for the parameters. For example, if you were querying posts with a specific user ID, you might add userId=1.
- Add Authorization (Optional)
- Select Auth Type and fill values corresponding with each type
- Add Headers (Optional)
- Click on the “Headers” tab to add HTTP headers if required by the API.
- Enter the header name and value. For example, you might need to set Content-Type to application/json.
- Add Body Data (Optional):
- For methods like POST or PATCH, click on the “Body” tab.
- Choose the format of the request body (e.g., raw, form-data).
- Enter the data you want to send. For example, in raw format, you might send JSON data like {“title”: “foo”, “body”: “bar”, “userId”: 1}.
- Add URL Parameters
- Send the request
- Click Send: Once you’ve configured your request, click the “Send” button to send the request to the server
- Review the Response
- After sending the request, Postman will display the response in the lower section of the screen.
- You’ll see details such as the status code (e.g., 200 OK), response time, and the response body
3. Examples to send the GET/POST/PATCH/DELETE API requests
Let’s walk through an example from SIMPLE API BOOK
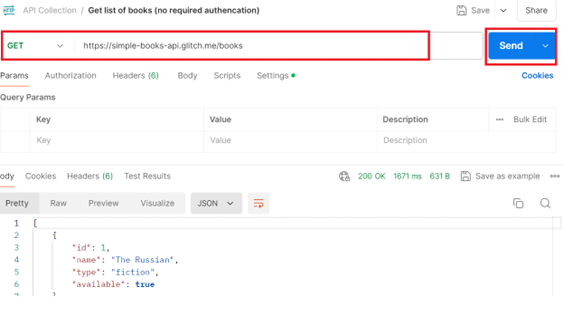
3.1 Send a GET request to get list of books with no authorization
Input information
URL: https://simple-books-api.glitch.me/books
Method: GET
Click “Send,” and you should see a list of books in the response section
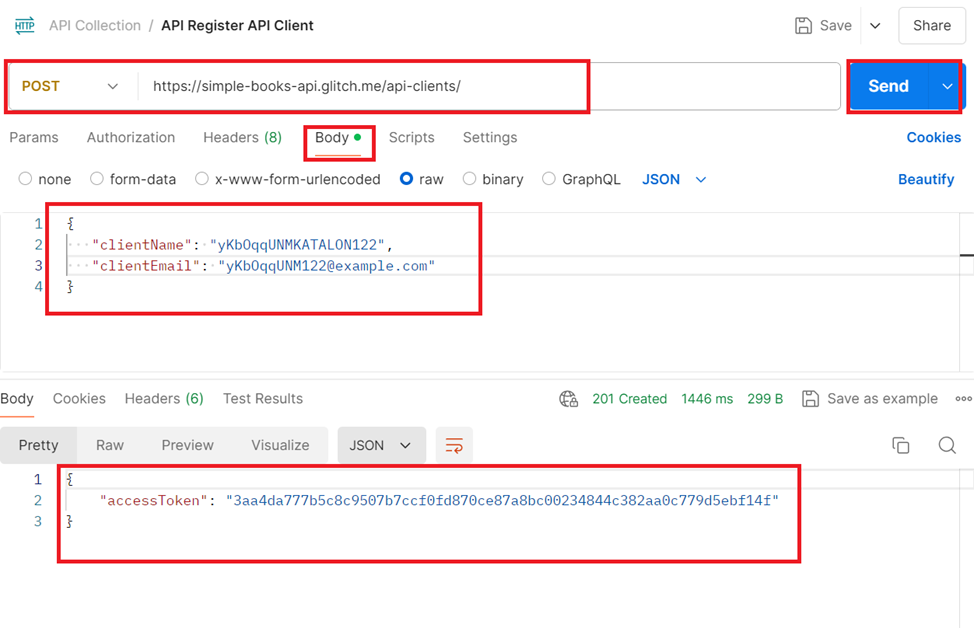
3.2 Send a POST request to register a client and get access token for authorization
Input information
URL: https://simple-books-api.glitch.me/api-clients/
Method: POST
Body:
{ “clientName”: “yKbOqqUNMKATALON122”,
“clientEmail”: “yKbOqqUNM122@example.com” }
Click “Send,” and you should see an access token in the response section
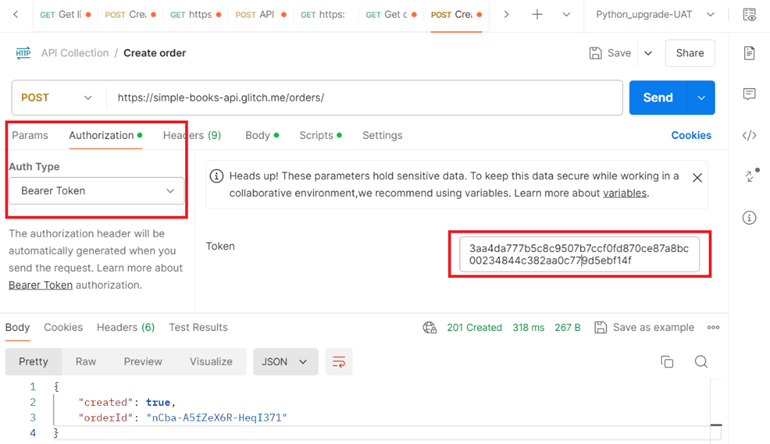
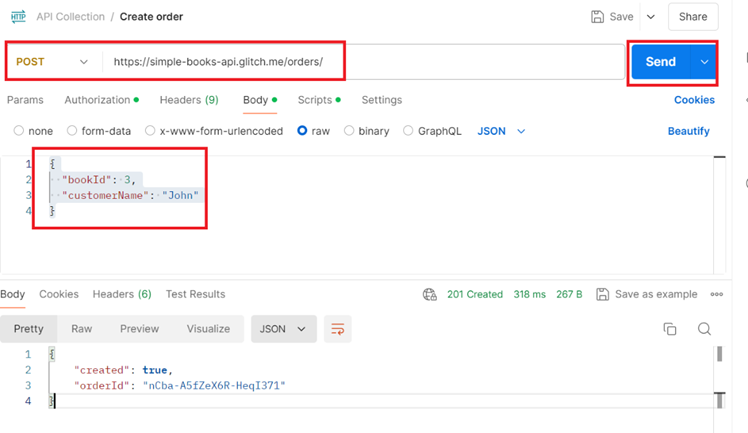
3.3. Send a POST request to create an order to borrow a book with required access token for authorization
Input information
URL: https://simple-books-api.glitch.me/orders/
Method: POST
Authorization: Auth Type = Bear Token, put Token value from value of ‘accessToken’ from section 3.2
Body:
{ “bookId”: 3,
“customerName”: “John” }
Click “Send,” and you should see an orderId
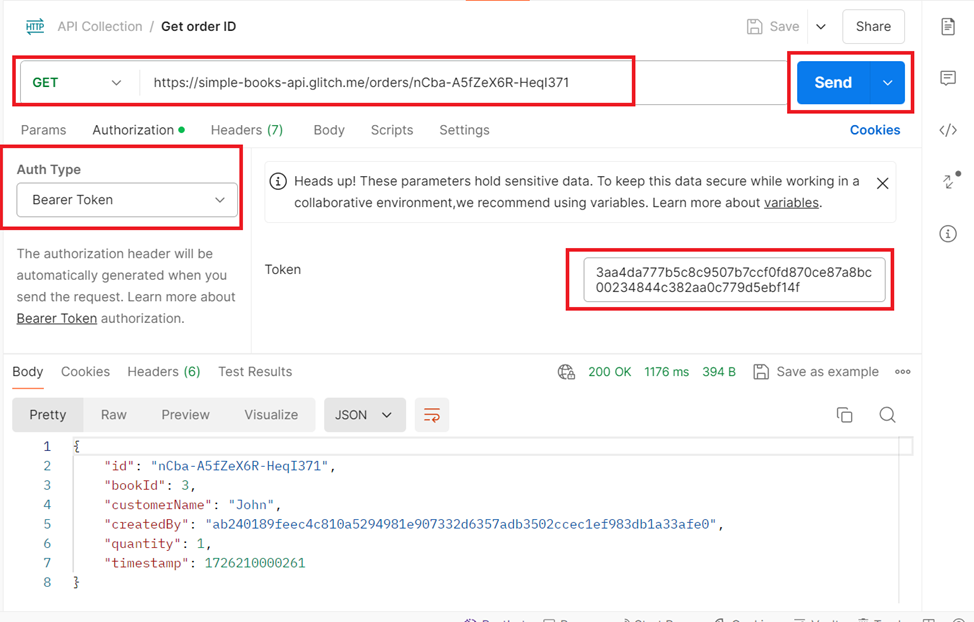
3.4. Send a GET request to get information of an order with authorization
Input information
URL: https://simple-books-api.glitch.me/orders/nCba-A5fZeX6R-HeqI371
Method: GET
Parameters: ‘nCba-A5fZeX6R-HeqI371’ in URL is orderId from section 3.3
Authorization: Auth Type = Bearer Token, put Token value from value of ‘accessToken’ in section 3.2
Click “Send,” and you should see an order information in the response section
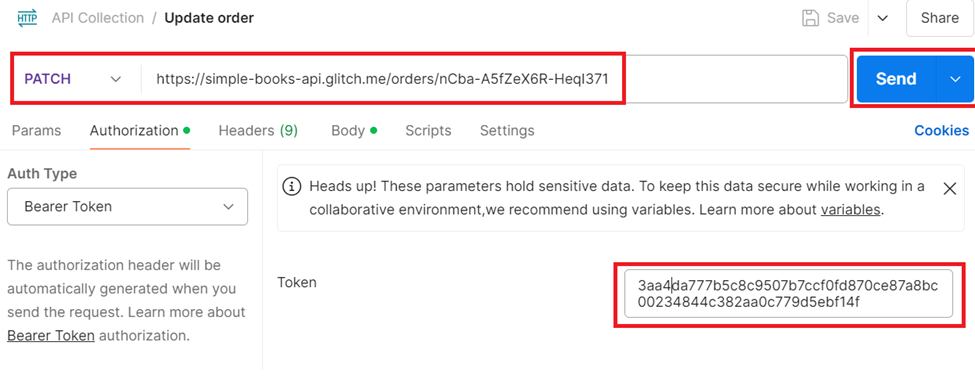
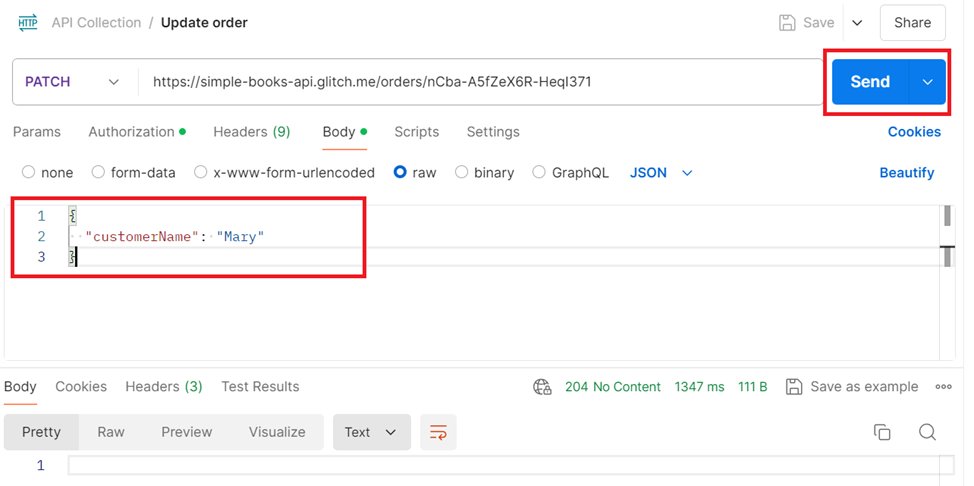
3.5. Send a PATCH request to update an order with required access token authorization
Input information
URL: https://simple-books-api.glitch.me/orders/nCba-A5fZeX6R-HeqI371
Method: PATCH
Parameters: ‘nCba-A5fZeX6R-HeqI371’ in URL is orderId from section 3.3
Authorization: Auth Type = Bearer Token, put Token value from value of ‘accessToken’ in section 3.2
Body: {“customerName”: “Mary”}
Click “Send,” and you should see updating order in the response section
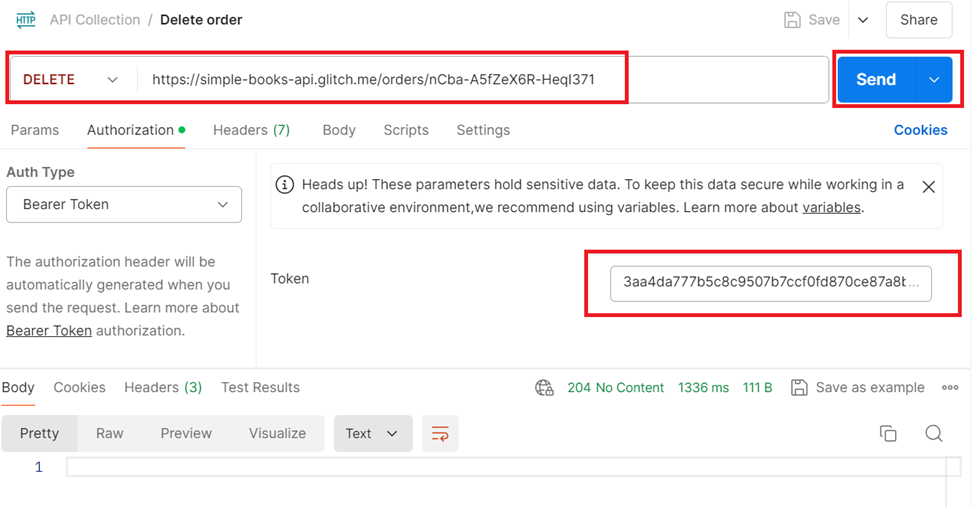
3.6. Send a DELETE request to delete an order with required access token authorization
URL: https://simple-books-api.glitch.me/orders/nCba-A5fZeX6R-HeqI371
Method: DELETE
Parameters: ‘nCba-A5fZeX6R-HeqI371’ in URL is orderId from section 3.3
Authorization: Auth Type = Bearer Token, put Token value from value of ‘accessToken’ in section 3.2
4. Conclusion
By following to these above steps, you can test APIs using Postman efficiently, ensuring that they work as expected and handle various scenarios correctly. Thanks for your reading and happy testing with Postman.
References
https://learning.postman.com/docs
https://github.com/vdespa/introduction-to-postman-course/blob/main/simple-books-api.md