


1. What is Vite?
Vite (pronounced like “vite” in “invite”) is a modern, fast build tool and development server for JavaScript and TypeScript applications. It’s primarily used to bundle and serve applications written in frameworks like React, Vue, Svelte, and others. Vite leverages modern browser features like ES modules and HTTP/2 to provide an enhanced developer experience with faster build and hot-reloading speeds.

Key features of Vite:
- Instant Development Start: Vite serves your app almost instantly without waiting for a full bundling process.
- Fast Hot Module Replacement (HMR): HMR updates only the modified part of your app, offering a faster development experience.
- Optimized Production Build: Vite uses esbuild, a super-fast bundler written in Go, to produce optimized and minified production builds.
- Supports Modern JavaScript Features: Vite supports modern JavaScript features like ES modules, and it’s optimized for next-gen JavaScript and CSS features.
- Zero Config for Most Frameworks: It provides ready-to-use templates for React, Vue, and others, making setup straightforward.
2. Why Should We Use Vite Instead of Create React App (CRA)?
There are several reasons why you might prefer to use Vite over Create React App (CRA) for your React projects:
1. Faster Development Server
- Vite: It uses native ES modules in the browser during development, which allows it to load only the code that’s needed for the page. This means that Vite can start the development server instantly.
- CRA: CRA bundles your entire app and serves it, which means it needs to do more work before starting the development server. This can lead to slower startup times, especially in large projects.
Result: With Vite, you’ll experience significantly faster startup times, especially as your project grows.
2. Hot Module Replacement (HMR)
- Vite: The Hot Module Replacement (HMR) in Vite is super-fast and updates only the changed part of your code. Because Vite uses a more efficient dependency graph, HMR is extremely quick, leading to a snappy development experience.
- CRA: CRA’s HMR is slower because it has to re-bundle a larger portion of the app when changes occur, resulting in a noticeable delay.
Result: Vite provides a much smoother and faster development experience, especially when making quick changes to your app.
3. Optimized Production Build
- Vite: Vite uses esbuild, a JavaScript bundler written in Go, which is incredibly fast. esbuild can bundle and minify your code much faster than Webpack, which is used by CRA.
- CRA: CRA uses Webpack, which is highly customizable but is relatively slower than Vite’s esbuild for tasks like transpiling and bundling.
Result: Vite’s production builds are typically faster, resulting in a more optimized and quicker deployment process.
4. No Bundling During Development
- Vite: Vite serves code as native ES modules during development, meaning no bundling is done until you’re ready for production. This eliminates the need for the time-consuming bundling process when developing.
- CRA: CRA uses Webpack to bundle everything during development. While Webpack is powerful, it can slow down the initial build and the subsequent re-builds as the project grows.
Result: Vite’s approach significantly improves development speed and reduces complexity during development.
5. Better Support for Modern JavaScript and TypeScript
- Vite: Vite is designed to support modern web standards and takes full advantage of ES modules, TypeScript, CSS Modules, and other cutting-edge technologies right out of the box.
- CRA: CRA is more of a “batteries included” setup but doesn’t always embrace the newest technologies as quickly as Vite.
Result: If you’re working with modern features or need TypeScript support, Vite is often a better fit.
6. Easier Configuration
- Vite: Vite provides a zero-config setup for many frameworks like React, Vue, and Svelte. It has sensible defaults and is simple to extend using plugins and configuration files.
- CRA: CRA offers a lot of abstraction, but if you need custom configurations (like modifying Webpack), you often have to eject from CRA, which can be complex and difficult to maintain.
Result: Vite’s configuration is more flexible, while CRA requires more effort to customize, especially if you need to change internal configurations.
7. Modern Browser Features
- Vite: Vite uses ES modules for faster code splitting, as well as support for HTTP/2, which can lead to even faster loading times and better caching.
- CRA: CRA is based on Webpack and doesn’t leverage some of these newer features directly, often relying on plugins to optimize certain processes.
Result: Vite offers modern optimizations by default, making it more suited for future-proof applications.
8. Smaller Bundle Size and Improved Performance
- Vite: Vite leverages tree shaking and code-splitting to produce smaller bundles in production. It can also optimize dependencies by transforming and caching them in a more efficient way.
- CRA: CRA uses Webpack for bundling and requires additional configuration to get optimal results for smaller bundles.
Result: Vite generally results in faster load times and more optimized output with smaller bundle sizes.
9. Growing Ecosystem
- Vite: The ecosystem around Vite is growing quickly, with many plugins and integrations available for a variety of frontend technologies. Additionally, Vite is designed to work well with modern JavaScript frameworks and has official templates for React, Vue, Preact, and more.
- CRA: CRA is stable and widely used, but it’s based on older tooling and doesn’t integrate with newer web features as easily as Vite does.
Result: Vite’s growing ecosystem and plugin support make it a future-proof choice for modern JavaScript applications.
10. Conclusion: Why Choose Vite Over CRA?
While both Vite and CRA are excellent tools for building React apps, Vite has several advantages that make it an attractive choice for modern web development:
- Speed: Vite’s development server is faster, and it offers much quicker build times in both development and production.
- Modern Approach: Vite uses modern standards like ES modules and HTTP/2, making it a more future-proof choice.
- Improved Developer Experience: Vite’s fast HMR, zero-config setup, and efficient builds make it easier and more enjoyable to work with.
- Better Performance: Vite’s production builds are often smaller and more optimized thanks to its use of esbuild and better support for tree-shaking and code-splitting.
If you’re starting a new React project, Vite is a strong contender because of its faster, more modern approach to bundling and development. However, if you’re working with an existing CRA project, migrating to Vite might require some setup effort but will likely pay off in the long term with faster builds and a better overall experience.
3. Migrating from Create React App to Vite
CRA package has not been updated for about a year. This may cause some problems where packages already updated to more recent versions cannot be used within an existing application. As a result, you may need to update existing applications by replacing the CRA package with the Vite.
1. Install Vite and Plugins
Here are the commands to install the packages we need:
yarn add -D vite @vitejs/plugin-react vite-tsconfig-paths
OR
npm install vite @vitejs/plugin-react vite-tsconfig-paths --save-dev
Apart from Vite, we are adding two plugins — @vitejs/plugin-react and vite-tsconfig-paths.
The vitejs/plugin-react plugin enables fast refresh in development, uses automatic JSX runtime, and custom Babel plugins or presets. It enriches your React development experience.
The vite-tsconfig-paths plugin resolves imports for TypeScript’s path mapping. For example, you can use components/ComponentName instead of ./../components/ComponentName.
2. Create a Vite config file
On running vite in the command terminal, Vite tries to find a vite.config.ts file inside the project’s root directory. At your application’s root, create a file named vite.config.ts with the following content:
import { defineConfig } from 'vite'
import react from '@vitejs/plugin-react'
import viteTsconfigPaths from 'vite-tsconfig-paths'

export default defineConfig({
    // depending on your application, base can also be "/"
    base: '',
    plugins: [react(), viteTsconfigPaths()],
    server: {
        // this ensures that the browser opens upon server start
        open: true,
        // this sets a default port to 3000
        port: 3000,
    },
})
3. Create a Vite Types File Reference
his step is needed to reference a type declarations file which aids type checks and Intellisense. By default, Vite types are for a NodeJS environment. At your application’s root, create a file named vite-env.d.ts with the following content:
/// <reference types="vite/client" />4. Move the index.html File
Vite uses an index.html file as a template, which is served directly by the dev server. CRA, on the other hand, uses public/index.html and injects the React script dynamically. Move your public/index.html (from CRA) to the root of your project,
Update the index.html File
Remove %PUBLIC_URL%
Vite automatically resolves URLs inside index.html, so there’s no need for %PUBLIC_URL% placeholders. You can do a search and replace inside your index.html file for this. Be sure to remove all occurrences.
Before:
<link rel="icon" type="image/svg+xml" href="%PUBLIC_URL%/favicon.svg" />After:
<link rel="icon" type="image/svg+xml" href="/favicon.svg" />Add module script to the bottom of the body tag
Vite treats index.html as source code and part of the module graph. It resolves <script type="module" src="..."> that references your JavaScript source code.
At the bottom of the body tag in index.html file, add the script as shown below:
<body>
    {/* others here */}
    <script type="module" src="/src/index.tsx"></script>
</body>
5. Replace CRA with Vite
You can now remove CRA, add Vite scripts to the package.json file, and update tsconfig.json.
Remove CRA
To remove CRA, run the following command. This will remove react-scripts from our installed packages.
yarn remove react-scripts
OR
npm uninstall react-scripts
After running the command above, delete the react-app-env.d.ts file.
Update the scripts section in your package.json
"scripts": {
  "dev": "vite",          // Start the development server
  "build": "vite build",  // Build the project for production
  "preview": "vite preview" // Preview the production build locally
}
Update tsconfig.json
For more options, here is a sample tsconfig file from Vite.
{
    "compilerOptions": {
        "lib": ["dom", "dom.iterable", "esnext"],
        "target": "ESNext",
        "types": ["vite/client"],
        "isolatedModules": true,
    },
 }
Update process.env.REACT_APP_VARIABLE (optional)
This is necessary if your application uses environment variable. Vite uses import.meta.env.REACT_APP_VARIABLE instead of process.env.REACT_APP_VARIABLE. You can find more details on Vite’s env variables and modes here.
Replace your REACT_ environment variables to start with VITE_. This is needed because Vite filters out any env variable not starting with VITE_.
Before:
process.env.REACT_APP_VARIABLEAfter:
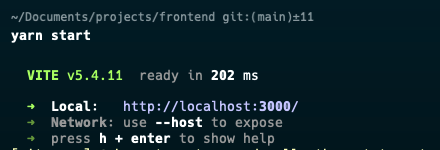
import.meta.env.VITE_APP_VARIABLE6. Run your Application
yarn start
OR
npm start
Congratulations! You have successfully completed the first step in migrating your application from CRA to Vite. You should see a screen that looks like the image below:
4. Possible blockers and their solutions
1. If you have many environment variables you can convert and define process.env in vite.config.ts
  const env = loadEnv(mode, process.cwd(), "");
  const processEnv = {};

  for (const [key, value] of Object.entries(env)) {
    if (key.startsWith("REACT_APP_")) {
      processEnv[key] = value;
    }
  }
  processEnv["REACT_APP_ENVIRONMENT"] = mode;

...

vite.config.ts will return

  define: {
    global: "globalThis",
    "process.env": processEnv
  },
2. Error can not use environment variables in index.html
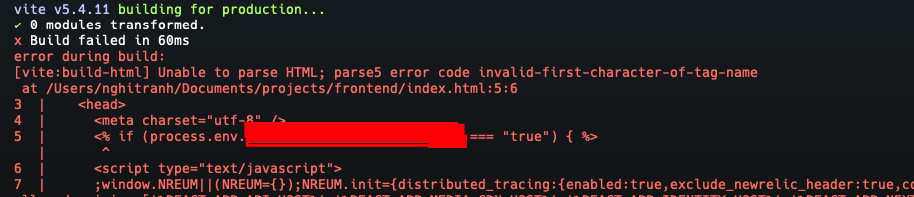
You should use vite-plugin-ejs to create variable that can use in index.html
yarn add -D vite-plugin-ejsimport { ViteEjsPlugin } from "vite-plugin-ejs";
...
vite.config.ts will return
plugins: [
react(),
viteTsconfigPaths(),
ViteEjsPlugin({
REACT_APP_XXX: processEnv["REACT_APP_XXX"], // variable that using in index.html
....
})
],
define: {
// here is the main update
global: "globalThis",
"process.env": processEnv
},3. CSS config
Example config to add the variables for ant.design CSS
css: {
    preprocessorOptions: {
      less: {
        math: "always",
        relativeUrls: true,
        javascriptEnabled: true,
        modifyVars: antDesignTheme,
      },
    },
  },
4. Issue require is not defined.

At the bottom of the body tag in index.html file, add the script as shown below:
<script type="text/javascript">
    window.require = () => { return { default: {} } }
    window.global = window;
    window.process = {};
</script>