


Introduction to Load Simulation in Gatling
Overview of Load Testing in Gatling
Gatling simplifies load testing by simulating user traffic, identifying performance bottlenecks, and ensuring systems can handle heavy loads efficiently. It offers detailed insights into system behavior, helping pinpoint issues like slow response times and resource constraints. With customizable scenarios and robust reporting, Gatling ensures applications scale effectively and maintain high performance under real-world conditions.
Importance of Realistic User Scenarios
Developing realistic user scenarios is crucial for effective load testing, as they closely replicate genuine user behavior and offer valuable insights into how the system performs under real-world conditions. These scenarios help identify performance bottlenecks, ensure accurate scaling, and ensure the application can handle actual user traffic efficiently.
Understanding Gatling Basics
What is Gatling?
Gatling is an open-source load testing tool known for its user-friendliness, maintainability, and high performance. It supports HTTP protocols and enables users to create tests using Scala, Java, or Kotlin.
Key components of Gatling Simulation
Before exploring Gatling’s key components, it’s helpful to understand how they work together for effective performance testing. Gatling organizes testing into simple steps that help simulate real user behavior. These components define what to test, how users interact with the system, and the load it can handle. Let’s break down these three main parts.
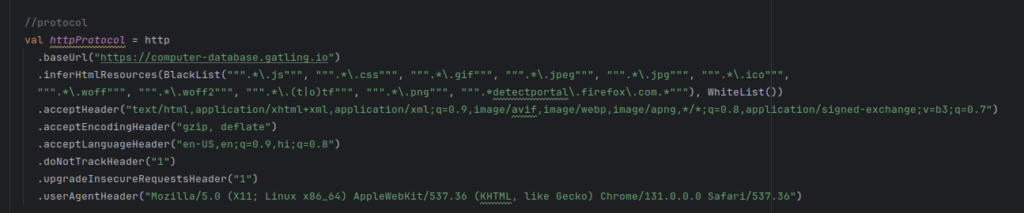
1. Protocol Setup: Defines the configuration details for interacting with the system under test, such as HTTP settings, server details, and base URLs.
What it does:
- Defines how requests are sent to the application.
- Includes settings like base URL, headers, timeouts, and other protocol-related configurations.
2. Scenario Definition: Models the behavior of virtual users, describing the sequence of actions they will perform during the test.
What it does:
- Defines steps like browsing pages, submitting forms, or interacting with APIs.
- Includes pauses, loops, and conditions to mimic realistic user behavior.
The system will convert the series of actions recorded in the .har file into scenarios.

3. Injection Profiles: Definition of how virtual users are introduced during the test.
The below code sets up a Gatling simulation where users are injected into the scenario. Here we can use various Gatling Injections as per our need.
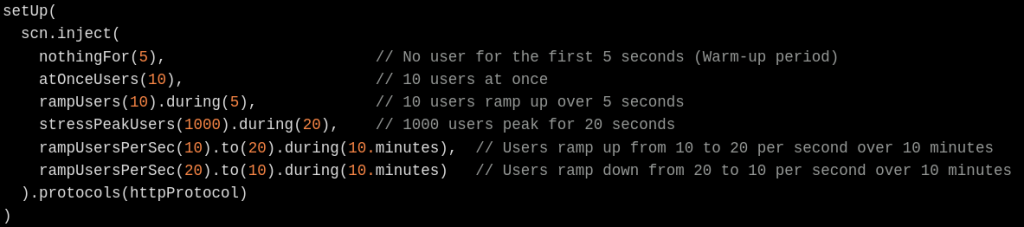
- Warm-up period (nothingFor(5)): The system runs idle for 5 seconds without simulating any users, which allows it to stabilize.
- Initial load (
atOnceUsers(10)): 10 users are simulated at once to create an immediate load. - Ramp-up phase (
rampUsers(10).during(5)): 10 users are gradually introduced over 5 seconds, simulating a steady increase in traffic. - Peak load (
stressPeakUsers(1000).during(20)): 1000 users hit the system for 20 seconds, representing a high traffic scenario. - Ramp-up from 10 to 20 users per second (
rampUsersPerSec(10).to(20).during(10.minutes)): Users gradually ramp up from 10 to 20 per second over 10 minutes. - Ramp-down (
rampUsersPerSec(20).to(10).during(10.minutes)): Users gradually reduce from 20 to 10 per second over 10 minutes.
Designing Realistic User Scenarios
1. Defining User Actions
Check the ‘Preserve Log’ option to capture all user actions, including product searches and button clicks. After completing the actions, stop the recording and download the .har file to your system for use in Gatling to create user scenarios based on the actions.
I chose a demo website as an example.

2. Creating Scenarios with the Recorder
The Gatling Recorder captures browser actions to create simulations automatically. This tool simplifies the process of defining scenarios by recording user interactions directly from the browser.
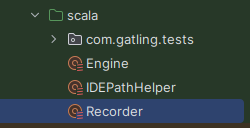
For creating the user scenarios, we have to run the Recorder.scala class
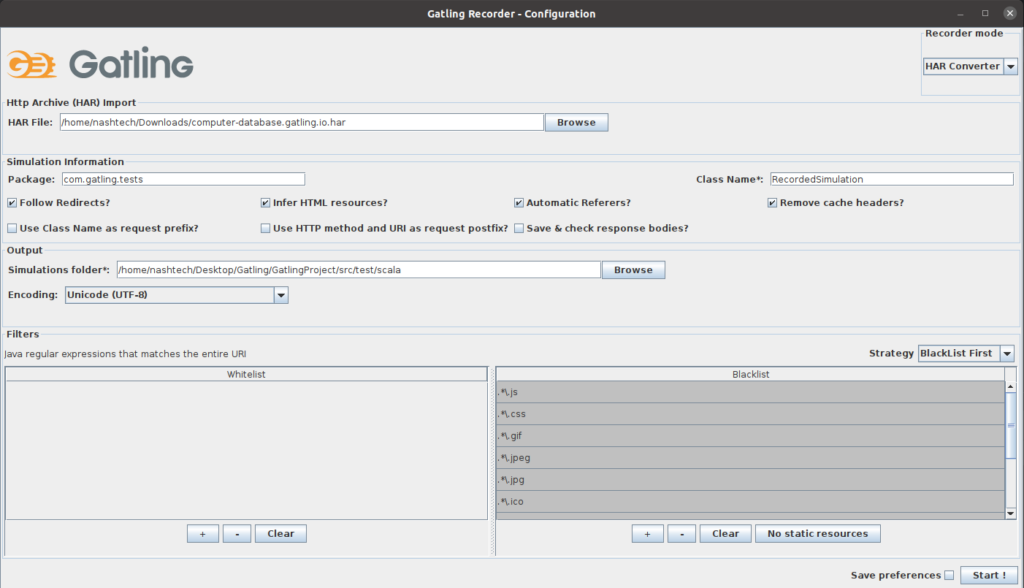
After running the Recorder.scala class, a window panel will open. Using this window, input your downloaded .har file using the “Browse” option. Make sure to convert the Recorder mode to “HAR Converter.” Ensure you select the “No Static Resources” option (to exclude all static resources) and then press the “Start!” button.
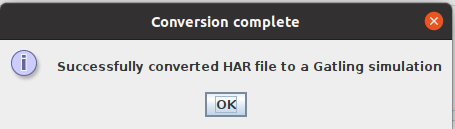
After clicking on the Start button, we then see this Confirmation Window
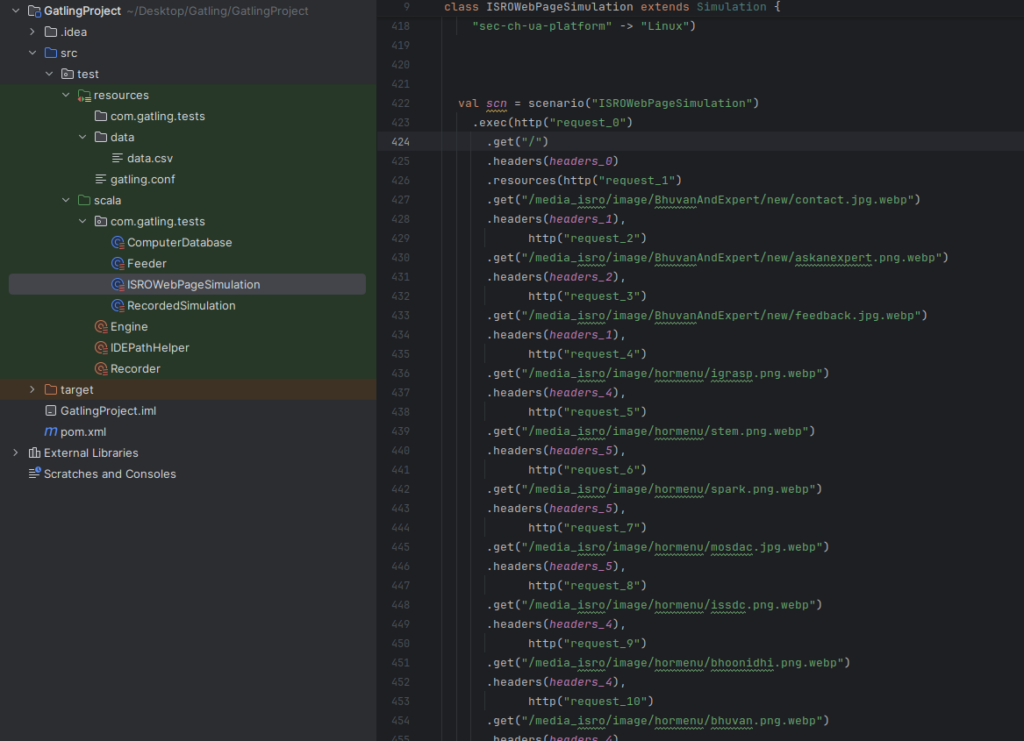
Finally, view the scenarios generated based on the respective actions.
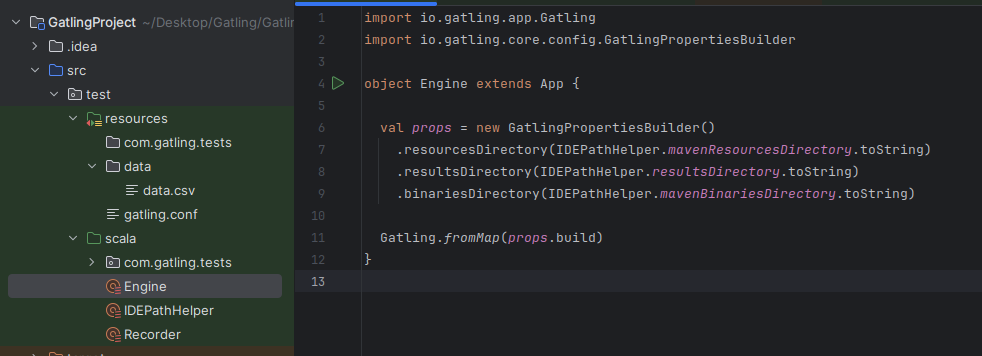
After that we have to run the Engine.scala class for performing the Load test and to generate the Detailed execution Report.
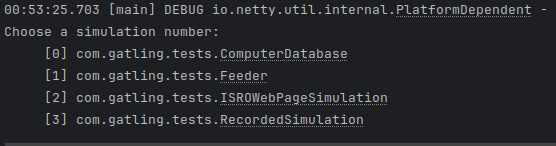
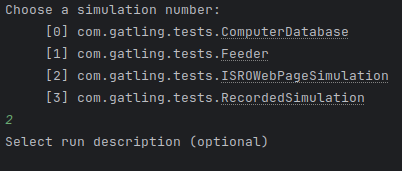
After successfully executing the Engine.scala class, the terminal will prompt you to choose which simulation to run. Enter the index number of the simulation you want to run into the terminal. For example, to run the ISROWebPageSimulation, provide simulation number 2 and press Enter.
Gatling will prompt you to enter a description that it will display in the report.
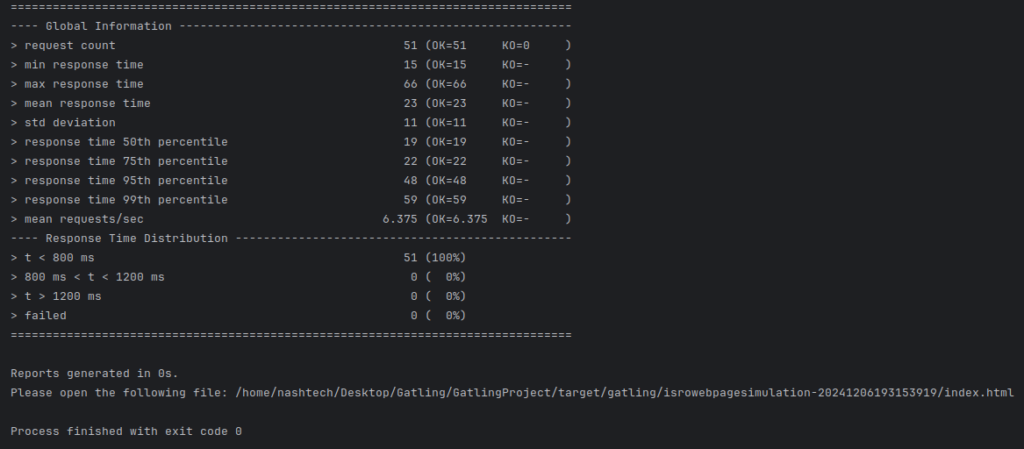
After hitting Enter, Gatling starts working with the simulation provided internally, and at the end, after successful execution, the terminal will look like this.
The Reports will be generated into the target/gatling/ folder

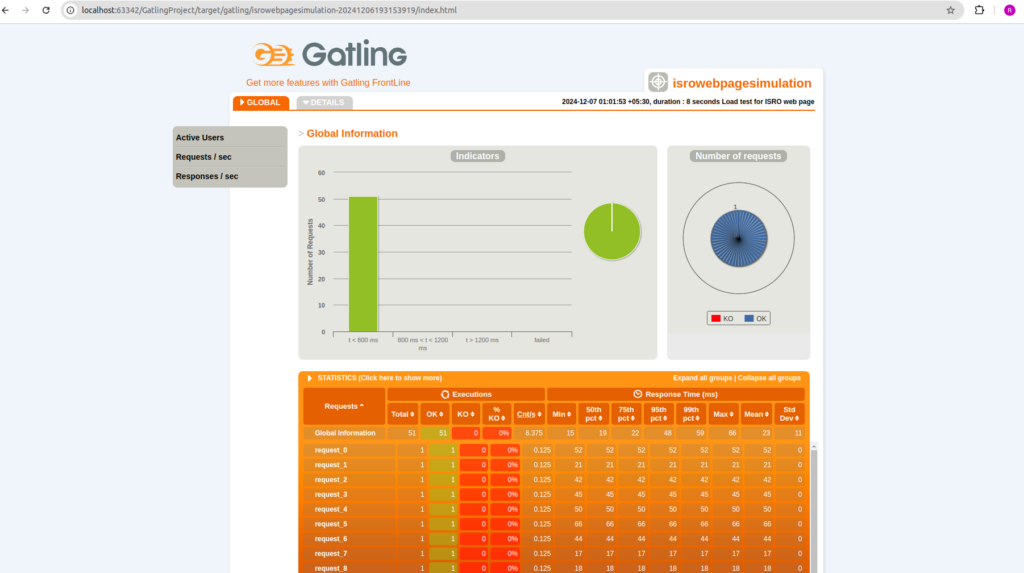
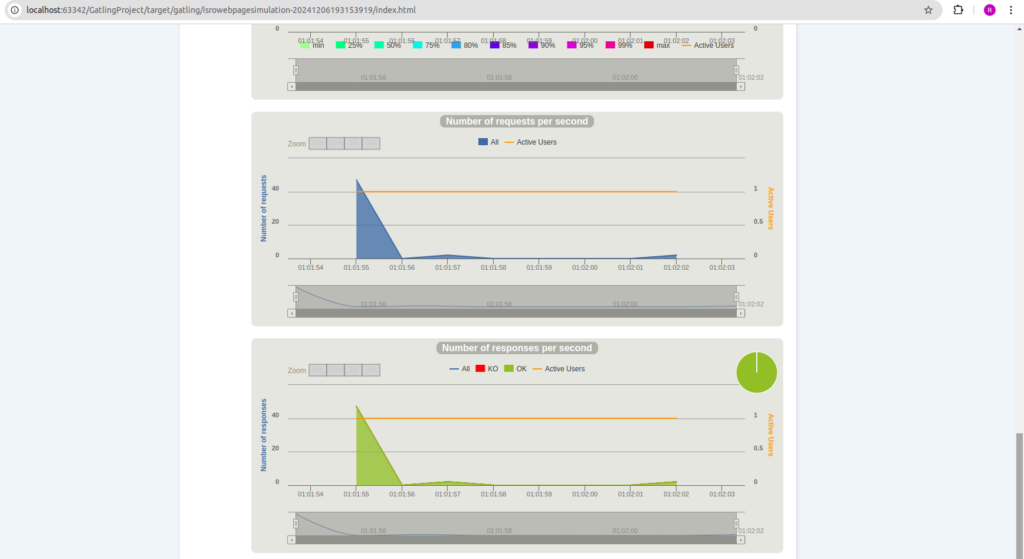
The Detailed Report will look like this

Conclusion
Performance testing works well when it closely matches real user behavior. Gatling’s easy-to-use tools help testers create simulations that find problems, improve performance, and ensure a smooth experience for users.
Reference:
- https://gatling.io/
- https://www.softwaretestinghelp.com/gatling-tutorial/