


Introduction
When developing software applications, one of the primary goals is to keep the code clean, modular, and easy to maintain. One way to achieve this is through Dependency Injection (DI). Dependency Injection is a design pattern that promotes loose coupling between components by providing their dependencies from the outside. Instead of a class creating its own dependencies, they are injected, making the class more flexible, testable, and maintainable.
In this guide, we will learn how to implement Autofac, a popular dependency injection (DI) container, in an ASP.NET Core 8 application. Autofac helps manage your application’s dependencies and makes your code cleaner and more modular. We will walk you through the steps to set up Autofac in ASP.NET Core 8 and provide a detailed explanation with a simple example.
What is Dependency Injection (DI)?
Before diving into Autofac, it’s important to understand Dependency Injection itself. Dependency Injection is a technique where a class receives its dependencies (objects it needs to function) from an external source, rather than creating them internally. There are three main types of Dependency Injection:
- Constructor Injection: Dependencies are passed via the constructor.
- Property Injection: Dependencies are set via properties.
- Method Injection: Dependencies are passed to methods when they are called.
The primary advantage of DI is that it promotes loose coupling. When components are loosely coupled, it’s easier to swap, test, and maintain them.
Why Use Autofac in ASP.NET Core?
Autofac is a powerful and flexible DI container for .NET applications. It offers several benefits:
- Inversion of Control (IoC): Autofac implements the principle of Inversion of Control, meaning the framework manages the creation and lifecycle of objects.
- Modularity: With Autofac, you can decouple your application’s components, making it easy to swap out implementations or add new ones without affecting other parts of your application.
- Testability: By decoupling the components, you can more easily mock or replace dependencies when unit testing.
- Lifetime Management: Autofac helps manage the lifetimes of objects (singleton, transient, or scoped), optimizing performance and memory usage.
- Seamless Integration: Autofac works well with ASP.NET Core, providing easy DI management out of the box.
Prerequisites
Before we start, make sure you have the following:
- .NET Core 8 SDK installed on your machine.
- Visual Studio Code or any other IDE that supports ASP.NET Core development.
- Basic understanding of C# and ASP.NET Core.
Folder Structure

you can access the given code from here:
Step-by-Step Guide to Setting Up Autofac in ASP.NET Core 8
Step 1: Create a New ASP.NET Core 8 Application
To get started, let’s first create a new ASP.NET Core 8 project. Open a terminal or command prompt, navigate to the directory where you want to create the project, and run the following command:
dotnet new webapi -n AutofacExampleThis command creates a new Web API project with the name AutofacExample.
Once the project is created, navigate into the project folder using
cd AutofacExampleStep 2: Install the Necessary Autofac Packages
To use Autofac in your project, you need to install the required NuGet packages. You can install these using the .NET CLI or through the Visual Studio NuGet Package Manager.
Run the following commands to install Autofac and its ASP.NET Core extensions:
dotnet add package Autofac
dotnet add package Autofac.Extensions.DependencyInjection
These packages are essential for integrating Autofac with the built-in ASP.NET Core dependency injection system.
Step 3: Set Up Autofac in Program.cs
In ASP.NET Core 8, the DI configuration is typically done in the Program.cs file instead of Startup.cs. We will modify Program.cs to use Autofac as the DI container.
Here’s how you can set it up:
using Autofac.Extensions.DependencyInjection;
using Autofac;
using AutofacExample.Interfaces;
using AutofacExample.Services;

var builder = WebApplication.CreateBuilder(args);

// Add services to the container.

builder.Services.AddControllers();
// Learn more about configuring Swagger/OpenAPI at https://aka.ms/aspnetcore/swashbuckle
builder.Services.AddEndpointsApiExplorer();
builder.Services.AddSwaggerGen();
// Step 1: Configure Autofac as the ServiceProviderFactory
builder.Host.UseServiceProviderFactory(new AutofacServiceProviderFactory());

// Step 2: Add services to the IServiceCollection
builder.Services.AddControllers();

// Step 3: Configure Autofac container
builder.Host.ConfigureContainer<ContainerBuilder>(containerBuilder =>
{
    // Register custom services
    containerBuilder.RegisterType<MyService>().As<IMyService>();
});
var app = builder.Build();

// Configure the HTTP request pipeline.
if (app.Environment.IsDevelopment())
{
    app.UseSwagger();
    app.UseSwaggerUI();
}

app.UseHttpsRedirection();

app.UseAuthorization();

app.MapControllers();

app.Run();
In this code:
- We create an
Autofac ContainerBuilderto register services with Autofac. - After registering our custom services, we populate Autofac with the existing services using
builder.Services. - Finally, we configure Autofac as the DI container by using
ConfigureContainer.
Step 4: Define a Simple Service and Interface
Now, let’s define a simple service and its corresponding interface. The service will implement the IMyService interface and provide a method DoSomething().
1. Create the IMyService interface:
public interface IMyService
{
    void DoSomething();
}
2. Create the MyService class which implements the interface:
public class MyService : IMyService
{
    public void DoSomething()
    {
        Console.WriteLine("Hello from MyService!");
    }
}
In this example, MyService is a simple implementation that just prints a message to the console when DoSomething() is called.
Step 5: Inject and Use the Service in a Controller
Now that we have defined and registered our service with Autofac, let’s inject it into a controller and use it.
- Create a new controller (
MyController.cs) and inject theIMyServicedependency:
using AutofacExample.Interfaces;
using Microsoft.AspNetCore.Mvc;

namespace AutofacExample.Controllers
{
    [ApiController]
    [Route("[controller]")]
    public class MyController : ControllerBase
    {

        private readonly IMyService _myService;

        public MyController(IMyService myService)
        {
            _myService = myService;
        }

        [HttpGet]
        public IActionResult Get()
        {
            _myService.DoSomething();
            return Ok();
        }
    }
}
Here, we inject IMyService into the controller via the constructor. The Get() method calls DoSomething() on the injected service.
Step 6: Run the Application
At this point, you can run the application by executing the following command:
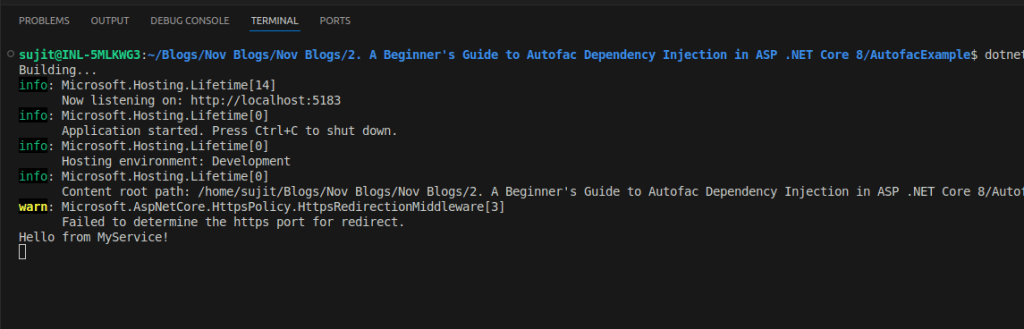
dotnet runOnce the application is running, open your browser or use Postman to visit http://localhost:5183/api/my. (change the localhost address as per your launchsettings.json file) You should see the message “Hello from MyService!” printed in the console, which is confirming that the dependency injection is working.
Conclusion
Autofac makes it easy to manage dependencies in ASP.NET Core applications by providing a powerful and flexible DI container. By following the steps in this guide, you have successfully set up Autofac in your ASP.NET Core 8 application. You can now:
- Use Autofac to manage dependencies more effectively.
- Take advantage of its powerful lifetime management and modularity.
- Test components more easily by replacing real dependencies with mocks during unit testing.