


Welcome back to our journey of Akka Agentic AI! In our previous blog, we said our first “Hello!” to an Akka AI Agent and saw how it responds back in different languages. In this article, we will take a step forward and plan our next trip/activity using Akka Agentic AI recommendations.
Planning AI Agent
Let’s start with creating a Planning AI Agent which will suggest us with real-world places we can visit.
- Annotate the AI Agent class with @ComponentId and pass a unique identifier for this agent type.
- Extend the class with Agent.
- Define the command handler method.
- Define the system message (prompt) as a constant.
- Define the user message (input) for the specific request.
- Use the system message and user message in the effect builder.
import akka.javasdk.agent.Agent;
import akka.javasdk.annotations.ComponentId;

@ComponentId("planning-agent")
public final class PlanningAgent extends Agent {

    private static final String SYSTEM_MESSAGE =
            """
            You are a planning agent. Your job is to suggest places in the
            real world. Like for example, a metropolitan city, hill station, a costal region,
            a cruise trip, etc.
            """.stripIndent();

    public Effect<String> query(String message) {
        return effects()
                .systemMessage(SYSTEM_MESSAGE)
                .userMessage(message)
                .thenReply();
    }
}
As we are aware, from our previous blog, that system message acts as a system-level instruction to the AI Model (OpenAI in this case) that defines AI Agent’s behavior. Also, to customize the response, user input will act as a query for the AI Model. Hence, if you need to create an agent for a different purpose, defining an appropriate system message is important.
Expose AI Agent to World!
Next we need to open the AI Agent’s access to everyone via internet to make it easy to try out:
- Inject the ComponentClient, which is used to call the AI Agent.
- Call the PlanningAgent created in the previous step
import akka.javasdk.annotations.Acl;
import akka.javasdk.annotations.http.HttpEndpoint;
import akka.javasdk.annotations.http.Post;
import akka.javasdk.client.ComponentClient;
import com.example.application.PlanningAgent;

import java.util.UUID;

@Acl(allow = @Acl.Matcher(principal = Acl.Principal.INTERNET))
@HttpEndpoint
public class PlanningEndpoint {

    public record Request(String message) {}

    private final ComponentClient componentClient;

    public PlanningEndpoint(ComponentClient componentClient) {
        this.componentClient = componentClient;
    }

    @Post("/plans")
    public String suggestActivities(Request request) {
        var sessionId = UUID.randomUUID().toString();
        return componentClient
                .forAgent()
                .inSession(sessionId)
                .method(PlanningAgent::query)
                .invoke(request.message());
    }
}
Configure AI Model
Previously, we used OpenAI (gpt-4o-mini) AI Model and we will continue to do the same
akka.javasdk {
  agent {
    model-provider = openai

    openai {
      model-name = "gpt-4o-mini"
      api-key = ${?OPENAI_API_KEY}
    }
  }
}
Let’s Plan a Trip!
Set OpenAI API Key as environment variable
set OPENAI_API_KEY=<your-openai-api-key>Start the service locally
mvn compile exec:javaUse curl/postman to call the Endpoint
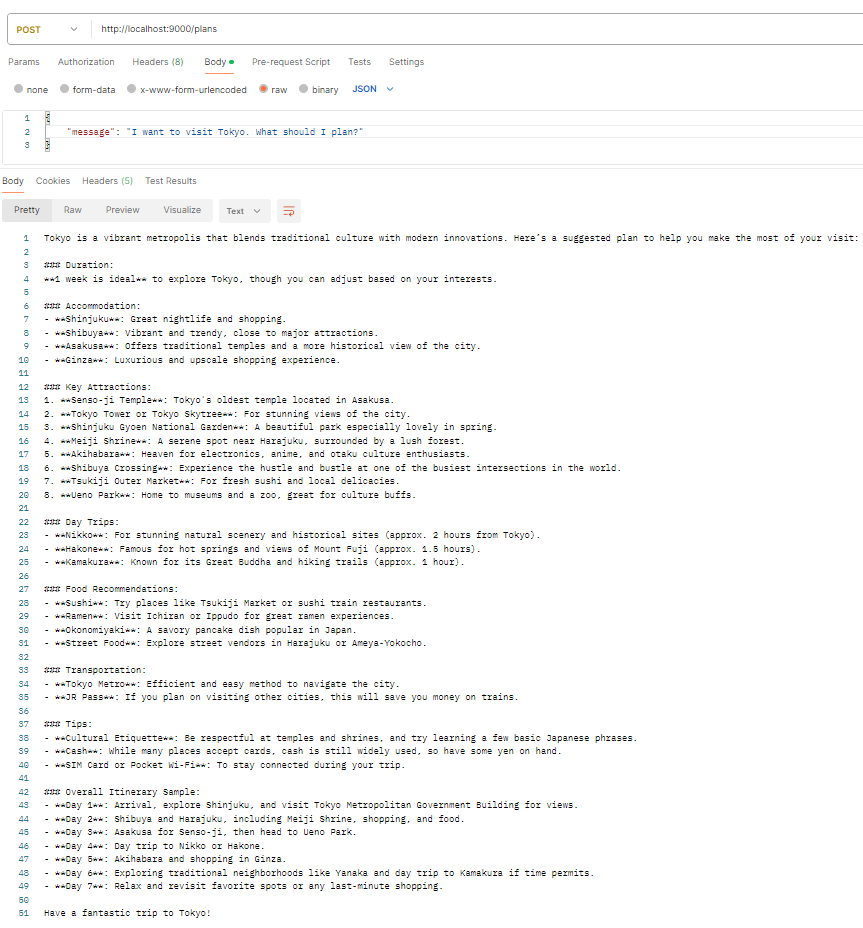
Next Steps
- To get more personalized trip planning, we will learn how to add User context to the PlanningAgent in our next blog.
- Also, we will learn more about Agent interface.