


Introduction
In terms of vulnerability assessment, Nessus has a tendency to take centre stage. It is strong, fast, and relatively simple to use. The cost, limited customisation choices, and lack of transparency compared to some open-source alternatives are some of its drawbacks, let’s face it. You might want to look into OpenVAS if you work as a researcher or security expert, or if your company needs a little more freedom. Beyond Nessus, OpenVAS combined with Python can provide you with a strong foundation for creating a vulnerability scanning solution that meets your requirements.
This blog will walk you through:
- Why go beyond Nessus?
- What is OpenVAS?
- Setting up OpenVAS
- Automating vulnerability scans using Python
- Parsing and reporting results
- Sample Python scripts
- Use cases and considerations from the real world
What is Nessus?
One popular vulnerability scanning tool in the realm of security testing and cyber security is Nessus. Tenable created the Nessus platform, which checks for security flaws in OS systems, apps, devices, cloud services, and other network resources. It is a remote security scanning program that checks a computer and sounds an alarm if it finds any security holes that would allow malevolent hackers to access any computer you have connected to a network.
Key Features:
- It scans for over 75,000 vulnerabilities.
- Plus, it has a user-friendly interface with pre-configured templates.
- Scheduled scans and customizable policies
- Integration with popular security tools
- Exportable reports (PDF, HTML, CSV)
Use Cases:
- Network vulnerability assessments
- Patch auditing
- Compliance checks (e.g., PCI DSS, HIPAA)
- Malware detection
While Nessus is free for personal, non-commercial purposes (via Nessus Essentials), enterprise use requires a paid license.
Why Go Beyond Nessus?
But let’s not overlook the fact that Nessus has limitations, even though it is widely used and regarded in the business. You may feel somewhat constrained if you’re hoping for total transparency, additional customisation choices, or smooth integration into your particular workflows.
| Feature | Nessus | OpenVAS + Python |
|---|---|---|
| Licensing | Commercial | Free & Open Source |
| Customization | Limited | Fully scriptable |
| Transparency | Closed Source | Full access to source & logic |
| Automation | API support | Full control via API and CLI |
| Integration | Requires paid license | Easily integrates with Python apps or pipelines |
Verdict: If you’re building custom scanners, automation workflows, or want a more auditable and flexible solution, going beyond Nessus with OpenVAS combined with Python offers serious advantages.
OpenVAS: What is it?
On the flip side, we have OpenVAS, which stands for Open Vulnerability Assessment Scanner. This tool is fully loaded with features and was developed by Greenbone Networks. It’s actually part of the broader Greenbone Vulnerability Management (GVM) framework. Now, that’s definitely something worth considering!
- OpenVAS Scanner (the actual scanner)
- Greenbone Security Assistant (GSA, the web interface)
- Greenbone Vulnerability Manager (GVM)
- gsad (Greenbone Security Assistant Daemon)
- gvmd (Greenbone Vulnerability Manager Daemon)
OpenVAS is fully open-source and supports modern vulnerability scanning profiles like CVSS scoring, compliance tests, and scan tuning.
Setting up OpenVAS (on Ubuntu)
OpenVAS (now part of Greenbone Vulnerability Management) is a robust open-source vulnerability scanner. Here’s how to set it up in a VM or local machine.
Install OpenVAS
sudo apt update
sudo apt install openvas -y
Initialize and Start
sudo gvm-setup
sudo gvm-start
Access Web UI
Access the Dashboard at
https://localhost:9392Log in with the credentials provided during setup.
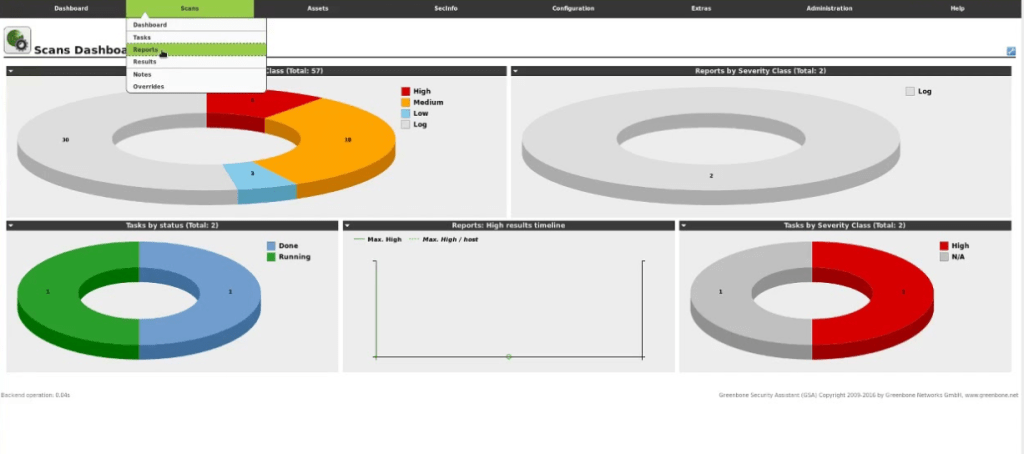
Here’s what the Greenbone Security Assistant (GSA) dashboard looks like after a successful scan:
Understanding GVM Architecture
OpenVAS works as part of a suite called GVM:
gvmdThe vulnerability manager daemonopenvasThe scanner engineospd-openvasProvides OSP protocol interfacegsadGreenbone Security Assistant (web UI)
The GMP (Greenbone Management Protocol) is the API layer you’ll interface with from Python.
Setup Tip: Use Bridged networking in VirtualBox to allow your VM to talk to your host machine directly.
Automating with Python
Once GVM is set up, we can start automating it using Python.
Install:
pip install gvm-toolsAuthenticate:
Make sure you’re using a valid GVM user:
gvm-cli ssh --hostname <host> --gmp-username <user> --gmp-password <pass>Building a Python Wrapper Scanner
Here’s a simple end-to-end Python example using gvm-tools and gvm.protocols.gmp.
from gvm.connections import TLSConnection
from gvm.protocols.gmp import Gmp

# Connect to GVM
connection = TLSConnection(hostname='localhost', port=9390)
with Gmp(connection) as gmp:
    gmp.authenticate('admin', 'your_password')

    # Create target
    target_id = gmp.create_target(name='MyTarget', hosts='192.168.1.10')

    # Get existing scan configs
    configs = gmp.get_scan_configs()
    full_fast_id = next(c.get('id') for c in configs.xpath('scan_config') if c.findtext('name') == 'Full and fast')

    # Create and start task
    task_id = gmp.create_task(name='MyScan', config_id=full_fast_id, target_id=target_id)
    gmp.start_task(task_id)
This script connects to the local GVM service, creates a new target, and starts a scan using the “Full and fast” config.
Let’s walk through what this Python script does:
1. Establish Connection
connection = TLSConnection(hostname='localhost', port=9390)
with Gmp(connection) as gmp:- Establishes a secure TLS connection to the Greenbone Vulnerability Manager (gvmd).
- Port 9390 is used for GMP (Greenbone Management Protocol).
2. Authenticate with GVM
gmp.authenticate('admin', 'your_password')- It authenticates using the username and password you configured during the OpenVAS setup.
- Make sure this user has permissions to create tasks.
3. Create a Target
target_id = gmp.create_target(name='MyTarget', hosts='192.168.1.10')- Creates a new target named “MyTarget”.
- hosts can be a single IP, hostname, or even a range (e.g., 192.168.1.1-50).
4. Fetch and Select Scan Configuration
configs = gmp.get_scan_configs()
full_fast_id = next(c.get('id') for c in configs.xpath('scan_config') if c.findtext('name') == 'Full and fast')- Retrieves available scan configurations.
- Selects the Full and fast config, one of the most comprehensive default scans.
5. Create and Start a Task
task_id = gmp.create_task(name='MyScan', config_id=full_fast_id, target_id=target_id)
gmp.start_task(task_id)- Creates a task (i.e., a scan job) using the selected config and target.
- Immediately starts the scan.
Reporting and Parsing Results
After a scan finishes, you can pull reports programmatically:
report = gmp.get_report(report_id=task_id, report_format_id='c402cc3e-b531-11e1-9163-406186ea4fc5')
print(report)
Real-World Use Cases
- CI/CD Integration: Trigger scans after each deployment.
- Asset Discovery Pipelines: Discover and scan new machines added to the network.
- Compliance Reporting: Generate regulatory-specific reports.
- Education and Research: Create new detection signatures and alter scan configurations.
Conclusion
Nessus is definitely a go-to scanning tool for a lot of businesses, no doubt about it. But have you checked out OpenVAS? It truly adds an entirely new level of strength when used with Python. We’re talking about unmatched flexibility, cost savings, and complete transparency. Really, all it takes to design a vulnerability scanner that is tailored to your network, compliance requirements, and even automated procedures is a little bit of Python programming.
So, whether you’re diving into this as a penetration tester, working as a SOC analyst, or maybe you’re a DevSecOps engineer or a cybersecurity student, this method opens up some fantastic opportunities for you. You can:
- Build custom automation flows that commercial tools often restrict
- Plug vulnerability scanning right into your CI/CD pipelines, which is super convenient.
- Adjust scan settings or plugins to match specific scenarios you’re dealing with.
- Sidestep those annoying licensing issues or hidden fees that can pop up.
Investigating OpenVAS with Python isn’t just a choice; it’s a wise step towards a more flexible and transparent approach to security in the modern world, where there is a strong push for open, auditable, and customisable security measures. Why not make that leap, really?