


Introduction
In the ever-evolving landscape of data management and analytics, Snowflake has emerged as a powerful cloud-based data platform known for its scalability, performance, and ease of use. Integrating Snowflake with .NET Core allows developers to leverage these advantages while building robust and efficient data access layers for applications. This blog explores how to effectively integrate Snowflake with .NET Core to create a scalable and performant data access layer.
Why Snowflake and .NET Core?
Snowflake’s architecture separates storage and compute, offering elasticity and concurrency without performance degradation. It supports both structured and semi-structured data, making it versatile for a wide range of applications. On the other hand, .NET Core provides cross-platform capabilities, high performance, and extensive tooling support, making it an excellent choice for building modern, scalable applications.
Prerequisites:
Before diving into the implementation, ensure you have the following prerequisites:
- Snowflake Account: Sign up for a Snowflake account and create a database and warehouse for testing purposes.
- .NET Core SDK: Install the latest version of .NET Core SDK from dot.net.
- Snowflake .NET Driver: Install the Snowflake.Data NuGet package, which provides the official Snowflake .NET Core driver.
Step-by-Step Guide:
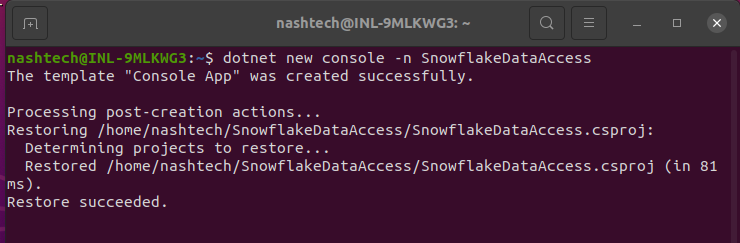
Create a .NET Core Project: Open your terminal or command prompt and create a new .NET Core console application using the following command:
Install Snowflake .NET Driver: Add the Snowflake.Data NuGet package to your project. This package provides the necessary libraries for connecting to Snowflake from .NET Core.

2. Configuring Snowflake Connection
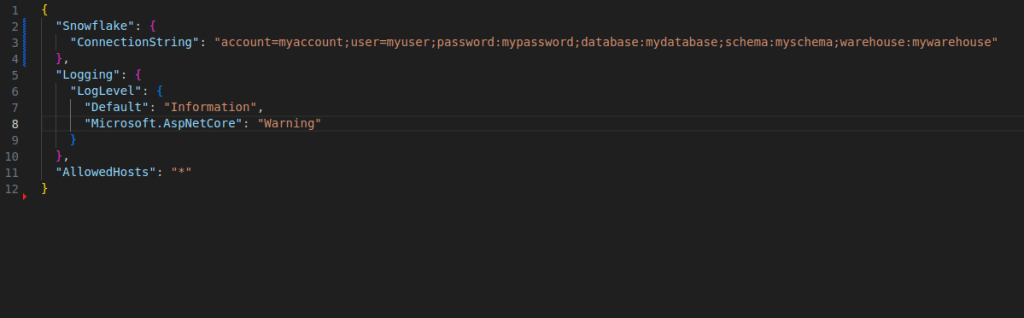
- Connection String: In your
appsettings.jsonfile or environment variables, configure the Snowflake connection string with your account details, including account name, user, password, database, schema, and warehouse.
3. Creating Data Access Layer
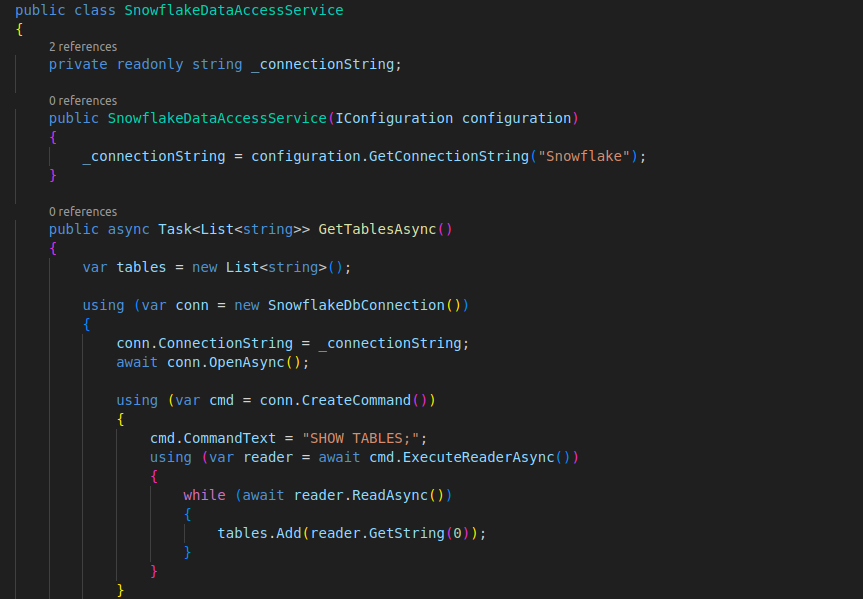
- Data Access Service: Create a service or class to encapsulate Snowflake-specific data access logic. This service will handle establishing connections, executing queries, and handling data retrieval.
4. Using the Data Access Layer
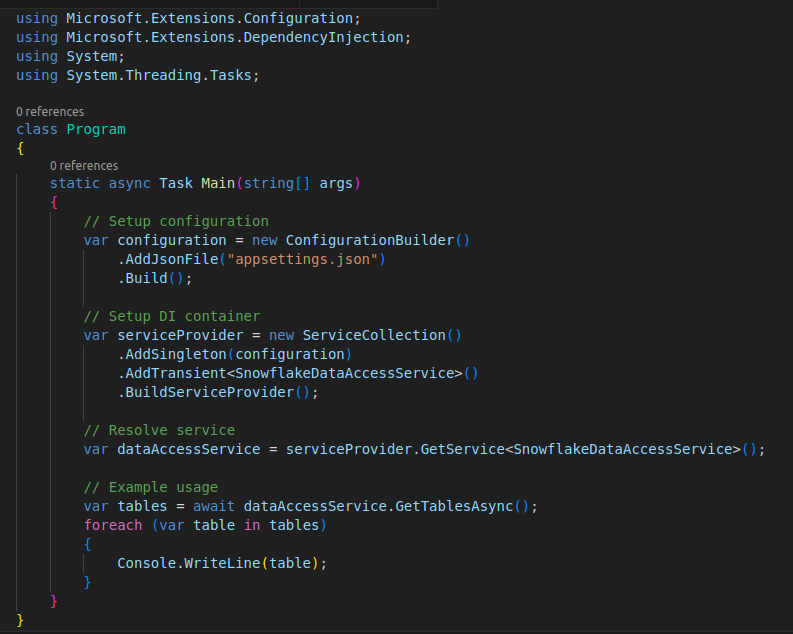
- Consuming Service: In your application entry point or any other component, inject the
SnowflakeDataAccessServiceand use it to fetch data from Snowflake.
Conclusion:
Integrating Snowflake with .NET Core to build a data access layer involves setting up the Snowflake .NET driver, configuring the connection string, and encapsulating data access logic in a service. This approach leverages Snowflake’s strengths in handling large-scale data workloads while harnessing .NET Core’s flexibility and performance. By following the steps outlined in this blog, developers can effectively harness the power of Snowflake within their .NET Core applications, enabling scalable and efficient data management solutions.