


In modern software development, especially with the use of microservices and cloud platforms, RESTful APIs play a crucial role in enabling communication between systems. Spring Boot provides a smooth and efficient way to create RESTful APIs. This blog provides a beginner-friendly guide to developing RESTful APIs with Spring Boot, covering everything from foundational annotations to advanced response techniques. Whether you’re just getting started or revisiting the basics, this guide has you covered.
Why Spring Boot for REST APIs?
Spring Boot streamlines the creation of Spring applications by offering built-in tools and features.
1. Auto-configuration
- What it means: In simple terms, Spring Boot auto-configures your application depending on the libraries and tools you’ve added.
- Why it helps: You don’t need to write long XML files or do a lot of manual setup — for example, if you add a web dependency, Spring Boot configures an embedded server and sets up REST controllers automatically.
2. Embedded Servers (Tomcat, Jetty)
- What it means: You don’t need to deploy your application to an external server. Instead, it runs as a standalone Java app with a built-in web server.
- Why it helps: You just run a
main()method, and your REST API is up and running — very convenient for development and deployment.
3. Production-ready features
- What it means: Spring Boot includes tools like Actuator that provide metrics, health checks, environment info, and more.
- Why it helps: You get insights into how your REST API is running in production, without having to build monitoring from scratch.
4. Minimal Boilerplate Code
- What it means: Spring Boot reduces the amount of code and configuration needed.
- Why it helps: For example, creating a REST endpoint is as simple as adding a
@RestControllerannotation and writing methods with@GetMapping,@PostMapping, etc. No need for complex setup.
5. Focus on Business Logic
- What it means: Since Spring Boot handles much of the “plumbing,” you can concentrate on building the actual functionality of your API.
- Why it helps: It speeds up development and makes your code cleaner and easier to maintain.
With Spring Boot, you can focus more on writing business logic than on infrastructure configuration.
Setting Up a Spring Boot Project for REST APIs
Use Spring Initializr to bootstrap your project:
- Dependencies: Spring Web, Spring Boot DevTools, Spring Data JPA, H2 Database (for quick testing)
- Language: Java
- Packaging: Jar
- Java Version: 17+
After downloading and importing the project into your IDE, you’re ready to begin. You can use Maven or Gradle as your build tool and configure your application.properties or application.yml for environment-specific settings.
Creating the Controller Layer APIs
Controllers manage the first step of processing client requests within your application. In Spring Boot, you use the @RestController annotation to define a REST controller.
@RestController
@RequestMapping("/project")
public class ProjectController {
    private static final Logger log = LoggerFactory.getLogger(ProjectController.class);

    private ProjectService projectService;

    public ProjectController(ProjectService projectService){
        this.projectService = projectService;
    }

    @PostMapping("/create")
    public Project createProject(@RequestBody Project project){
        log.info("Received request to create a Project");
        return projectService.CreateProject(project);
    }

    @GetMapping("/getAll")
    public List<Project> getAllProjects(){
        log.info("Received Request to getAll projects");
        return projectService.getAllProjects();
    }

    @PutMapping("/{id}")
    public ResponseEntity<Project> updateProject(@PathVariable Long id , @RequestBody Project project){
        log.info("Received Request to UPDATE the Project with ID: {}", id);
        Project updatedProject = projectService.updateProject(id, project);
        return ResponseEntity.ok(updatedProject);
    }

    @DeleteMapping("/{id}")
    public ResponseEntity<String> deleteProject(@PathVariable Long id){
        log.info("Received request to delete Project with ID : {}", id);
        projectService.deleteProject(id);
        return ResponseEntity.ok("Project DELETED Successfully.");
    }
}
URL Mapping Best Practices
- Use nouns, not verbs:
/productsinstead of/getProducts - Use plural names:
/products,/users - Use HTTP methods appropriately:
GETfor retrievalPOSTfor creationPUTfor updatesDELETEfor deletions
- Nest resources logically:
/products/{id}/reviewsmakes more sense than/getReviewsByProductId - Use query parameters for filtering/sorting:
/products?category=electronics&sort=price - Use versioning: Prefix URLs with versions (
/api/v1/products) to maintain backwards compatibility
Response Handling Best Practices
- Using
ResponseEntity<T>lets you customise HTTP responses, including status codes and headers. - Return proper status codes:
200 OKfor successful retrieval201 Createdfor successful creation204 No Contentfor successful deletion404 Not Foundfor missing resources400 Bad RequestFor invalid input
Example:
    @PutMapping("/{id}")
    public ResponseEntity<Project> updateProject(@PathVariable Long id , @RequestBody Project project){
        log.info("Received Request to UPDATE the Project with ID: {}", id);
        Project updatedProject = projectService.updateProject(id, project);
        return ResponseEntity.ok(updatedProject);
    }

    @DeleteMapping("/{id}")
    public ResponseEntity<String> deleteProject(@PathVariable Long id){
        log.info("Received request to delete Project with ID : {}", id);
        projectService.deleteProject(id);
        return ResponseEntity.ok("Project DELETED Successfully.");
    }
Structuring Your API Responses
Consider using a consistent response structure:
public class ApiResponse<T> {
    private boolean success;
    private String message;
    private T data;

    // Constructors, getters, setters
}
This ensures uniformity across all endpoints and simplifies client-side parsing.
Example Usage:
return ResponseEntity.ok(new ApiResponse<>(true, "Fetched successfully", project));Exception Handling
Use @RestControllerAdvice to handle exceptions globally:
@RestControllerAdvice
public class GlobalExceptionHandler {
// Handles Resource Not Found Exception
@ExceptionHandler(ResourceNotFoundException.class)
public ResponseEntity<Object> handleResourceNotFound(ResourceNotFoundException ex) {
return new ResponseEntity<>(ex.getMessage(), HttpStatus.NOT_FOUND);
}
// Handles Duplicate Resource Exceptin
@ExceptionHandler(DuplicateResourceException.class)
public ResponseEntity<Object> handleDuplicateResource(DuplicateResourceException ex) {
return new ResponseEntity<>(ex.getMessage(), HttpStatus.CONFLICT);
}
// Hanldes Validation Exception
@ExceptionHandler(ValidationException.class)
public ResponseEntity<Object> handleValidationException(ValidationException ex){
return new ResponseEntity<>(ex.getMessage(), HttpStatus.BAD_REQUEST);
}
//Handles Bad Request Exception
@ExceptionHandler(BadRequestException.class)
public ResponseEntity<Object> handleBadRequest(BadRequestException ex){
return new ResponseEntity<>(ex.getMessage(),HttpStatus.BAD_REQUEST);
}
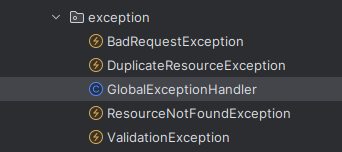
}It’s very helpful to make a separate folder for all the Exceptions which is needed to be handled. Custom exceptions such as BadRequestException, DuplicateResourceException, ResourceNotFoundException, and ValidationException They are placed in a dedicated package. This structured setup helps keep exception classes well-organised and easier to maintain. And improves:
- Readability: Clear separation of concerns
- Reusability: Shared exceptions across different modules
- Scalability: Easier to maintain as the application grows
- Avoids Duplication: The same exception class can be reused across controllers and services, reducing the need to write repetitive error-handling logic. You simply call the specific exception wherever required.
Somewhat like this:
This clean and consistent structure makes it easier to debug and manage error scenarios in a scalable way.
Service and Repository Layers
Service Layer:
The service layer connects controllers to repositories and holds the core business logic, handling key operations and workflows.
@Service
public class ProjectService {
    @Autowired
    private final ProjectRepository projectRepository;

    @Autowired
    private final UserRepository userRepository;

    public ProjectService(ProjectRepository projectRepository, UserRepository userRepository) {
        this.projectRepository = projectRepository;
        this.userRepository = userRepository;
    }

    public Project CreateProject(Project project) {
        User user = userRepository.findById(project.getCreatedBy().getUserId())
                .orElseThrow(() -> new ResourceNotFoundException("User not found with ID: " + project.getCreatedBy().getUserId()));
        project.setCreatedBy(user);

        return projectRepository.save(project);
    }

    public List<Project> getAllProjects() {
        return projectRepository.findAll();
    }

    public Optional<Project> getProjectById(Long id) {
        if (id == null) {
            throw new IllegalArgumentException("Project ID must not be null");
        }
        return projectRepository.findById(id);
    }

    public void deleteProject(Long id) {
        Project project = projectRepository.findById(id)
                .orElseThrow(() -> new ResourceNotFoundException("Project not found with ID: " + id));

        projectRepository.deleteById(id);
    }
}
Repository Layer:
The repository layer directly communicates with the database. In Spring Data JPA, you typically extend JpaRepository to inherit basic CRUD operations.
package com.rahulsharma.Project_Task_Management.repository;

import com.rahulsharma.Project_Task_Management.entity.Project;
import org.springframework.data.jpa.repository.JpaRepository;

public interface ProjectRepository extends JpaRepository<Project, Long> {
API Versioning
When you update your API, older clients may still rely on the previous version. Versioning your APIs helps maintain backwards compatibility, preventing disruptions for current users when updates are made. It allows multiple versions of the same API to exist side by side.
Common APIs Versioning Strategies
1. URI Versioning
- Example:
/api/v1/products - What it does: Puts the version directly in the URL path.
- Benefit: Easy to understand and test; version is clearly visible.
- In Spring Boot: Use different
@RequestMappingpaths for each version.
@RestController
@RequestMapping("/api/v1/products")
public class ProductV1Controller { ... }
2. Request Parameter Versioning
@GetMapping("/api/products")
public ResponseEntity<?> getProducts(@RequestParam("version") int version) {
    if (version == 1) return v1Service.getProducts();
    else return v2Service.getProducts();
}
3. Header Versioning
- Example:
X-API-VERSION: 1 - What it does: Sends the version info in a custom HTTP header.
- Benefit: Keeps URLs clean, flexible and doesn’t expose versioning in public URLs.
- In Spring Boot: Use
@RequestHeaderor create custom@RequestMappingconditions.
@GetMapping(value = "/api/products", headers = "X-API-VERSION=1")
public List<Product> getV1Products() { ... }
Conclusion
Spring Boot provides a powerful platform to build RESTful APIs quickly and efficiently. By following best practices around controllers, mappings, responses, exception handling, service-repository layering, and versioning, you can create APIs that are not only functional but also maintainable and intuitive.