


Introduction
Azure Databricks is a powerful analytics platform that brings together big data and machine learning. It was founded by the creators of Apache Spark and provides an environment that simplifies the complexities of big data processing. In this guide, we’ll walk through the steps in creating an Azure Databricks Workspace using the Azure Portal. Whether you’re new to Databricks or looking to set up a workspace for your team, this step-by-step tutorial will help you get started.
Prerequisites
Before we begin, make sure you have the following:
- An Azure subscription. If you don’t have one, you can create a free account.
- Sufficient permissions to create resources in your Azure subscription.
Steps to create Databricks workspace are given as under: –
1: Sign In Azure Portal
- Navigate to the Azure Portal.
- Sign in with your Azure account.
2: Search for Databricks
In the “Search the Marketplace” box, type “Databricks” and hit Enter.
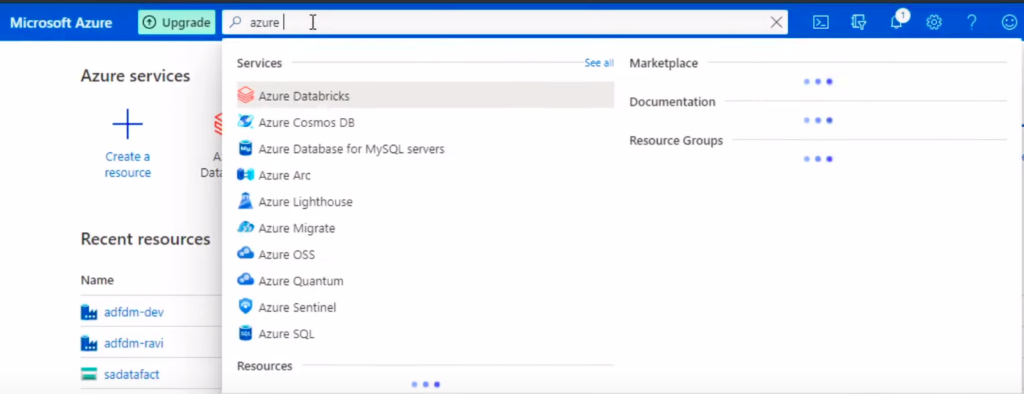
3: Select Azure Databricks
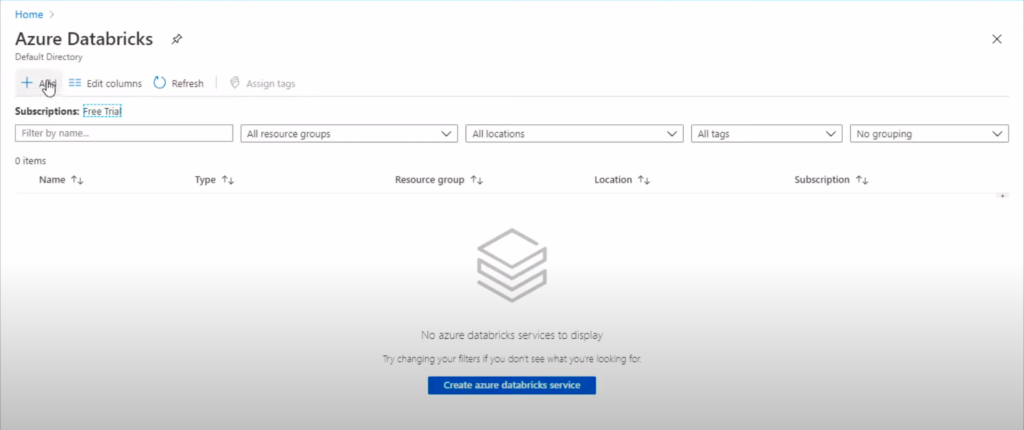
From the search results, select “Azure Databricks” and click on the “Create” button. Now, click on Add button to create azure databricks service.
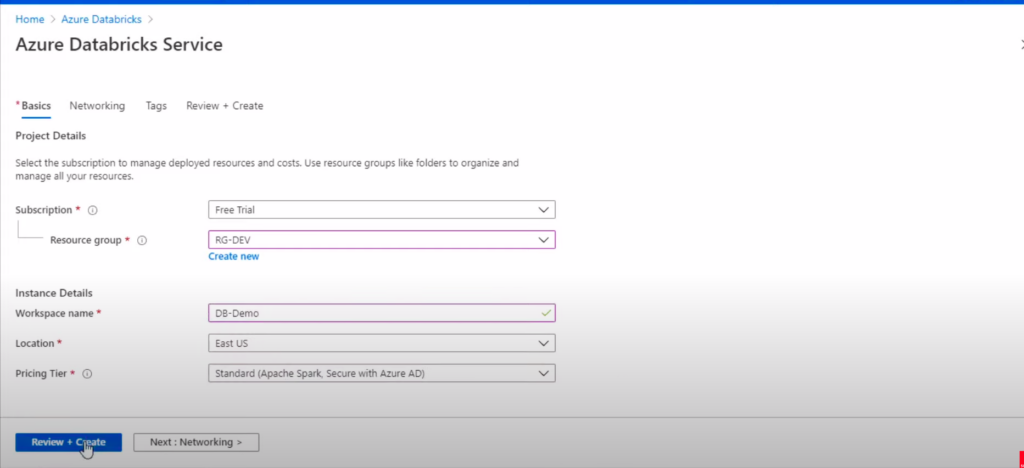
4: Configure Databricks Workspace
- Subscription: Choose your Azure subscription.
- Resource Group: Create a new one or select an existing group.
- Workspace Name: Provide a unique name for your Databricks workspace.
- Region: Select the region for deployment.
- Pricing Tier: Choose the desired tier (e.g., standard).
- Virtual Network: Choose an existing one or create a new virtual network.
5: Review and Create
- Review the configuration settings.
- Click on the “Create” button.
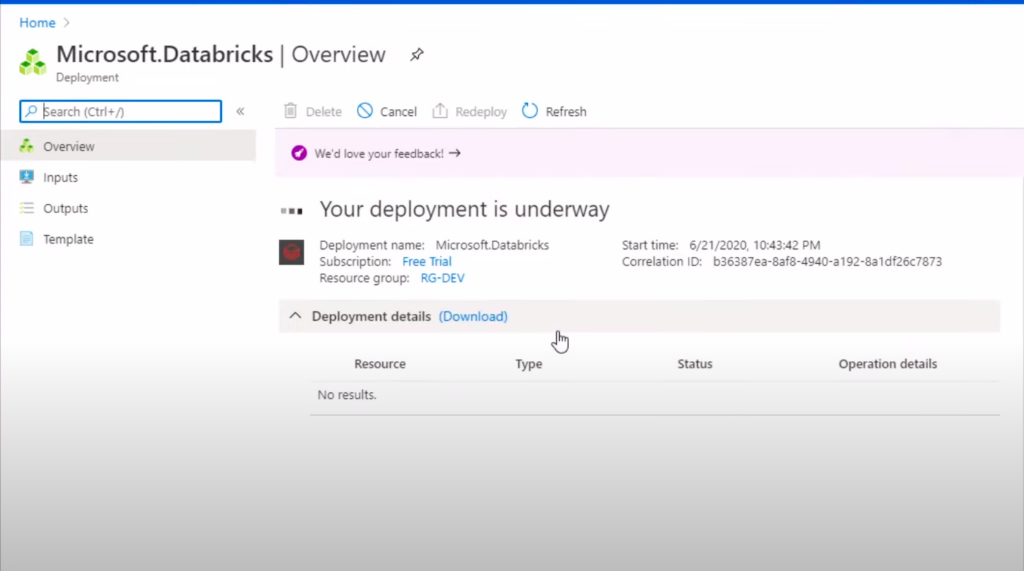
6: Deployment
The deployment process may take a few minutes. You can track the progress on the Azure Portal.
7: Access the Databricks Workspace
Once deployed, navigate to your Databricks Workspace in the Azure Portal.
8: Launch Databricks Workspace
Click on the “Launch Workspace” button. This will open the Databricks Workspace in a new tab.

Conclusion
In this guide, we’ve covered the steps to create an Azure Databricks Workspace using the Azure Portal. Creating a Databricks Workspace in Azure is a straightforward process that sets the stage for powerful analytics and collaboration. This is just the beginning of your journey with Databricks. Continue to explore its features, collaborate with your team, and unlock valuable insights from your data. Also, stay connected to more https://www.databricks.com/databricks-documentation