


Machine learning (ML) has become an integral part of modern applications, enabling intelligent decision-making based on data. Once you have trained a powerful ML model, the next step is to deploy it and make these predictions available to end users and other systems. Azure, Microsoft’s cloud computing platform, provides a robust set of tools and services to seamlessly deploy machine learning models. This blog post walks you through the step-by-step process of deploying a machine learning project on Azure.
In this piece, the focus will be on:
1.Enabling the Deploy ability of End-to-End Machine Learning Projects through Docker Containerization along with CI/CD pipeline using GitHub actions.
2. Implementing the Deployment of ML Project as Web Applications utilizing Azure App Services.
Project Approach
Data Ingestion
The initial step involves ingesting data by reading it in CSV format. Subsequently, we partition the dataset into training and testing sets, saving the segregated data as CSV files for further processing.
Data Transformation
This phase employs a sophisticated Column Transformer Pipeline to enhance the quality of the data. For numeric variables, we implement a two-step process. Initially, we apply Simple Imputer with a median strategy, followed by applying Standard Scaling to the numeric data. Concerning categorical variables, a sequence of transformations unfolds. Simple Imputer is first applied with the most frequent strategy, followed by ordinal encoding, and culminating in data scaling with Standard Scaler. The entire preprocessing workflow is then preserved and stored as a pickle file for future use.
Model Training
Upon completing the data transformation, the project proceeds to model training. We tested and identified the foundational model, CatBoost Regressor, as the optimal choice. Subsequently, we execute an intensive hyperparameter tuning phase for both the CatBoost and KNN models. Crafting the final ensemble model, we create a Voting Regressor to combine the strengths of the individual models.
Prediction Pipeline
The creation of a prediction pipeline follows, designed to convert given data into a structured data frame. This pipeline incorporates various functions to load the previously saved pickle files and efficiently predict the final results within a Python environment.
Flask App Creation:
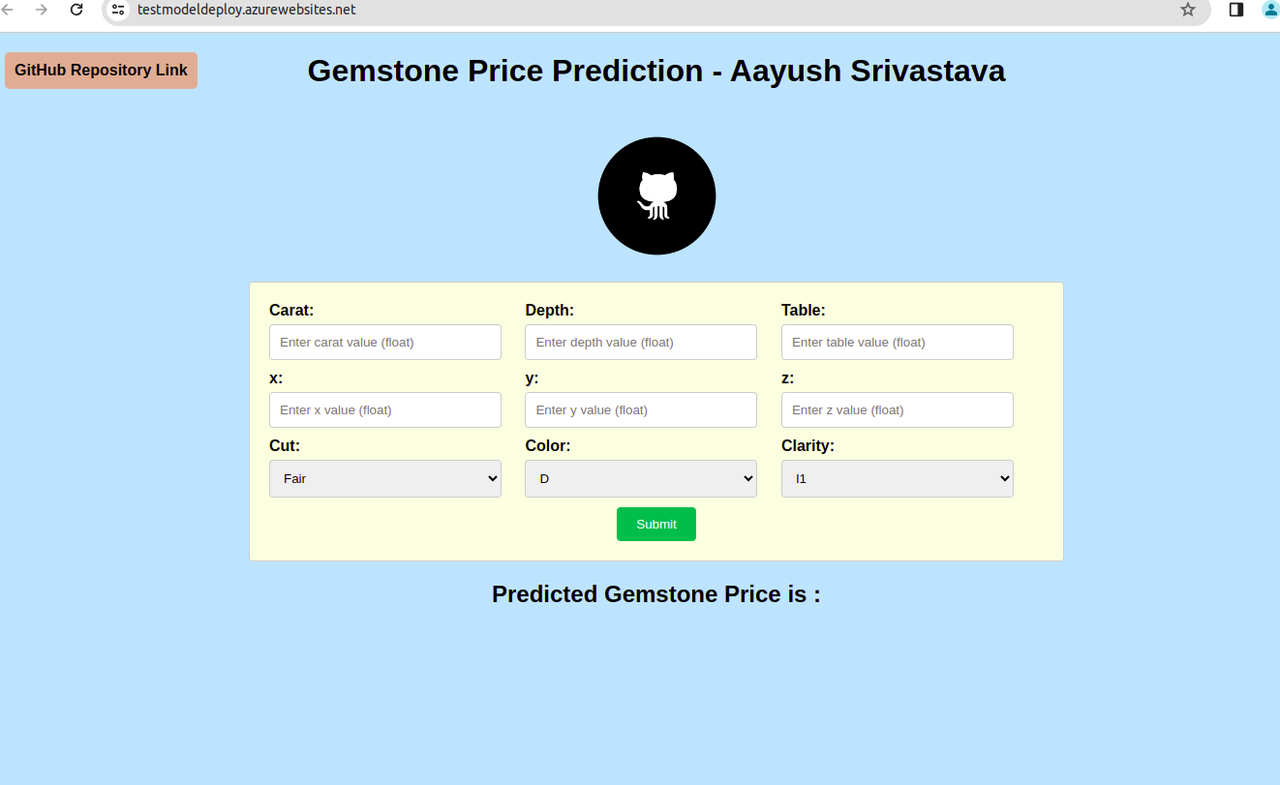
The final leg of the project involves the creation of a Flask application complete with a user interface. This user-friendly web application empowers users to predict gemstone prices seamlessly. Leveraging the prediction pipeline, the Flask app offers an interactive and intuitive experience for users to explore and obtain predictions within the application interface.
Project Structure:
├── application.py
├── artifacts
│   ├── data.csv
│   ├── model.pkl
│   ├── preprocessor.pkl
│   ├── test.csv
│   └── train.csv
├── Dockerfile
│   ├── data
│   └── gemstone.csv
├── README.md
├── requirements.txt
├── setup.py
├── src
│   ├── component
│   │   ├── data_ingestion.py
│   │   ├── data_transformation.py
│   │   ├── init.py
│   │   └── model_trainer.py
│   ├── exception.py
│   ├── init.py
│   ├── logger.py
│   ├── pipeline
│   │   ├── init.py
│   │   ├── predict_pipeline.py
│   │   └── train_pipeline.py
│   └── utils.py
├── static
│   ├── css
│   │   └── style.css
│   └── Image
│   └── logo.jpg
└── templates
└── index.html
Here we are focusing on Deployment rather than building the model.
1.Creating a Simple Web Page and a Flask App
Now, let’s shift our attention to the exciting part – deployment! Instead of building the model, we’ll focus on putting it into action. Our goal is to create a simple web page and a Flask application. To accomplish this, an HTML file is developed that prompts for input.
ML models are used to predict output and display the results on web pages. Make sure to have app.py in root folder.
2.Create Azure Container Registry
Creating an Azure Container Registry is crucial for deploying machine learning models within Docker containers. This registry serves as a dedicated repository for storing these containers, ensuring efficient management, version control, and secure distribution.
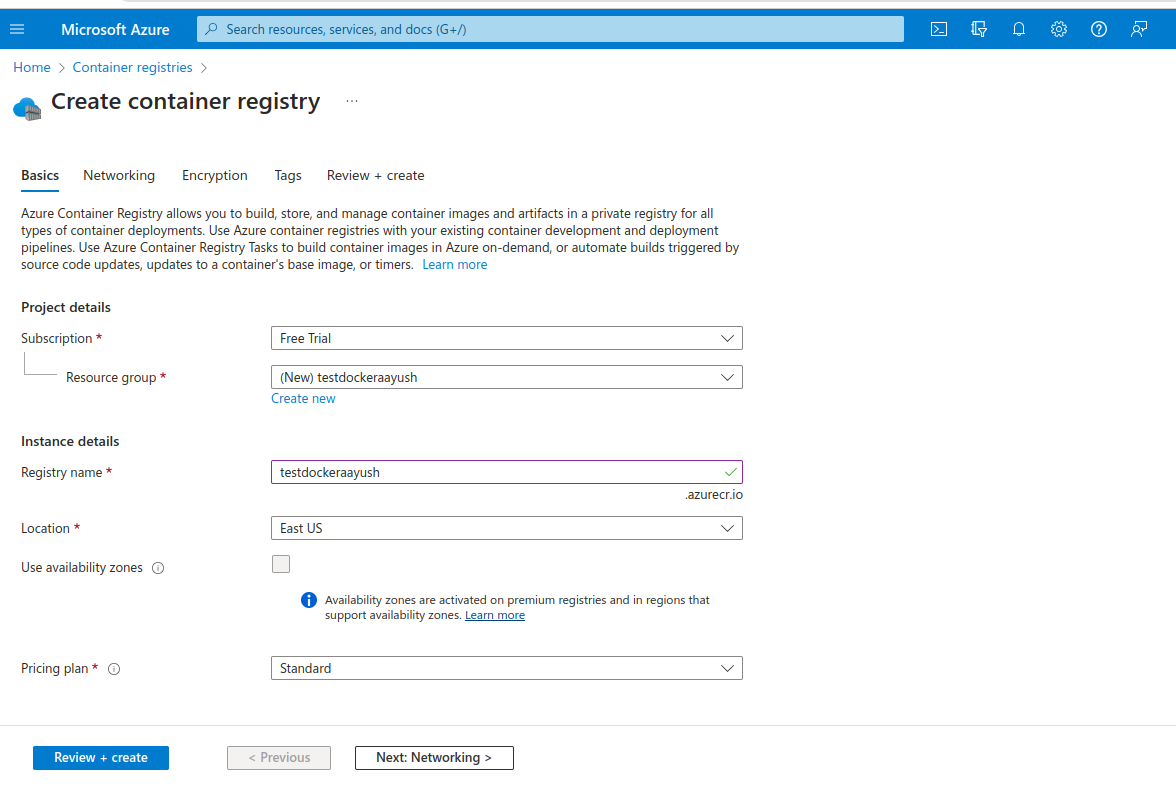
After Successfully Creating the registry, navigate to access keys section inside your registry and Enable administrator. From there you will be able to obtain the username and password make a copy of the same.
3.Build Docker Image
Now we will proceed with creating a docker image for our end-to-end ML project, here is a sample Docker file for reference:
#DockerFIle
FROM python:3.8-slim-buster
WORKDIR /app
COPY . /app

RUN apt update -y

RUN apt-get update && pip install -r requirements.txt
CMD ["python3", "application.py"]- Run this docker build command to build your docker image: $ docker build -t <container_registry_url>.azurecr.io/<image_name>:latest
- Login to Azure container registry: $docker login <container_registry_url>.azurecr.io , Use the password you have copied earlier to login.
- Push your docker image to Container registry: $ docker push <container_registry_url>.azurecr.io/<image_name>:latest
Make sure to test your Docker Container on Local Machine. Once Docker Container starts to run successfully on the local machine and is ready to host or deploy the container anywhere without any troubles.
4.Deploying End-to-end ML Project as Web Application
1.Create an Azure Webapp
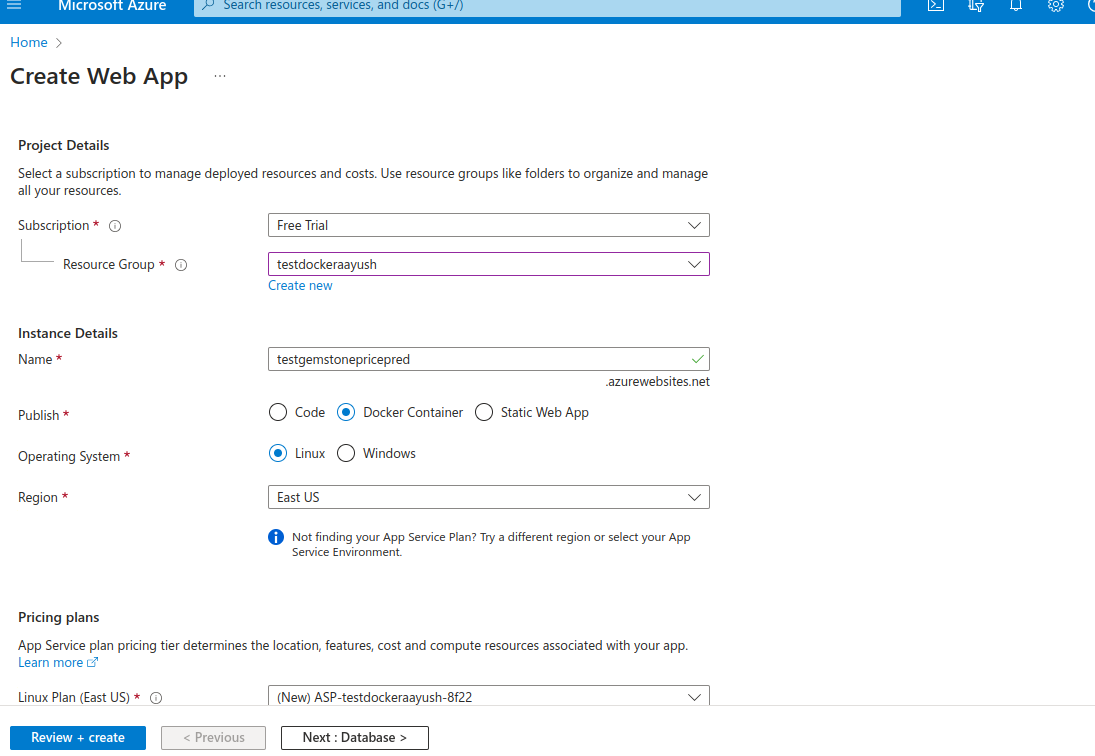
2.Select image source as container registry name that you created earlier and then the image name that you pushed to your registry.
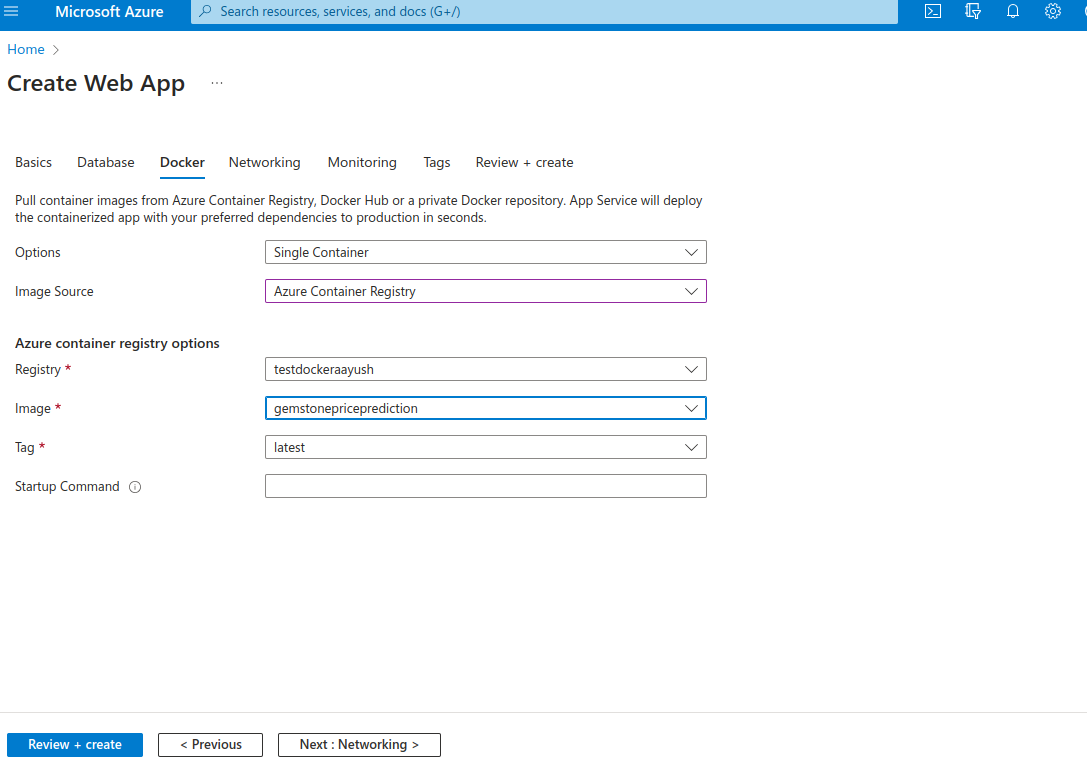
Finally press review and create and bravo your web app deployment is in progress seamlessly. It might take some time to for deployment. The Web app is now successfully created, and a link will be generated which will look something like: https://deploy_model.azurewebsites.net/
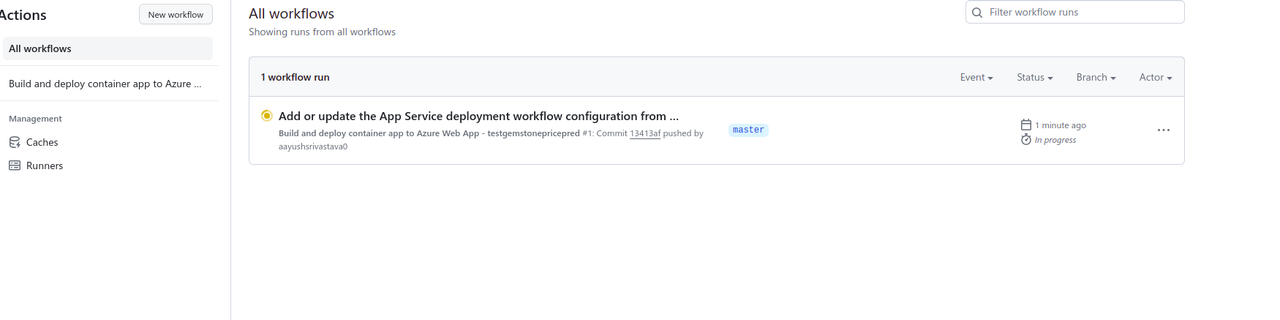
5.Setting up CI/CD pipeline for project using GitHub actions on Azure
Fist Navigate to “Deployment Center” inside your newly created azure web-app. Here select GitHub actions as source and authorize/sign-in to you GitHub. After authorization select your project repository and master branch. Finally enable continuous deployments setting and save this deployment setting.
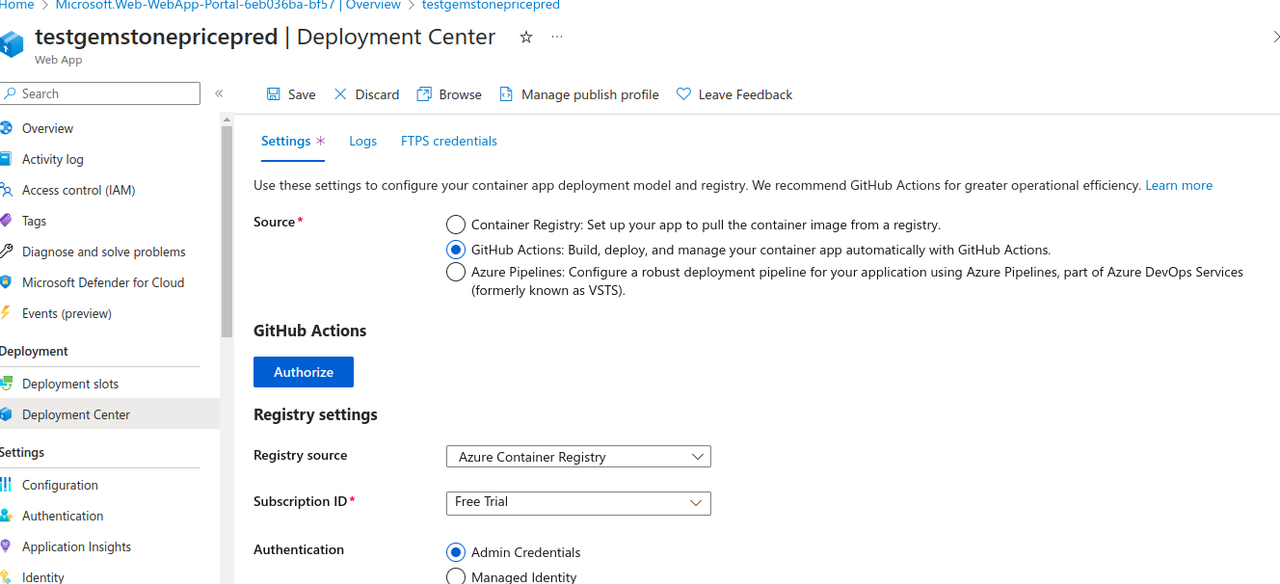
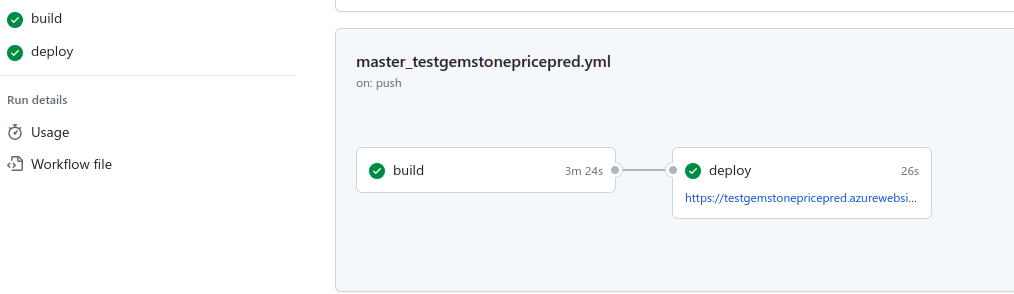
After It is Saved Successfully you will see that a .github/workflow yaml file will be automatically created inside your repository along with secrets and everything automatically setup and configured by Azure. Also GitHub actions will automatically be triggered. After the workflow is completed you will be provided with a link to your Deployed Webapp.
6.Finally let’s do some predictions!
Conclusion
In a triumphant conclusion, our Machine Learning Project is now seamlessly accessible as a Web Application, thanks to Docker and Azure. The integration of CI/CD through GitHub actions ensures an efficient and automated development cycle, reinforcing our commitment to modern development practices.