


Introduction
Google Kubernetes Engine (GKE) is a managed Kubernetes service by Google Cloud that simplifies deploying, managing, and scaling containerized applications. In this blog, we’ll cover:
- How to create a GKE cluster via the Console and CLI
- How to connect to your cluster
- How to deploy a sample application using
kubectl
Prerequisites
- A Google Cloud project with billing enabled
- IAM role:
Kubernetes Engine AdminorOwner - Cloud SDK installed for CLI-based steps
Part 1: Creating a GKE Cluster using Google Cloud Console
1: Open GCP Console
Navigate to console.cloud.google.com, then go to:
Kubernetes Engine > Clusters > Create

2: Configure Cluster
- Cluster name:
cluster-by-console - Location type: Regional or zonal (e.g.,
us-central1) - Machine type:
e2-medium - Number of nodes: e.g.,
3 - Use default network and subnetwork
- Leave other settings as default or customize as needed
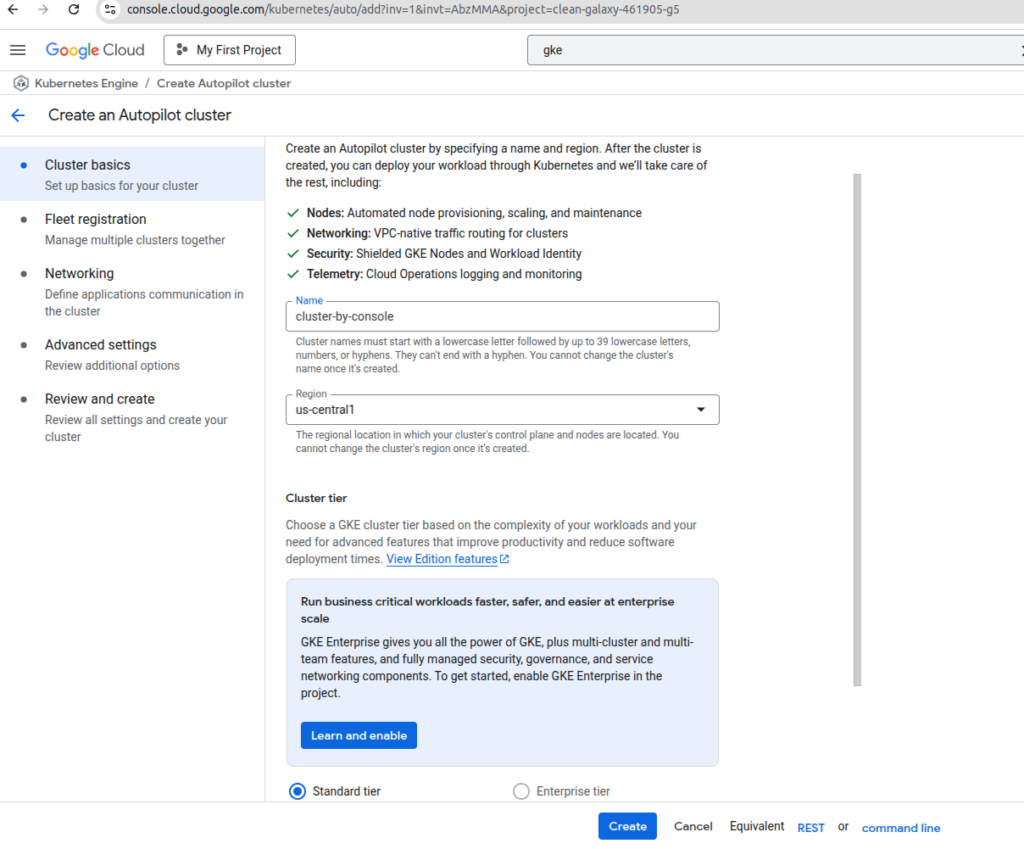
Click Create, and wait a few minutes for the cluster to be provisioned.
Part 2: Connecting to the GKE Cluster
After your cluster is ready, connect to it with:
gcloud container clusters get-credentials CLUSTER_NAME \
  --region us-central1 \
  --project YOUR_PROJECT_ID
Verify connection:
kubectl get all
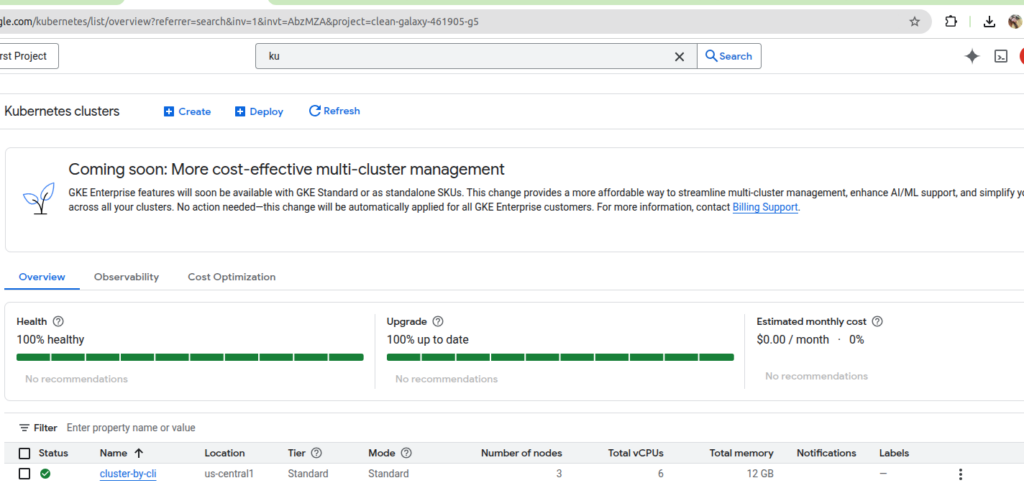
Part 3: Creating a GKE Cluster using gcloud CLI
1: Authenticate and Set Project
gcloud auth activate-service-account --key-file=KEY_FILE_NAME
gcloud config set project YOUR_PROJECT_ID
2: Create Cluster
gcloud container clusters create cluster-by-cli \
  --region us-central1 \
  --num-nodes 3 \
  --machine-type e2-medium \
  --disk-type=pd-standard \
  --disk-size=100 \
  --release-channel regular \
  --enable-autoupgrade \
  --enable-ip-alias \
  --network default \
  --subnetwork default \
  --scopes=https://www.googleapis.com/auth/cloud-platform \
  --logging=SYSTEM,WORKLOAD \
  --monitoring=SYSTEM \
  --service-account=YOUR_SERVICE_ACCOUNT \
  --project YOUR_PROJECT_ID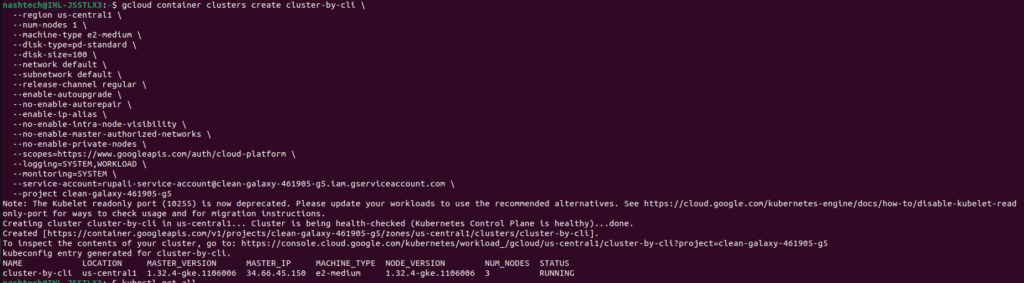
Replace YOUR_SERVICE_ACCOUNT and YOUR_PROJECT_ID accordingly.
Part 4: Deploying an Application to GKE
1: Create a Deployment YAML (e.g., Flask app or Nginx)
Deployment.yaml
apiVersion: apps/v1
kind: Deployment
metadata:
  name: flask-hello
spec:
  replicas: 1
  selector:
    matchLabels:
      app: flask-hello
  template:
    metadata:
      labels:
        app: flask-hello
    spec:
      containers:
      - name: flask-container
        image: <your-dockerhub-username>/flask-hello:latest
        ports:
        - containerPort: 8080
Replace with your actual Docker image.
2: Apply the Deployment
kubectl apply -f Deployment.yaml

3: Expose the Deployment as a Service
kubectl expose deployment flask-hello --type=ClusterIP --port=80 --target-port=80804: Access the App via Port Forwarding
kubectl get pods  # find pod name
kubectl port-forward pod/<pod-name> 8080:8080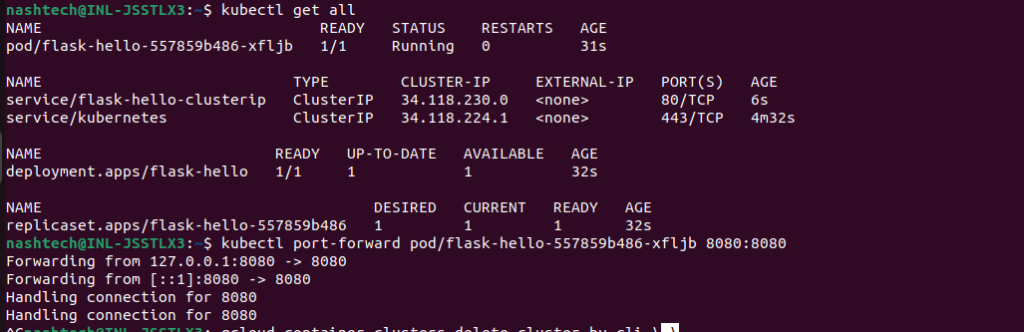
Then open your browser at http://localhost:8080
Part 5: Deleting the Cluster (when you’re done)
gcloud container clusters delete cluster-by-cli \
  --region us-central1 \
  --project YOUR_PROJECT_ID
Conclusion
In this tutorial, we explored how to:
- Create a GKE cluster using the Console and CLI
- Connect to it via
kubectl - Deploy and expose a sample application
GKE makes Kubernetes simpler by managing your control plane, scaling, and upgrades automatically. Whether you’re deploying from the Console or automating via CLI, GKE is a powerful tool for production-ready Kubernetes.