


Let me be upfront: if your API doesn’t have proper rate limiting, it’s not a matter of if something goes wrong, it’s a matter of when.
A while back, I experienced one of those moments in one of my projects where everything just started falling apart. One of our internal services went rogue, not intentionally, but due to a simple logic bug, it ended up calling a single endpoint in a tight loop. Within under a minute, the entire service became sluggish, the database connection pool had maxed out, and alerts started pouring in. That’s when it hit me, it wasn’t a security breach or a traffic spike from outside. It was our system misbehaving.
So I set out to fix this. In this post, I’ll share exactly how I implemented rate limiting and throttling in my Spring Boot APIs using Bucket4j and Redis, based on real-world lessons rather than just reading the docs.
The Problem: Too Many Requests, Too Little Defence
My APIs were being accessed in a range of ways — public clients, mobile users, and internal microservices. Some were well-behaved, others… not so much. And at that point, there were zero restrictions on how many requests someone could make.
Here’s what I personally ran into:
- A public client started sending over 200 requests per second.
- A developer accidentally hit “Send” repeatedly in Postman.
- A microservice began retrying calls too aggressively.
- A staging script made its way to production and overwhelmed it.
I was, quite literally, flooding my selves. That’s when I knew I needed a solid, flexible, and distributed rate-limiting mechanism.
What is Rate Limiting and Throttling?
Rate limiting is the process of controlling how many requests a client can make within a specific period. Think of it as your API saying, “You’ve made enough requests for now; come back in a minute.”
Throttling is what happens when a client hits that limit – the API says, “Too many requests”, and the request gets rejected with an appropriate response (usually HTTP 429).
Rate limiting protects backend systems from traffic spikes and abuse. It keeps services reliable, reduces downtime risk, and helps manage infrastructure costs.
Why I Chose Bucket4j?
I explored several options: Spring Cloud Gateway, Guava’s Rate Limiter, Resilience4j, and even writing our own filters.
But Bucket4j stood out. Here’s why:
- It uses the Token Bucket algorithm, which works really well for burst traffic
- The library is lightweight and doesn’t drag along heavy dependencies
- Redis support is built-in, so it’s perfect for multi-instance deployment
- It integrates smoothly into Spring Boot via filters, AOP, or straight service calls
Most importantly, Bucket4j supports shared rate limits across instances via Redis — a must for cloud-native setups.
Real Scenarios We Had to Handle
I didn’t want a one-size-fits-all solution. So, I mapped out our different consumers and designed rules accordingly:
- Public APIs: Free tier users were allowed 100 requests per minute, while paid tier users had up to 1000.
- Internal microservices: Allowed burst traffic but controlled average load over time.
- Mobile clients: Rate limited based on IP address to prevent abuse from shared networks.
How I started (Implementation Steps):
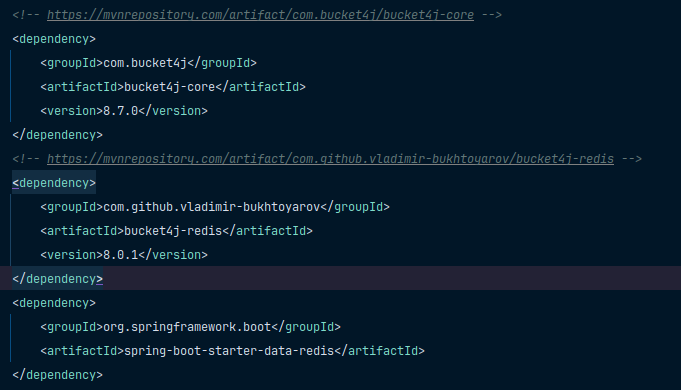
Step 1: Dependencies
In my pom.xml file:
Step 2: Redis Setup
In my application.yml file:

Redis lets me share rate limit state between app instances, essential for horizontal scaling.
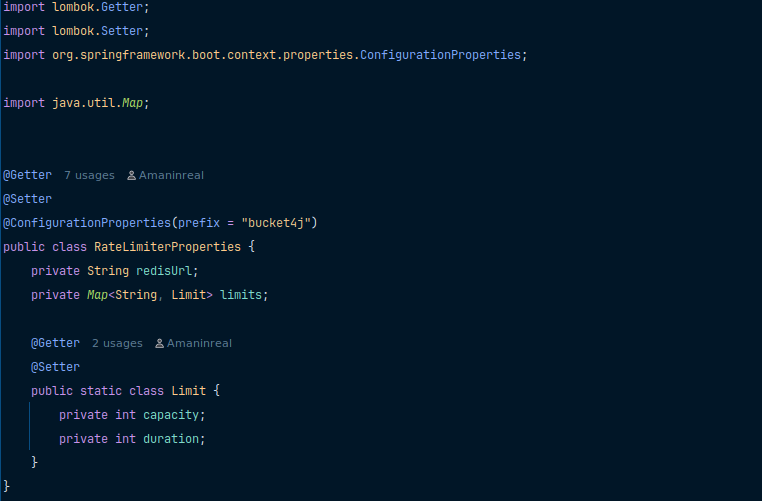
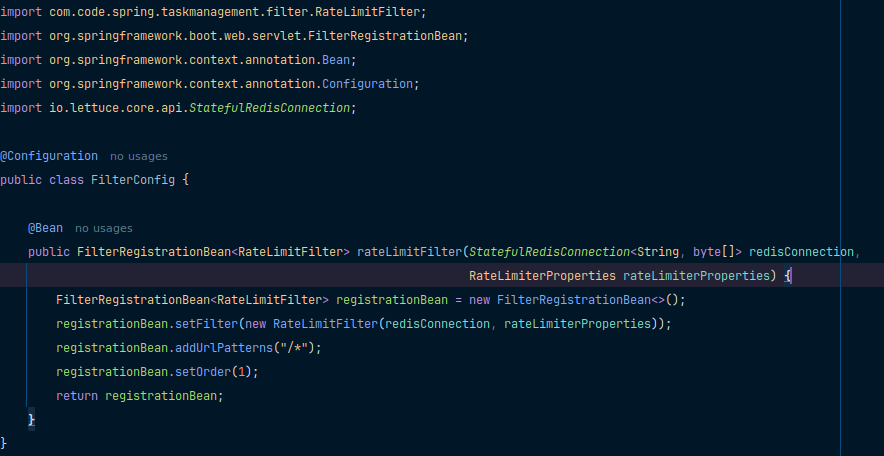
Step 3: Set up your Rate limiter Properties & Filter Config
Here’s this will be your Rate limiter properties:
And after that, add your filter config:
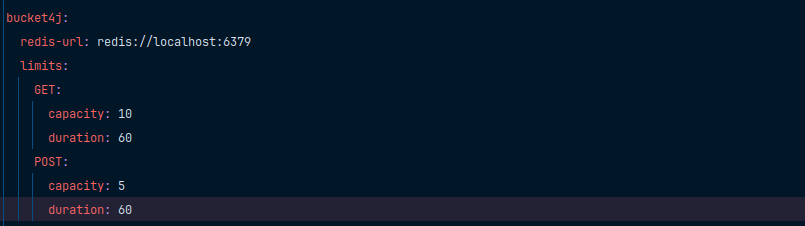
Also, after adding your configurations, set up your request limit as per your application requirements inside the application.yml file:
Step 4: Add a Filter or Aspect of Limiting
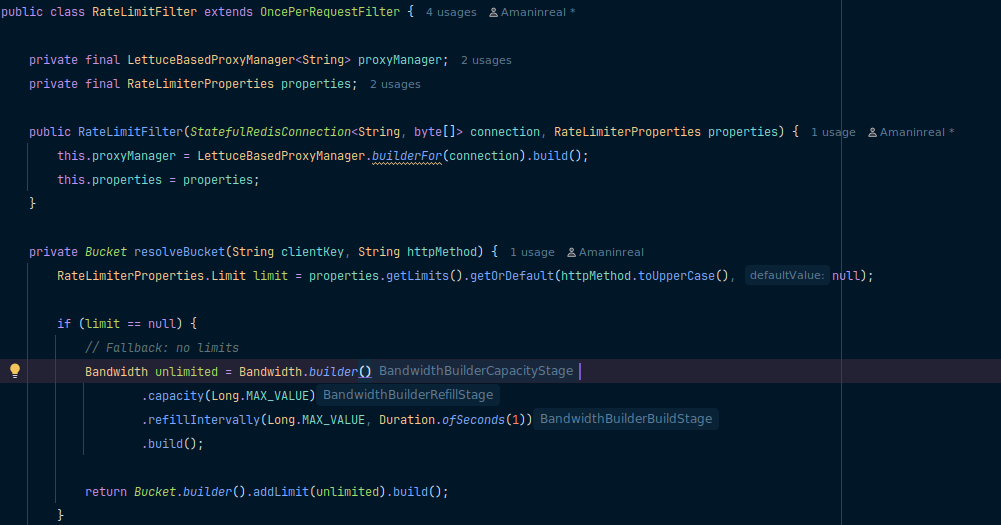
This filter intercepts every incoming HTTP request and enforces rate limiting based on the client’s IP and HTTP method. If the allowed request quota is exceeded, it responds with a 429 status code and blocks further access temporarily.
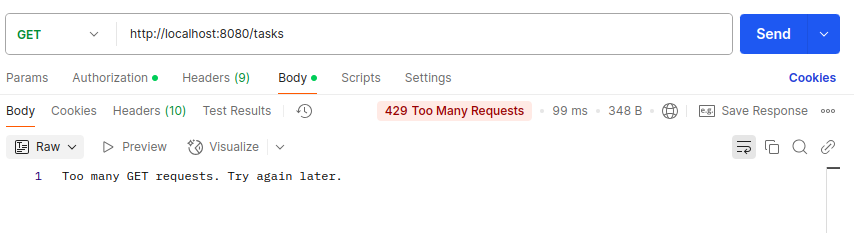
Real Test Scenarios for Rate Limiter
When you hit your endpoint with Postman rapidly, suppose 10 requests per minute (According to previous application.yml file configuration), the first 10 requests within the minute will succeed. From 11 onwards, you will receive 429 Too Many Requests.
Redis for Distributed Setup
Without Redis, rate limits would be per instance, so if you run 3 instances, each has its own limit. Redis lets you share the token bucket across all instances, ensuring global enforcement.
This was crucial for us in production; without Redis, we would have users bypass limits by hitting different load-balanced IPs.
Final Thoughts
Rate limiting is not just for public APIs; it’s a critical layer of protection in any system dealing with concurrency, scale, or user-generated traffic. Using Bucket4j with Redis in Spring Boot helped us build a resilient and fair API, ensuring that one bad actor doesn’t ruin it for everyone.