


With today’s fast-paced technology world, data management is paramount. Regardless of whether you need to manage large documents, videos, images or any other test artefacts, a secure and robust storage system is crucial. Azure Blob Storage Integration for Test Artifacts Overview—Azure Blob Storage is part of the Microsoft Azure cloud platform, which is an optimal destination for such data. In this guide, we’ll get you up and running with Azure Blob Storage, including how to create a storage account and containers, and how to upload data. Plus, we’ll tell you how to streamline your workflow while making it faster when you choose Azure Blob Storage for your test artifacts. Azure Blob Storage Integration of Test Artifacts SDK Introduction – Learn the principles and concepts about Azure Blob Storage and how you can use it to manage and store test artifacts in a more effective manner.
What is Azure Blob Storage?
Azure Blob Storage is a flexible and scalable storage mechanism for handling massive amounts of unstructured data. It is versatile enough to handle everything from photos and videos for web apps to data archives, logs, and backups for large-scale enterprise applications.
So, we can get more specific with examples to go over the main functions:
1. Scalability
It can process large volumes of data, and it can both scale up and down.
Example:
Say you’re building a media streaming application, and people can upload and view videos. To begin with, you have a few thousand users, but as your app reaches scale, you have millions of users uploading their terabytes of video data every day. Azure Blob Storage will automatically scale itself to accommodate this greater load, at no cost to you, by you needing to maintain or even perform manual updates to the underlying infrastructure.
How It Works:
With Azure, there are no strict limits on storage size. Whether you’re storing 10GB or 1PB (petabyte) of data, Azure Blob Storage automatically manages the scaling. This ability to scale ensures your storage can handle the demand, regardless of how much data you collect.
2. Durability
It ensures high data durability with built-in redundancy and geo-replication options.
Example:
Suppose you’re an IT company storing critical backups of client databases. Azure Blob Storage offers redundancy options like Locally Redundant Storage (LRS), Geo-Redundant Storage (GRS), and Zone-Redundant Storage (ZRS). This redundancy makes sure that even if an entire data center goes offline due to an outage, your backups remain available from other data centers.
How It Works:
Azure automatically replicates your data across multiple storage nodes. It offers up to 99.999999999% (11 nines) durability for objects over a year. This high level of data protection keeps your data safe from accidental loss or damage.
3. Security
It provides various security features like encryption at rest and in transit, and access control mechanisms.
Example:
A healthcare provider stores sensitive patient data in Azure Blob Storage. They must protect this data both at rest and in transit to meet strict privacy regulations like HIPAA. Azure offers encryption at rest and HTTPS encryption in transit, which keeps the data secure throughout the process.
How It Works:
Azure Blob Storage uses 256-bit AES encryption for data at rest. You can set up Secure Socket Layer (SSL) or Transport Layer Security (TLS) for data in transit. Additionally, you can create access policies using shared access signatures (SAS) or Azure Active Directory (AAD) for detailed control over who can read or change data.
4. Accessibility
Data can be accessed through HTTP/HTTPS, making it ideal for applications, websites, and services.
Example:
Imagine an e-commerce platform using Azure Blob Storage to hold product images. These images need to be available to customers worldwide. Azure Blob Storage allows the e-commerce app to serve images via HTTP/HTTPS, ensuring fast, global access for users through Content Delivery Network (CDN) integration.
How It Works:
You can expose Blob Storage content directly to the public or to specific applications by setting access permissions. For instance, you can store images, PDFs, or other documents in Blob containers and link them directly in your web application using Azure Blob Storage’s URLs. You can also access these resources programmatically via Azure SDKs for various languages like Python, Java, and C#.
Creating an Azure Blob Storage Account
To use Azure Blob Storage, you need to first set up a storage account. Here’s a clear guide to help you get started:
- Sign in to the Azure Portal:
- Go to the Azure Portal and log in with your Microsoft account if you already have one.
- Create a New Storage Account:
- Click on “Create a resource”.
- Choose “Storage” and then “Storage account”.
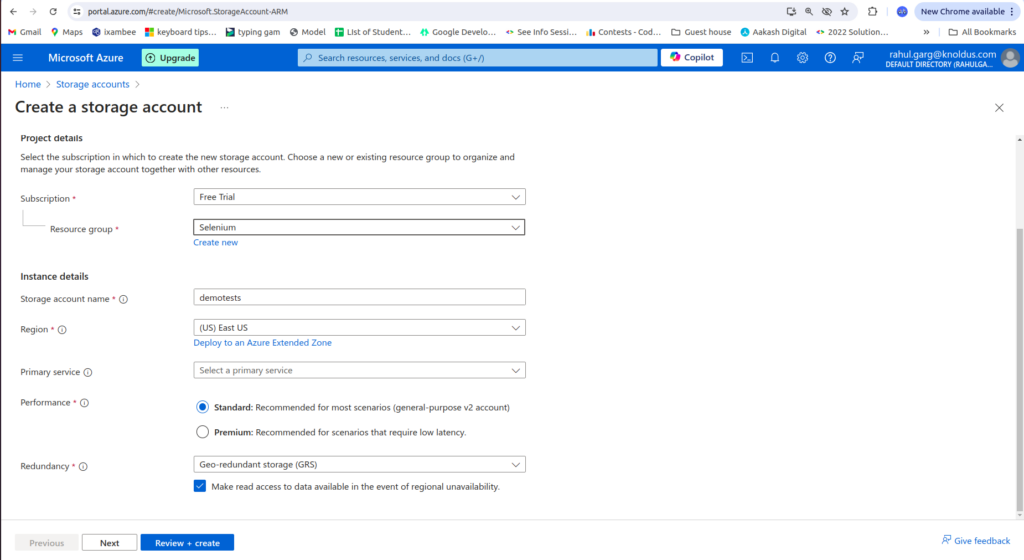
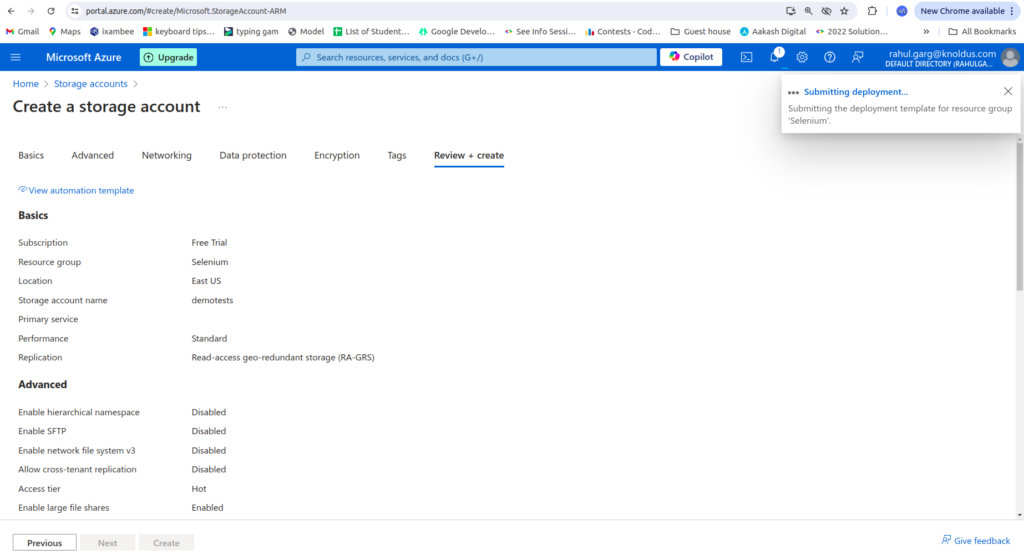
- Configure Your Storage Account:
- Subscription: Pick the Azure subscription you want to use.
- Resource Group: Choose an existing resource group or create a new one to organize your resources.
- Storage Account Name: Give your storage account a unique name that stands out across the Azure platform.
- Region: Select the location for your data storage. Picking a spot close to your users will improve performance.
- Performance: Choose between Standard and Premium performance options. The standard usually meets most needs.
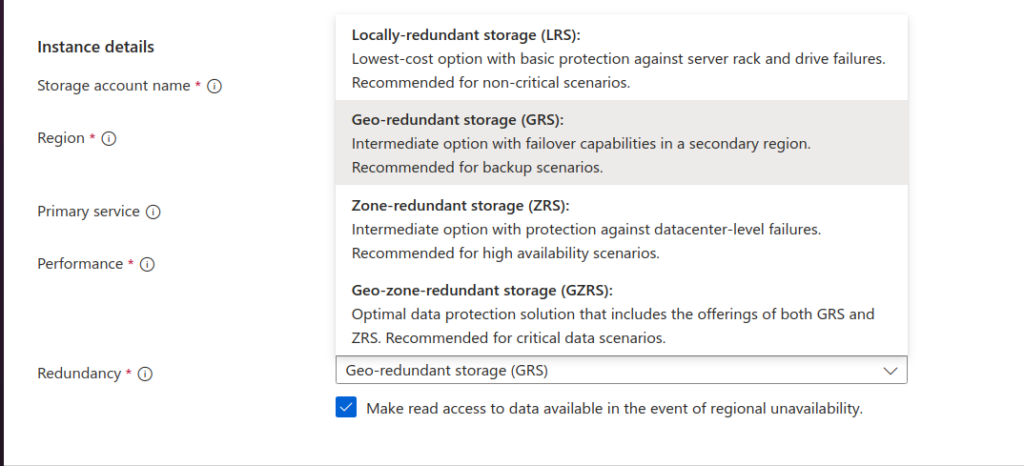
- Replication: Select how your data will be copied. Your options include:
- LRS (Locally Redundant Storage): Keeps copies of your data in one data center.
- GRS (Geo-Redundant Storage): Copies your data to a second region for more durability.
- RA-GRS (Read-Access Geo-Redundant Storage): Allows read access to the second region.
- ZRS (Zone-Redundant Storage): Stores data across multiple availability zones in the same region.
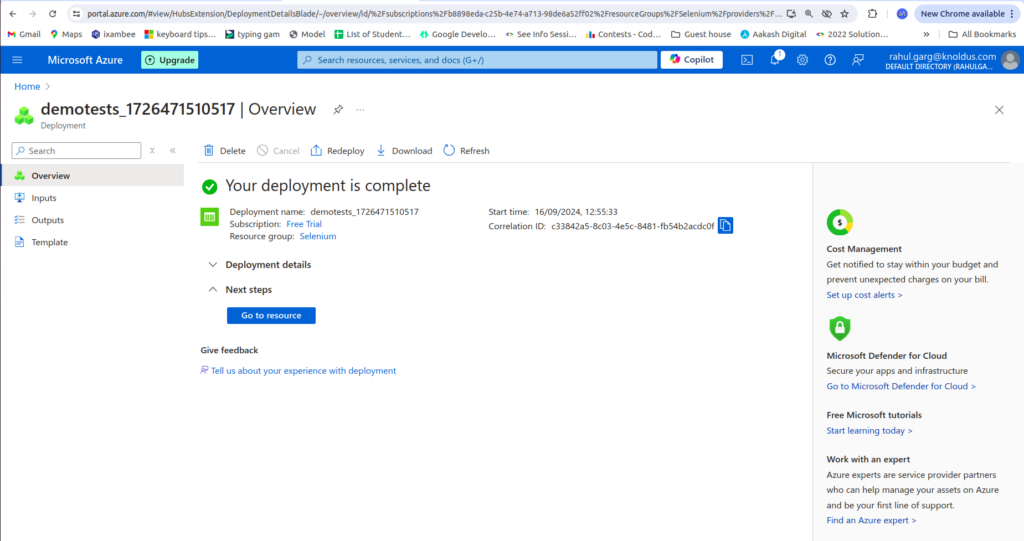
- Click “Review + create,” check your settings, and click “Create.”
Creating Containers in Azure Blob Storage
Containers help you organise your blobs (files) within your storage account, like folders on your computer. Here’s how to create one:
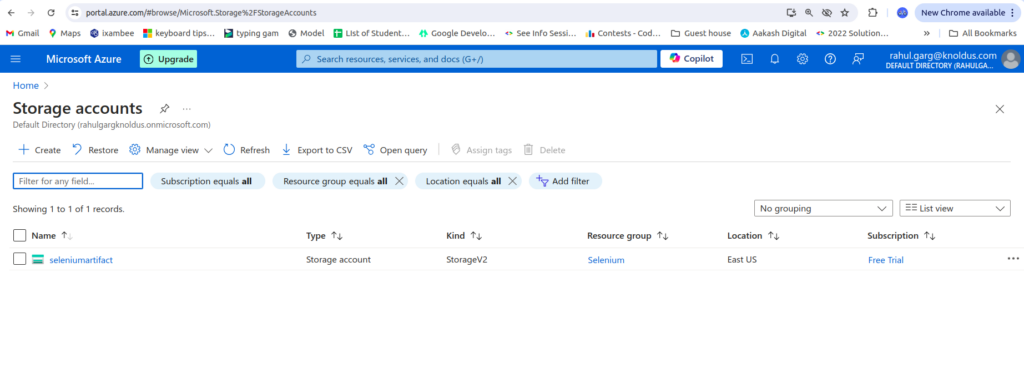
- Open Your Storage Account:
- In the Azure Portal, go to “Storage accounts” and select your account.
- Go to Blob Service:
- In the storage account’s menu, click on “Containers” under “Blob service”.
- Create a New Container:
- Click the “+ Container” button.
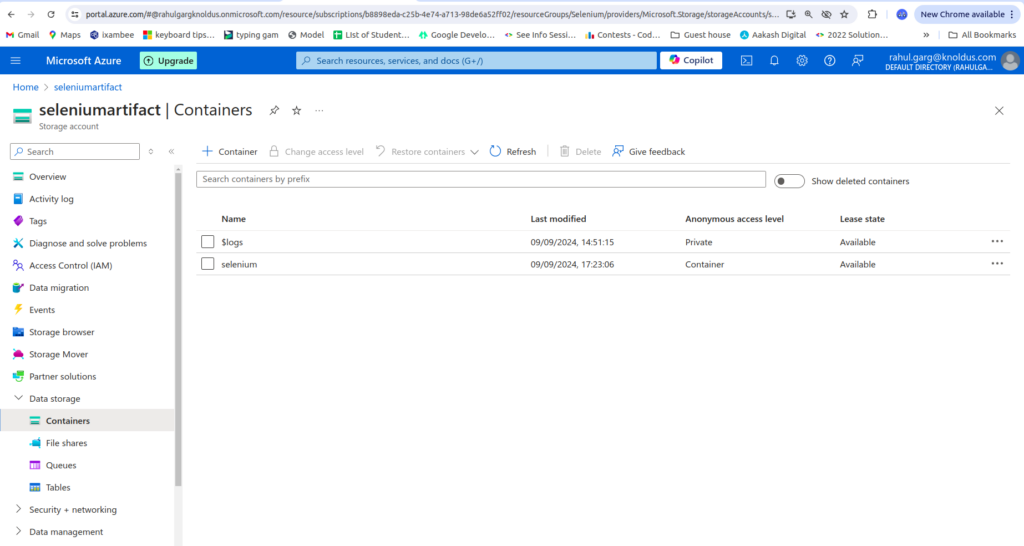
- Name: Choose a name for your container. Container names must be lowercase and can contain numbers and hyphens.
- Public Access Level: Decide who can access the container:
- Private: Only authorized users can access it.
- Blob: Public access to the blobs, but not to the container itself.
- Container: Public access to both the container and the blobs. Click “Create.”
- Click “Create”.
Uploading Data to Azure Blob Storage
With your storage account and container set up, you’re ready to upload your data.
1. Using the Azure Portal
- Navigate to Your Container:
- Go to your storage account, select “Containers”, and pick the container where you want to upload files.
- Upload Files:
- Click “Upload”.
- Click “Browse for files”, then select the files from your computer, and click “Upload”.
2. Using Azure CLI
- Install Azure CLI:
- Download and install Azure CLI.
- Upload Files:
- Use this command to upload a file
az storage blob upload-batch -d <container-name> -s $(Build.ArtifactStagingDirectory) –account-name <storage-account-name> –account-key <storage-account-key>
Why Use Azure Blob Storage for Test Artifacts?
- Centralized Storage: Keeps all your test artifacts in one place for easy management.
- Scalable: Can grow with your needs without worrying about running out of space.
- Cost-Effective: You’re charged solely based on the amount of storage you actually consume.
- Secure: Benefits from Azure’s strong security features.
- Accessible: Access your test artifacts from anywhere, which is great for remote teams.
References
https://learn.microsoft.com/en-us/azure/storage/blobs
Conclusion
Azure Blob Storage is a flexible tool for storing and managing large amounts of unstructured data. By setting up a storage account, creating containers, and uploading your files, you can efficiently manage your test artifacts and other data. This setup can simplify your development process, improve collaboration, and ensure your data remains secure and accessible.
For more information and updates, check the official Azure Blob Storage documentation. With Azure Blob Storage, you can streamline your data management, leading to better development and testing practices.