


Introduction to IPAM
IPAM was created to provide customers with a user-friendly and efficient solution for managing their IP address space within Azure. With IPAM, you gain end-to-end capabilities for planning, deploying, managing, and monitoring your IP address space, all through a seamless and intuitive user experience. By leveraging IPAM, you can easily discover and oversee IP address utilization across your Azure tenant, utilizing a centralized user interface. In this blog we will see IPAM Reservation and VNet/Subnet Integration with Terraform

Prerequisites
- Make sure you have deployed IPAM successfully
- Create required space inside the IPAM UI
- Create required block on IPAM UI
- Create a service principle on azure portal and use it to run terraform
Terraform Configuration
Before getting started if you want to download the code repo and use it directly you can clone it from here https://github.com/knoldus/azure_ipam_terraform_module/tree/main
Lets create one directory as ipam or provide any name you want . Inside this directory create providers.tf and paste following snippet there . We need two providers here i.e. azurerm and azureipam
terraform {
  required_providers {
    azurerm = {
      source  = "hashicorp/azurerm"
      version = "~>2.0"
    }
    azureipam = {
      version = "0.1.1"
      source  = "xtratuscloud/azureipam"
    }
  }
}

provider "azurerm" {
  features {}
  tenant_id       = var.azure_tenant_id
  subscription_id = var.azure_subscription_id
  client_id       = var.azure_client_id
  client_secret   = var.azure_client_secret
}

# Configure the Azure IPAM provider
provider "azureipam" {
  api_url = local.ipam_url
  token   = data.external.get_access_token.result.accessToken
}
Now create resources.tf file inside the same directory ipam and paste the following code snippet . The code includes configurations for IPAM URL, Azure AD Application ID, IP address reservations, and the creation of a virtual network with dynamically generated subnets. By combining Terraform and IPAM, organizations can automate the provisioning and management of IP addresses in Azure, ensuring efficient utilization and streamlined network deployment.
locals {
  ipam_url   = var.ipam_url
  ipam_apiId = var.ipam_apiId #ApplicationId of the Engine Azure AD Application, see also the [IPAM deployment documentation](https://github.com/Azure/ipam/tree/main/docs/deployment)
}

## Get an access token for ipam engine application
data "external" "get_access_token" {
  program = ["az", "account", "get-access-token", "--resource", "api://${local.ipam_apiId}"]
}

# Create an ipam reservation
resource "azureipam_reservation" "multiclient-vnet" {
  space = var.space
  block = var.block
  size  = var.size
  description = var.description
}


module "subnet_addrs" {
  source = "hashicorp/subnets/cidr"

  base_cidr_block = azureipam_reservation.multiclient-vnet.cidr
  networks = [
    {
      name     = "iac-subnet-a"
      new_bits = 8
    },
    {
      name     = "iac-subnet-b"
      new_bits = 8
    },
  ]
}

# Deploy the azurerm vnet
resource "azurerm_resource_group" "rg" {
  name     = var.rg_name
  location = var.rg_location
}

resource "azurerm_virtual_network" "vnet" {
  name                = var.vnet_name
  location            = azurerm_resource_group.rg.location
  resource_group_name = azurerm_resource_group.rg.name

  address_space = [azureipam_reservation.multiclient-vnet.cidr]
  tags          = azureipam_reservation.multiclient-vnet.tags ##add the auto-generated `X-IPAM-RES-ID` tag to the vnet.

  dynamic "subnet" {
    for_each = module.subnet_addrs.networks
    content {
      name           = subnet.value["name"]
      address_prefix = subnet.value["cidr_block"]
    }
  }
}
Now we will create variables.tf file . After creating this file paste the following snippet in that file . we will be using these variables in our resources block
variable "azure_client_id" {
  description = "Service Principal Client id"
}
variable "azure_client_secret" {
  description = "Service Principal Client Secrets"
}
variable "azure_tenant_id" {
  description = "Service Principal tenant id "
}

variable "azure_subscription_id" {
  description = "Service Principal subsription id"
}

variable "ipam_url" {
  description = "URL of IPAM instance or web service"
}

variable "ipam_apiId" {
  description = "api ID of IPAM instance"
}

variable "space" {
  description = "name of the existing space in the IPAM application."
}

variable "block" {
  description = "name of the existing block, related to the specified space, in which the reservation is to be made."
}

variable "size" {
  description = "subnet mask bits, which defines the size of the vnet to reserve"
}

variable "description" {
  description = "description text that describe the reservation,"
}

variable "vnet_name" {
  description = "Name of the VNet which will be created"
}

variable "rg_name" {
  description = "Name of the Resource Group"
}

variable "rg_location" {
  description = "Location of the Resource Group"
}
we will create outputs.tf file to get the outputs after terraform apply run successfully
output "ipam_reservation" {
  value = azureipam_reservation.multiclient-vnet
}

output "vnet" {
  value = azurerm_virtual_network.vnet
}

Now we will create terraform.tfvars file and we need to pass the values here which we need to run terraform files
 azure_client_id = ""
azure_client_secret = ""
azure_tenant_id = ""
azure_subscription_id = ""
ipam_url = ""
ipam_apiId = ""
space = ""
block = ""
description = ""
size = 16
vnet_name = ""
rg_name = ""
rg_location = ""
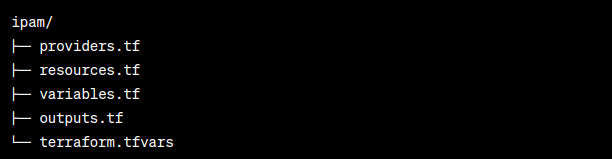
Now our file is ready it will look something like this
Now run terraform commands to apply this . Run following commands in the following order
- terraform init
- terraform fmt
- terraform validate
- terraform plan
- terraform apply –auto-approve
- if you want to destroy your infrastructure after deployment, you can simply run terraform destroy
Thats all for this blog. We will be publishing more such blogs here . https://blog.nashtechglobal.com/