


K6 is an open-source, developer-centric tool designed for performance testing. It allows you to create and run load tests, providing valuable insights into how your applications perform under various conditions.
Testers commonly use recordings to avoid writing complex tests from scratch. For example, they use recordings for testing advanced scenarios on websites or mobile applications, such as end-to-end (E2E) tests involving dozens or hundreds of requests.
K6 provides two options that can directly convert a recording into k6 script:
- Browser recorder generates a k6 script from a browser session.
- HAR converter generates a k6 script from the requests included in a HAR file.
In this blog post, we’ll explore those recording options in K6.
Be sure to record realistically
Consider the following DOs and DON’Ts if you use a browser to simulate a user session and generate its recording.
It’s a good idea to:
- Browse as a user would.
- Take natural pauses that users would take to consume page content.
- Focus on the most common use cases, rather than all the possible use cases.
- Take note of pages where forms or logins occur. You will need to edit the script to handle correlation.
You probably do not want to:
- Visit every page in one journey.
- Click on every available option.
- Navigate as quickly as possible.
- Navigate out of your actual site or application.
Using the browser recorder
The browser recorder lets you generate a k6 script based on a browser session. It’s available as an extension for Chrome and Firefox.
Install the Firefox/ Chrome extension.
Open Firefox.
Click on the Extension icon => Manage Extensions.

Search and install the extension name as Grafana k6 Browser Recorder.
We will see the extension as below on the browser.

Register your account on K6 cloud
We can create a free account for K6 Cloud. The account includes:
- The (actually useful) free forever plan
- Grafana, of course
- 10k metrics
- 50GB logs
- 50GB traces
- 50GB profiles
- 100k Synthetics Test Executions
- 500VUh k6 testing
- 50k Frontend sessions
- 14-day retention
- 3 active users
- 2,232 Application Observability host hours
Create a user account by clicking on that link: https://grafana.com/auth/sign-up/create-user?pg=hp&plcmt=cloud-promo&cta=create-free-account
Record
Open the extension by clicking on the k6 logo. It will prompt you to log in with K6 Cloud.

After logging in with K6 Cloud account, we will see the following interface on Firefox or Chrome:
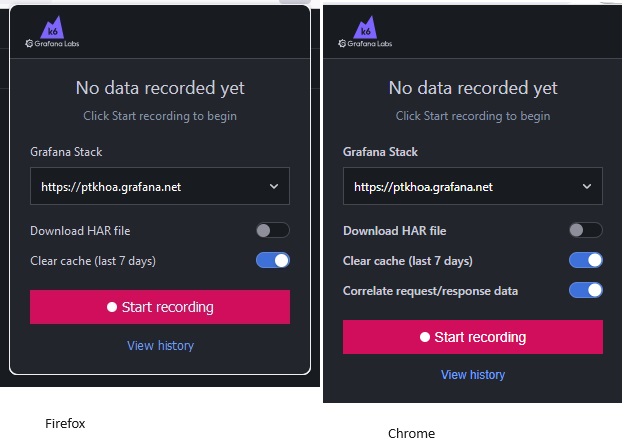
Click to Start recording.
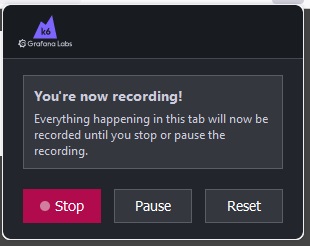
Follow the steps as outlined in the scenario test.
Click on ‘Stop’ to end the recording in the extension.
It will redirect you to the K6 Cloud page.
Run the recorded script
After clicking ‘Stop’ for recording, it will display as follows:
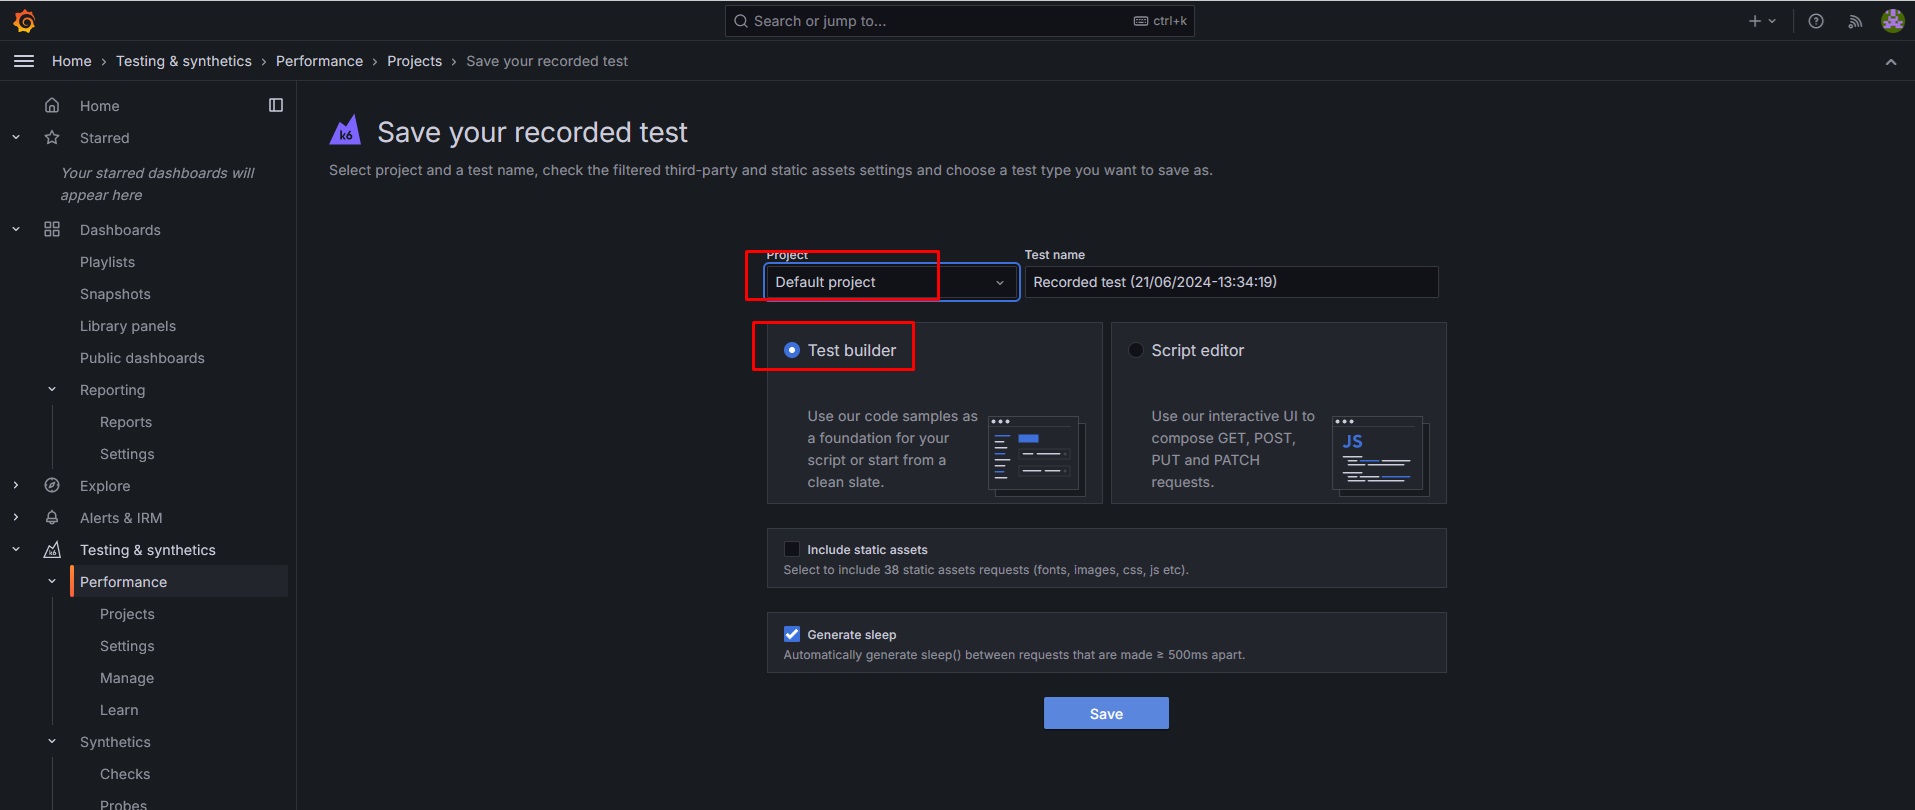
We can choose the Default project and Test builder.
Click to Save.
It will show as below:
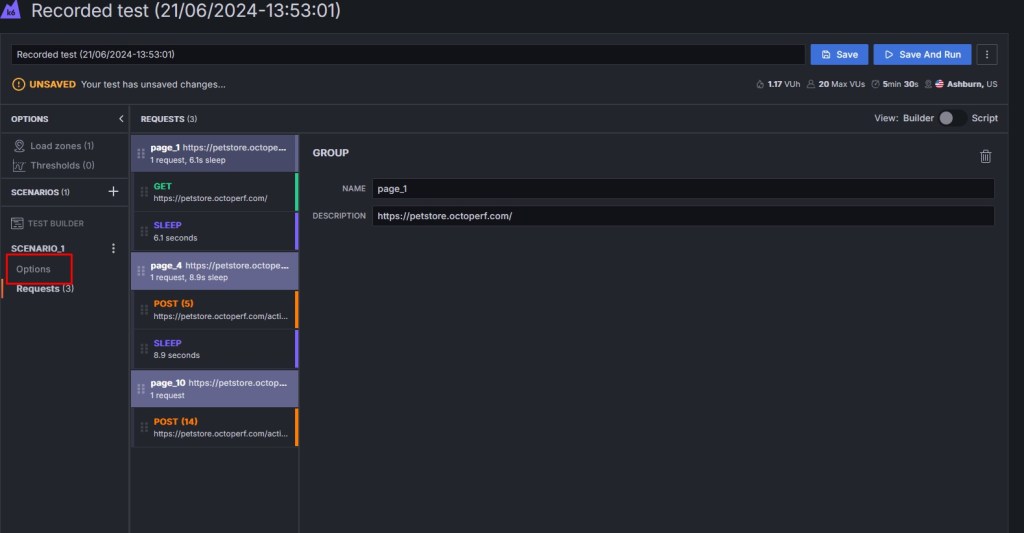
Click to Save and Run.
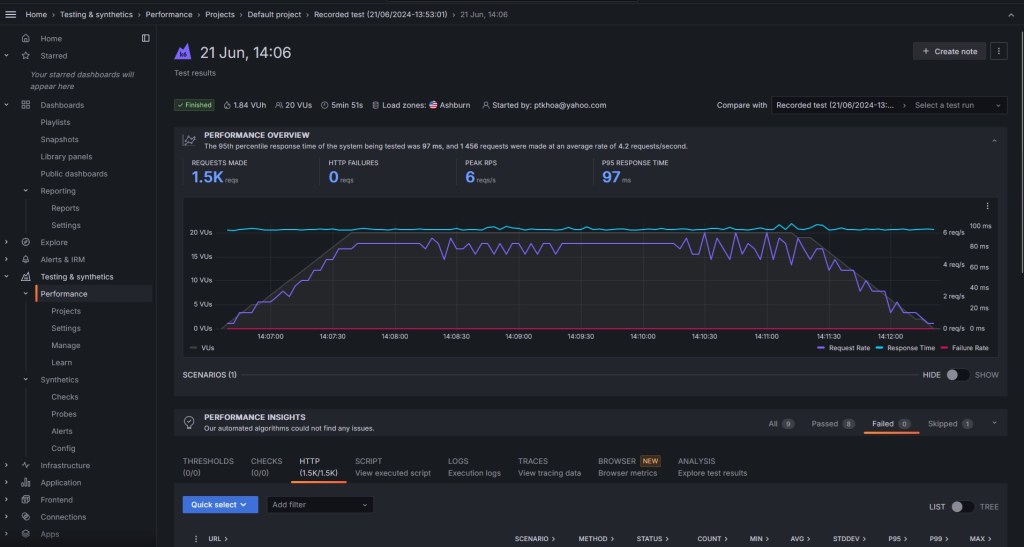
The app presents the results in near real-time. When it finishes, you can look at granular data for all results output.
Changing the ramping logic
Grafana Cloud k6 provides many options to simulate realistic load. You can modify the same test so that the volume of traffic “ramps up”, which means it increases the number of active virtual users, and comes from multiple load zones, which are locations around the world.
Here are the steps we can follow:
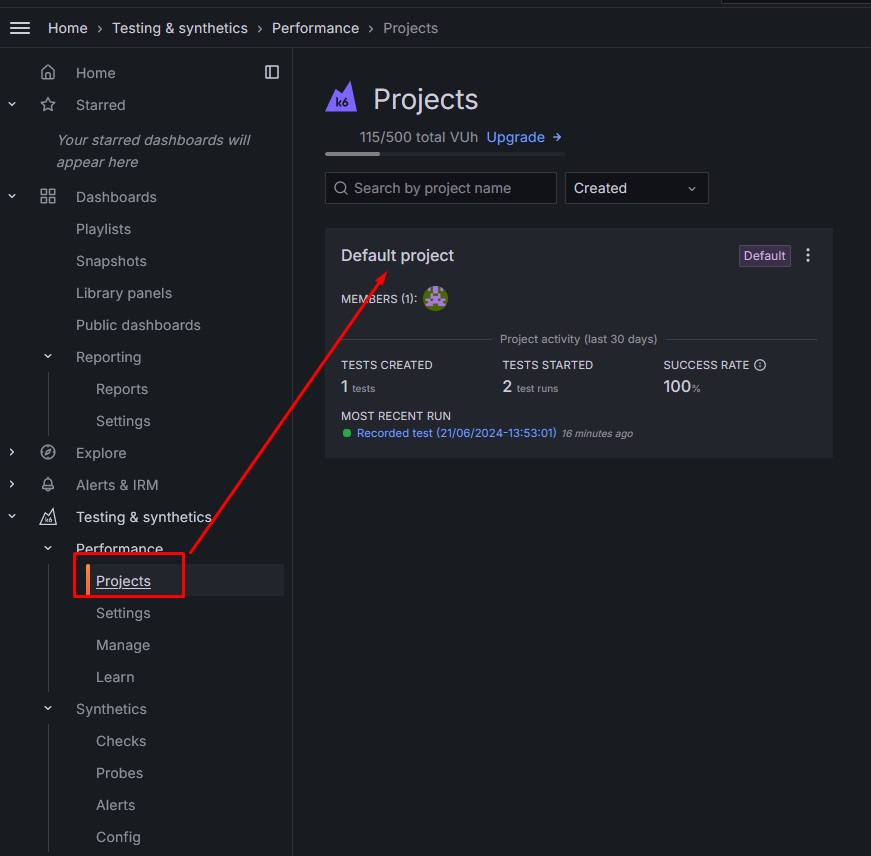
1. Click to Projects and click to Default project that have previous recorded script
2. Click to Configure of last run

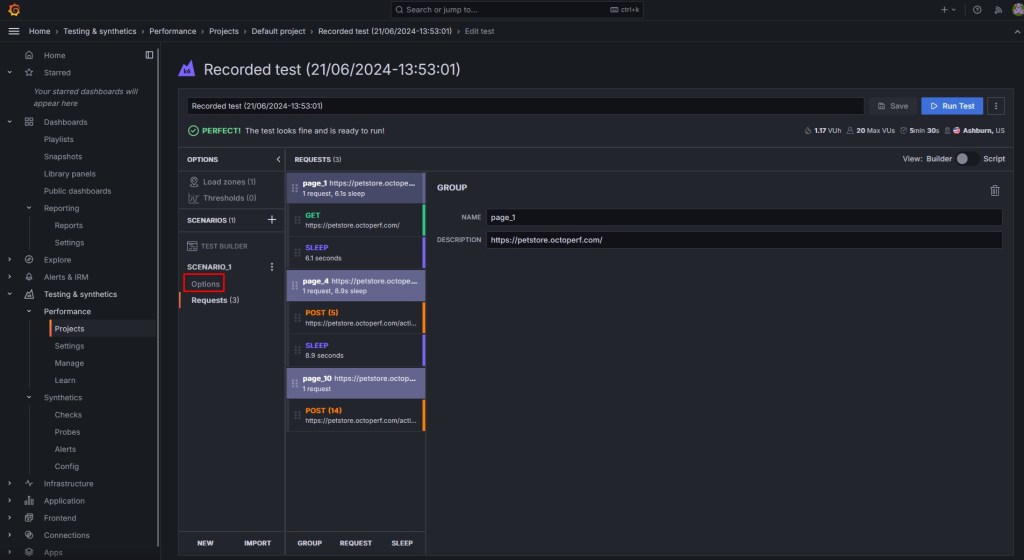
3. Now, we click to Options
4. The default option like as below:

This load configuration starts with 0 virtual users, ramps up to 20 over a minute, remains at this level for 3 minutes and 30 seconds, then ramps back down to 0.
5. Make changes and click ‘Save and Run.

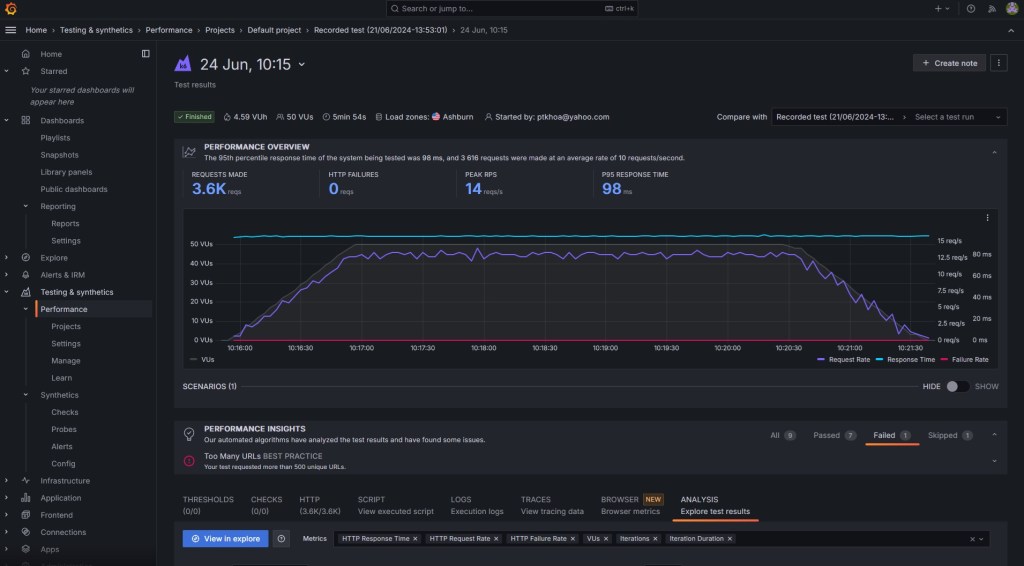
The app presents the results in near real time. When it finishes, you can look at granular data for all results output.
Using the HAR converter
The HTTP Archive format, or HAR, is a JSON-formatted archive file format for logging of a web browser’s interaction with a site. The common extension for these files is .har.
Record a HAR file
In this option, we will choose a tool to record the HAR file. Multiple browsers support screen record and exporting HTTP traffic in a HAR format.
Here are steps to record a HAR File using Chrome:
- Open Chrome DevTools: right-click on the page and select “Inspect” or press Ctrl + Shift + I (Windows/Linux) or Cmd + Option + I (macOS).
- Go to the Network Tab: Click on the “Network” tab in the Developer Tools panel.
- Start Recording: Ensure the red recording button is active (red). Click it if it’s not. Clear any existing logs by clicking the clear button (a circle with a diagonal line).
- Perform Actions: Perform the actions you want to record on the web page.
- Export the HAR File: Right-click on the network request list and select “Save all as HAR with content”. Save the HAR file to your desired location.
In the K6 browser extension, we can download HAR file during recording the screen by enabling the “Download Har file” option.

When we finish the record, HAR file will be saved to local.
Notes: We can run that HAR file on K6 Cloud, but this test runs with one virtual user and one iteration by default. If we want to run with many virtual users, we have to convert HAR file to K6 by a third-party tool or we can edit that HAR file in K6 Cloud.
HAR to K6 converter
1. Make sure that you have installed NodeJS (version >=11.0.0).
2. Install the converter. You can use npm:
$ npm install -g har-to-k6
3. Generate a k6 script from a HAR file with the convert command:
$ har-to-k6 yourfile.har -o yourfile.js
This command auto-generates a k6 script for you. It reads the HAR file (yourfile.har) and converts it into a k6 test (yourfile.js).
4. Modify the K6 script and run.
$ k6 run --vus 10 --duration 30s yourfile.js
Modify and run HAR file on K6 Cloud
Click to Create new test in the Projects:
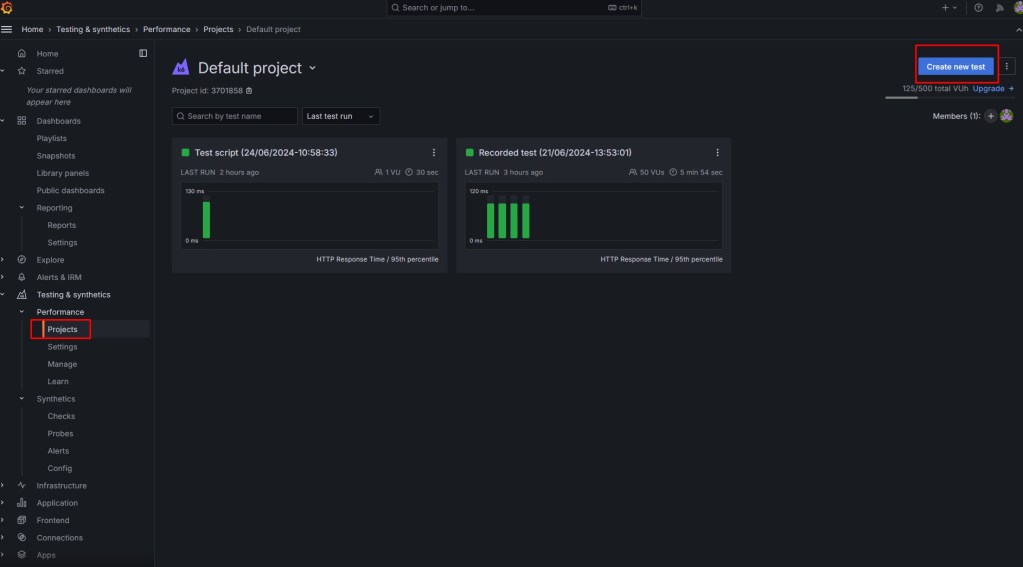
Choose the Start Scripting in next screen:
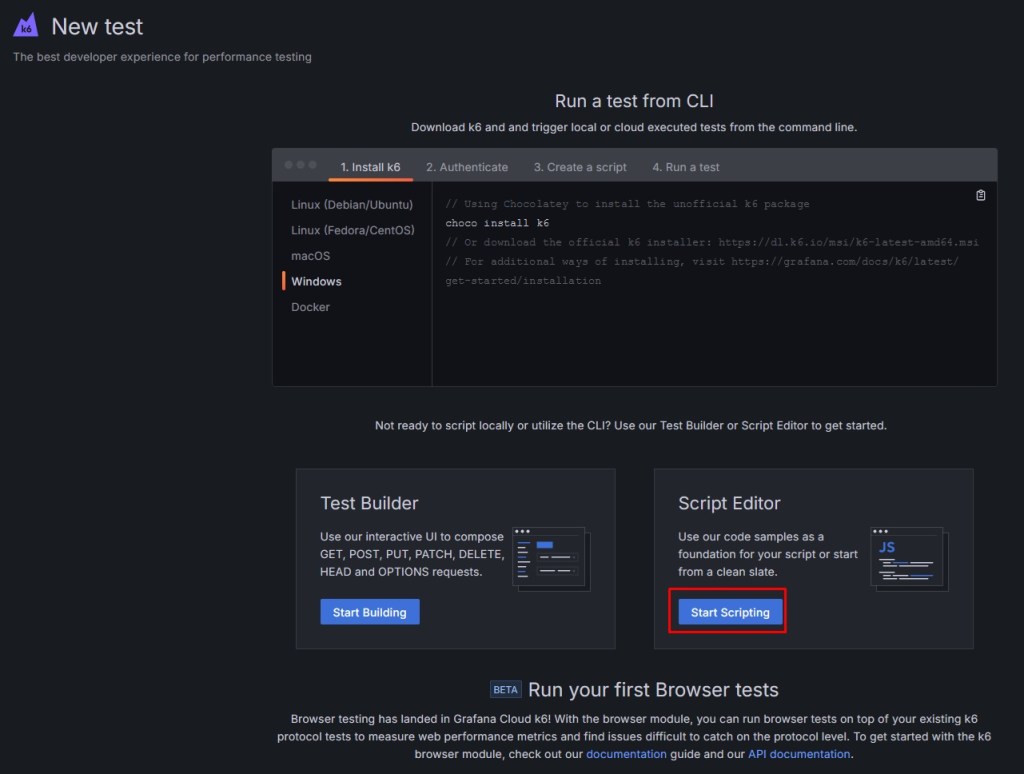
Click to Import HAR on next screen:
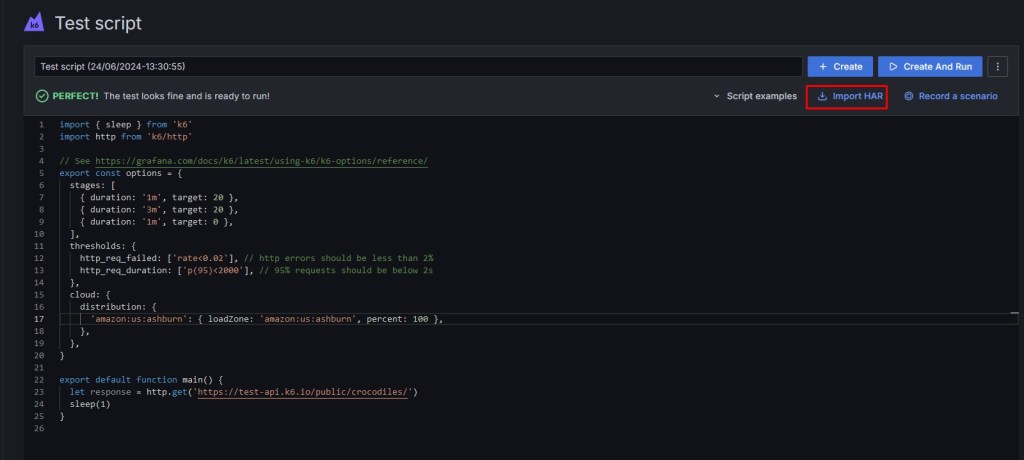
Upload the HAR file, after that we will see as below:
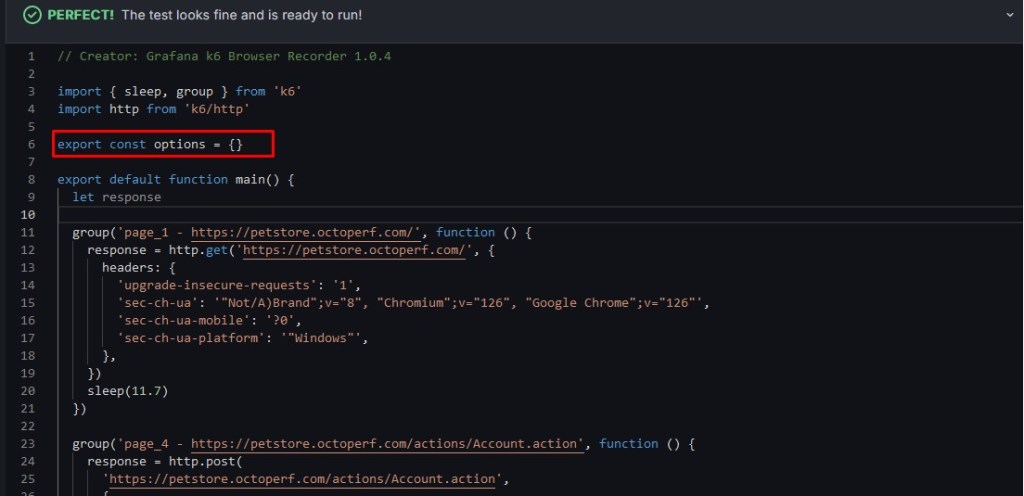
If we create and run that script, this test runs with one virtual user and for one iteration so we will edit the “export const options” in script as below:
export const options = {
stages: [
{ duration: '1m', target: 20 },
{ duration: '3m', target: 20 },
{ duration: '1m', target: 0 },
],
thresholds: {
http_req_failed: ['rate<0.02'], // http errors should be less than 2%
http_req_duration: ['p(95)<2000'], // 95% requests should be below 2s
},
cloud: {
distribution: {
'amazon:us:ashburn': { loadZone: 'amazon:us:ashburn', percent: 100 },
},
},
}
This load configuration starts with 0 virtual users, ramps up to 20 over a minute, remains at this level for 3 minutes, then ramps back down to 0.
Click to Create and Run Now. The app presents the results in near real time.

Conclusion
Creating performance tests for an application isn’t necessarily hard or complex. At the very least, it doesn’t have to be. You can achieve a lot using just the ‘k6 Browser Recorder’ plugin. I hope this topic proves very useful for understanding how to create and run tests by recording in a browser, allowing testers to apply K6 to their projects.