


Introduction
In the realm of modern Linux system management, Systemd has become the de facto init system. It not only serves as the first process to start on boot but also provides a robust framework for managing system processes and services. In this blog post, we will delve into the intricate world of Systemd, learning how to create, manage, and understand the lifecycle of custom services.
Prerequisites
Before we begin, ensure that your Linux distribution is using Systemd as the init system. Most modern distributions, such as Ubuntu, CentOS, and Fedora, have adopted Systemd.
Understanding Systemd Basics
Systemd introduces a paradigm shift in managing services, offering a unified approach to handling system processes. Key concepts include units, targets, and the concept of a service’s lifecycle.
Units:
- Service Unit: Represents a system service or application.
- Target Unit: Groups units and serves as a synchronization point.
- Timer Unit: Defines a timer for running services periodically.
Lifecycle of a Service:
- Start: Begin the service.
- Stop: Stop the service.
- Restart: Stop and then start the service.
- Reload: Reload configuration without stopping the service.
Creating a Custom Systemd Service
Let’s start by creating a simple web server script. In this example we create a Systemd service that starts a simple web server. The web server listens on a specified port (WEB_SERVER_PORT) and responds to requests with a welcome message (WELCOME_MESSAGE). The service is configured to restart always if it exits and has resource limits set. The script reads these configurations from environment variables, making it flexible and customizable.
Step 1: Service Script
Create a script for your service, e.g., my_web_server.sh, and ensure it has the necessary execution permissions.
#!/bin/bash

# Read environment variables
WEB_SERVER_PORT="${WEB_SERVER_PORT:-8080}"
WELCOME_MESSAGE="${WELCOME_MESSAGE:-Welcome to My Web Server!}"

echo "Starting My Web Server..."
echo "Web server will run on port $WEB_SERVER_PORT"
echo "Welcome message: $WELCOME_MESSAGE"

# Simulate the web server running
while true; do
  echo -e "HTTP/1.1 200 OK\r\nContent-Length: ${#WELCOME_MESSAGE}\r\n\r\n$WELCOME_MESSAGE" | nc -l -p $WEB_SERVER_PORT -q 1
done
Explanation of the Script:
- Environment Variables:
WEB_SERVER_PORT: Specifies the port on which the web server should listen. Default is set to 8080.WELCOME_MESSAGE: Specifies the welcome message displayed by the web server. Default is set to “Welcome to My Web Server!”
- Script Logic:
- The script echoes the configured values for
WEB_SERVER_PORTandWELCOME_MESSAGE. - It then enters a loop simulating a basic web server behavior using
nc(netcat) to respond to incoming HTTP requests with the configured welcome message.
- The script echoes the configured values for
Save the script and ensure it has execute permissions:
chmod +x /home/user/my_web_server.shStep 2: Service Unit File
Create a Systemd unit file, e.g., my_web_server.service, in the /etc/systemd/system/ directory:
[Unit]
Description=My Web Server
After=network.target

[Service]
ExecStart=/home/knoldus/Documents/my_web_server.sh
Environment=WEB_SERVER_PORT=3030 WELCOME_MESSAGE="Welcome to My Web Server!"
Restart=always
RestartSec=5s
LimitNOFILE=4096
LimitNPROC=2048

[Install]
WantedBy=default.target
Explanation of the Unit File:
[Unit]Section:- Description: A human-readable description of the service, which is “My Web Server.”
- After: Specifies that this service should start after the
network.targethas been reached.
[Service]Section:- ExecStart: Specifies the script that will be executed to start the service (
/home/user/my_web_server.sh). - Environment: Sets environment variables for the service, specifically
WEB_SERVER_PORTandWELCOME_MESSAGE. - Restart: Defines that the service should restart always if it exits.
- RestartSec: Specifies a 5-second delay between restart attempts.
- LimitNOFILE: Sets the maximum number of file descriptors the service can use.
- LimitNPROC: Sets the maximum number of processes the service can create.
- ExecStart: Specifies the script that will be executed to start the service (
[Install]Section:- WantedBy: Indicates that this service is wanted by the default target, meaning it will be started when the system reaches its default state.
Save the unit file to /etc/systemd/system/my_web_server.service.
Step 3: Reload Systemd
Reload the Systemd manager to recognize the new service. The reload command is used to reload the Systemd manager. When you make changes to Systemd configuration files, such as service unit files, you need to inform the Systemd manager about these changes. The daemon-reload command is used for this purpose.
sudo systemctl daemon-reloadStep 4: Start and Enable the Service
Start the service:
sudo systemctl start my_web_serverEnable the service to start on boot. The enable command is used to enable the automatic startup of the my_web_server service on system boot by creating symbolic links to its unit file in the appropriate Systemd target directories.
sudo systemctl enable my_we_serverStep 5: Check Status and Logs
Check the status of the service:
sudo systemctl status my_custom_service
View the service logs:
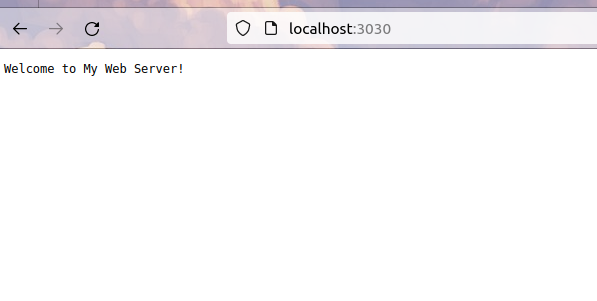
journalctl -u my_custom_serviceIf you have a web server running on your local machine (localhost) and you want to check its functionality, you can use a web browser to access it. In the address bar of the browser, type http://localhost:PORT, replacing PORT with the actual port number your web server is using.
Conclusion
Creating and managing custom Systemd services on Linux provides a flexible and standardized approach to process management. Understanding the lifecycle of a service, creating unit files, and leveraging Systemd’s features empowers administrators to maintain a robust and efficient system.
As you explore custom services, consider integrating additional features like dependencies, environment variables, and service notifications. The world of Systemd is vast, and mastering it opens the door to efficient and reliable service management on Linux systems. Happy Systemd scripting!
For more such blogs Click Here