


Load testing is essential to ensure your web application can handle high traffic and perform well under stress. OctoPerf simplifies this process with its browser recording feature, allowing you to create realistic test scenarios by capturing real user interactions.
Key Features
- User-Friendly Interface: OctoPerf offers a drag-and-drop interface that simplifies the creation and management of performance tests. This reduces the learning curve and allows testers to quickly set up and execute tests.
- Cloud-Based and On-Premises Solutions: OctoPerf provides the flexibility to run tests either in the cloud or on-premises, catering to various security and infrastructure requirements.
- Comprehensive Reporting: The platform delivers detailed real-time reports and analytics, enabling testers to identify performance bottlenecks and optimize application performance.
In next step, we’ll walk you through the steps to perform load testing using browser recording in OctoPerf.
Sign Up and Create a New Project
Visit the OctoPerf website at https://octoperf.com to sign up for an account and start with a free trial. You can then explore the features of OctoPerf, using either the SaaS service or by installing it in your infrastructure.
OctoPerf offers browser extensions for Chrome, Edge, Safari, and Firefox, which you can install from the respective browser’s web store to begin recording test scenarios.
In this blog, we will create a test scenario for https://petstore.octoperf.com using the Firefox browser to record the screen and store it as HAR file.
- Open a new private window for Firefox and click the upper right menu.
- Go to Web Developer Tools of the browser
- Make sure Persist logs are activated
- Now enter your application address in the address bar.
- Click to navigate through the application.
- Right-click anywhere in the log-in Web Developer Tools and select Save All As HAR.
- We store the HAR file to import it into the OctoPerf project in the next step.
- Go back to the Octoperf and create a project by clicking on “Create Project”.
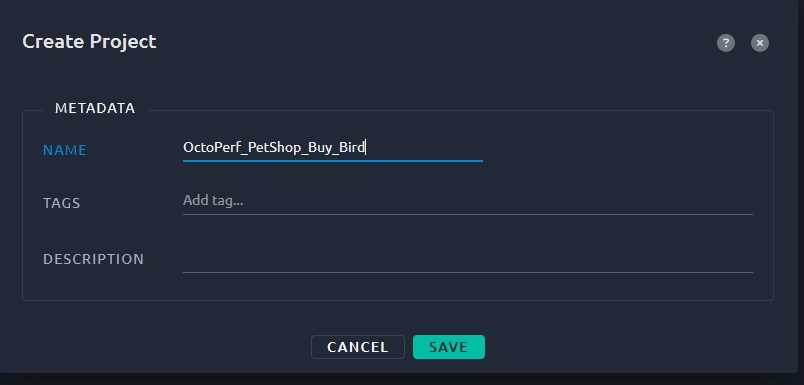
Select the newly created project.
- The next screen will be Virtual User (VU) creation where we select Browser Record (HAR):
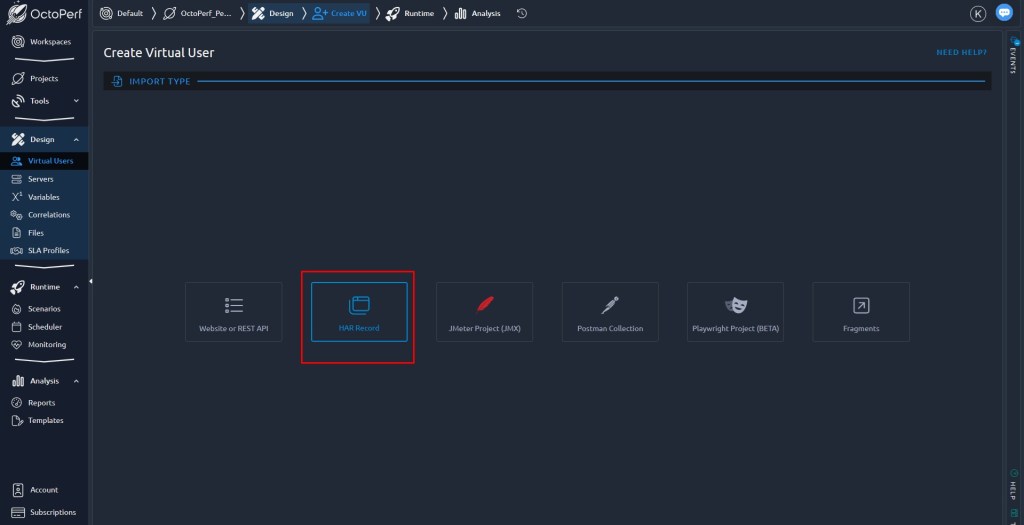
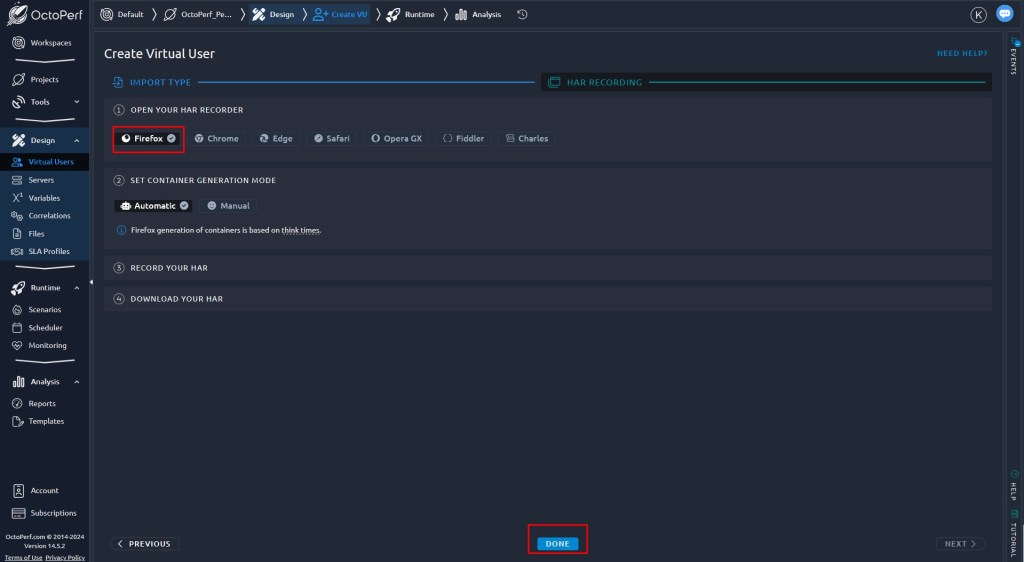
- The import type will be obviously Firefox and click Done.
Notes: As screenshot above, you can see that we can also import the Jmeter script or Postman collection for running the performance testing with Octoperf.
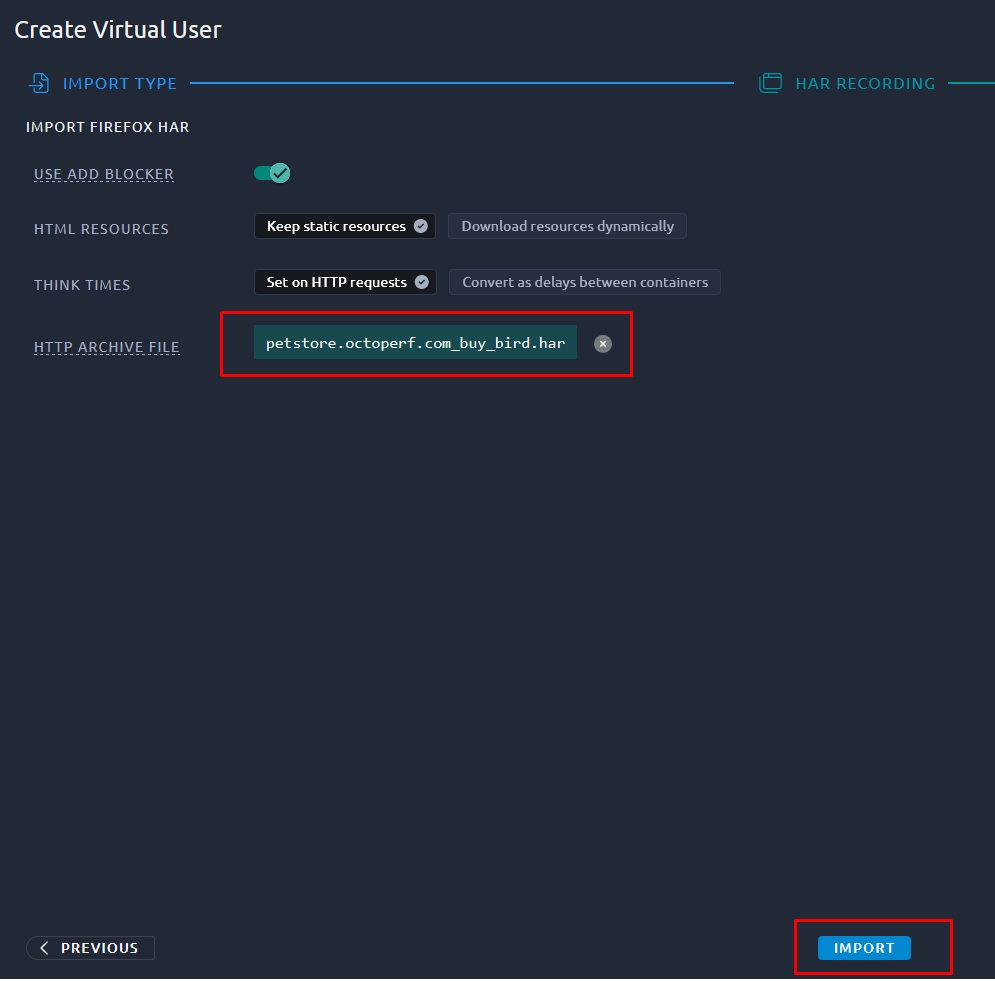
- Upload your HAR file which has been stored in the previous step and click Import
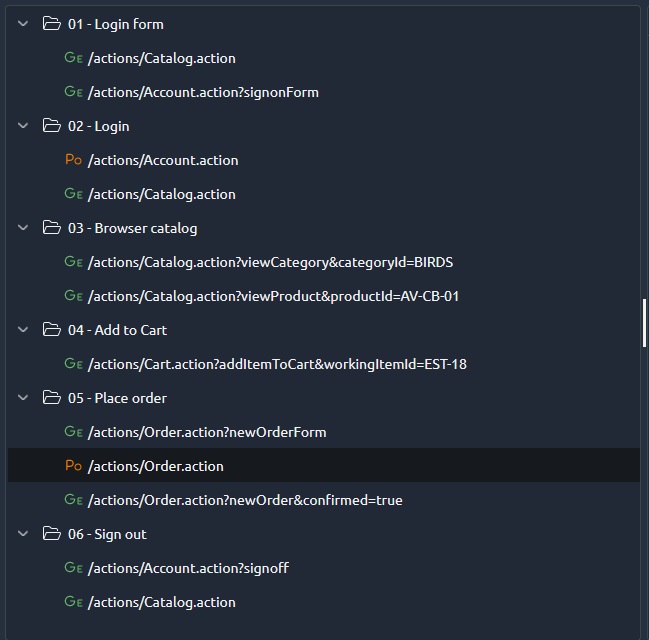
Then, double-click on the newly created VU. We are seeing a list of containers by expanding.
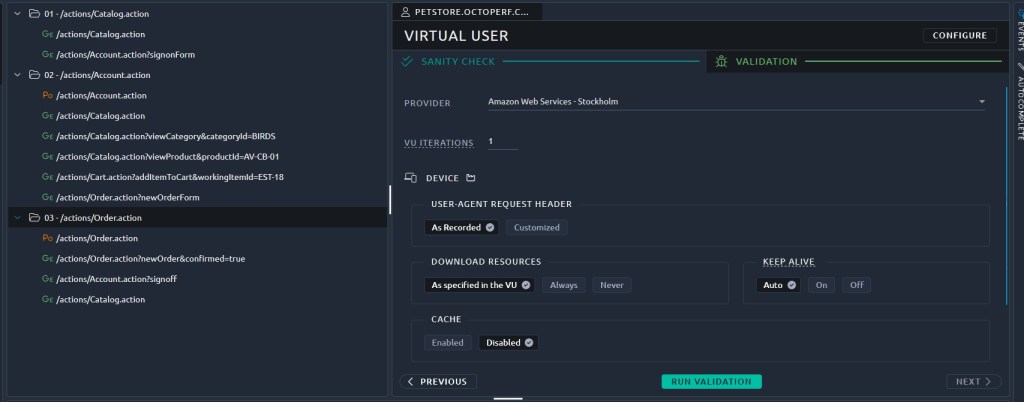
We can run validation now. However, we must rename or add some containers to make it cleaner. The new VU is now like as below:
Run The Test
Before running at scale with a scenario, I will trigger one Run Validation to see how it behaves. The tree changed a bit with a small green dot:
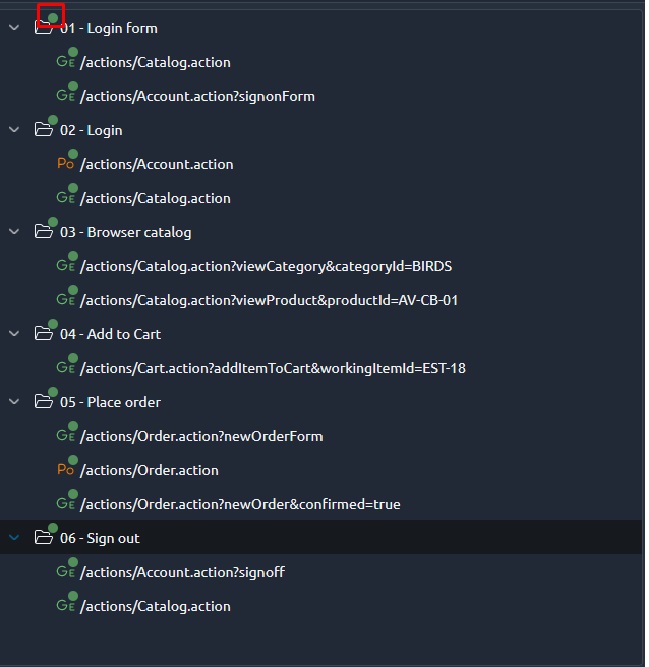
This means we can go into each request and access debugging information. Let’s see in the first HTTP POST:

In the bottom part of this window, we have access to several information including:
- Metrics with response times
- Request headers
- Request bodies
- Response Headers
- Response Bodies
A nice feature is the small icon near each piece of information: ≠ or =.
It tells you whether the data between the first and last run is different or not. This helps to focus on where variables extraction and injection could be added. For example, in the Request Headers:
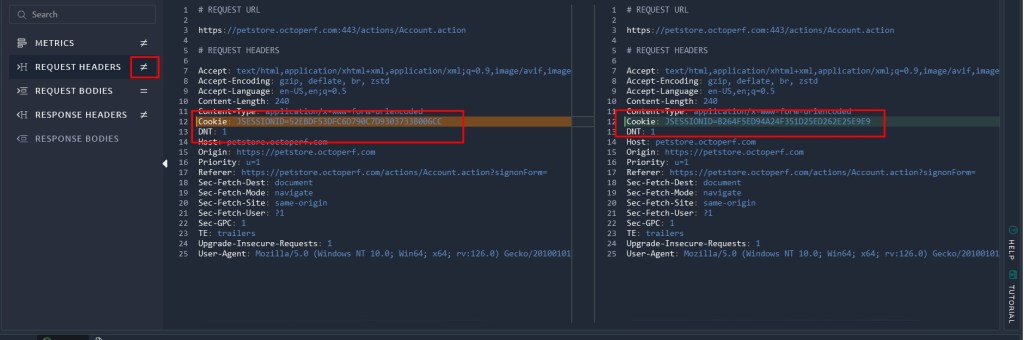
We can see that JSESSIONID changed which is obvious as every user (each run) will have a different session.
Test Reports
Test reports will show after we Launch Test. There are many items in the Reports.
Summary Report Item:
This item describes the test configuration including:
- Test duration.
- Virtual user profiles with their respective geo-location.
- Injectors used for each user profile.

Statistics Report Item:
This item contains a number of test-wide metrics.

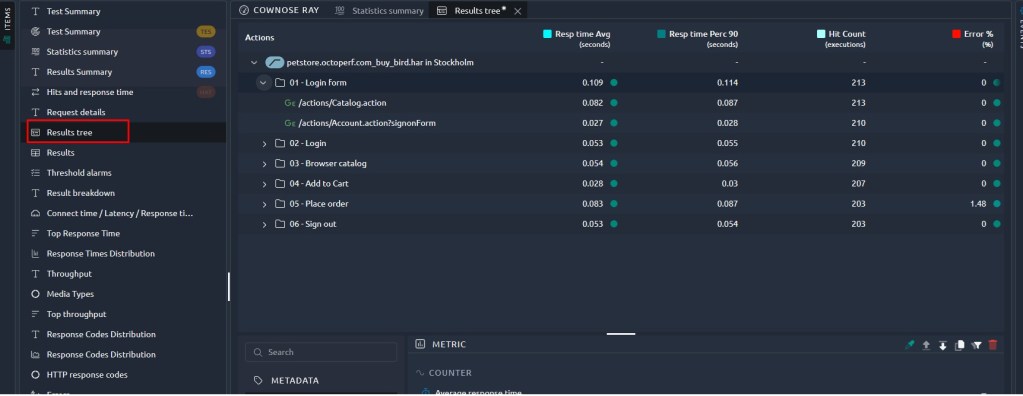
Results Tree Report Item:
The results tree provides overall statistics for each container or request via Results tree:
Errors Table Report Item:
The errors table provides details about each error that occurred during the test. It allows us to understand what happened server-side during the load test.
We can click on Inspect to check the Error details.

And the Request and Response panels display the request which has been sent to the server, and the received response.
- Number of errors: the number (and percentage) of this error message compared to the total hits on this request.
- Occurred at: the exact time at which the error occurred.
- Timings of this particular request.
- Message: the error message or code.
- Region: in which region the error has occurred.
- Injector: load generator container name.
- Virtual user: which user profile and associated virtual users raised the error.
- Container: the parent container of the action that failed.
- Action: an action that failed.
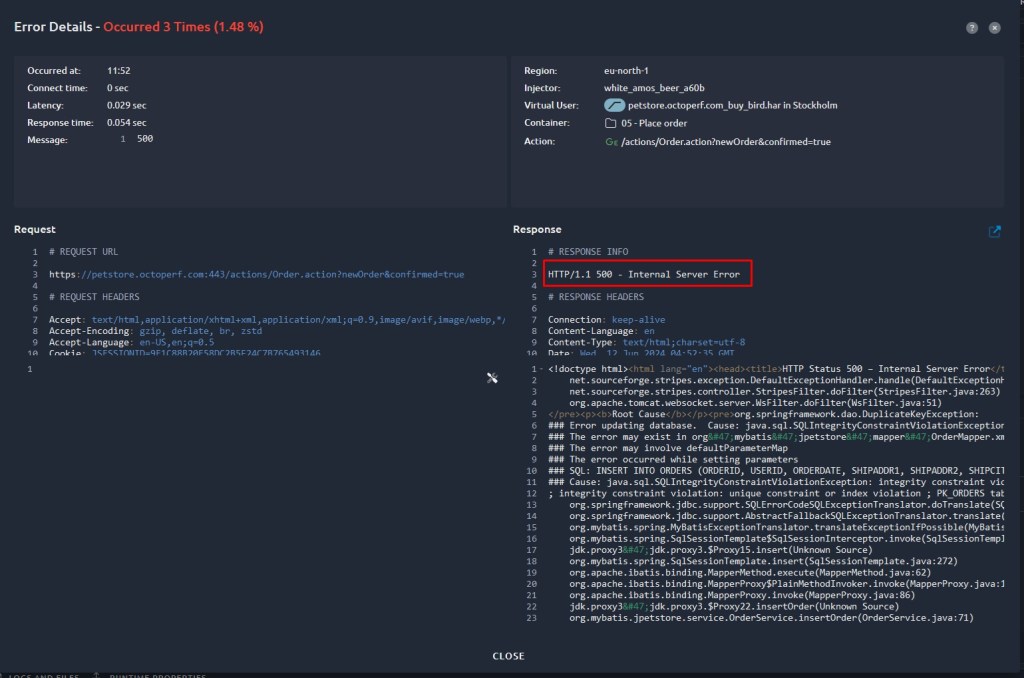
An error is triggered when:
- The response code is 4XX or 5XX. These codes can mean one of two things: The application is failing or The test scripts are incorrect.
- There is no response code (JMeter internal error message).
- An assertion failed.
Conclusion
The advantage of OctoPerf is that users can work directly on the browser without installation. The user can easily create the load-testing scenario by recording it on the browser. In this blog, we see how to create the simple test Virtual Users and check the test report. I hope that is useful for applying the performance test for the project which needs performance testing for less than 50 concurrent users.