


Introduction
In the previous blog Save your Kubernetes const with Kubecost: Part 1,I discussed about Kubecost along with its features.In today’s blog ( Save your Kubernetes cost with Kubecost: Part 2 ), I will tell you how to install Kubecost in your Kubernetes cluster. So, without further delay, let’s begin with some prerequisites.
Prerequisites for installing Kubecost
- Kubernetes cluster
- Helm 3
- Kubectl
- Node Exporter
- Prometheus
Installation
I am using Helm package manager to install Kubecost in the Kubernetes cluster.
Step 1: Installing Node Exporter
As we all know we need a node exporter to collect various node metrics so we need to install that first to install node exporter run following command
helm repo add prometheus-community https://prometheus-community.github.io/helm-charts

helm install my-prometheus-node-exporter prometheus-community/prometheus-node-exporter --version 4.34.0
Step 2: Installing Kubecost
To install Kubecost inside your kubernetes cluster just paste down the below Helm commands
helm repo add kubecost-repo https://kubecost.github.io/cost-analyzer

helm install kubecost kubecost-repo/cost-analyzer
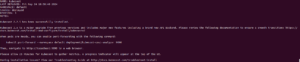
after that you will see some outputs like that
Step 3: Running the Kubecost application
Now using port forwarding you can forward ports locally
kubectl port-forward --namespace default deployment/kubecost-cost-analyzer 9090
Now open any of your web-browser and type
http://localhost:9090
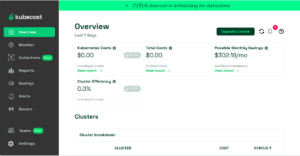
You will able to see Kubecost GUI in your browser
Important Note
While installing Kubecost in your kubenetes cluster make sure that you cannot disable Prometheus by setting its value to false on the helm chart.
Problems you might face during installation
- If your pods stuck in a pending state make sure to check if your PVC is configured successfully or not.
- If you are running Kubecost on minikube then you might get CrashLoopBackOff error for your pods. To resolve this you just need to check the security context for deployments and change it from 1001 to 0 which will provide root access to that pod and that will fix the issues.
Conclusion
Installing Kubecost becomes very easy when you use a package manager such as Helm. If you, the reader, still have any doubts, feel free to add your questions in the comment box below. So that’s it for this blog (Save Your Kubernetes Costs with Kubecost: Part 2). I will catch you all in the next blog. Until then, take care and happy learning!