


Power BI is a powerful tool that allows users to create insightful dashboards and reports from various data sources. One of its most useful features is the ability to set up alerts. Alerts can notify you in real-time when your data meets specific conditions, ensuring you never miss important changes or trends. In this step-by-step guide, we’ll walk you through the process of setting up alerts in Power BI, so you can stay informed and make timely decisions based on your data.
Why Set Up Alerts in Power BI?
Alerts in Power BI help you monitor your data continuously and receive notifications when certain conditions are met. This feature is particularly useful for:
- Tracking KPIs: Keep an eye on key performance indicators (KPIs) and get alerted when values cross predefined thresholds.
- Monitoring Sales: Receive notifications when sales figures exceed or fall below expected ranges.
- Budget Management: Get alerts when expenses approach budget limits.
- Operational Efficiency: Monitor operational metrics and be notified of any significant deviations.
Prerequisites
Before you begin setting up alerts in Power BI, ensure you have:
- A Power BI account.
- A published Power BI dashboard.
- Administrative or edit permissions for the dashboard where you want to set up alerts.
Step-by-Step Guide to Creating Alerts in Power BI
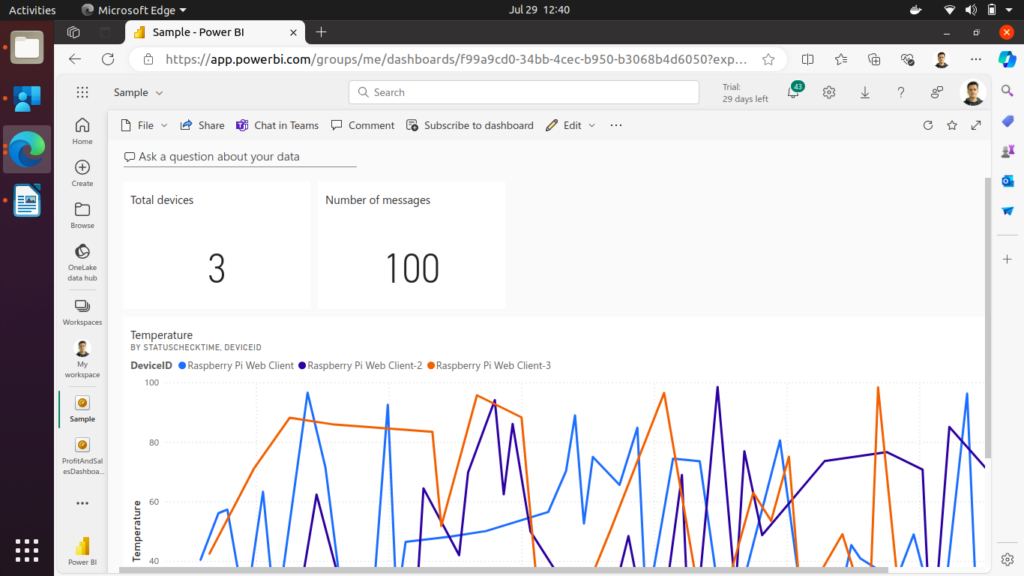
Step 1: Open Your Power BI Dashboard
- Log in to your Power BI account.
- Navigate to the dashboard where you want to set up alerts.
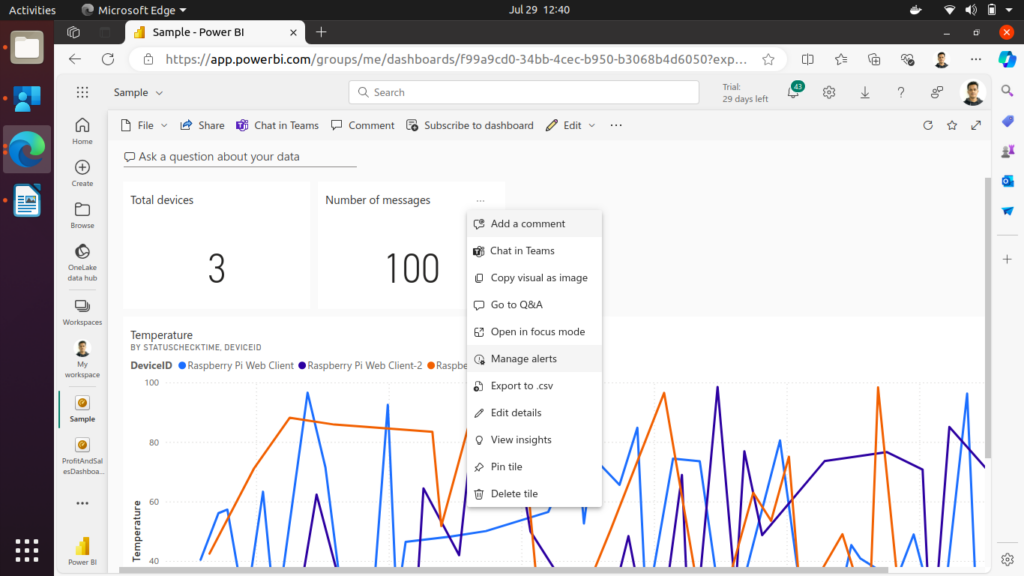
Step 2: Select a Tile for Alerts
- Identify the tile (e.g., a KPI, gauge, or card) on your dashboard that you want to set an alert for.
- Hover over the tile to reveal additional options.
- Click on the ellipsis (three dots) in the upper-right corner of the tile.
- Select “Manage alerts” from the drop-down menu.
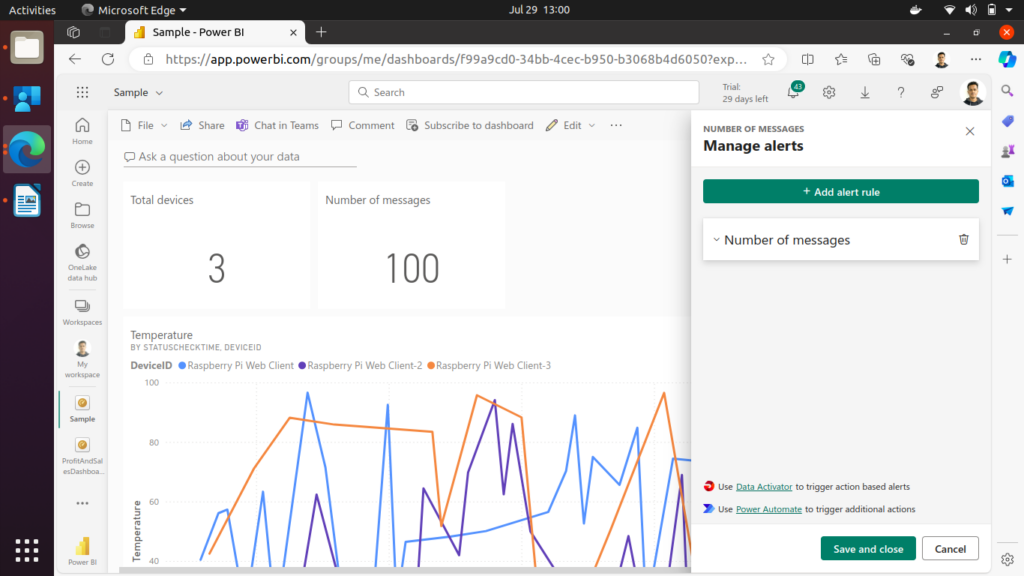
Step 3: Create a New Alert Rule
- In the Alerts pane, click on “Add alert rule”.

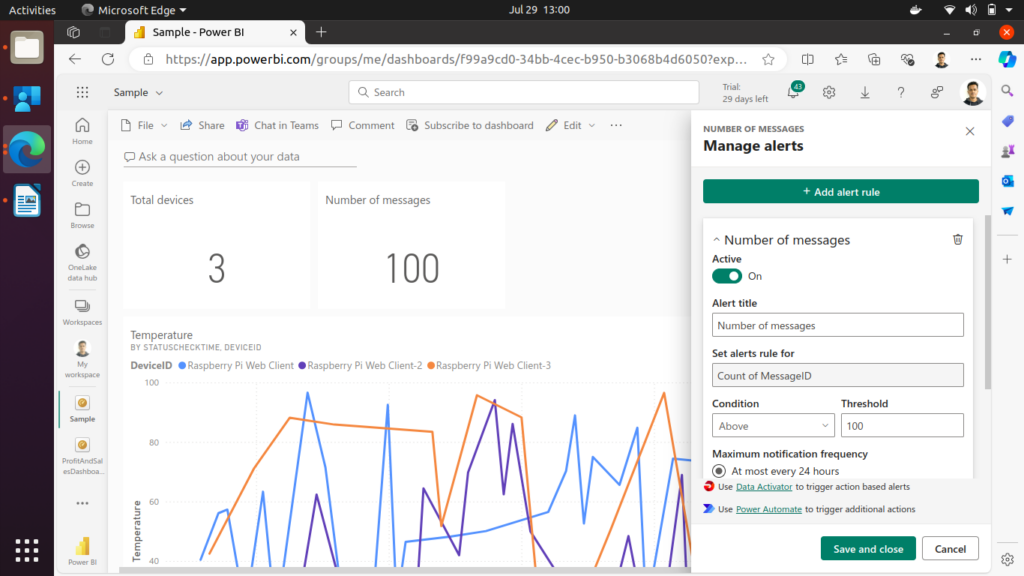
- Configure your alert settings:
- Alert Title: Give your alert a descriptive name.
- Condition: Specify the condition that will trigger the alert. You can choose to be alerted when the data is above, below, or equal to a certain value.
- Threshold Value: Enter the value that will trigger the alert.
- Notification Frequency: Choose how often you want to be notified when the alert condition is met (e.g., only once, every hour, every day).

3. Optionally, you can enable the “Send me an email” option to receive email notifications in addition to in-app alerts.

Step 4: Save the Alert Rule
- After configuring your alert settings, click on “Save and close”.
- Your alert rule will now be active, and you will receive notifications when the specified condition is met.
Step 5: Managing and Editing Alerts
- To view or edit your existing alerts, go back to the tile and click on the ellipsis (three dots).
- Select “Manage alerts” to open the Alerts pane.
- Here, you can see all the alert rules you’ve set up for that tile. Click on an alert to edit its settings or delete it if no longer needed.
Tips for Effective Use of Alerts
- Be Specific: Set precise conditions for your alerts to avoid receiving too many notifications.
- Use Multiple Alerts: Create multiple alerts for different thresholds or conditions to monitor various aspects of your data.
- Regularly Review Alerts: Periodically review and update your alert rules to ensure they remain relevant as your data changes.
Conclusion
Setting up alerts in Power BI is a straightforward process that can significantly enhance your ability to monitor and respond to changes in your data. By following this step-by-step guide, you can create effective alerts that keep you informed in real-time, helping you make timely and informed decisions. Start using Power BI alerts today and take your data monitoring to the next level.