


In this blog, we will practically implement a regression problem with Databricks AutoML using UI. For the introduction to Databricks and AutoML, you can refer to my other blog, Introduction to Databricks AutoML.
Requirements
- Databricks Runtime 9.1 ML or above. For the general availability (GA) version, Databricks Runtime 10.4 LTS ML or above.
- For time series forecasting, Databricks Runtime 10.0 ML or above.
- With Databricks Runtime 9.1 LTS ML and above, AutoML depends on the
databricks-automl-runtimepackage, which contains components that are useful outside of AutoML, and also helps simplify the notebooks generated by AutoML training.databricks-automl-runtimeis available on PyPI.
- No additional libraries other than those that are preinstalled in Databricks Runtime for Machine Learning should be installed on the cluster.
- Any modification (removal, upgrades, or downgrades) to existing library versions results in run failures due to incompatibility.
- AutoML is not compatible with shared access mode clusters.
- To use Unity Catalog with AutoML, the cluster access mode must be Single User, and you must be the designated single user of the cluster.
Steps to create ML model using UI with Databricks AutoML
The AutoML UI steps for the process of training a regression problem on the model on a dataset –
STEP 1 – Open Databricks UI
In the sidebar, select Experiments, from there as shown in the below screenshot click on Create AutoML Experiment.

STEP 2 – After clicking on Create AutoML Experiment Button
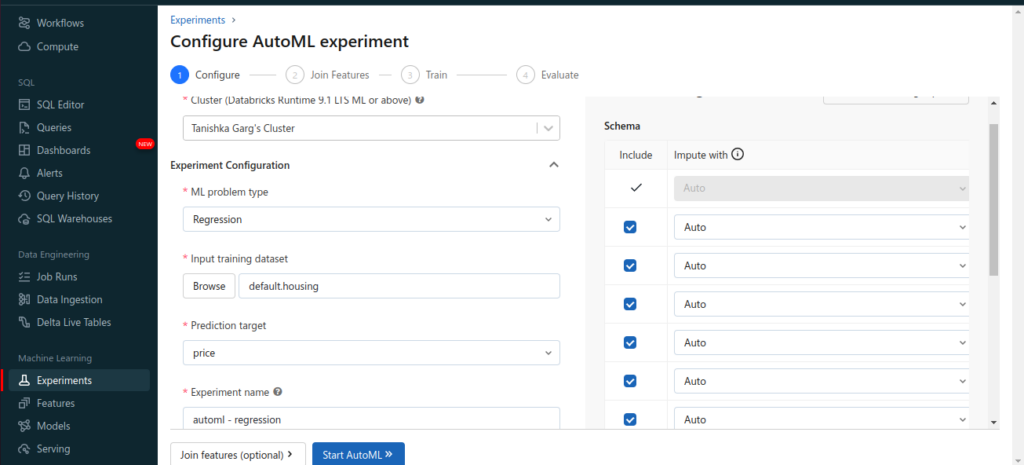
A screen will show, where you need to configure the AutoML process, specifying the dataset, problem type, target or label column to predict, metric to use to evaluate and score the experiment runs, and stopping conditions. Below are detailed configurations needed to create the AutoML Experiment.
- In the Compute field, select a cluster running Databricks Runtime ML.
- From the ML problem type drop-down menu, select Regression or Classification. If you are trying to predict a continuous numeric value for each observation, such as annual income, select regression. If you are trying to assign each observation to one of a discrete set of classes, such as good credit risk or bad credit risk, select a classification.
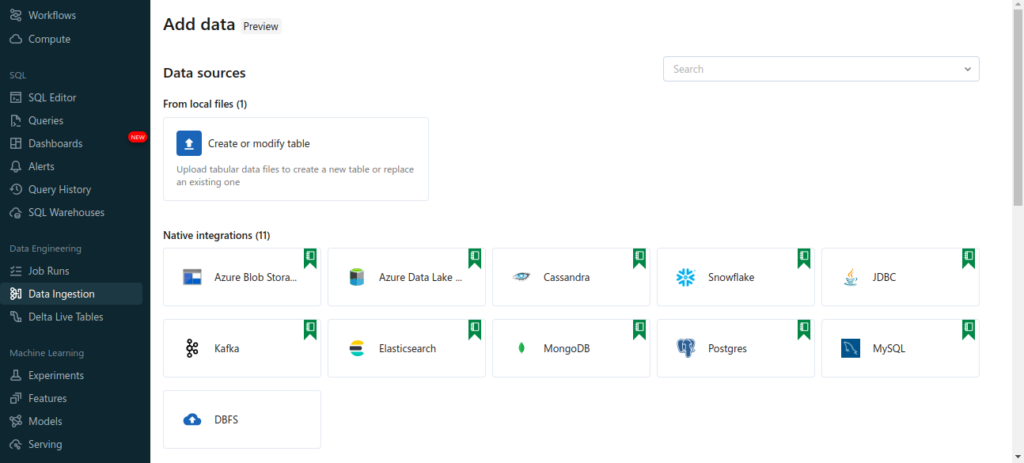
- In the input Training Dataset, Navigate to the table you want to use and click Select. The table schema appears. For classification and regression problems only, you can specify which columns to include in training and select custom imputation methods. For creating a table you can navigate to data ingestion and there you can upload your CSV file from your local system, as in the screenshot below.
- Click in the Prediction target field. A drop-down appears listing the columns shown in the schema. Select the column you want the model to predict.
- The Experiment name field shows the default name. To change it, type the new name in the field.
You can also: Specify the additional configuration options.
STEP 3 – Run the experiment and monitor the result
To start the AutoML experiment, click Start AutoML as shown in the above screenshot. The experiment starts to run, and the AutoML training page appears. To refresh the runs table, click  .
.
From this page, you can:
- Stop the experiment at any time.
- Open the data exploration notebook.
- Monitor runs.
- Navigate to the run page for any run.
STEP 4 – Compare the machine learning models build
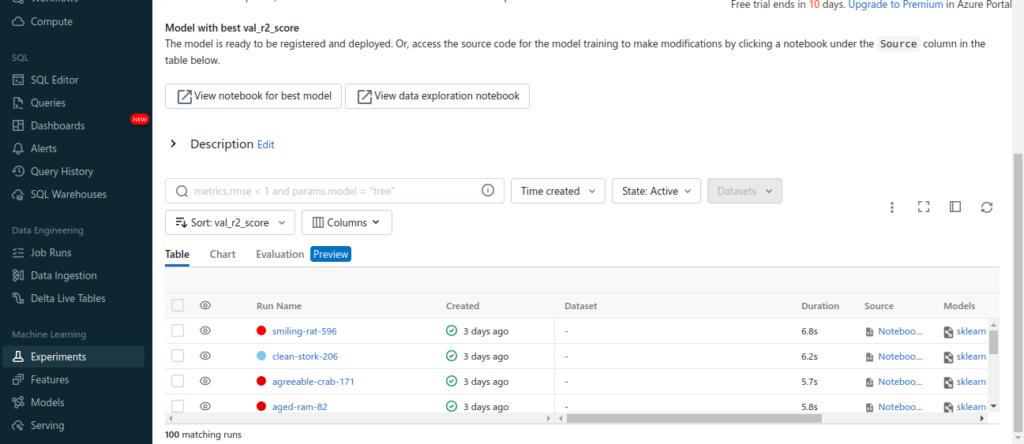
Once the training of models is completed, there will be multiple models developed with their respective Python Notebook, which can help us reproduce, review, and modify the code according to your needs. As it provides you the Python notebook for each model developed, we can easily review and update the code and enhance the performance of the model.
As you can see from the below screenshot, there are 100 models developed. We can easily compare them by selecting the models and clicking on the Compare button. There you can also see an option to view the notebook for Best Model and data exploration as well.
Conclusion
In this blog, we implemented how to build a machine learning model using Databricks AutoML UI. We can do the same process to build classification and forecasting problems as well.
References
- https://docs.databricks.com/en/machine-learning/automl/train-ml-model-automl-ui.html
- https://learn.microsoft.com/en-us/azure/databricks/machine-learning/automl/train-ml-model-automl-ui