


Understanding How Power BI Object-Level Security Behaves
For a POC project, my team lead asked me to practice and build a demo Power BI report that applied OLS (Object Level Security). Although it sounded simple at first, I was surprised by how OLS actually behaves in Power BI. In this blog, I would like to share my findings with you.
Excerpt from Microsoft’s definition of OLS:
“Object-level security (OLS) enables model authors to secure specific tables or columns from report viewers. For example, a column that includes personal data can be restricted so that only certain viewers can see and interact with it.“
Let’s jump right into the demo. I created a simple PBI report with a table visual displaying data from the dim_venue table. Please notice the red borders of the screenshot below, the report is showing 5 columns, we will focus on two column named ‘venueseats’ and ‘venuestate’ in the ‘dim_venue’ table.

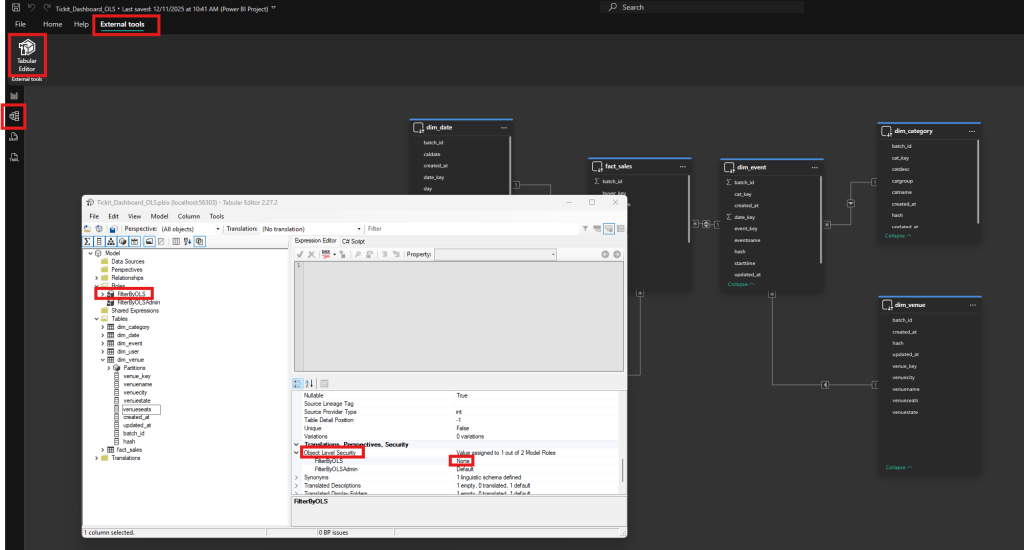
Next, we will need to download and install an external tool named Tabular Editor (TE), it will automatically be integrated with PBI Desktop. The free TE version is enough for this demo, at this time I am using the TE 2.27.2 as you see at the screenshots below.
Then switch to Model View -> Choose External -> Click on ‘Tabular Editor’ (TE) to open this tool, you can see what I have done as the screenshot below:
- Create a Role named ‘FilterByOLS’
- In the dim_venue table -> choose venueseats column -> In Object Level Security, FilterByOLS choose ‘None’ as the screenshot below
- Repeat the same actions for the venuestate column
Then on Tabular Editor, click on ‘Save the change to the connected database’ button and close the TE tool.
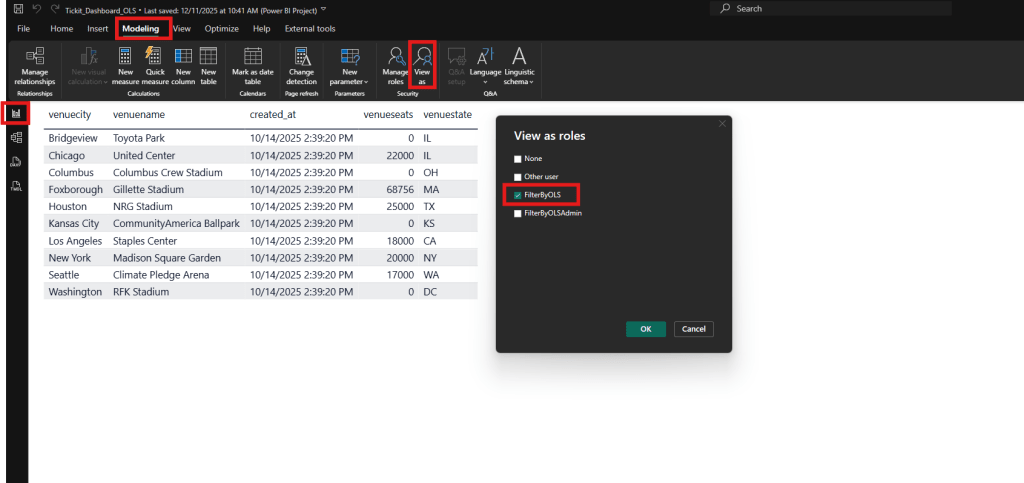
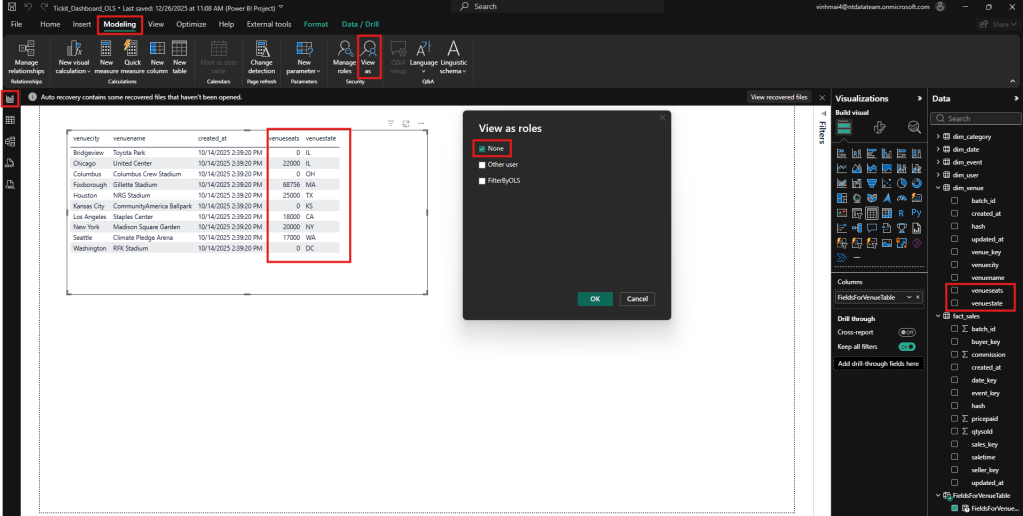
Head back to the PBI Desktop, navigate to Report View -> Modeling -> choose ‘View as’ and choose ‘FilterByOLS’ then ‘OK’ as the screenshot below, you will see how OLS actually behaves.
The report now looks like the following. At first glance, it feels like something went wrong and the report appears to display an error:

In the screenshot above, focusing on the right-hand side of the Data pane, you will notice that the ‘venueseats’ and ‘venuestate’ columns no longer appear in the dim_venue table. In other words, these columns have been removed from the semantic model.
In fact, nothing is wrong, this is the expected default behavior of OLS and how it works. Now it we return with ‘None’ role, we will see two columns.

We may run into a question from the client such as ‘Do you have any solution to customize this behavior? It looks like an error, I would like the report to still be displayed without the OLS protected columns’.
After spending more time researching and discussing with my team, I see there are 2 approaches:
Workaround 1: create a copy of the existing semantic model, physically remove the columns or tables that are considered sensitive, then build new reports based on this new model and assign them to the user group you want to restrict access for.
Workaround 2: we will use a combination of OLS + RLS + a feature of ‘Field Parameters‘. When we create a field parameter a table is added to our dataset with one row for each field we have chosen; this effectively makes the fields used in a visual data-driven, and we can leverage RLS (Row Level Security) on the table we created for our field parameter to control which fields are displayed in our visual and the problem is solved.
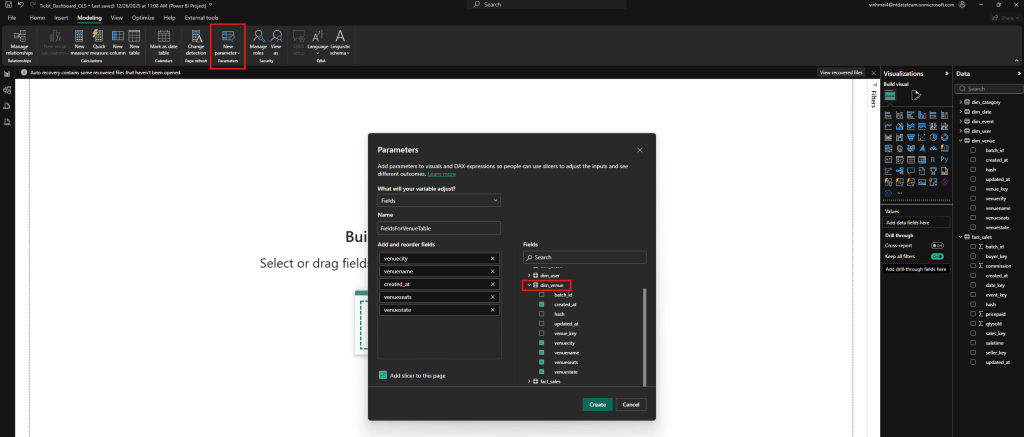
Going back to our report, in Modeling tab -> Choose New Parameter and configure as the screenshot below.
When the configuration is done and click on ‘Create’ button, you will see a new table named ‘FieldsForVenueTable’ has been added to our semantic model. I then deleted the slicer since we don’t need it.
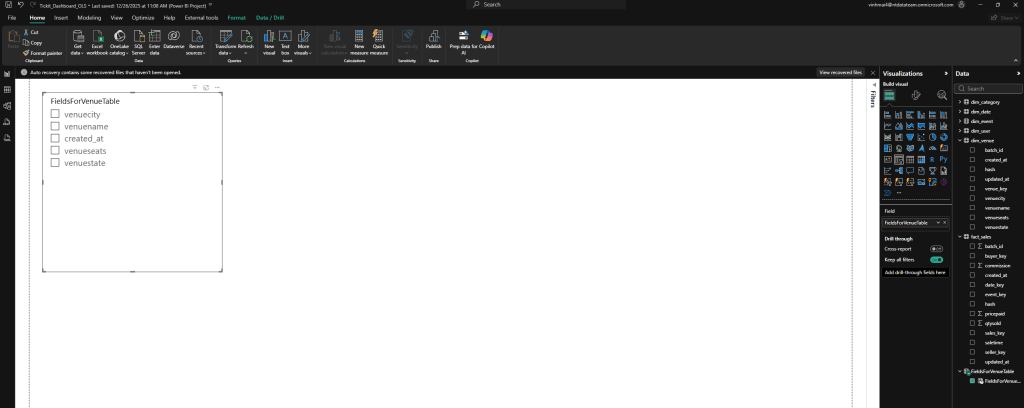
After that, I created a visual table by simply clicking on the FieldsForVenueTable in semantic model as the screenshot below.

We can then edit the role that already has OLS in it to apply RLS on the field parameter table, so only the rows for the fields that are allowed by the OLS returned:
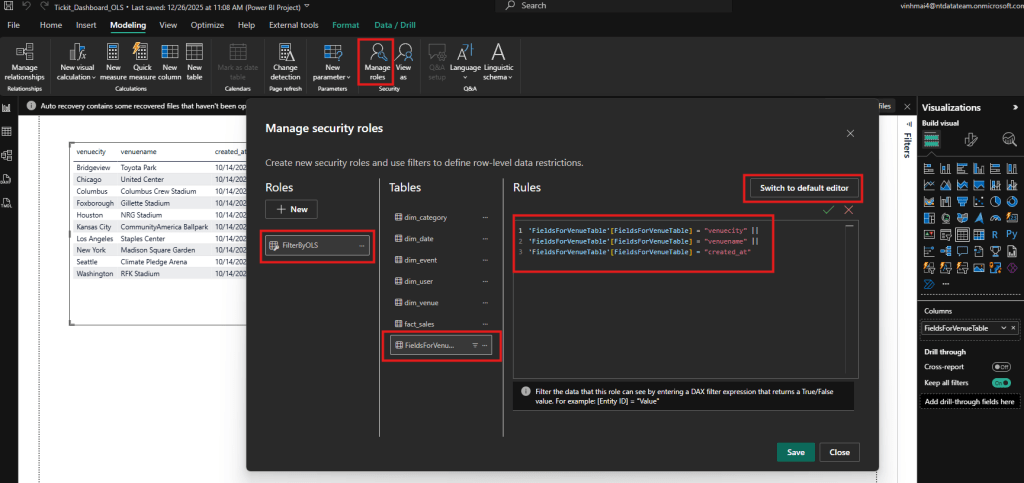
We see that in this case, the OLS and RLS are defined in the same role.
Finally, now when we view the report through the role ‘FilterByOLS’ we only see 3 columns: venuecity, venuename, created_at. The result is as the screenshot below, notice my red borders, you see that the ‘venueseats’ and ‘venuestate’ has been removed to the dim_venue in semantic model also.

And here is when we choose the role as ‘None’. As the screenshot below, the ‘venueseats’ and ‘venuestate’ columns have appeared in the table visual and semantic model again.
In conclusion, the approach 2 meets our expectations.
Thank you for your time and for reading this entire blog post. I hope you found it helpful and informative.
Additonal rerources: