


Introduction
In today’s fast-paced software delivery environment, quality teams need more than manual test case management—they need intelligent automation that lives inside Jira. SmartBear has expanded the capabilities of Zephyr Scale with powerful AI-driven automation features, including the Zephyr Automate – Expanded Automation for Zephyr add-on, bringing modern test automation directly into the Jira ecosystem.
This page provides an internal overview of Zephyr Automate and explains how QC teams can start using automation directly within Jira + Zephyr Scale. The goal is to help teams understand what Zephyr Automate does, when to use it, and how to get started.
What Is Zephyr Automate?
Zephyr Automate – Expanded Automation for Zephyr is a SmartBear add-on that extends Zephyr Scale with automated test creation and execution capabilities directly inside Jira.
It enables teams to:
- Create new automated test cases by recording real user actions, which are automatically converted into executable test steps
- Convert existing manual test cases into automated tests
- Execute automated tests directly from Jira
- Run tests in parallel to reduce execution time
- Perform cross-browser testing
- Track automated execution results within Zephyr Test Cycles
Zephyr Automate is designed to make automation more accessible to QC and UAT teams, including users without strong programming backgrounds.
How Zephyr Automate Fits Our Tooling
- Jira: Requirement, sprint, and defect tracking
- Zephyr Scale: Test case management, Test Cycles, reporting
- Zephyr Automate: Automated test execution and results
Together, these tools provide a single, integrated QA workflow inside Jira.
Getting Started: Step-by-Step
Step 1: Open Zephyr Scale in Jira
- Go to your Jira project
- Navigate to Zephyr Scale → Test Cases
- Click Create Test Case
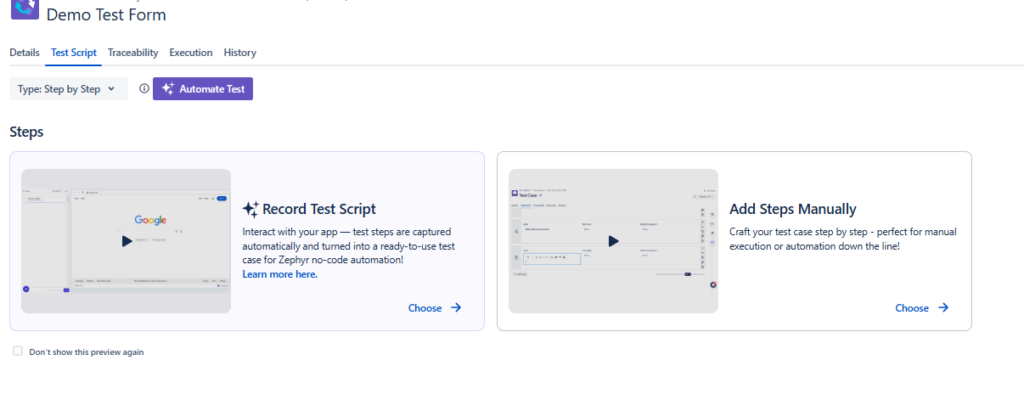
Step 2: Start Automation Recording
- In the test case creation screen, select Test script
- Choose Record Test Script
- Input Starting URL link
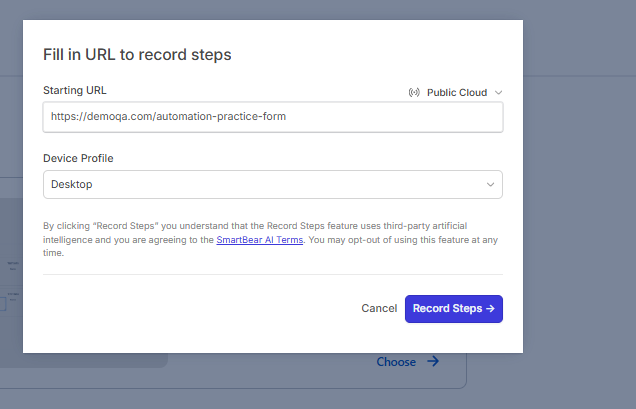
Step 3: Record User Actions
- Click Start Recording
- Perform the test scenario in the application:
- Click buttons and links
- Enter text
- Navigate between pages
- Zephyr Automate captures each action as an automation step
💡 Tip: Perform actions slowly and avoid unnecessary clicks for cleaner automation.
Step 4: Stop Recording and Review Steps
- Click Stop Recording
- Review the captured steps:
- Validate actions
- Remove unnecessary steps
- Adjust selectors or conditions if needed
- Add assertions / expected behavior where required
Step 5: Save as an Automated Test Case
- Provide:
- Test Case Name
- Description
- Preconditions (if any)
- Save the test case
The test is now:
- ✅ An automated test
- ✅ Stored in Zephyr Scale
- ✅ Ready to be executed via Zephyr Automate
Step 6: Execute the Automated Test
- Add the test case to a Test Cycle
- Trigger execution via Zephyr Automate
- Review results directly in Jira
Best Practices
- Start automation with high-value regression tests
- Avoid automating unstable or frequently changing flows
- Keep test steps simple and reusable
- Mix manual and automated tests within the same Test Cycle
Key Notes
- Zephyr Automate extends Zephyr Scale; it does not replace it
- Manual and automated tests are managed together in Jira
- Automation execution is controlled via Zephyr Automate
When to Use Recording
✅ Good for:
- Smoke tests
- Stable UI flows
- UAT automation
- Regression candidates
❌ Avoid for:
- Highly dynamic UI
- Frequently changing screens
- Complex conditional logic
Summary
Zephyr Automate enables QC teams to scale automated testing while staying within Jira. By combining Zephyr Scale’s test management with SmartBear-powered automation, teams gain faster execution, better coverage, and full traceability—all in one place.