


What is Angular Routing?
Angular routing is a feature that allows you to build SPAs by defining the navigation paths within your application. Instead of traditional server-based navigation, where each page request results in a full page reload, Angular routing enables you to load different views and components dynamically within a single HTML page. This approach provides a smoother and more responsive user experience.
Key concepts to understand about Angular routing include:
Router Module
Angular’s RouterModule is a core module that provides the necessary tools for setting up and managing routes in your application. It includes the RouterModule.forRoot() method for configuring the root routing module and RouterModule.forChild() for feature modules.
Routes Configuration
Routes in Angular are defined using an array of route objects. Each route object typically consists of the following properties:
path: The URL path for the route.component: The component to be displayed when the route is activated.- Optional properties like
redirectTo,children, anddatafor additional route configuration.
Router Outlet
The <router-outlet></router-outlet> is a directive that acts as a placeholder in your template where the routed component will be rendered when the URL matches the specified route.
Router Link
The routerLink directive is used in HTML templates to create links for navigating between different routes. It takes the path to the desired route as its argument.
ActivatedRoute
The ActivatedRoute service provides information about the currently activated route, including route parameters, data, and other route-related details. It can be injected into your components to access this information.
Now, let’s dive into a simple example to demonstrate Angular routing in action.
Setting Up an Angular Project
Before we dive into routing, let’s set up a basic Angular project. You’ll need Node.js and Angular CLI installed. If you haven’t already, you can install Angular CLI globally using the following command:
npm install -g @angular/cliNow, let’s create a new Angular project:
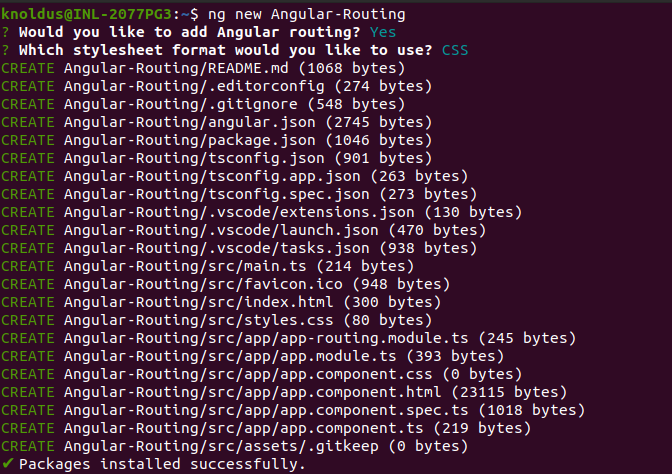
After creating the project, navigate to the project folder:
cd Angular-Routing
Configuring Angular Routing
Angular routing is based on a configuration file called app-routing.module.ts, which is located in the src/app directory. This file defines the routes and their corresponding components. Let’s create a few routes for our example application.
- Open the
src/app/app-routing.module.tsfile and importRouterModuleandRoutesfrom@angular/router:
- Define your routes as an array of objects inside the
Routesconstant. Each route object should have apath(the URL segment) and acomponent(the Angular component to display).
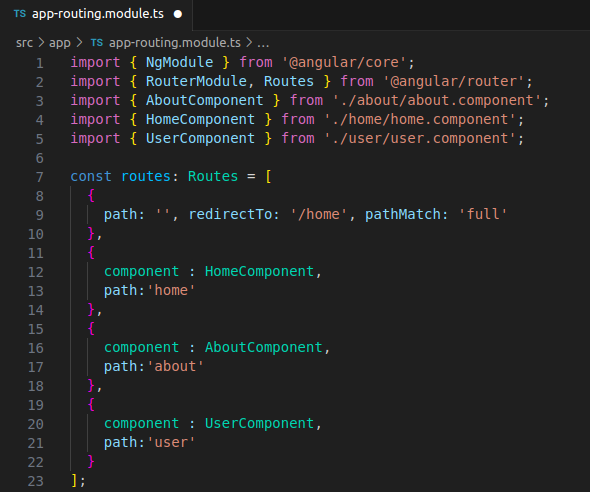
In this example, we have four routes:
- An empty path (
'') redirects to the/homeroute. /homeloads theHomeComponent./aboutloads theAboutComponent./userloads theUserComponent.
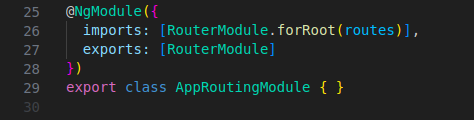
- Add the
RouterModule.forRoot(routes)configuration inside theimportsarray of the@NgModuledecorator.
Now that we’ve set up our routes, let’s create the components.
Creating Angular Components
To create the components, you can use the Angular CLI. Run the following commands:
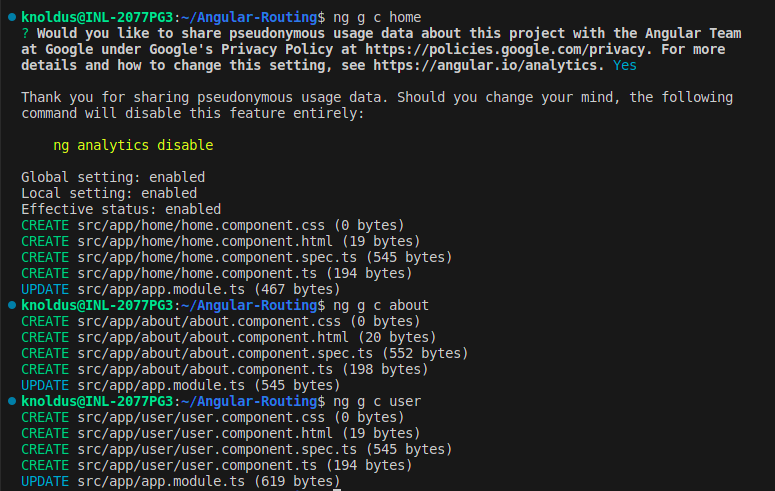
These commands will generate three components: HomeComponent, AboutComponent, and UserComponent. You can find these components in the src/app directory.
Displaying the Router Outlet
In your src/app/app.component.html file, add the <router-outlet></router-outlet> tag where you want the routed components to be displayed:
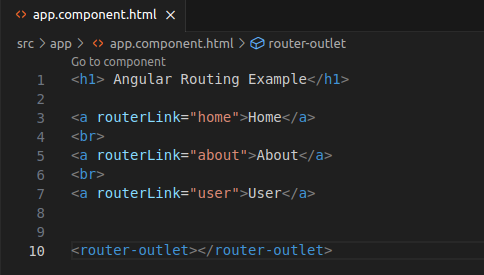
In this example, we have a navigation menu with links to our defined routes, and the <router-outlet></router-outlet> element will display the routed components.
Navigating Through the Application
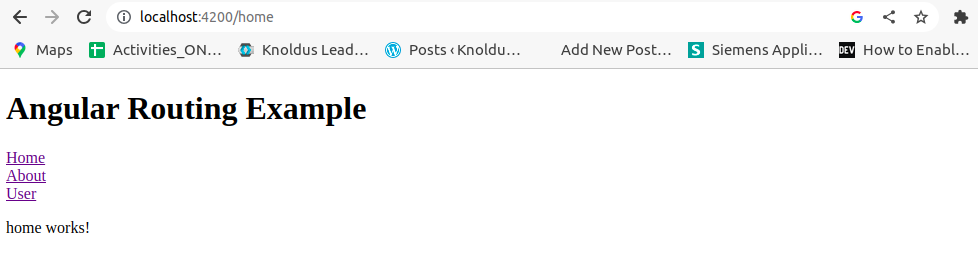
With everything set up, you can now navigate through your application using Angular’s router. Start your development server with:
ng serveNow, open your browser and visit http://localhost:4200. You should see your application with the navigation menu. Clicking on the menu items will load the corresponding components without a full page refresh.
Conclusion
Angular routing allows you to create dynamic and responsive SPAs by defining routes and associating them with components. In this blog, we covered the basic steps to set up routing in an Angular application, create components, and navigate through the application. As you explore Angular further, you can enhance your routes with parameters, guards, and lazy loading for more advanced scenarios.