


In today’s digital landscape, safeguarding sensitive data is paramount as its mishandling can result in disastrous consequences. As technology continues to advance, preventing such calamities becomes increasingly crucial. Conducting security assessments on your web application can help identify vulnerabilities, ensuring the protection of your data against potential attackers when it’s in production.
One of the common security vulnerabilities that you might find in your web application is cross-site scripting. It usually occurs when an attacker is able to inject some JavaScript code into your web application. It is a big security risk nowadays for any web application. Let us look at this vulnerability in more detail.
What is Cross-Site Scripting?
Cross-site scripting (XSS) is a type of security vulnerability where attackers inject malicious scripts into web applications that are then executed by unsuspecting users in their browsers. These scripts can steal sensitive information, manipulate user sessions, deface websites, or perform other malicious actions. XSS vulnerabilities occur when an application does not properly validate or sanitize user input before rendering it on a webpage. These are the three main types of XSS attacks:
- Stored (Persistent) XSS: Malicious scripts are permanently stored on the target server, and every user who views the compromised page becomes a potential victim.
- Reflected (Non-Persistent) XSS: Malicious scripts are embedded in a URL or form input and then reflected back to the user in the response from the server. The attack is typically targeted at a specific victim and requires the victim to click on a malicious link.
- DOM-based XSS: The vulnerability arises within the Document Object Model (DOM) of a web page. Malicious scripts manipulate the DOM elements on the client side, often without sending data to the server.
XSS attacks can have serious consequences, including:
- Session hijacking: Attackers can steal users’ session cookies, allowing them to impersonate the victim on a website.
- Data theft: Personal and sensitive information entered by users on a website can be stolen.
- Defacement: Attackers can alter the appearance of a website by injecting malicious scripts.
- Phishing: XSS can be used to create convincing phishing attacks, tricking users into divulging their credentials or other sensitive information.
Example of Cross-Site Scripting
Let us look at an example of cross-site scripting. Suppose you have a search page on a website that takes a user’s query and displays it in the search results without proper input validation:
<!-- Search Page -->
<form action="/search">
  <input type="text" name="query">
  <input type="submit" value="Search">
</form>
If a user enters the following as their search query: <script>alert(‘XSS’);</script>
The resulting URL would look like:
https://example.com/search?query=<script>alert('XSS');</script>As a result, the browser executes the embedded script, causing an alert box to pop up with the message “XSS.”
How to prevent it?
Preventing Cross-Site Scripting (XSS) vulnerabilities in your web applications is essential to ensure the security of your users and their data. Here are some best practices and techniques to help you prevent XSS attacks:
- Input Validation: Always validate and sanitize user inputs on both the client and server sides. Reject any input that doesn’t conform to expected patterns.
- Output Encoding: Encode data properly before rendering it in HTML, JavaScript, or any other context. Use functions or libraries specifically designed for encoding, such as htmlspecialchars() in PHP or equivalent functions in other languages.
- Content Security Policy (CSP): Implement a CSP to restrict which sources of content are allowed to be executed in your web pages. This can prevent unauthorized scripts from running.
- Escape User-Generated Content: If you allow users to input HTML or rich text, ensure that you sanitize and escape their input to prevent it from being treated as executable code.
- Use Frameworks and Libraries: Utilize web development frameworks and libraries that provide built-in security features against XSS, such as Angular, React, or Vue.js.
- HTTP-Only and Secure Cookies: Set the “HttpOnly” and “Secure” flags on cookies to prevent client-side JavaScript from accessing them. This helps protect session data.
- Validation and Sanitization Libraries: Use security-focused libraries and tools that can help automatically validate and sanitize user input, such as OWASP’s Java Encoder for Java applications.
- Content Security Policy (CSP) Headers: Implement Content Security Policy (CSP) headers in your web application’s HTTP responses. CSP enables you to specify which sources of content are considered valid, thus reducing the risk of XSS attacks.
- Regular Security Audits and Code Reviews: Conduct regular security audits and code reviews to identify and fix potential vulnerabilities, including XSS issues, in your codebase.
- Web Application Firewall (WAF): Consider using a Web Application Firewall to filter out malicious requests and protect against various types of attacks, including XSS.
- Error Handling: Implement proper error handling that doesn’t leak sensitive information to potential attackers.
By implementing these practices and staying vigilant about security, you can significantly reduce the risk of XSS vulnerabilities in your web applications.
Detect Cross-Site Scripting With Selenium And OWASP ZAP Integration
OWASP Zap (Zed Attack Proxy) is a widely used open-source web application security testing tool. Security professionals use OWASP Zap to identify and fix vulnerabilities in web applications during the development and testing stages.
Prerequisites
- You have installed JAVA 11 or higher on your machine.
- You have installed IDE (IntelliJ) on your machine.
- You have installed OWASP Zap on your machine. You can use the following URL to install it based on your requirements – OWASP Zap installation.
- You have installed Selenium in your system and have the latest version of your browser driver.
- You have created a Maven project and added the following dependencies to your pom.xml file:
<dependency>
            <groupId>org.zaproxy</groupId>
            <artifactId>zap-clientapi</artifactId>
            <version>1.11.0</version>
</dependency>
<dependency>
            <groupId>org.zaproxy</groupId>
            <artifactId>zap</artifactId>
            <version>2.12.0</version>
</dependency>
Steps to Detect Cross-Site Scripting
Step 1: Launch OWASP ZAP and get the API key
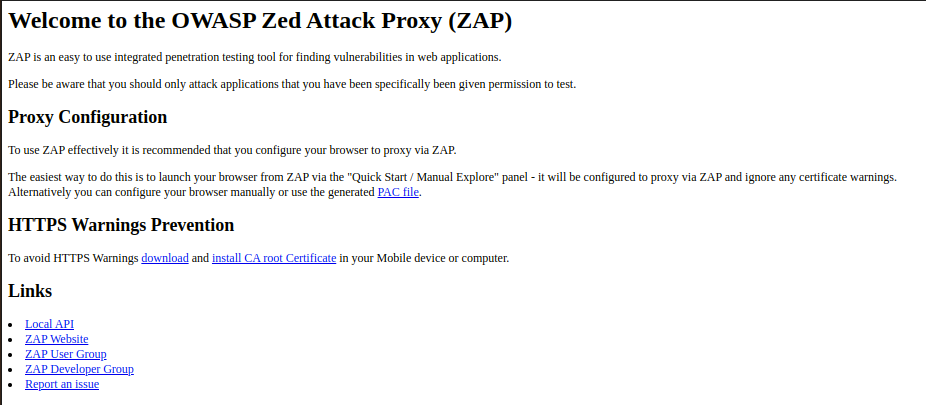
Open the OWASP Zap so that it is running on your local machine. The default port for the application to run is port 8080. To check if Zap is running on your machine, you can hit localhost:8080 in your browser. At this point, you should see the following page on that local address.
To get the API key for your application, go to Tools > Options > API. You should be able to see your specific API key. You will need this in later steps. There is also a random key generator option if you want to avail it.

Step 2: Add @BeforeMethod to start a proxy Zap server
static final String proxy_address_zap = "localhost";
static final int proxy_port_zap = 8080;
WebDriver driver;
static String appUrl = "your_app_url";

public void startUp(){
        ChromeOptions options = new ChromeOptions();
        options.addArguments("--ignore-certificate-errors");
        String proxyUrl = proxy_address_zap + ":" + proxy_port_zap;
        Proxy proxyServer = new Proxy();     //An instance of the Proxy class is created. This class represents the proxy configuration for Selenium WebDriver.
        proxyServer.setHttpProxy(proxyUrl)
                .setSslProxy(proxyUrl);  //This method sets the HTTP and SSL proxy for the proxyServer instance.
        options.setCapability(CapabilityType.PROXY, proxyServer);
        driver = new ChromeDriver();
        driver.manage().window().maximize();
    }
Therefore by configuring the Proxy object and setting the CapabilityType.PROXY capability, Selenium WebDriver will route all the HTTP and HTTPS requests through the specified proxy server. This allows you to intercept and inspect the network traffic using OWASP ZAP.
Step 3: Create a method to start a spider scan for your web application
Spider scan is a feature that allows for the automated exploration and discovery of a web application’s structure and content. It mimics the behaviour of a user browsing the application by navigating through its pages and following links to identify additional resources, endpoints, and parameters. The spider scan is designed to crawl a web application, systematically visit different URLs, and capture information about each request and response.
You can also configure other types of scanning like active scanning. There is also an option to configure scanning with specific security policies like SQL injection, and cross-site scripting amongst many more.
static final String proxy_apiKey_zap = "your_api_key";
private static ClientApi api;

 public static void spiderScan(String webAppUrl, String zapAddress, int zapPort) throws ClientApiException {
        api = new ClientApi(zapAddress, zapPort, proxy_apiKey_zap); //Instance of ClientApi class, which represents the client for interacting with the ZAP API
        ApiResponse apiResponse = api.spider.scan(webAppUrl, null, null, null, null);  //The api object (OWASP ZAP client) calls the spider.scan() method to initiate a spider scan on a web application
        logger.info("apiResponse : " + apiResponse.getName());
    }
By calling the spider.scan() method, the ZAP API sends a request to the ZAP instance to start the spider scan process on the specified web application. The response from the API call is stored in the ApiResponse object for further analysis or processing.
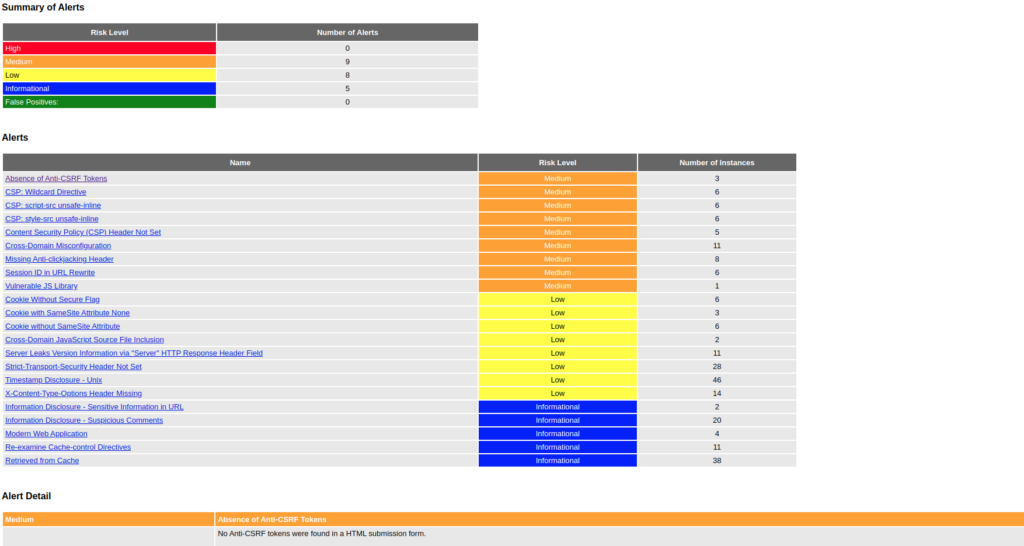
Step 4: Generate a report for your scan to see vulnerabilities
public static void getReports(String webAppUrl) throws ClientApiException, IOException {
        byte[] bytes = api.core.htmlreport();

        // getting the alert messages and just printing those.
        ApiResponse messages =  api.core.messages(webAppUrl,"0","99999999");
        logger.info("messages : " + messages);

        // storing the bytes in to html report.
        String str = new String(bytes, StandardCharsets.UTF_8);
        File newTextFile = new File("security_report.html");
        FileWriter fw = new FileWriter(newTextFile);
        fw.write(str);
        fw.close();
    }
Step 5: Call your methods in the @Test method
@Test
    public void testLoginSpiderSecurity() throws ClientApiException {
        loginToWebApp(); //A method to login to our web application. This contains your selenium code to automate login to the application.
        Utility.spiderScan(appUrl, proxy_address_zap, proxy_port_zap);
    }
Also read: OWASP TOP 10 – What you need to know
Featured Image: https://avinetworks.com/glossary/cross-site-scripting/