


In today’s fast-paced digital world, mobile app test automation has become essential for ensuring the quality and reliability of mobile applications. Integrating GitLab, Appium, and BrowserStack can significantly streamline the mobile app testing process, allowing development teams to achieve faster releases and deliver high-quality apps to end users. This blog post explores the powerful combination of GitLab, Appium, and BrowserStack. It provides a comprehensive guide on integrating and applying these tools for efficient mobile app test automation. I will separate the blog’s content into various sections for your convince.
Section 1: Overview of GitLab, Appium, and BrowserStack
In this section, we will provide a brief introduction to GitLab, highlighting its features and benefits. We will also discuss the importance of Appium and BrowserStack in mobile app testing.
GitLab is a web-based DevOps platform that offers a comprehensive collection of software development tools such as version control, continuous integration and delivery (CI/CD), and problem management. It provides a centralised repository for managing source code and successfully collaborating with team members. BrowserStack, on the other hand, is a cloud-based mobile and web testing platform. BrowserStack is essential for the Appium pipeline setup as it offers a cloud-based infrastructure for testing mobile applications on real devices and browsers. This eliminates the complexities of importing and deploying the program on the emulator, ensuring efficient and reliable testing.
Appium is an open-source test automation framework that allows you to automate mobile app testing across different platforms, including Android and iOS. It provides cross-platform compatibility, making it easier to reuse test scripts across other mobile platforms.
Section 2: Prerequisites
To integrate GitLab with Appium and BrowserStack, you will need the following prerequisites:
- GitLab Account: Create a GitLab account or use an existing one. GitLab provides version control and collaboration features for your codebase.
- Git Repository: Set up a Git repository in your GitLab account. This repository will contain your test scripts and any other necessary code for your project.
- BrowserStack Account: Sign up for a BrowserStack account. BrowserStack is a cloud-based testing platform that allows you to run automated tests on real devices and browsers.
- Configure GitLab Runner: Register your GitLab Runner with your GitLab account. This will enable GitLab to send jobs to the runner for execution.
- Test Framework: Choose a test framework that is compatible with both Appium and GitLab. Some popular options include TestNG, JUnit, and Cucumber.
- Configure GitLab CI/CD: Create a
.gitlab-ci.ymlfile in your GitLab repository. This file defines the CI/CD pipeline and specifies the stages and jobs to be executed. Configure the pipeline to trigger the build script for running your tests. - Configure BrowserStack Integration: Add the necessary configurations and credentials in your test scripts to connect to BrowserStack. This typically includes specifying the BrowserStack username, access key, and desired capabilities for the test devices or browsers
Section 3: Setting up Appium Test Framework
Configuring the required dependencies and components is part of setting up the test framework. Fortunately, setting up a Maven-based Appium framework is not a challenging task. With Maven, we can easily manage our project dependencies and ensure smooth integration with Appium. We need to add the required dependencies to the pom.xml file to get started. The essential dependencies include selenium-java, java-client, junit and cucumber-java. By adding these dependencies, our IDE, such as IntelliJ, will automatically load all the required dependencies, making it convenient to start writing our mobile tests.
public class purchaseProduct {
public void loginUser(String userName, String password) {
        wait.until(ExpectedConditions.visibilityOfElementLocated(TestUserName));
        LaunchEmulator.driver.findElement(TestUserName).sendKeys(userName);
        LaunchEmulator.driver.findElement(TestUserPassword).sendKeys(password);
    }

    public void clickOnLoginButton() {
        wait.until(ExpectedConditions.visibilityOfElementLocated(loginButton)).click();
    }
}
In the provided code snippet, there are two functions: loginUser and clickOnLoginButton, which are part of the purchase.java file located in the page package. These functions contain the necessary code for performing the login functionality in the target mobile application.
To utilize these functions, we can call them in our stepDefination.java file. here, we define the steps or actions that need to be executed to log in to the user in the mobile application. We can invoke the loginUser function to enter the login credentials and clickOnLoginButton the function to perform the action of clicking on the login button.
public class AndroidTest {
    public static AndroidDriver driver;

   @Given("I am on Login page")
    public void i_am_on_login_page() {
        System.out.print("I am on login page, I can see username and password field");
    }

    @When("I click on username and password field it takes input")
    public void i_click_on_username_and_password_field_it_takes_input() {
        PurchaseProduct.loginUser("standard_user", "secret_sauce");
    }

    @Then("click on singIn button")
    public void click_on_sing_in_button() {
        PurchaseProduct.clickOnLoginButton();
    }
}
Section 4: Configuring BrowserStack in the Project
To configure BrowserStack in a Maven project, establish a connection between your local project and the BrowserStack App Automate server. This can be done by setting up hooks that maintain the connection and facilitate communication between your project and BrowserStack.
Hooks act as a bridge between your test framework and BrowserStack, allowing you to execute tests on real devices provided by BrowserStack’s cloud infrastructure. Here’s an example of how the hooks file may look like:
public class Hooks{
DesiredCapabilities desiredCapabilities = new DesiredCapabilities();
        HashMap<String, Object> browserstackOptions = new HashMap<String, Object>();
        browserstackOptions.put("userName", browserstackUsername);
        browserstackOptions.put("accessKey", browserstackAccessKey);
        browserstackOptions.put("buildName", buildName);
        desiredCapabilities.setCapability("appium:deviceName", browserstackDeviceName);
        desiredCapabilities.setCapability("appium:os_version", Os_version);
        desiredCapabilities.setCapability("appium:app", app);
        desiredCapabilities.setCapability("platformName", platformName);
        desiredCapabilities.setCapability("bstack:options", browserstackOptions);

        URL remoteUrl = new URL("http://hub.browserstack.com/wd/hub");

        driver = new AndroidDriver(remoteUrl, desiredCapabilities);
}
To integrate the Appium and BrowserStack frameworks with GitLab and run mobile tests on the pipeline, we need to define some variables in the .gitlab-ci.yaml file. These variables provide centralized control over BrowserStack-related configurations, allowing us to easily customize and manipulate them according to our project requirements.
       String browserstackUsername = System.getenv("BROWSERSTACK_USERNAME");
        String browserstackAccessKey = System.getenv("BROWSERSTACK_ACCESS_KEY");
        String buildName = System.getenv("BUILD_NAME");
        String browserstackDeviceName = System.getenv("DEVICE_NAME");
        String Os_version = System.getenv("OS_VERSION");
        String platformName = System.getenv("PLATFORM_NAME");
        String app = System.getenv("BROWSERSTACK_APP_URL");
Section 5: Configuring GitLab CI/CD
Here, we will focus on setting up the Appium Test Framework specifically for integration with the GitLab CI/CD pipeline. While the previous sections covered the essential steps for setting up the test framework and BrowserStack configuring, this section will provide guidance on how to leverage GitLab’s powerful features to automate the execution and management of your Appium tests.
stages:
  - test

appium_job:
  stage: test
  image: maven:3.8.1-openjdk-11
  variables:
    BROWSERSTACK_USERNAME: "honxxxxxxxxxx"
    BROWSERSTACK_ACCESS_KEY: "N51T8oxxxxxxx"
    BUILD_NAME: "alpha_0.1.7"
    PLATFORM_NAME: "Android"
    DEVICE_NAME: "Samsung Galaxy S22"
    OS_VERSION: "12.0"
    BROWSERSTACK_APP_URL: "bs://xxxxxxxxxxxxxxx"

  script:
    - mvn -Dtest=cucumberOptions.TestRunner test
For configuring the GitLab pipeline we need to create a .gitlab-ci.yaml file and save it in the root directory of your project. This file acts as a configuration file that defines the steps and instructions for GitLab’s CI/CD pipeline
Section 6: Executing the test and pipeline
After completing the setup and configuration steps mentioned above, push your Appium test framework to the GitLab repository. This includes the GitLab repository setup, CI/CD pipeline configuration, Appium test framework implementation, and BrowserStack integration. GitLab’s powerful CI/CD features automatically detect the presence of the .gitlab-ci.yaml file in your project directory.
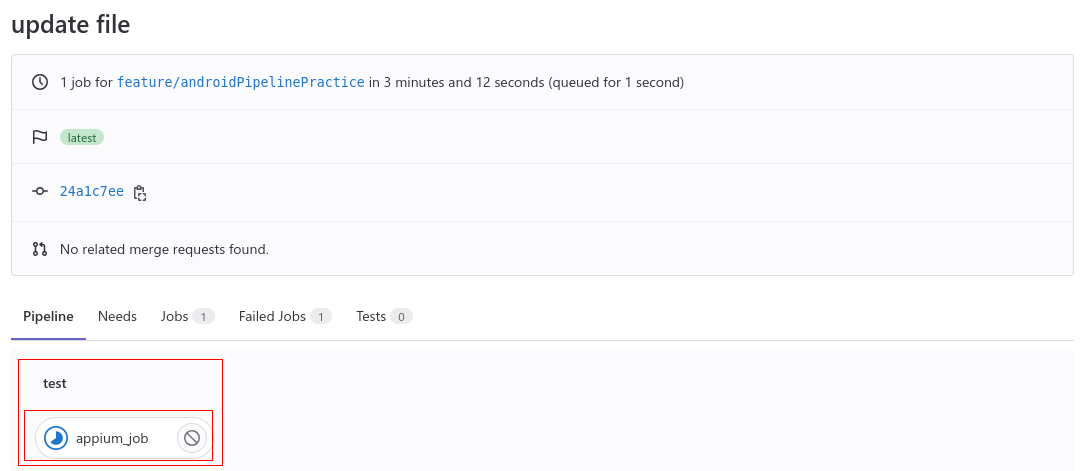
As you can see in the .gitlab-ci.yaml file, we have defined a single job that is responsible for running a specific task or set of tasks in our CI/CD pipeline. When you click on this job, you will be able to access the logs associated with its execution.
As you can see in the YAML file, we include a Maven command at the end of the file to load and execute Maven in our pipeline. This command triggers the execution of the Appium tests by running the pom.xml file, which contains the necessary dependencies and configurations for our test framework.
Section 7: Analyzing Test Results
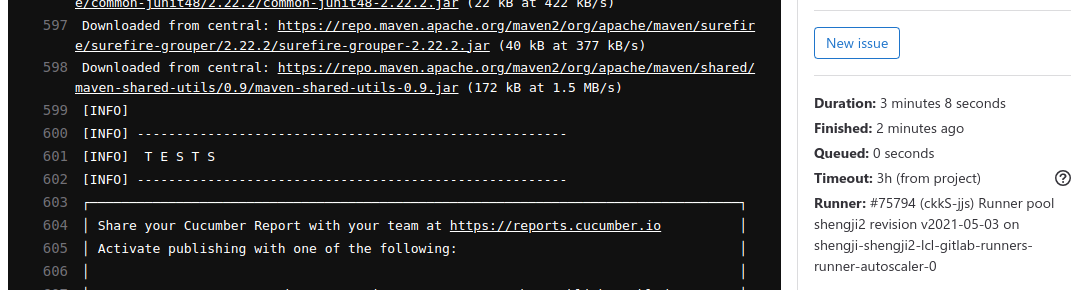
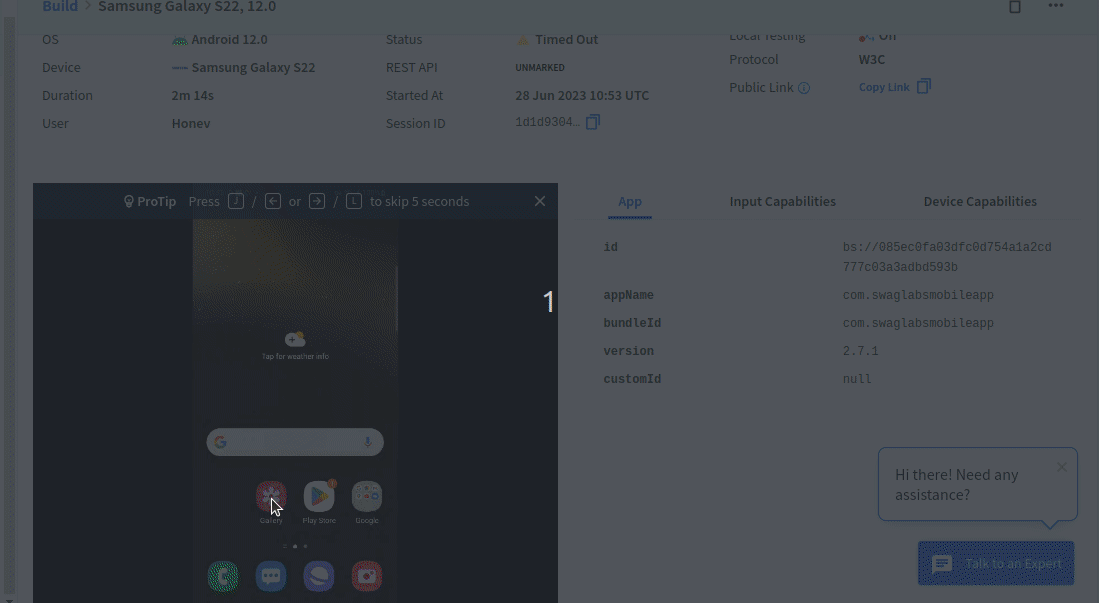
As part of our project, we use BrowserStack for mobile app testing, which offers several benefits, including robust reporting and notifications. With BrowserStack, we have the advantage of receiving comprehensive test reports that enable us to analyze the results more effectively. This feature is particularly useful when running tests within the GitLab pipeline, as it provides terminal-based execution with detailed feedback.
Additionally, BrowserStack’s integration allows us to monitor the live execution of tests directly on the BrowserStack dashboard. This real-time visibility enhances our ability to closely observe the test runs and pinpoint any issues or unexpected behaviour that may arise during the test execution.
We are all done now!!
Conclusion
I appreciate your patience as we explored the process of running an Appium test suite on the GitLab pipeline. Throughout this blog, we have covered various aspects, including setting up the necessary configurations, defining test cases, and integrating with BrowserStack for cross-browser testing.
To further assist you, I have created a tech hub that contains all the resources you need to get started, including the Appium test scripts, the .gitlab-ci.yaml file, and a sample mobile app. You can access these resources to accelerate your testing efforts and ensure seamless integration between GitLab and Appium. If you found this blog helpful, don’t hesitate to share it with your friends and colleagues. If you have any further questions or need assistance, feel free to reach out to me at rahul.kumar@nashtechglobal.com. I’m here to help!
Till then, Happy learning, and happy sharing!