


Introduction
What is the Glue ETL job?
“AWS Glue is a serverless data integration service that makes it easy for analytics users to discover, prepare, move, and integrate data from multiple sources. You can use it for analytics, machine learning, and application development. It also includes additional productivity and data ops tooling for authoring, running jobs, and implementing business workflows.” – AWS Document
Some concepts in Glue.
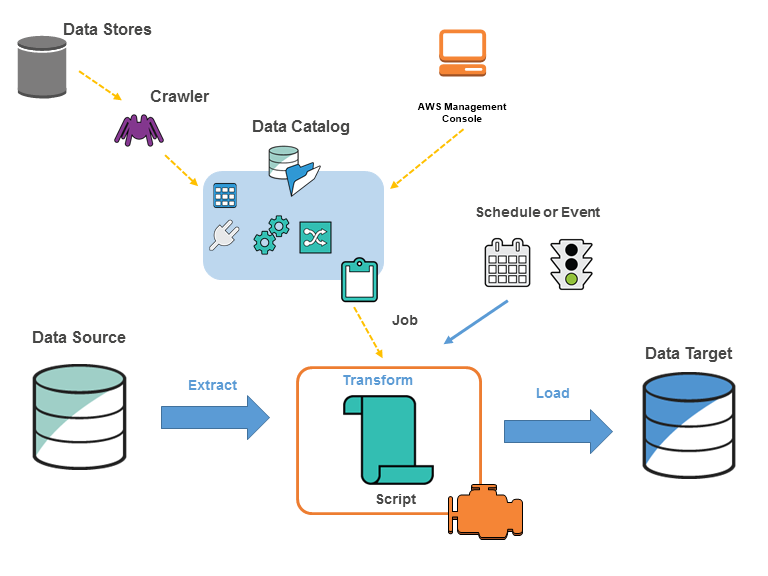
You define jobs in AWS Glue to accomplish the work that’s required to extract, transform, and load (ETL) data from a data source to a data target. You typically perform the following actions:
-
For data store sources, you define a crawler to populate your AWS Glue Data Catalog with metadata table definitions. You point your crawler at a data store, and the crawler creates table definitions in the Data Catalog. For streaming sources, you manually define Data Catalog tables and specify data stream properties.
In addition to table definitions, the AWS Glue Data Catalog contains other metadata that is required to define ETL jobs. You use this metadata when you define a job to transform your data.
-
AWS Glue can generate a script to transform your data. Or you can provide the script in the AWS Glue console or API.
-
You can run your job on demand, or you can set it up to start when a specified trigger occurs. The trigger can be a time-based schedule or an event.
When your job runs, a script extracts data from your data source, transforms the data, and loads it to your data target. The script runs in an Apache Spark environment in AWS Glue.
Basically, some of the ideas in AWS Glue are summarized as follows.
AWS’s main task is to extract data from a data source to a data destination. Data sources can be AWS’s own data services such as S3, RDS, Redshift… or can also connect directly to external data services via JDBC connection.
Crawler is “a machine that collects” the data structure of the data source, it collects the metadata and creates a Data Catalog. From this Data Catalog, we will create a Glue ETL job using AWS Console (drag and drop) or Interactive Script (write the script yourself) to complete the collection and transformation of data to the data destination.
But there is a note, Crawler will not be supported for non-native data sources such as DB2, in which case you need to connect directly to the data source without any data catalog being created. And how to use AWS Glue to run ETL jobs against non-native JDBC data sources, please read at here.
Developing and testing AWS Glue job scripts locally
Developing and testing AWS Glue job scripts locally – AWS Glue (amazon.com)
At this post, I will demo extract data from a non-native JDBC DB2 to AWS Redis ElastiCache, script using Interactive notebook with Jupyter. And using Docker on WSL2 Ubuntu to run some components.
Config DB2 and Redis local
DB2
create a docker-compose.yml file
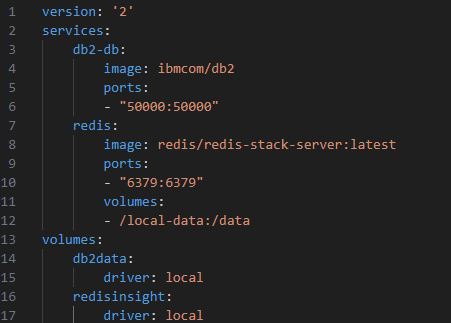
Redis
https://redis.io/docs/install/install-stack/docker/
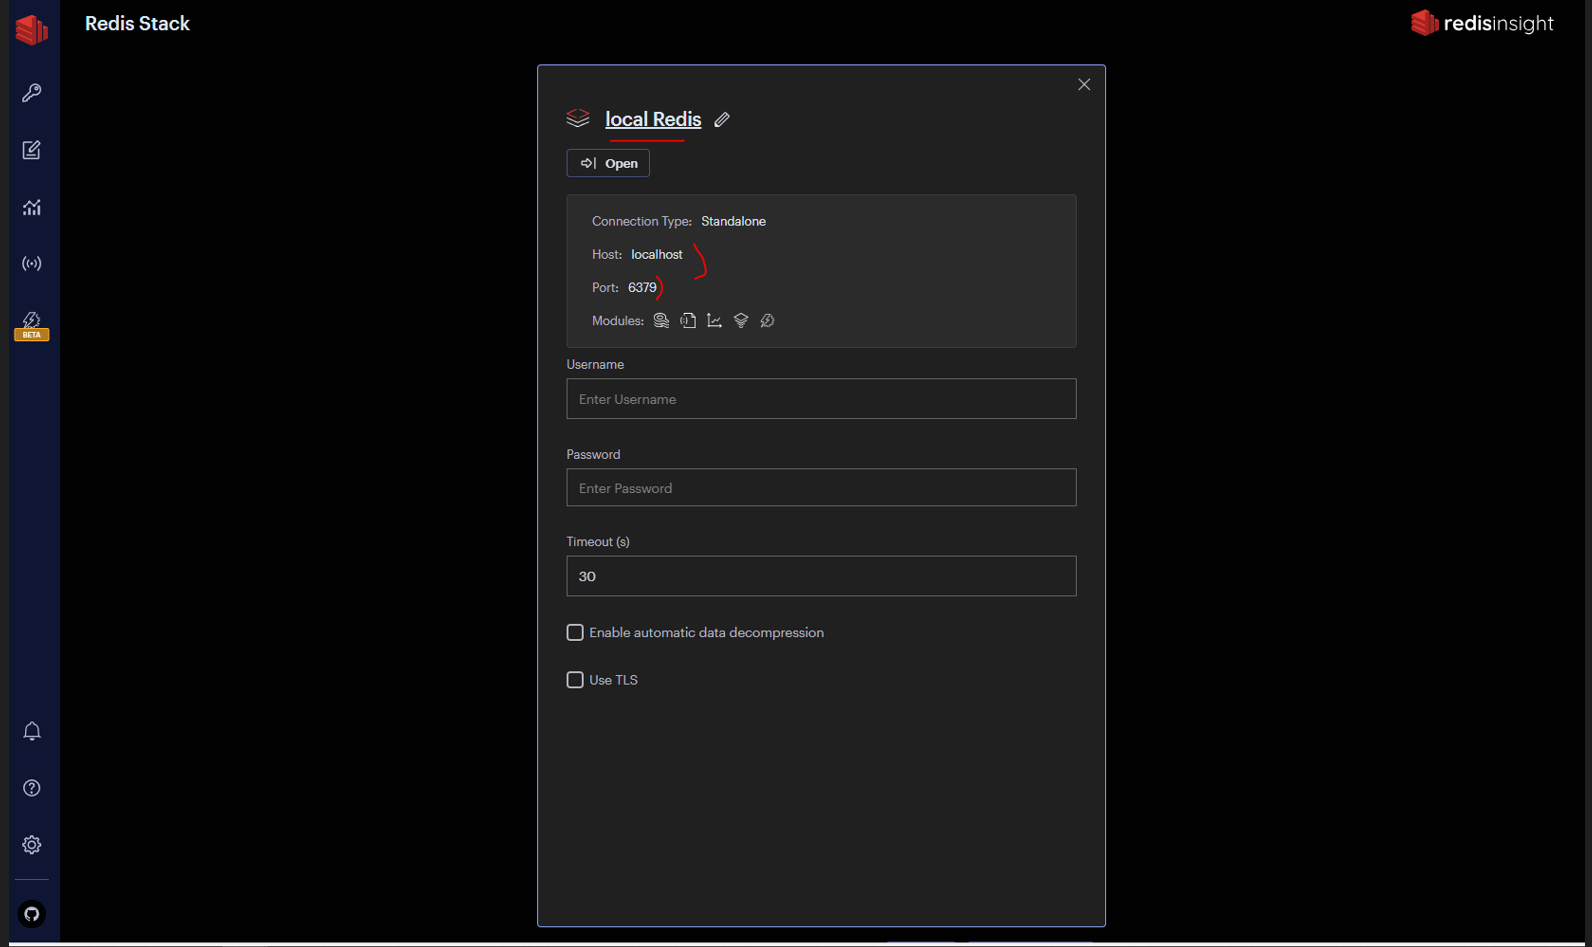
To get started with Redis Stack using Docker, you first need to select a Docker image:
-
redis/redis-stackcontains both Redis Stack server and RedisInsight. This container is best for local development because you can use the embedded RedisInsight to visualize your data. -
redis/redis-stack-serverprovides Redis Stack server only. This container is best for production deployment.
Here, I’m using redis/redis-stack because it contains RedisInsight as well for Redis UI – easier to connect and visualize data tool.
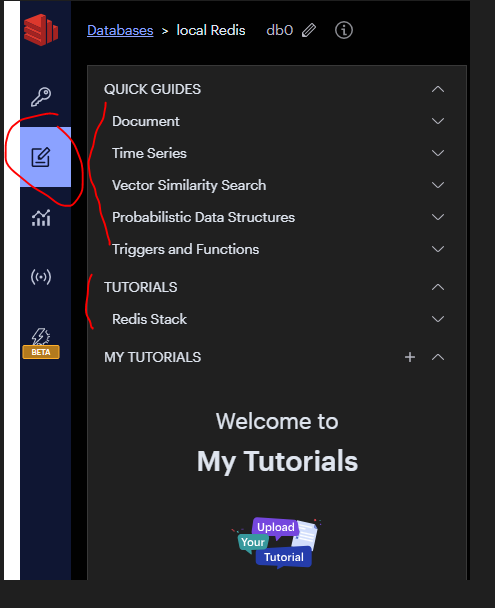
In RedisInsight, have Quick guild and Tutorials to researching.
Config Jupyter notebook
1. Start in WSL2
2. Setup AWS credentials in WSL2
3. Prepare environment variables
Run the following command to start Jupyter Lab:
export PROFILE_NAME=”default”
echo $PROFILE_NAME
export JUPYTER_WORKSPACE_LOCATION=”/mnt/c/jupyter_workspace”
echo $JUPYTER_WORKSPACE_LOCATION
sudo docker run -d –network=docker_default -v ~/.aws:/home/glue_user/.aws -v $JUPYTER_WORKSPACE_LOCATION:/home/glue_user/workspace/jupyter_workspace/ -e AWS_PROFILE=$PROFILE_NAME -e DISABLE_SSL=true –rm -p 4040:4040 -p 18080:18080 -p 8998:8998 -p 8888:8888 –name glue_jupyter_lab amazon/aws-glue-libs:glue_libs_4.0.0_image_01 /home/glue_user/jupyter/jupyter_start.sh
important notice
by default, when run container without docker-compose file, network is “brigde”
# list all network
“sudo docker network ls”
# inspect bridge network
“sudo docker network inspect bridge”
–network=docker_default aim connects the glue container to default docker network when running docker compose for DB2. all container must same network to communicate each others.
can be check with command line
“sudo docker network inspect docker_default”
or can connect with command line
“sudo docker network connect docker_default glue_jupyter_lab”
4. prepare db2 jdbc jar for container
copy jdbc for DB2 from local to container:
“sudo docker cp jupyter_workspace/db2jcc.jar glue_jupyter_lab:/home/glue_user/livy/rsc-jars”
5. Install requirement package for glue jupyter lab environment.
exec inside the glue_jupyter_lab container by command line:
sudo docker exec -it glue_jupyter_lab /bin/bash
after that, install redis and simplejson package for python by
pip install redis
pip install simplejson
pip install rejson
OR you can prepare a requirement.txt file like that
redis==5.0.1
simplejson==3.19.2
rejson==0.5.6
and run with command line to install:
pip install -r requirements.txt
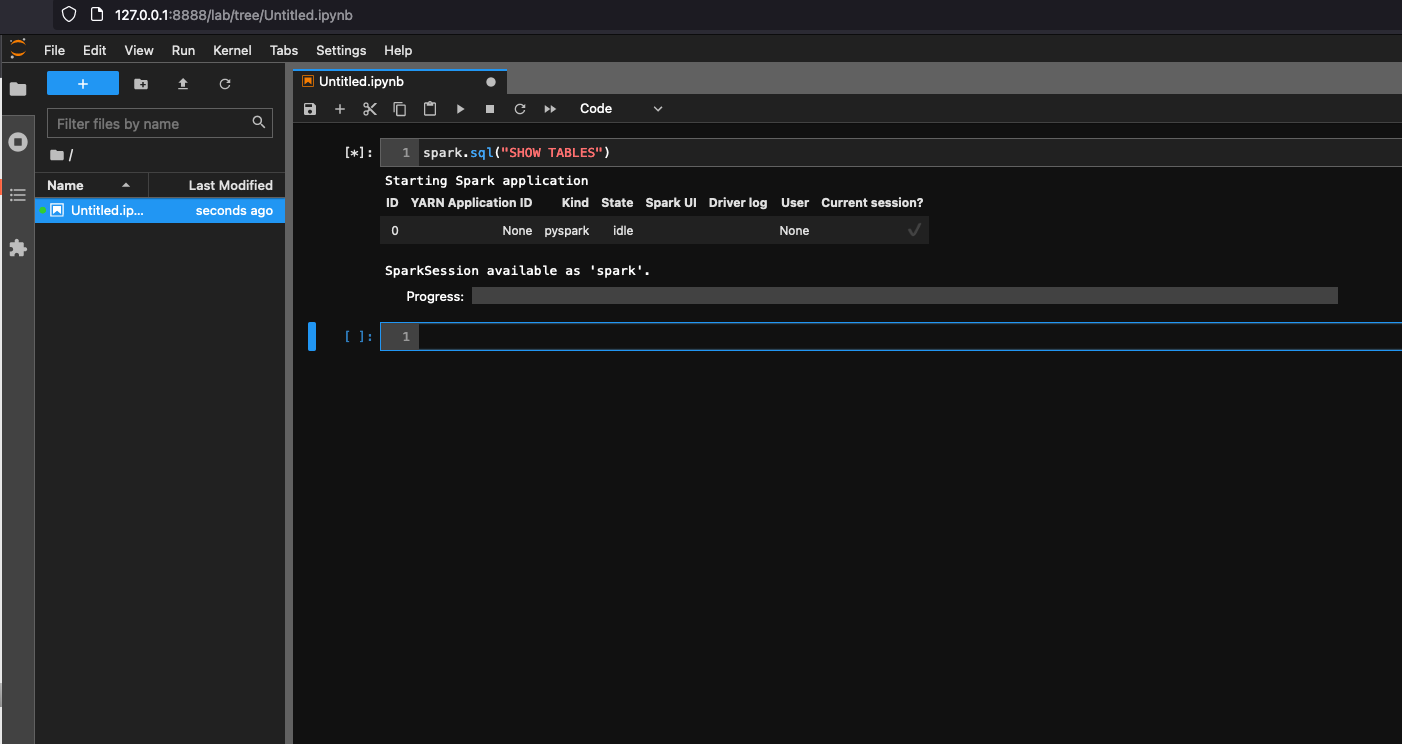
6. Open http://127.0.0.1:8888/lab in your web browser in your local machine, to see the Jupyter lab UI.

7. Choose Glue Spark Local (PySpark) under Notebook. You can start developing code in the interactive Jupyter notebook UI.
ETL jobs monitoring
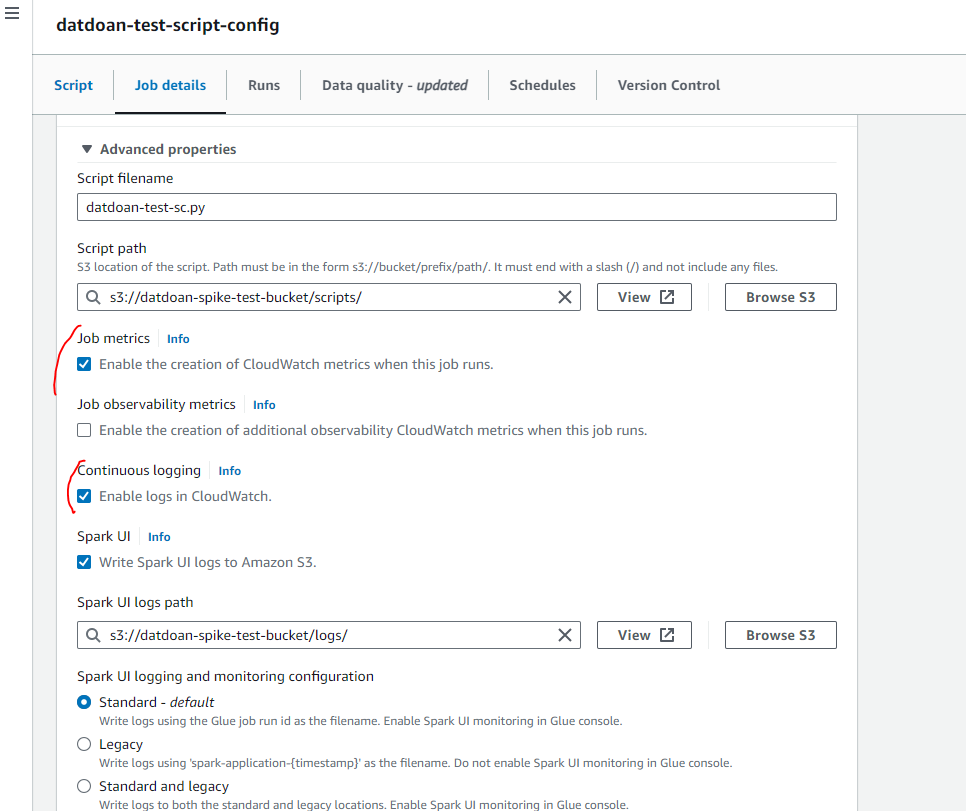
ETL jobs will be monitored by CloudWatch by settings.
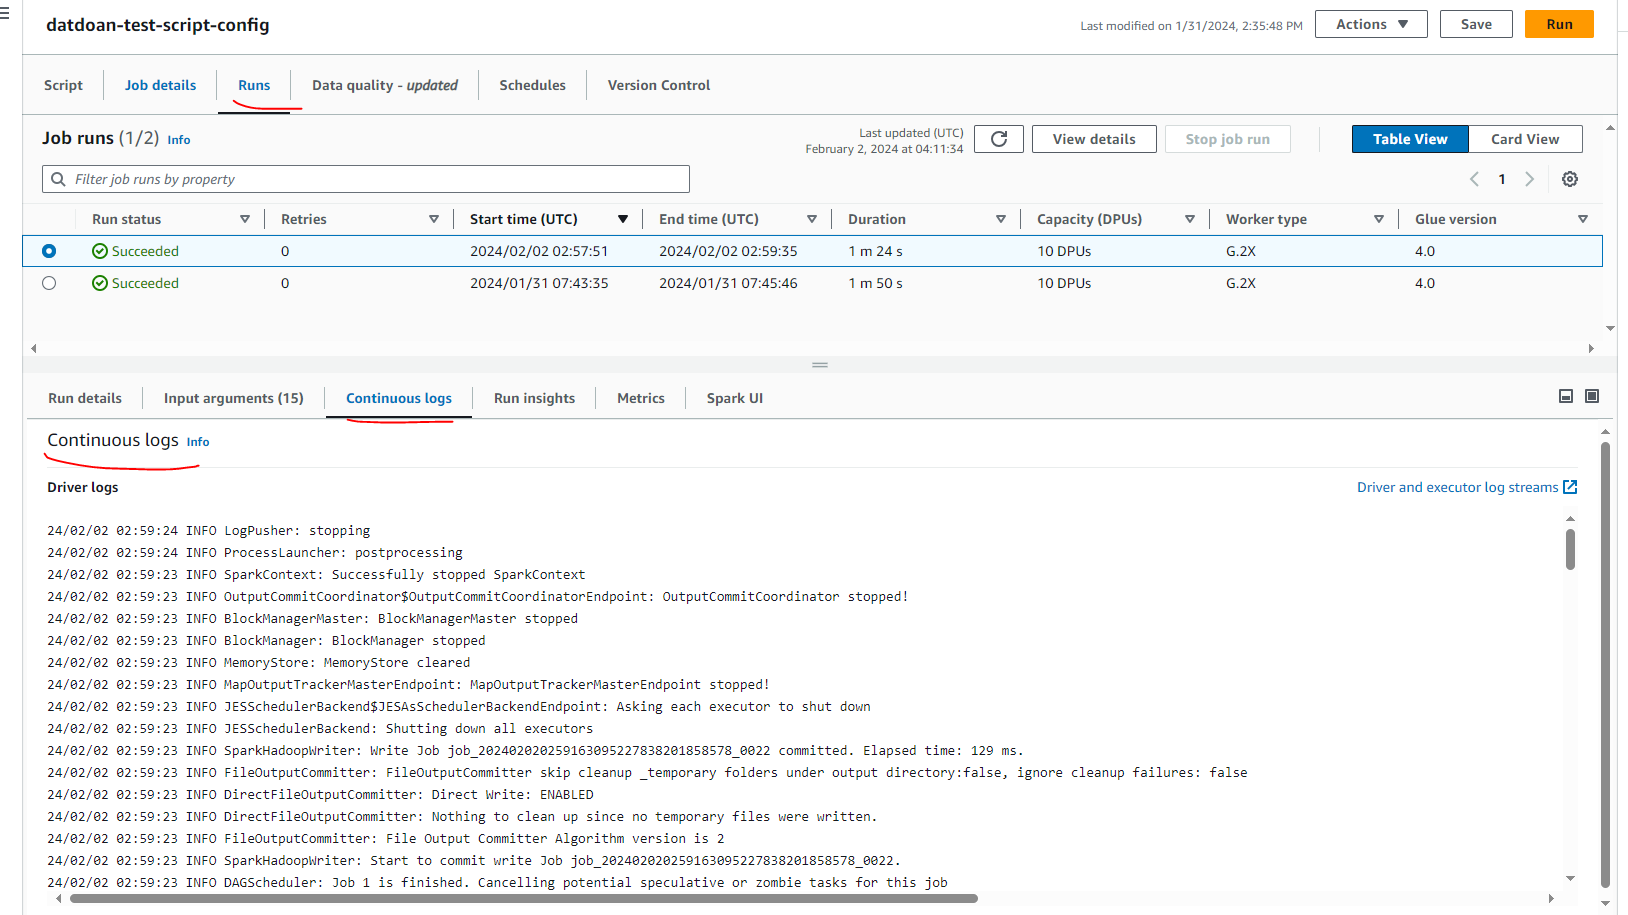
We can see the job was ran is successful and Continuous log like as below, it can be used for error debugging.
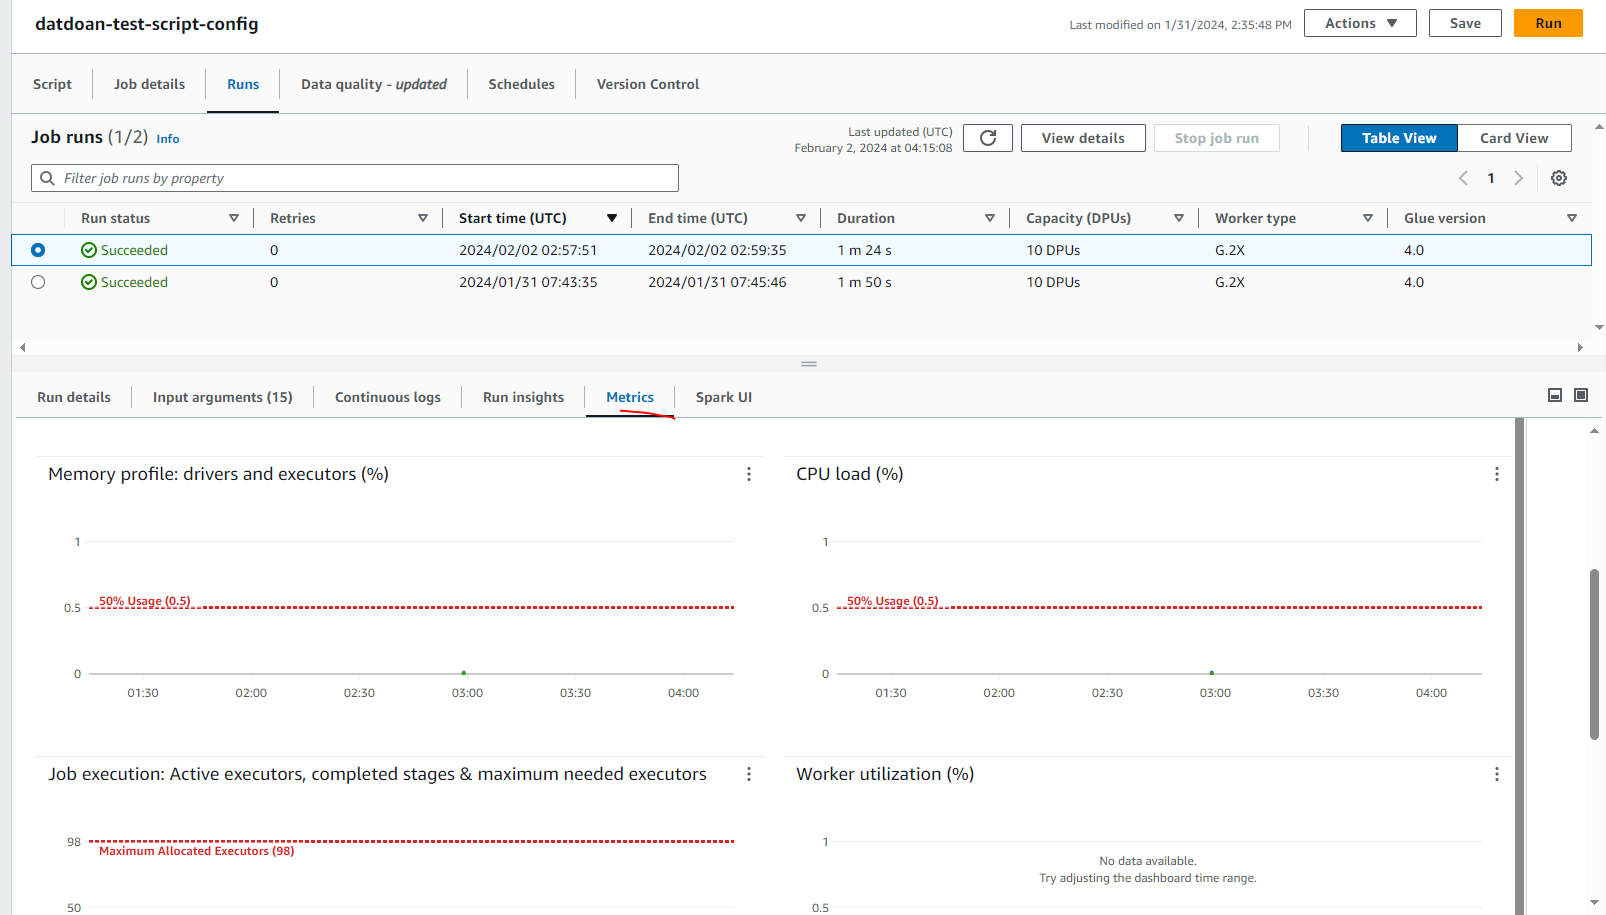
Same for Job Performance Monitoring at Metrics
Bigdata problem
One problem for big data is the cost of glue. With AWS Glue, you only pay for the time your ETL job takes to run. There are no resources to manage, no upfront costs, and you are not charged for startup or shutdown time. You are charged an hourly rate based on the number of Data Processing Units (or DPUs) used to run your ETL job. A single Data Processing Unit (DPU) is also referred to as a worker. AWS Glue comes with three worker types to help you select the configuration that meets your job latency and cost requirements. Workers come in Standard, G.1X, G.2X, and G.025X configurations.
Worker Type: definition and pricing at here: Jobs – AWS Glue (amazon.com)
Exception handler
Number of retries
MaxRetries – Number (integer).
The maximum number of times to retry this job if it fails.
Job timeout (minutes)
Timeout – Number (integer), at least 1.
The job timeout in minutes. This is the maximum time that a job run can consume resources before it is terminated and enters TIMEOUT status. The default is 2,880 minutes (48 hours).
Conclusion
In conclusion, AWS Glue ETL with PySpark simplifies data extraction with its seamless integration and cost-effective approach. By eliminating the need for infrastructure management and offering pay-as-you-go pricing, it streamlines operations while keeping expenses in check. Leveraging PySpark’s distributed computing capabilities ensures efficient processing of datasets, empowering businesses to derive valuable insights without unnecessary complexities. With AWS Glue ETL and PySpark, organizations can efficiently extract data, optimize resources, and stay ahead in today’s dynamic data landscape.