


Introduction
As we all know security is a big concern when dealing with cloud resources from safeguarding yourself from attackers to restricting your resources from unauthorized users. In this blog, I will explain to you how we can get Falco alerts sent directly to your email with Python but before that let’s understand what this Falco tool is and how it works.
Understanding Falco
Falco is a cloud-native security tool that helps increase the security of our resources by applying custom rules. It might sound confusing, so let me explain with an example: Suppose I have a house guard, and I have provided him with some rules. These rules dictate that everyone must use Gate 1 to enter the house and Gate 2 to exit. The guard continuously monitors both doors, and if someone tries to enter the house using Gate 2, he will create an alert and inform me. Falco works similarly to this guard. We provide it with some rules, and it continuously monitors system calls. If the rules are satisfied, it generates an alert.
In this blog, I will not deep dive into Falco, but I will show you how we can get Falco alerts sent directly to your email with Python. Let’s begin with the demo.
Prerequisites
- Python3
- Falco
Demo
The very first thing that we need is a Python application that sends our output to a specified recipient. Below is the application code that we need to run on our machine. You must have Python 3 installed on your system before running this program.
Step 1: Application Configuration
from flask import Flask
from flask import request
import smtplib
from email.message import EmailMessage

def sendEmail(textfile):
smtp_user = "yourusername@domain.com"
smtp_password = "yourpassword" # you should create an App password from the google setting and replace it with this
server = "smtp.gmail.com"
port = 587
to_address = 'recipient@domain.com'

msg = EmailMessage()
msg['Subject'] = f'The contents of {textfile}'
msg['From'] = smtp_user
msg['To'] = to_address

s = smtplib.SMTP(server, port)
s.connect(server, port)
s.ehlo()
s.starttls()
s.ehlo()
s.login(smtp_user, smtp_password)
s.sendmail(smtp_user, to_address, msg.as_string())
s.quit()

app = Flask(__name__)

@app.route("/", methods=['GET', 'POST'])
def hello_world():
sendEmail(request.get_json()['text'])
return "email sent succesfully"

app.run("127.0.0.1", 3000)
You need to replace the smtp_user and smtp_password and to_address variables. Save the file with the name app.py.
Then run the following command
$ python3 app.py
This application will run on 3000 port.
Step 2: Modifying Falco configuration
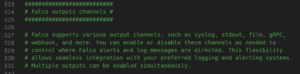
- Navigate to /etc/falco directory and open falco.yaml file in you editor
- Now go to falco output channels section

- . In falco output channels find program output and modify it as
program_output:
  enabled: true
  keep_alive: false
  program: "jq '{text: .output}' | curl --header 'Content-Type: application/json' -d @- -X POST http://127.0.0.1:3000/"
step 3: Enable Json_output
step 4: Generate an Alert
To generate an alert you need to open a file that satisfies a rule or some predefined rule. I am using a predefined rule which is AWS find the credential rule to generate an alert by running following command:
$ find /home/ .aws/credentials
That is after running the above command you will get an email alert to your mail.
Bonus content
You can get all these code in my github repo https://github.com/NashTech-Labs/falco-python-program-to-send-output-over-email