


Enterprises operating in the domain of insurance, construction, or e-commerce, till date rely on people for tagging images, verifying identities, and flagging inappropriate content. This raises 3 major challenges:
- Slow: Processing 1,000,000 images/month manually (at 30 seconds/image) requires 8,334 hours of manual labor every single month.
- Expensive: Manual tagging incurs significant labor costs.
- Error-prone: Every once in a while, even trained reviewers (manual) struggle with maintaining consistency. Especially when labeling subtle attributes (like emotions, micro-objects, etc.).
Amazon Rekognition helps in overcoming all of the above-mentioned challenges. But, how?
- Fast: Amazon Rekognition can process a million images within seconds
- Cost-effective: A million images can be processed for as little as $1,000 (i.e., $0.001 per image)
- Consistency: It provides consistent results since pretrained models analyze images with standardized logic and confidence scores
In this blog, we’ll see what Amazon Rekognition is and how we can get started using its core image and video analysis capabilities to automate visual intelligence in our applications.
What is Amazon Rekognition?
Amazon Rekognition is a fully managed, AI‑powered computer vision service that enables enterprises to analyze images and videos with ease. Whether we need to detect objects, identify faces, recognize celebrities, track people, moderate content, or extract text, Rekognition offers a wide range of pre‑built models designed to simplify these tasks and more.
Features
Amazon Rekognition’s pre‑built models offer:
- Object Detection
- Face Recognition (Detection + Search)
- People Tracking
- PPE Detection (for construction-sites)
- Content Moderation
- Text Detection
- Video Segment Detection
- Face Liveness
Moreover, if a use case is not covered in the above-mentioned features, in that case, Amazon Rekognition offers Custom Labels. It lets us train a model to detect domain-specific object(s).
Experimenting with Custom Labels
Amazon Rekognition’s pre-built models are ideal when our use case falls under into the common patterns (defined above). However, in most of the cases, an organization wants to train their own models to make them stand different from the rest. Also, they would like to have more control over different aspects of the model, like training dataset, labels used, and version of the model.
Hence, here we’ll learn how to use Custom Labels of Amazon Rekognition to train a model from scratch.
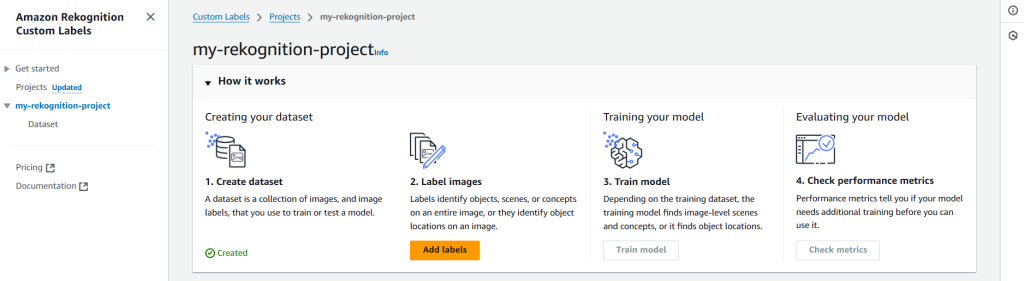
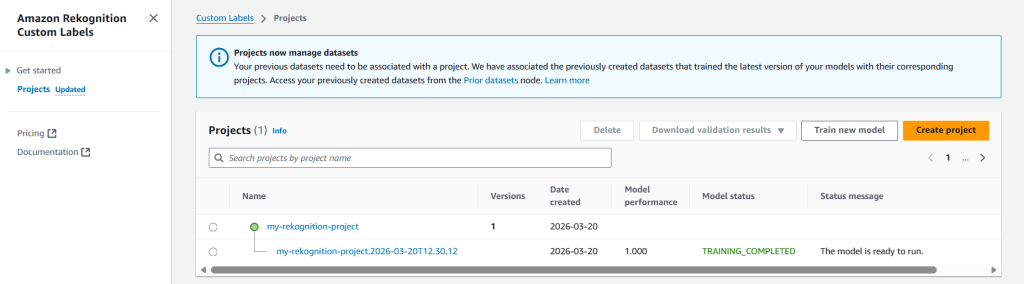
Step 1: Create Project
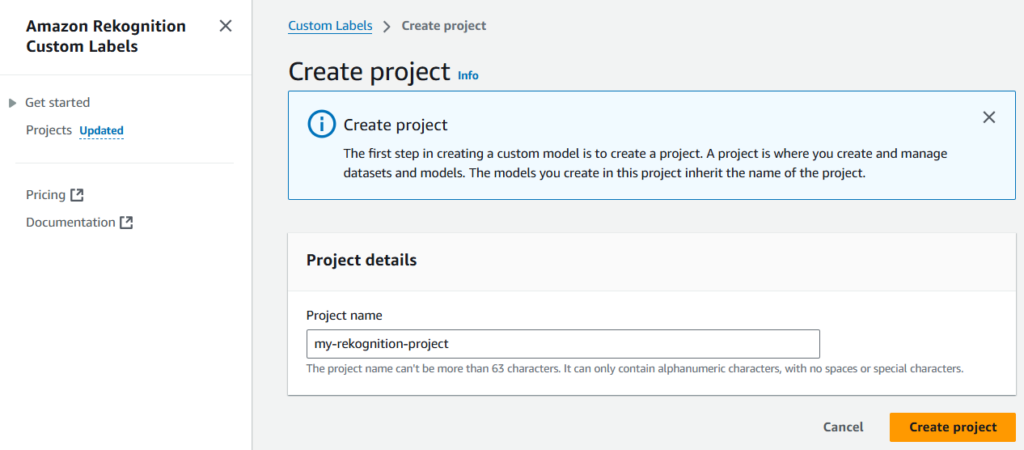
First step is to create a project under which the model will be placed. For that we need to navigate to Projects section (on the left-side panel) of Amazon Rekognition’s Custom Labels.
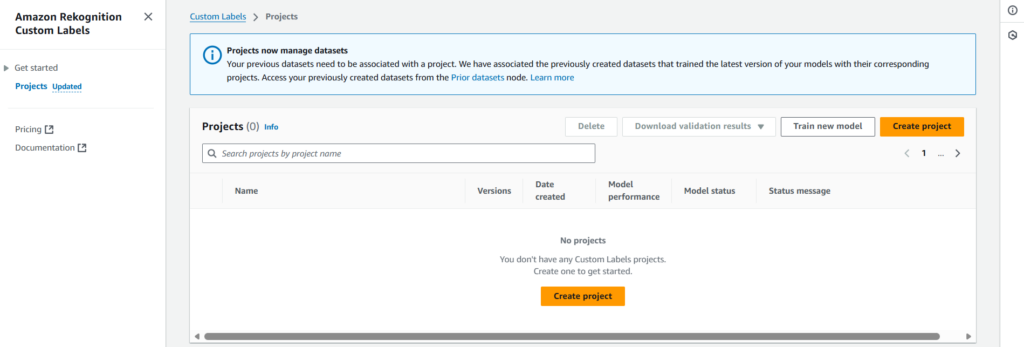
Let’s name the project as my-rekognition-project.
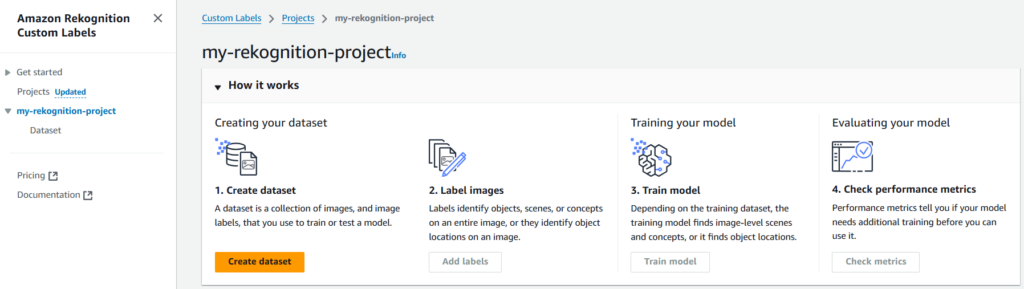
Step 2: Create Dataset
Once the project is created, we need to create a dataset using which the model will be created/trained.
For importing dataset, we’ll be using Amazon S3 (s3://amazon-rekognition-sample-dataset/images/), since it is cost-effective and efficient.
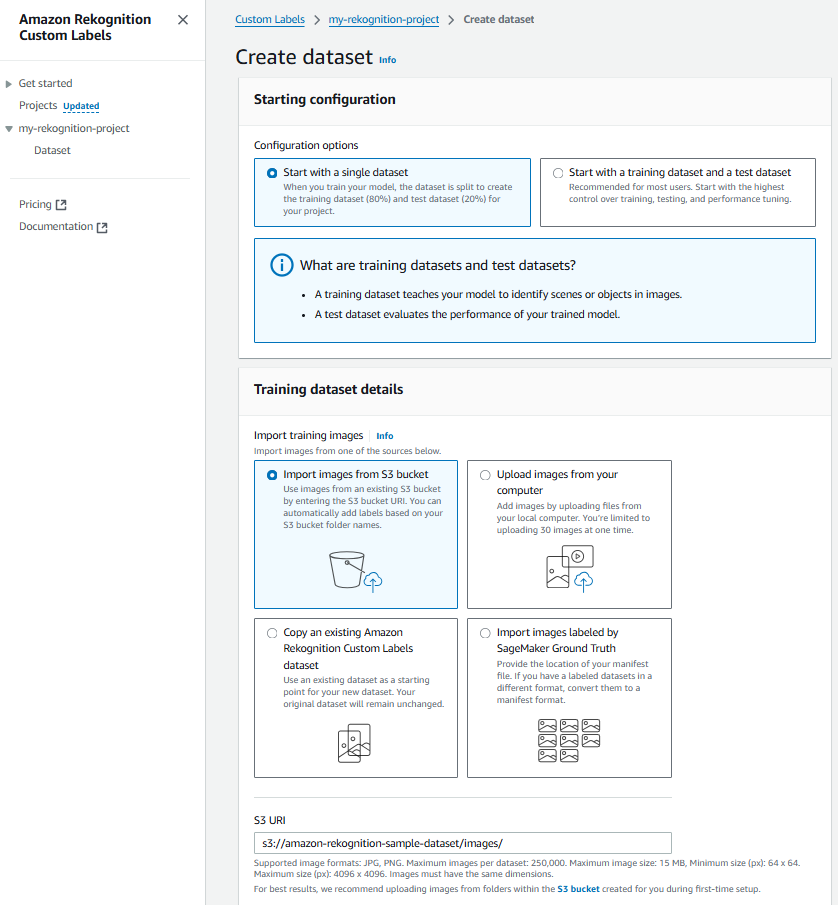
Note: We need to make sure that the S3 bucket, selected for dataset import, is correctly configured. And it has the right permissions added to its policy. For reference,
{
	"Version": "2012-10-17",
	"Statement": [
		{
			"Sid": "AWSRekognitionS3AclBucketRead20191011",
			"Effect": "Allow",
			"Principal": {
				"Service": "rekognition.amazonaws.com"
			},
			"Action": [
				"s3:GetBucketAcl",
				"s3:GetBucketLocation"
			],
			"Resource": "arn:aws:s3:::amazon-rekognition-sample-dataset"
		},
		{
			"Sid": "AWSRekognitionS3GetBucket20191011",
			"Effect": "Allow",
			"Principal": {
				"Service": "rekognition.amazonaws.com"
			},
			"Action": [
				"s3:GetObject",
				"s3:GetObjectAcl",
				"s3:GetObjectVersion",
				"s3:GetObjectTagging"
			],
			"Resource": "arn:aws:s3:::amazon-rekognition-sample-dataset/*"
		},
		{
			"Sid": "AWSRekognitionS3ACLBucketWrite20191011",
			"Effect": "Allow",
			"Principal": {
				"Service": "rekognition.amazonaws.com"
			},
			"Action": "s3:GetBucketAcl",
			"Resource": "arn:aws:s3:::amazon-rekognition-sample-dataset"
		},
		{
			"Sid": "AWSRekognitionS3PutObject20191011",
			"Effect": "Allow",
			"Principal": {
				"Service": "rekognition.amazonaws.com"
			},
			"Action": "s3:PutObject",
			"Resource": "arn:aws:s3:::amazon-rekognition-sample-dataset/*",
			"Condition": {
				"StringEquals": {
					"s3:x-amz-acl": "bucket-owner-full-control"
				}
			}
		}
	]
}
Step 3: Start Labeling
After creating dataset, we need to add labels.
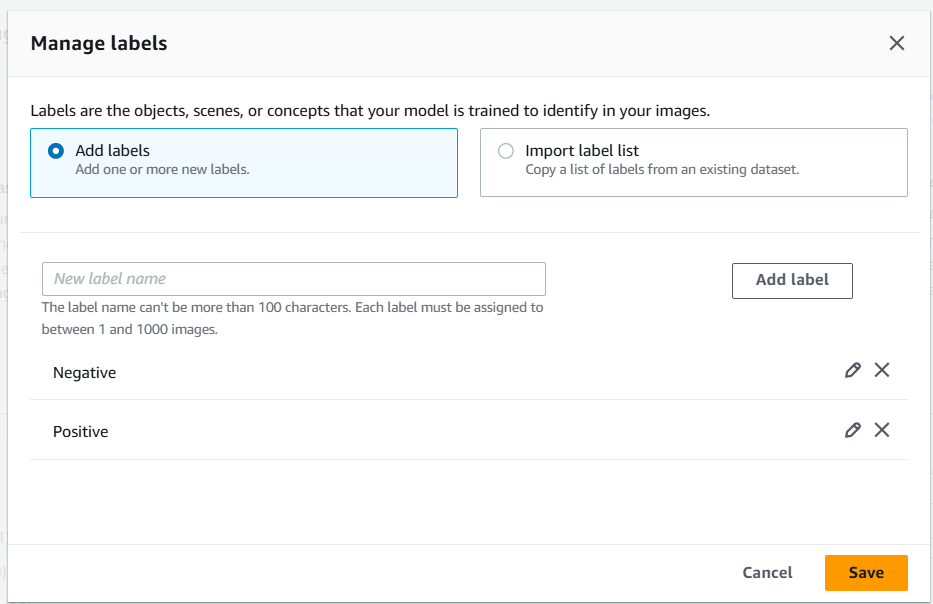
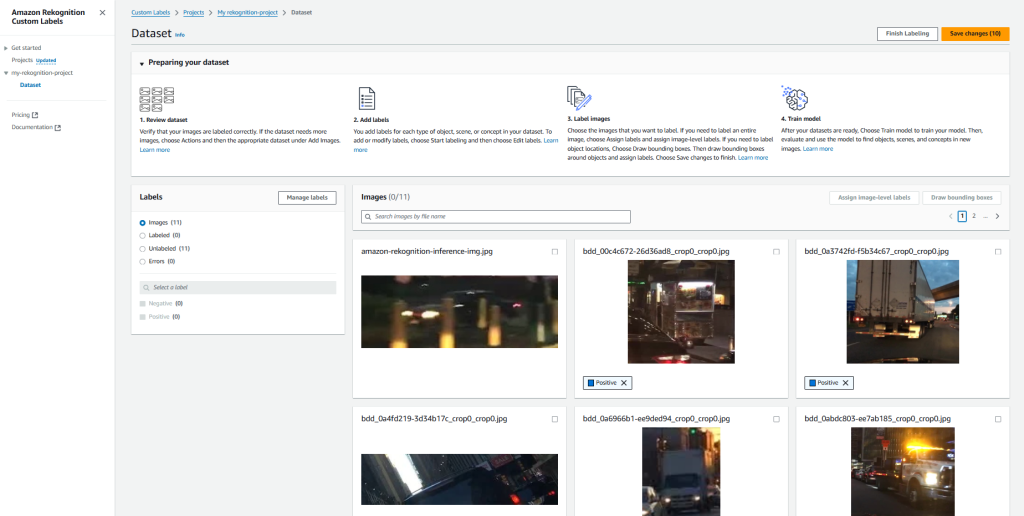
Next we need to label the images. For now, we are labelling images manually. But we can import the labels from an existing dataset as well.
Step 4: Model Training
This step depends on the training dataset. Since, the training model finds image-level scenes & concepts, or it finds object locations.
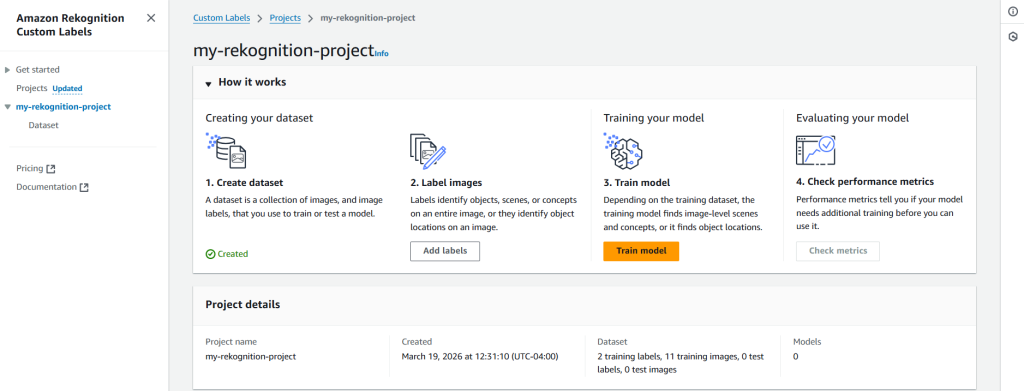
To train our model, Amazon Rekognition Custom Labels uses your project’s labeled dataset. Optionally, we can add tags to help track your models. Also, we can encrypt our dataset (images) with our own AWS Key Management Service key (by default, the dataset is already encrypted with a key that AWS owns and manages for us).
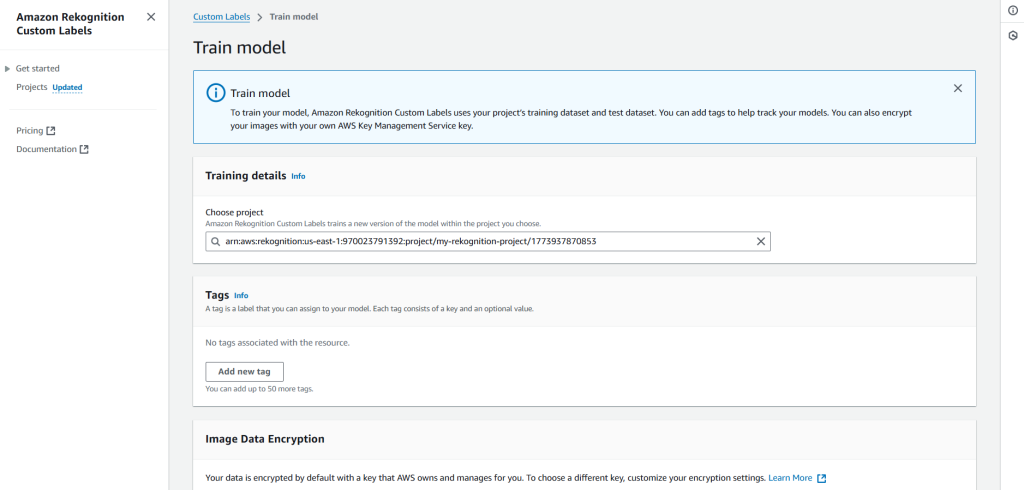
Note: Training a model is a time consuming process. Hence, Amazon Rekognition might take from 30 minutes up to 24 hours to complete the training process.
Step 5: Infer Using the Model
At last, when the model is trained, we can infer results using it.
To infer the results we need to start the model.
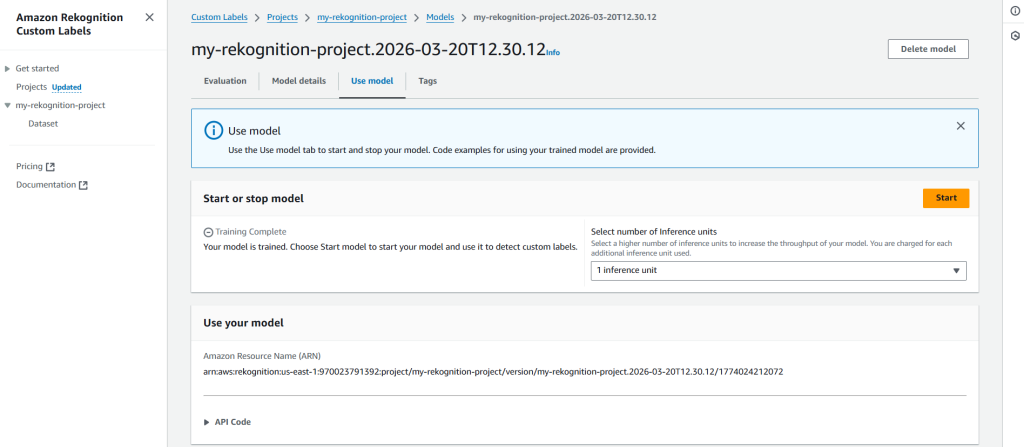
Once the model has started, we can use AWS CloudShell to infer the result(s).
aws rekognition detect-custom-labels \
>   --project-version-arn "arn:aws:rekognition:<aws-region-id>:<aws-account-id>:project/my-rekognition-project/version/my-rekognition-project.2026-03-20T12.30.12/1774024212072" \
>   --image '{"S3Object": {"Bucket": "amazon-rekognition-sample-dataset","Name": "images/amzn-rekognition-inference-img.jpg"}}' \
>   --region us-east-1
{
    "CustomLabels": [
        {
            "Name": "Negative",
            "Confidence": 84.72000122070312
        }
    ]
}
We can clearly see in the result that the model has inferred the image as Negative with ~84% confidence.
In-Summary
With Amazon Rekognition we can keep the operational tasks as light as it can get, while the stakeholders can focus on the core business. Since, it provides both breadth and depth for modern computer vision use cases. With its ability to seamlessly process images from S3, support for standard formats, and accessible SDK integrations, the service enables businesses to focus on building features rather than managing infrastructure.
Hopefully you found this blog insightful. In case you want to share your thoughts, please do so via comments 🙂