


Introduction
Imagine ‘Getting Started with GraphQL’ like crafting a personalised meal—tailoring data retrieval to your exact needs from websites or apps!
In the world of web development, there’s this powerful tool called GraphQL. It’s like being your own chef in a restaurant kitchen, and you can order precisely what you want and how you want it. Let’s take a peek at this cool way of getting data from the web, where you’re in charge of your data order, getting only what you need, just how you want it, and all from one place!
What is GraphQL?
GraphQL is a language made by Facebook, that helps you get the exact data you want from a website or an app without wasting anything extra. You become the boss of your data order, getting only what you need, just how you want it, and all from one place!
GraphQL API architecture

Query Language for APIs:
1. Precise Data Requests:
- With GraphQL, clients can ask for exactly what they need. Instead of receiving a fixed set of data from an API (like with traditional APIs), they construct a query detailing the specific fields and their structure that they want in the response.
- For instance, instead of getting all the information about a book, a client can request only the book’s name and ID.
Request -
query {
 books {
  id
  name
 }
}
2. Structured Queries:
GraphQL uses a well-defined schema that outlines the available data and its structure. Clients craft queries adhering to this schema, ensuring a clear understanding between the client and the server about the data being exchanged.
Efficient Data Retrieval:
1. Reduced over-fetching and under-fetching:
- Traditional APIs often either provide more data than needed (over-fetching) or lack necessary information (under-fetching). GraphQL solves this by letting clients specify exactly what they require, avoiding wasted data.
2. Aggregating Data from Multiple Sources:
- GraphQL can act as a middleman, allowing clients to query and aggregate data from multiple sources or services in a single request.
- For instance, a client can ask for user information from one source, recent transactions from another, and reviews from a different service, all in one GraphQL query.
3. Unified Endpoint for Multiple Data Sources:
- Unlike traditional APIs that may require multiple endpoints for different data, GraphQL typically uses a single endpoint. This simplifies the process for clients, who can access diverse data sources through a unified interface.
Key Concepts of GraphQL
Schema: The Blueprint of GraphQL
Structure and Importance:
A GraphQL schema acts as the blueprint, defining the structure of the data available to clients. It outlines types, queries, and mutations, serving as the contract between the server and clients.
Types, Queries, and Mutations:
- Types: These define the shape of the data and can be scalar (single values like integers or strings) or complex (objects or enums).
- Queries: Clients use queries to fetch data from the server. They describe the specific information needed and its structure.
- Mutations: When data modification is required, mutations come into play. They allow clients to add, update, or delete data on the server.
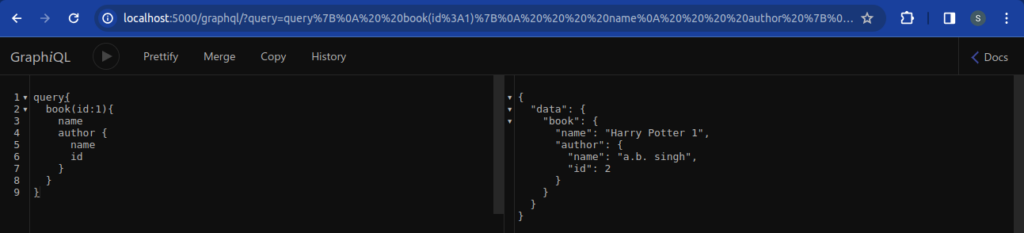
Queries and Resolvers: Unravelling the Fetching Mechanism
- Queries: Represent the client’s request for specific data. They define what data is needed and its structure.
- Resolvers: These are functions that handle queries, fetching the requested data from the backend. Resolvers align with the structure of the queries.
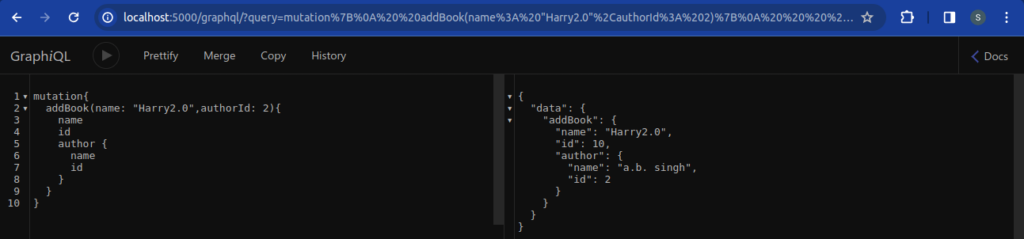
Mutations: Modifying Data on the Server
- Mutations are used to modify data on the server, addressing the need for adding, updating, or deleting information.
- They ensure that data changes are explicit and controlled, maintaining the integrity of the system.
4 simple ways to call a GraphQL API
1. Using a Special App for GraphQL
You can use a special app that helps you talk to GraphQL. It’s like using a special phone for just one purpose. For example, Apollo Client for some apps and Apollo Android for Android phones. They do the talking part for you, so you don’t have to figure out how to speak the GraphQL language.
2. Using a Different App
You can also use a different app, like Postman or Insomnia, which can talk to GraphQL too. Just like sending a message using a different phone, you tell this app what you want to say, send it to the GraphQL place, and get a reply back in a language you understand.
3. Using Some Commands on Your Computer
There are commands you can type on your computer that act like speaking to GraphQL. Tools like Curl or HTTPie are like talking directly to GraphQL from your computer. You type what you want to ask and see the answers in a simple way on your screen.
4. Using a Tool on the Internet
There are websites where you can write your GraphQL questions in a nice box and get the answers right there. It’s like asking a question in a chatroom and getting an instant reply. Tools like GraphiQL or GraphQL Playground help you see and test GraphQL things easily.
Steps to Set Up GraphQL: Explained Line by Line
Step 1: Initialise the Node.js Project
Run these commands in your terminal:
npm init
npm i express express-graphql graphql
npm i --save-dev nodemon - npm init: This command initialises a new Node.js project. It creates a package.json file, which keeps track of the project’s dependencies and configuration details.
- npm i express express-graphql graphql: These commands use npm (Node Package Manager) to install essential packages.
- express: This package is a popular web application framework for Node.js. It simplifies building web applications by providing robust features for handling HTTP requests and defining routes.
- express-graphql: Specifically tailored for integrating GraphQL with Express, this package streamlines the process of setting up GraphQL APIs within Express applications.
- graphql: The GraphQL package contains tools necessary to work with GraphQL APIs. It offers functionalities to define schemas, execute queries, and manage GraphQL data structures.
- npm i –save-dev nodemon: Nodemon is a developer tool that automatically restarts the Node.js server whenever changes are detected in the code. It’s installed as a development dependency (–save-dev) to enhance the development experience by reducing the manual effort needed to restart the server after code modifications.

Updating package.json Configuration
Rename Main File : Rename the main file to server.js. Update the “main” field in the package.json:
{
  "main": "server.js",
  ...
}
Modify the Scripts Section: Update the scripts section to include a devStart script using Nodemon:
{
  "scripts": {
    "devStart": "nodemon server.js",
    ..
  }
}
Final package.json Configuration: Your updated package.json file should look something like this:
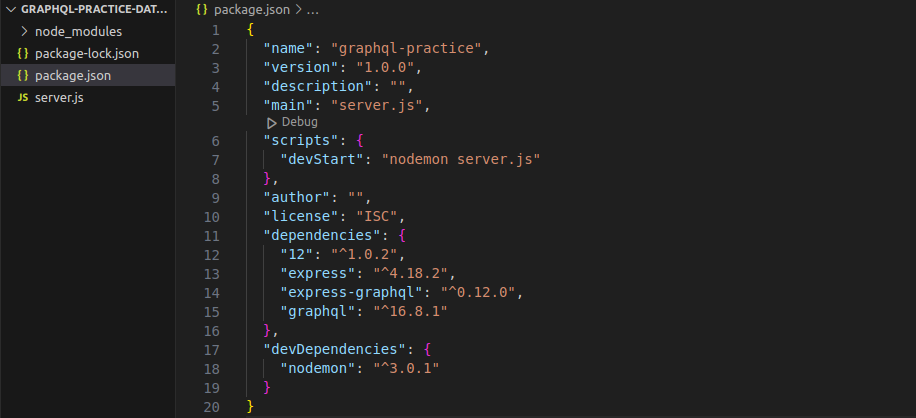
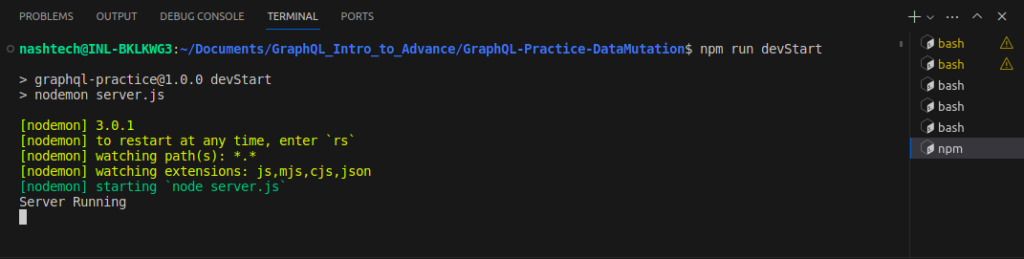
Running the Server with Updated Configuration
After making these changes, you can run your server using npm run devStart. This command will start your server using Nodemon and use server.js as the entry point.
Step 2: Create the server file.
Create a file (e.g., server.js) and add the code to create a basic Express server:
const express = require('express');
const app = express();
app.listen(5000, () => console.log ('Server Running on http://localhost:5000')).
Step 3: Run the server.
Run the server using npm run devStart in the terminal.
Step 4: Integrate GraphQL into the server.
Add GraphQL functionality to your Express server:
const express = require('express');
const { graphqlHTTP } = require('express-graphql');
const {
  GraphQLSchema,
  GraphQLObjectType,
  GraphQLString
} = require('graphql');
const app = express();

// Define a simple GraphQL schema
const schema = new GraphQLSchema ({
  query: new GraphQLObjectType({
    name: 'HelloShivam',
    fields: () => ({
      message: {
        type: GraphQLString,
        resolve: () => 'Hello Shivam Singh'
      }
    })
  })
});
// Integrate GraphQL with Express
app.use('/graphql', graphqlHTTP({
  schema: schema,
  graphiql: true // Provides a UI for interacting with GraphQL
}));
app.listen(5000, () => console.log('Server running on http://localhost:5000'));
Step 5: Accessing the GraphQL Interface
- Access the GraphQL interface at http://localhost:5000/graphql.
- This setup includes a simple GraphQL schema with a single query that returns a “Hello Shivam Singh” message.

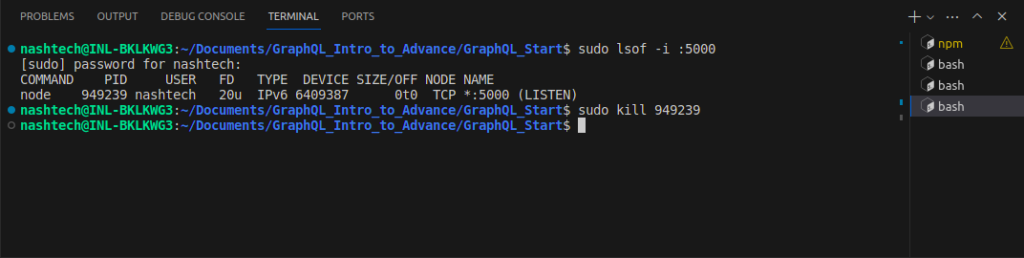
Note: Killing the server port by PID
Step 1: Find the process ID (PID) for the port: Run the following command to find the PID using the specified port (e.g., port 5000):
sudo lsof -i :5000Example Output:
COMMAND   PID     USER   FD   TYPE DEVICE SIZE/OFF NODE NAME
node    35262    user   26u  IPv6 796114      0t0  TCP *:5000 (LISTEN)
Step 2: Kill the Process Using its PID: Execute the command to terminate the process associated with the given PID (e.g., PID 35262):
sudo kill 35262 This command terminates the process running on the specified port, allowing you to free up the port for other uses.
Conclusion
GraphQL is like your personal data genie, granting your wishes for exactly the information you need from websites and apps. This guide showed how it helps fetch just the right data, avoids wasted information, and lets you modify things as needed. With examples from real-world places like social media and online stores, it’s a great start for beginners exploring this powerful tool!