


Introduction:
Ktor is a framework for building asynchronous servers and clients in Kotlin. It is a lightweight and flexible framework that provides an easy and intuitive way to build web applications, microservices, and HTTP-based APIs.
Kotlin is designed to leverage Kotlin’s language features and coroutines to create highly efficient and scalable applications. It is built on top of Netty, an asynchronous event-driven framework, which allows it to handle a large number of concurrent connections efficiently.
One of the key features of Ktor is its support for both server-side and client-side development. It provides a rich set of components and modules that make it easy to handle HTTP requests and responses, routing, authentication, data serialization, and more. In this blog, we will walk through the process of setting up a basic Ktor project, including the installation process, project structure, and running the server. Let’s dive in!
Step 1: Installing Ktor
To get started, make sure you have Kotlin and a compatible build tool such as Gradle or Maven installed on your system. Follow the official Kotlin documentation to set up Kotlin and your preferred build tool.
Once Kotlin is set up, you can create a new Ktor project by adding the Ktor dependencies to your build file. For Gradle, add the following dependencies to your build.gradle file:
dependencies {
implementation "io.ktor:ktor-server-netty:$ktor_version"
implementation "io.ktor:ktor-jackson:$ktor_version"
}
For Maven, add the following dependencies to your pom.xml file:
<dependencies>
    <dependency>
        <groupId>io.ktor</groupId>
        <artifactId>ktor-server-netty</artifactId>
        <version>$ktor_version</version>
    </dependency>
    <dependency>
        <groupId>io.ktor</groupId>
        <artifactId>ktor-jackson</artifactId>
        <version>$ktor_version</version>
    </dependency>
</dependencies>
Make sure to replace $ktor_version it with the desired version of Ktor.
Step 2: Creating the Project Structure
Next, create the basic project structure for your Ktor application. Create the following directories:
- src
- main
- kotlin
- com.example
- routes
- Application.kt
- test
- kotlin
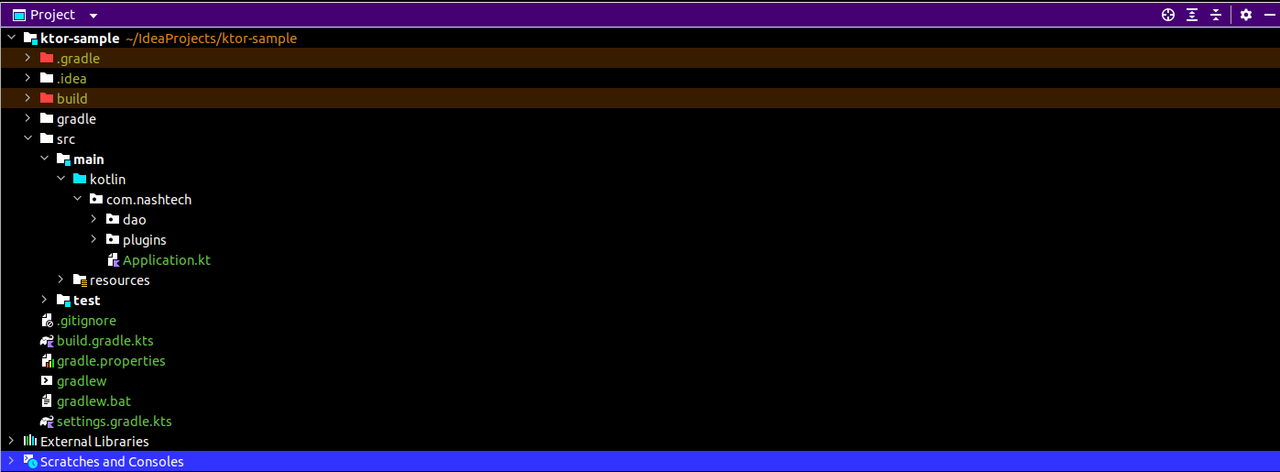
Inside the routes directory, we will define our application routes. The Application.kt file will contain the main entry point for our Ktor application.
Step 3: Defining Routes
Now, let’s define our application routes. In the routes directory, create a new Kotlin file named HelloRoutes.kt. Add the following code to define a simple route that returns a greeting:
import io.ktor.application.*
import io.ktor.response.*
import io.ktor.routing.*
package com.example.routes

fun Application.configureRouting() {
routing {
get("/hello") {
call.respondText("Hello, Ktor!")
        }
    }
}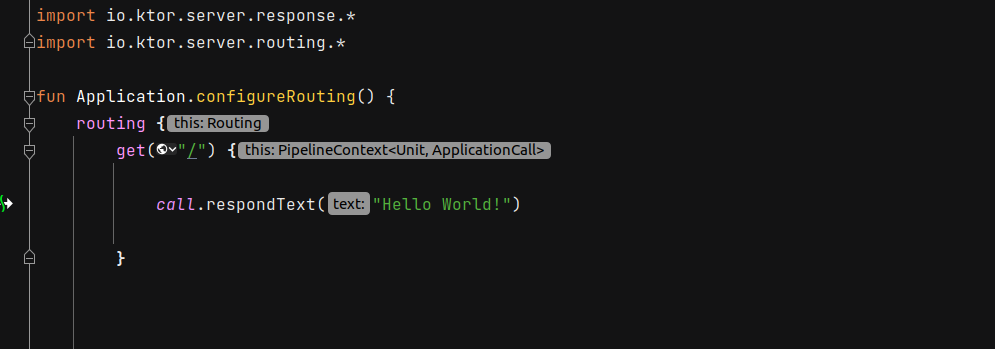
This defines a single route for the /hello path that responds with the text “Hello, Ktor!”.
Step 4: Setting up the Server
In the Application.kt file, we will set up the Ktor server and configure the necessary plugins and routes. Add the following code:
package com.example
import io.ktor.application.*
import io.ktor.server.engine.*
import io.ktor.server.netty.*

fun main() {
    embeddedServer(Netty, port = 8080, module = Application::module).start(wait = true)
}

fun Application.module() {
    configureRouting()
}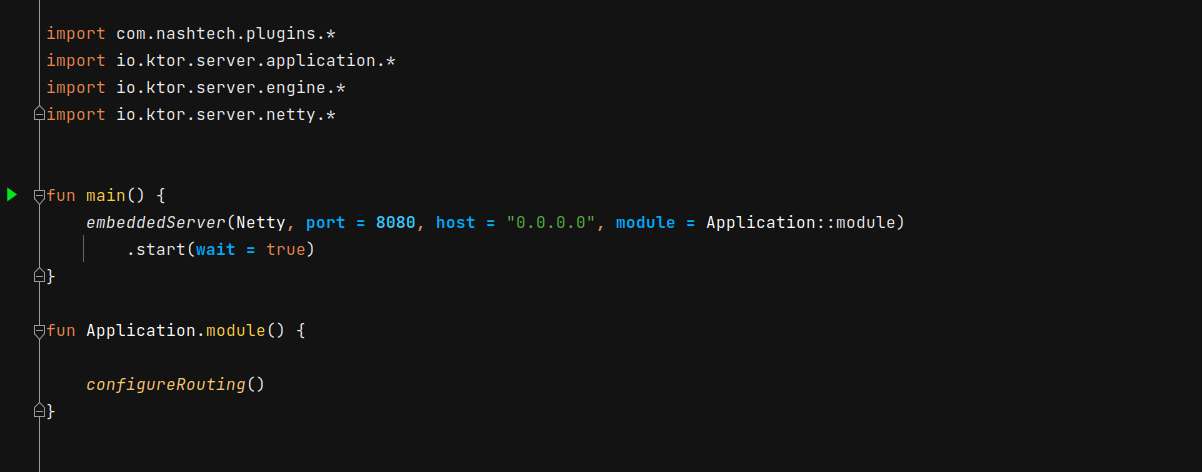
This code sets up the Ktor server using the Netty engine on port 8080 and associates it with the Application.module function, which configures the routes.
Step 5: Running the Server
To run your Ktor server, simply execute the main function in the Application.kt file. You can do this from your IDE or by using the command line.

Once the server is running, you can access the defined route by visiting http://localhost:8080/hello your web browser or using tools like cURL or Postman.

Congratulations! You have successfully set up a basic Ktor project and created a simple route.
Conclusion:
In this step-by-step guide, we walked through the process of setting up a basic Ktor project. We covered the installation process, project structure, defining routes, and running the server. With this foundation, you can start building more complex applications and explore the rich features and flexibility that Ktor offers.
Ktor’s simplicity and extensibility make it a fantastic choice for developing server-side applications in Kotlin. So go ahead, experiment, and unlock the full potential of Ktor in your next project!
References
1: https://blog.jetbrains.com/ktor/
2: https://developer.okta.com/blog/2020/10/19/ktor-kotlin