


In the world of cloud computing, effective access management is paramount to ensuring the security , functionality of your resources and services. Google Cloud Platform offers robust identity with access management capabilities, and one of the fundamental tools at your disposal is the creation of service accounts. Service account in GCP act as identities for your applications and services, allowing them to interact with GCP resources securely and with fine-grained control.
Service accounts are fundamental components of GCP that play a critical role in managing access to cloud resources and services. They are associated with applications, virtual machines (VMs), and other resources running within GCP, enabling them to interact securely with various GCP services without the need for human intervention. Effectively access management through service accounts is paramount maintaining security, ensuring compliance, and optimizing functionality within GCP environments.
Why Effective Access Management Is Needed:
Service accounts might sound technical, but their importance boils down to a few key factors that anyone using GCP should understand:
- Keeping Your Data Safe- Security: Just like you wouldn’t hand out keys to your house to just anyone, service accounts ensure that only authorized programs and systems can access your GCP resources. This helps keep your data safe from prying eyes and potential threats.
- Smoother Operations: Service accounts enable automation by allowing programs and systems to perform tasks automatically, without constant human intervention. This streamlines operations, saves time, and reduces the risk of errors caused by manual processes.
- Clear Oversight: With service accounts, you can easily track and audit the actions performed by different programs and systems within your GCP environment. This visibility is essential for compliance with regulations and internal policies, as well as for troubleshooting and performance optimization.
- Scalability and Flexibility: As your GCP setup grows, managing access manually becomes impractical. Service accounts provide a scalable solution, allowing you to grant the right permissions to the right programs and systems, no matter how large or complex your environment becomes.
Service accounts may not be the flashiest feature of GCP, but they play a critical role in ensuring the security, efficiency, and reliability of your cloud infrastructure.
In this step-by-step guide, we will walk through the process of creating a service account and adding roles to it :
Step 1: Prerequisites
Google Cloud Platform provides detailed documentation on how to check for required permissions and create service accounts if needed. You can find this information here. Before you begin, make sure you have the following prerequisites:
- Access to a Google Cloud Platform (GCP) project.
- Sufficient permissions to create a service account and assign roles.
Step 2: Access the Google Cloud Console
- Open your web browser and go to the Google Cloud Console.
- Sign in with your Google account credentials.
- Select the GCP project in which you want to create the service account. You can choose or create a new project from the project selector in the top menu.
Step 3: Create a Service Account
When creating service accounts in Google Cloud Platform (GCP), selecting clear and purposeful names is recommended because of:
-
Clarity and Organization: Clear names make it easy to understand each service account’s role, promoting organization as your GCP environment grows.
-
Documentation and Collaboration: Descriptive names simplify documentation and collaboration, ensuring everyone understands the account’s purpose.
-
Auditing and Accountability: Clear names aid auditing and accountability by showing which service accounts are responsible for specific actions.
Best Way to define names as: –
- Be descriptive: Choose names that explain itself describe each account’s purpose.
- Use consistent conventions: Establish a naming convention for uniformity.
- Avoid special characters: Stick to alphanumeric characters for compatibility.
For example, name a data processing VM’s service account “data-processing-vm-service-account”.
Now, let’s create the service account:
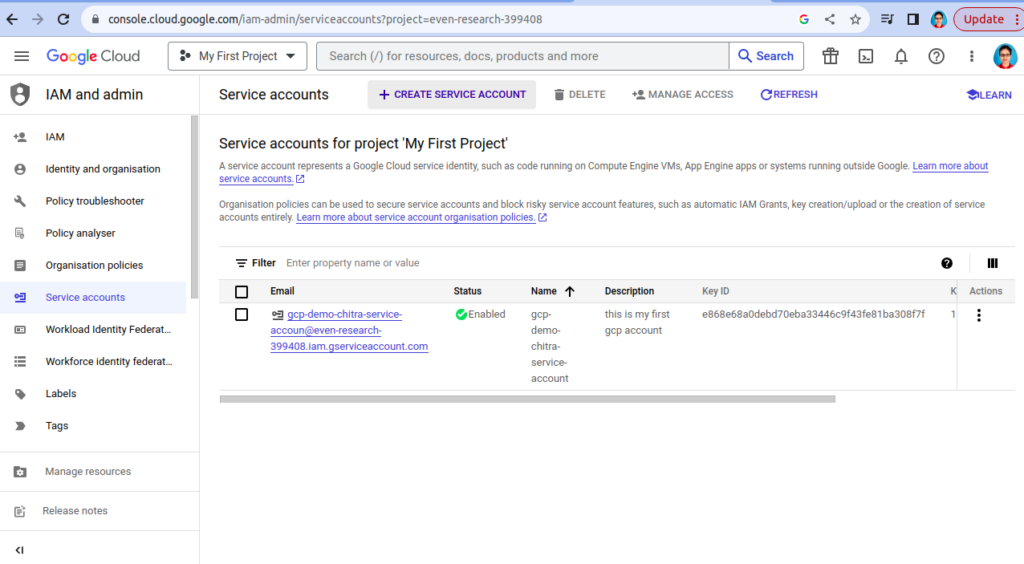
- In the Google Cloud Console, navigate to the “IAM & Admin” section from the left-hand navigation menu.
- Click on “Service accounts” in the IAM & Admin section.

- Click the “Create Service Account” button at the top of the Service accounts page.
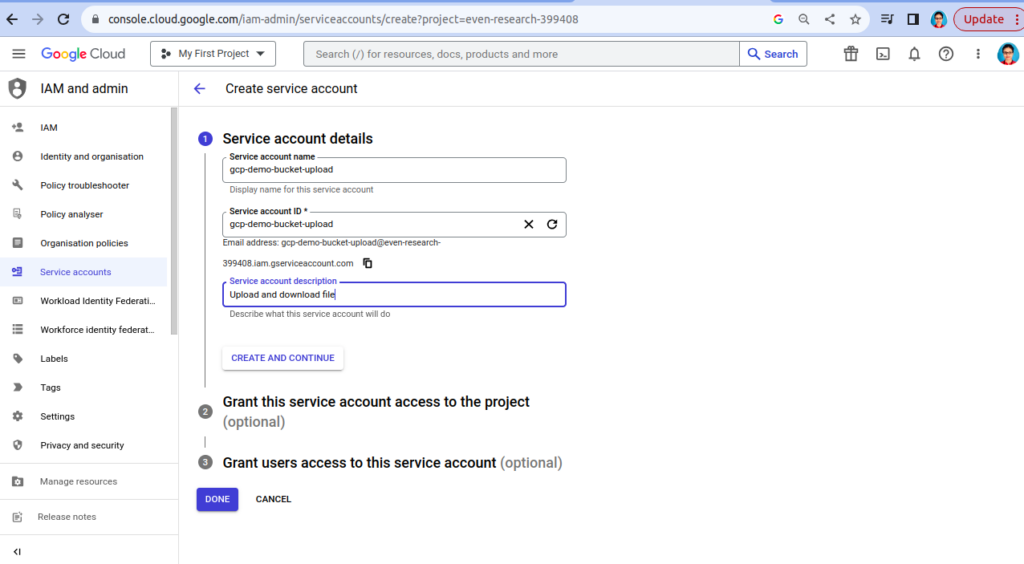
- Now you will get the page where you need to add details related to account.
- Enter a name for your service account. It should be a descriptive name that helps you identify its purpose.
- You can also add an optional description to provide more information about the service account.
- Click the “Done” button.
- It might take some seconds, wait till you get success message.[
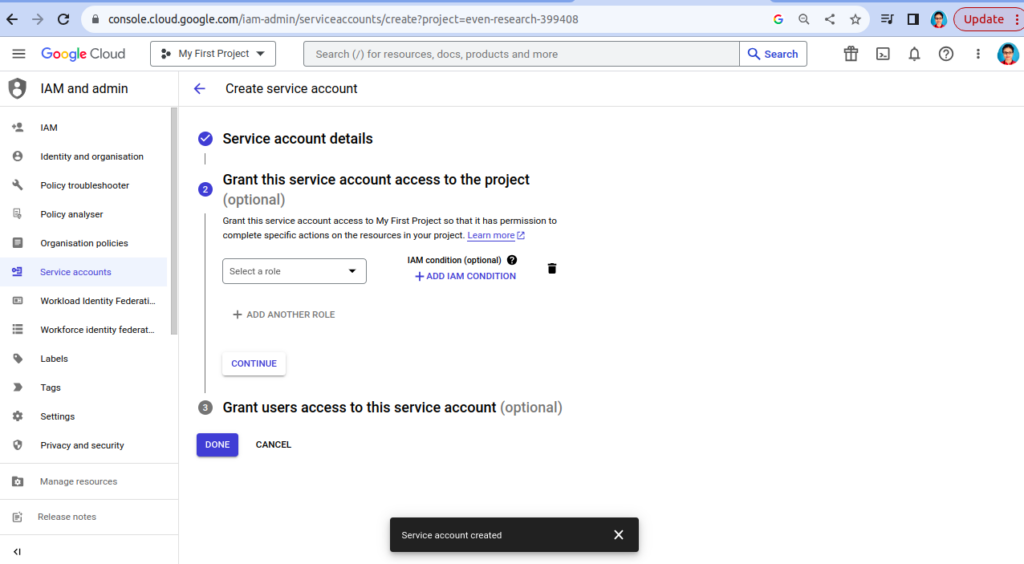
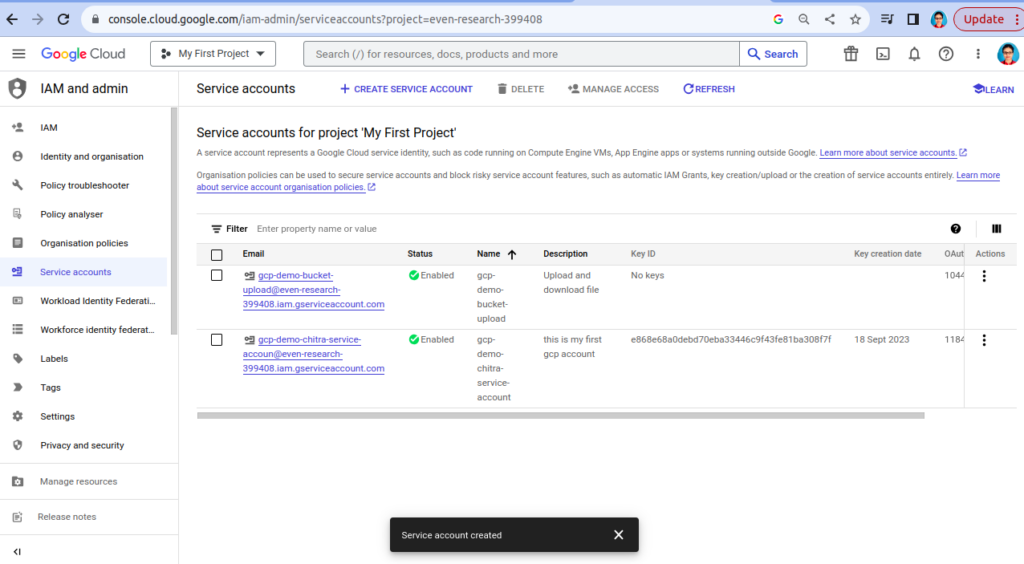
- Now Service account created successfully. Refresh and check again.
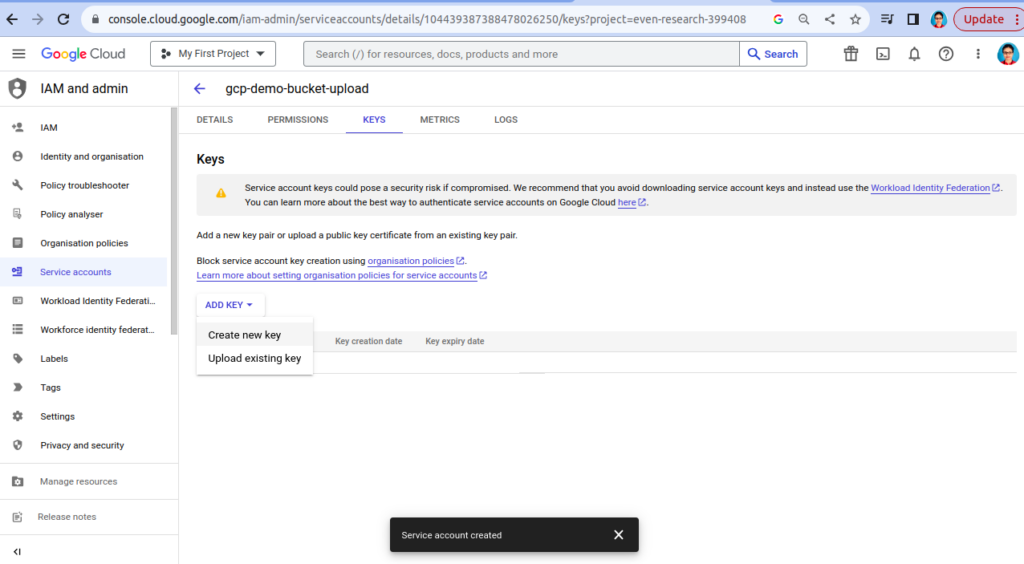
Step 4: Key Creation (Optional)
Service account keys are a form of credential. If a user can access a valid service account key, they can use key in authentication and access the resources the respective service account that is granted. Without key you cannot use any resource provided by GCP.
Why is create a key required?
- For Authentication: The key allows the service account to securely interact with GCP services, facilitating automation and precise access control.
Why it’s necessary to keep key at secure and safe storage:
-
Protection: Storing keys securely in GCP safeguards against unauthorized access, ensuring the integrity of your cloud resources.
-
Built-in security: GCP offers robust security features, including encryption and access controls of services, for managing and securing service account keys.
You may need to create a key for the service account. It is used for authentication in applications or scripts. If you need a key, follow these steps:

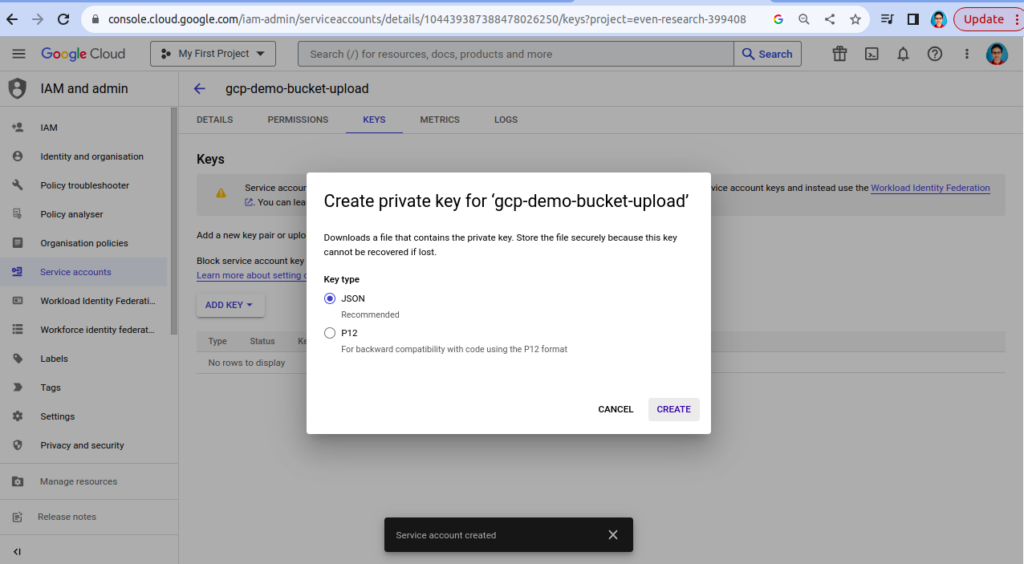
- In the Service Account details page, under the “Keys” section, click on “Add Key” and select the type of key you need (JSON or P12).
- Once the key is generated, securely store it. It will be needed for authentication.
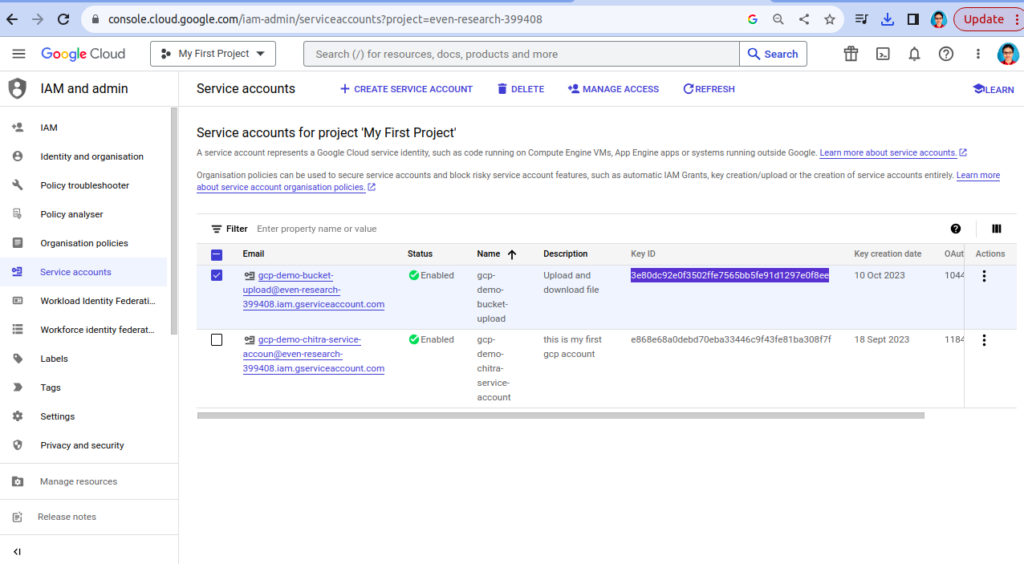
- Key Id is created that can we check from service account, below key is highlighted.
Step 5: Assign Roles to the Service Account
Now that you have created the service account, you need to assign roles to it to specify what actions it can perform in your Google cloud project.
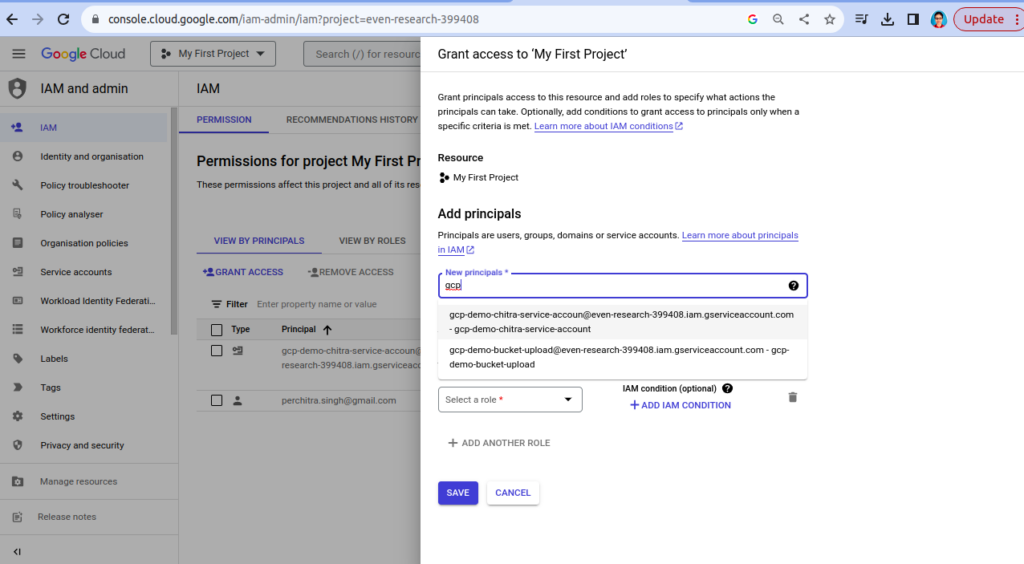
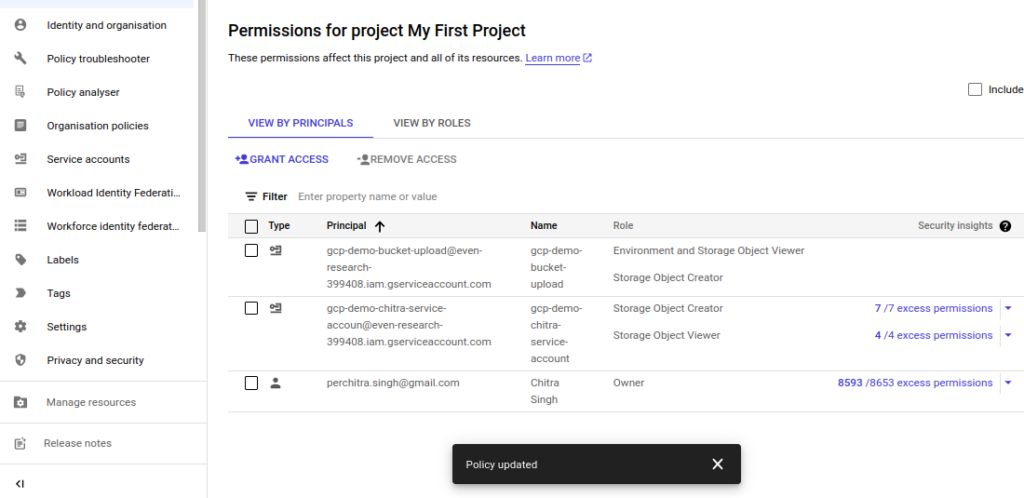
- On the Service accounts page, find the newly created service account in the list and click on its name to open its details. Goto IAM.
- Click on the “Grant Access” button.
- In New principal select service for which you want to grant roles.
- In the “Role” field, start typing the name of the role you want to assign (e.g., “Compute Engine Admin,” “Storage Object Viewer,” etc.), and Google Cloud will provide suggestions.
- Select the role you want to assign from the suggestions.
- Optionally, you can add more roles by clicking the “Add another role” button and repeating the process.
- Once you’ve added all the roles you need, click the “save” button.
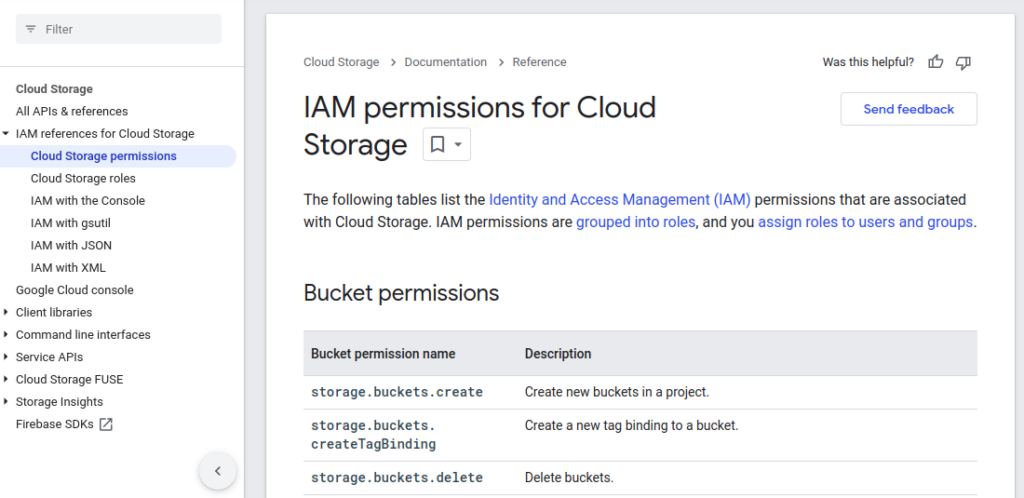
- You can check roles permission from here : click.
Step 6: Finish and Review
Review all the details you’ve entered and actions you’ve taken to ensure they are correct.
Congratulations! You’ve successfully created a service account in Google Cloud and assigned roles to it. This service account is now ready to be use for various tasks and services within your GCP project.
Schedule Reviews, follow Least Privilege and use GCP’s Recommendations are better for management.
Make sure to manage and monitor its permissions regularly to maintain a secure and well-organised environment. Regularly review and update the permissions of your service accounts in Google Cloud Platform (GCP) to ensure ongoing security and organization.
Why Update Permissions and review regularly is best practice:
- Adaptability: Adjust permissions as your projects change to match evolving needs.
- Security: Mitigate risks by removing unused or excessive permissions.
- Organization: Streamline manageability by cleaning up unnecessary permissions.
For more : look into below
https://cloud.google.com/storage/docs/access-control/iam
For further insights, please visit this blog.