1. Context
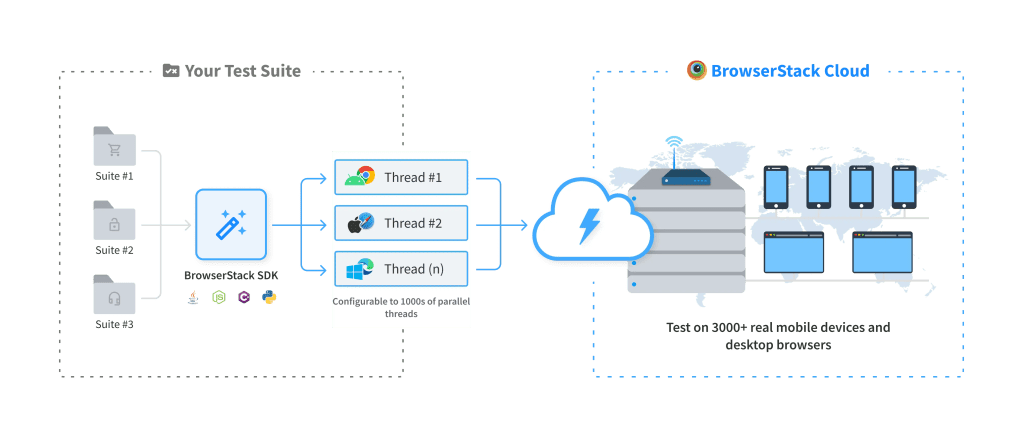
On BrowserStack remote devices, your app can retrieve data from publicly-hosted servers. However, your app cannot directly connect to servers that are hosted privately or behind a proxy, firewall, or VPN. To connect to such servers, the BrowserStack infrastructure requires some kind of network tunneling.
Local Testing creates a network tunnel between your private network and the BrowserStack infrastructure. This allows the BrowserStack remote devices to access the non-public servers hosted in your internal environments. To create this network tunnel, the Local app or binary needs to be installed on your local system that has access to the non-public server.
2. Set up Local Testing
Download and install BrowserStackLocal app or binary
In case of using BrowserStackLocal binary, go to the directory that contains the BrowserStackLocal binary and Run the following command:
BrowserStackLocal --key <YourBrowserStackAccessKey> –force-proxyOpen Local Console (
http://localhost:45454).In the Tunnel Settings pane, apply the following settings:
– Enable the Force Local flag
– Enable the Force Proxy flag
– Enter your Proxy host and port
– Click Update Command
– Enable the Force Local flag
– Enable the Force Proxy flag
– Enter your Proxy host and port
– Click Update Command

3. Run your test
Now you can enable the Force Local and Force Proxy flags to force BrowserStackLocal to resolve all connections through your local network or proxy, instead of resolving the requests through the public internet.
– The Force Local flag ensures that any resolution of URLs that your BrowserStack device does will be routed through the Local tunnel
– The Force Proxy flag routes all traffic through the proxy you configured
Start App Live on your selected device. On the toolbar, you can see that Force Local is on. And now you can test your app is behind a proxy

4. References
BrowserStack App Live | BrowserStack Docs