


Hello Learners, I am back with another blog. In today’s blog, we will learn about the terratest. We will explore how to write the test cases for the Private ACR to perform the docker push operation. If you like my blogs, you can read more blogs here.
Note:- I am working on the terratest blog series. So please follow my blog and learn about the terratest. You can check out this link for more blogs on the terratest.
Introduction:-
Terratest is an open-source Go library designed to enable automated testing of infrastructure code. It can integrate with the very famous infrastructure-as-code (IAC) tools such as Terraform, giving you the ability to validate your IAC deployments through automated tests.
Basically, We have two options to push the images to the private ACR. Actually, If we want to push the image to the private ACR as we can push the image to the public ACR. This is not possible. So we have two options here:-
* IP Configure.
* All resources in single Vnet.
In this blog, we will see the IP configuring part like how we can configure the IP and run the docker push operation. We will see the second option in the second part of this blog. You can check out this link for the second part on this terratest.
Writing Terratest Test Cases for Docker Push on private ACR using the IP configuration:-
1. Prerequisites and Setup:–
- Ensure you have to terraform
- Install the Go in your system
- Azure CLI.
2. Create a test file:-
First of all, we will create a test file. let’s say acr_test.go but you should keep the postfix _test.go. This is responsible to run the test with the test command.
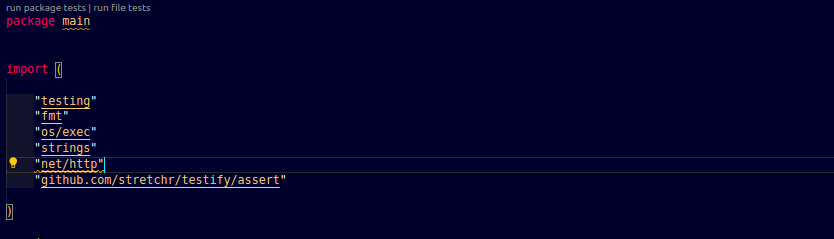
3. Import the libraries:-
First, we will import the required library for the terratest. This library will use in the execution of the terratest and give more functionality for the terratest:
4. Define the functions:-
In this section, we will define all the functions that are required for the terratest test cases. First, we will fetch the IP address to configure the private ACR, then add that IP to the private ACR and then docker login and push the image.
i. Get the IP address:-
With the help of this function, we will fetch the IP address of the system. So that in the next step, we can add ip:-
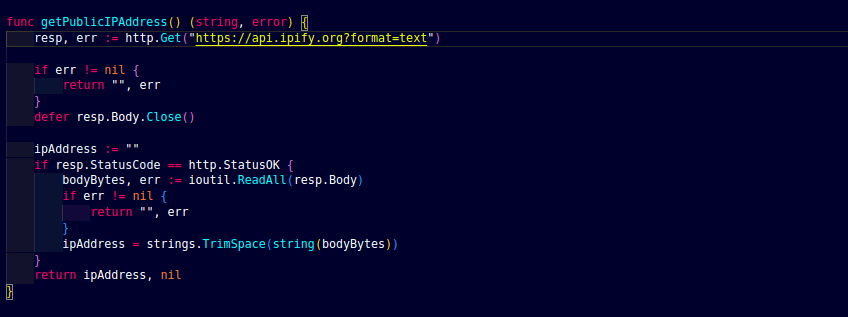
In this function, we are fetching the ipv4 using the URL and then returning that IP.
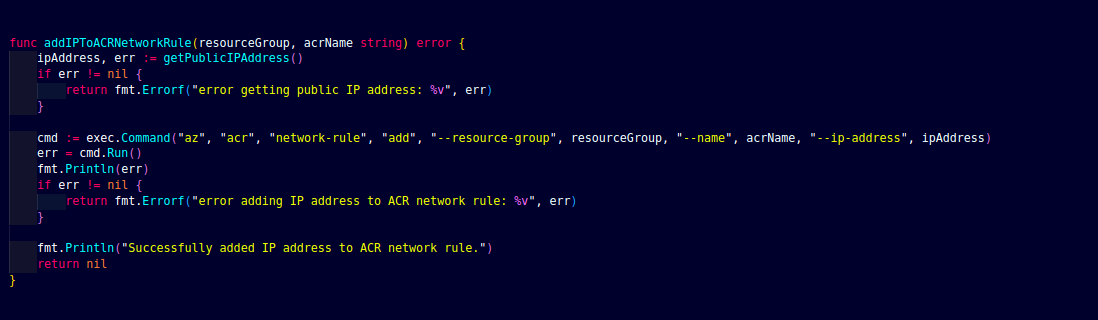
ii. Add the IP to the Private ACR:-
Now, We have the IP to add with the Private ACR. In this function, we will add this IP:-
iii. Docker login:-
Now, We will try to do the docker login as we have added our ip to the private ACR to allow the docker operation on our IP. So we can do the docker login to the private ACR:-

iv. Docker push:-
With the help of this function, we will push the docker image to the private ACR and when our image will push successfully then this function will return the true otherwise it returns false:-
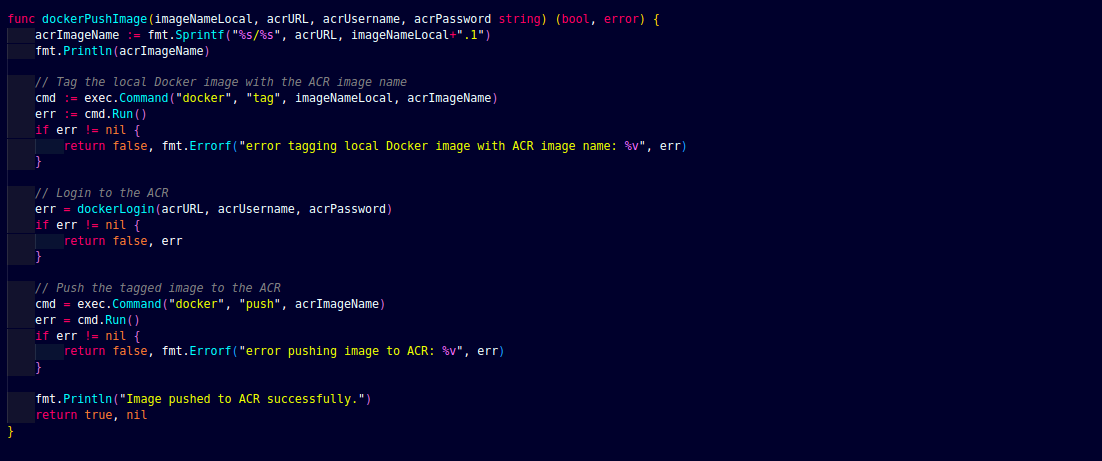
In the same function, we are calling the docker login function so that we can log in to the private ACR and then push the image to that private ACR.
v. Test Function:-
This is the main test function where we will call all the functions and then run the terratest. in the same function, we also define the test cases to compare the expected value with the actual values.
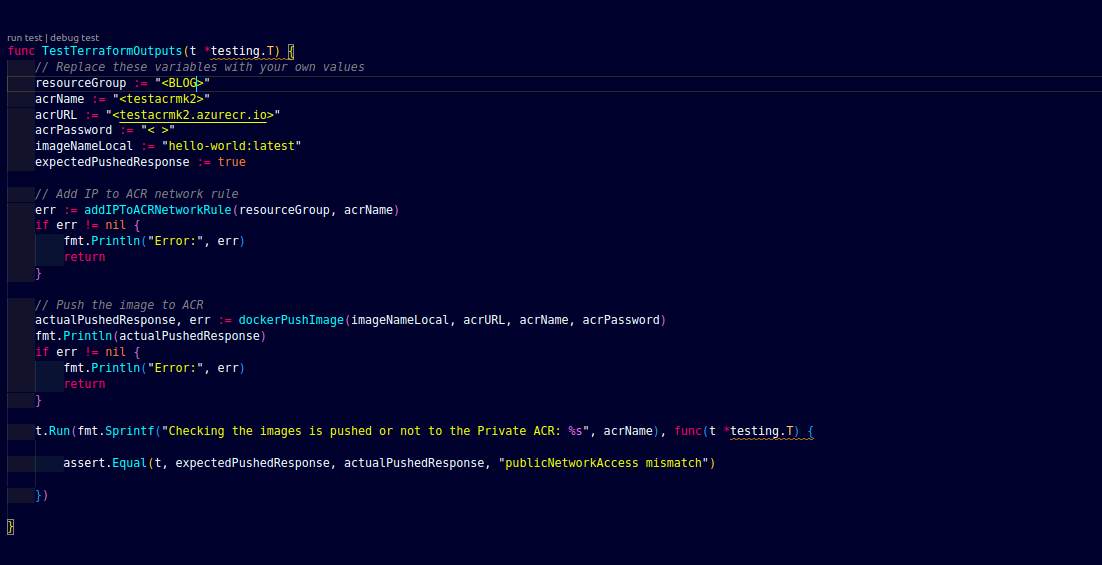
You can change every single value of the variable and you need to pass the password also of your private ACR which will be used while we login to the ACR. In this function, We are also run the test case where we compare the expected value with the actual values.
5. Executing the Tests:–
To execute the terratest will will run the below command:-
go mod init <github.com/privateacr/pushimage>

go mod tidy

go test -v
Conclusion:-
In this blog, we have learned about the terratest test case to Docker push operation to your private Azure Container Registry using ip configuring and also running the test case. If you are facing any issues then please comment below If you like my blog then you can like this or want to read more blogs then follow this link. and also check out the terratest official doc.
NOTE:- I have written the terratest with hardcode values. you can replace these values using the terraform means you can fetch the values from the terraform output.tf file.