


Hey, it’s Khoa here. A web developer, a curious doer, and maybe a little bit of an adventurer who always wants to push limits before time catches up with me. Today, I’m back with one of my “less serious” hobbies: writing as a blogger. But enough about me. Let’s jump straight into the real reason you clicked on this article: we’re going to build our very first AI web app together.
If you’ve ever felt stuck between all the hype around AI and didn’t know where to start, this article is for you. My goal here (and probably in all my past, present, and future posts) is to make things less intimidating, more practical, and a little fun. I don’t want this to feel like going back to school. Instead, think of it as learning side by side with a friend who enjoys making tech a bit more human.
So grab your coffee (or whey protein shake 💪🏻 if you’re like me), and let’s dive in.

Let’s Get Started
In recent years, we’ve been bombarded with all kinds of funky buzzwords about AI — agentic, MCP, GPT, and a thousand shiny apps that proudly say “we have AI inside”. Even the simplest tools, like note-taking apps, now come with an AI badge on them. For example, I’m writing this draft in Notion, and yes — its AI is definitely giving me a hand right now 😀.
So, what does that mean for us — the so-called “elite developers”? It means we can’t just sit back. We need to know how AI works and, more importantly, how to actually use it in our own projects.
And hey, the year is nearly done. So why not decorate your GitHub profile with a splash of trendy AI colors — something shiny, playful, and a little futuristic? Think of it as year-end decoration, but for developers. Instead of hanging lights on the wall, we’re wiring up an AI app that you can proudly show off.

Project Overview
Alright, enough talking — let’s get serious (well, as serious as we can be 😅).
For this project, we’re going to build a tiny AI Code Reviewer. Here’s the idea: whenever a developer pushes their code and opens a pull request, our AI reviewer will jump in, scan the code changes, and automatically leave comments on the exact lines that need fixing or improving. Pretty cool, right?
Of course, if this idea doesn’t spark joy for you, feel free to swap it out with your own. But trust me, starting with a simple project like this makes it much easier to actually finish (instead of abandoning it halfway) — and hey, a finished side project is always a nice dopamine boost.
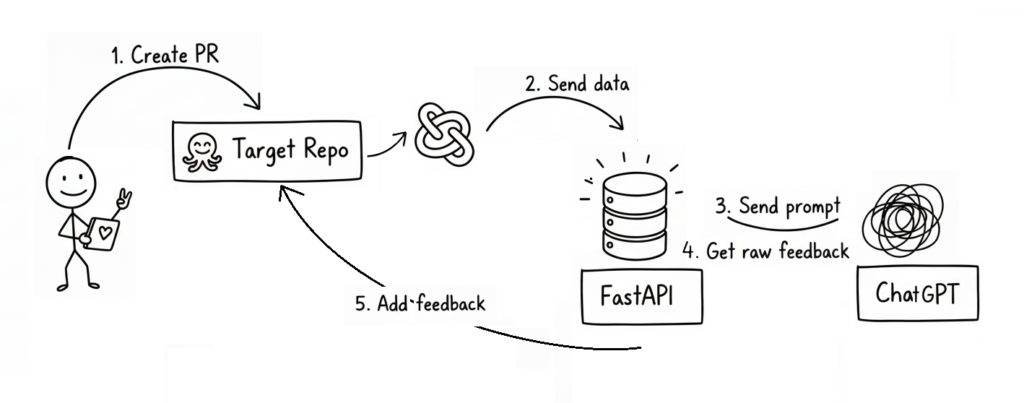
To help you picture the flow, here’s a little diagram I made:
Yeah, I know — I’m no Picasso. If the diagram feels confusing, don’t panic. That’s normal. I’ll spend more than 100 words to make sure you get it.
So, here’s how it works in plain English:
- A brave little developer (our stickman hero) creates a pull request.
- The repository has a Webhook configured, which triggers whenever that event happens.
- The webhook sends some useful data (repo name, PR number, etc.) to our AI project.
- Using that info, we call the GitHub API to fetch the actual code changes.
- Those changes are sent to the ChatGPT API (or another AI provider) with a carefully crafted prompt, asking it to review the code and return structured feedback.
- Finally, we take that AI feedback, process it a bit, and post it back to the pull request as comments — using the GitHub API again.
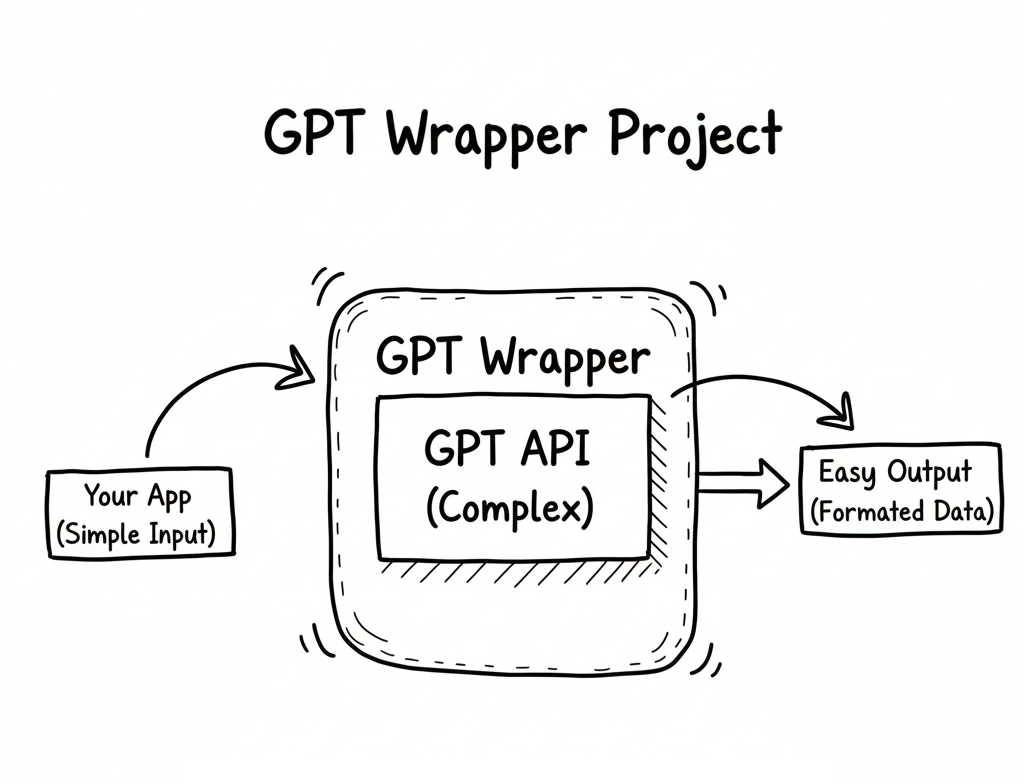
Think of it this way: normally, if you’re too lazy to review a pull request, you might just dump all the changes into ChatGPT, copy its feedback, and paste comments back. What we’re doing here is automating that entire loop. In other words, our app is essentially a GPT wrapper with some webhook and API magic sprinkled on top.
Simple enough, right?
If you’re thinking, “Hmm… maybe not quite” – no worries at all. We’re not chasing Google-level perfection here (obvious it’s not).
If you’re already familiar with all the terms listed above, feel free to jump straight into the main section of this article.
Otherwise, stick around — we’ll walk through each key term in a friendly, easy-to-digest way in the next part.
No More Mystery Words

Well, let’s start with the term “GPT wrapper.”
So, what exactly is a GPT wrapper project?
Simply put, it’s an AI project that uses ChatGPT — or similar models like Grok or Gemini — to handle requests, process data, or generate responses. In other words, your project wraps around an existing AI model instead of building one from scratch.
The term “GPT wrapper” is sometimes used sarcastically — as if to say, “Oh, you didn’t build a real AI, you just called ChatGPT’s API.”
But honestly? That’s missing the point.
To me, a great product isn’t about reinventing the model — it’s about solving real problems and helping people in smart, creative ways.
If using ChatGPT helps you do that faster and better, then why not? That’s innovation too.
Next up, let’s talk about “webhooks” — the silent messengers of the internet.
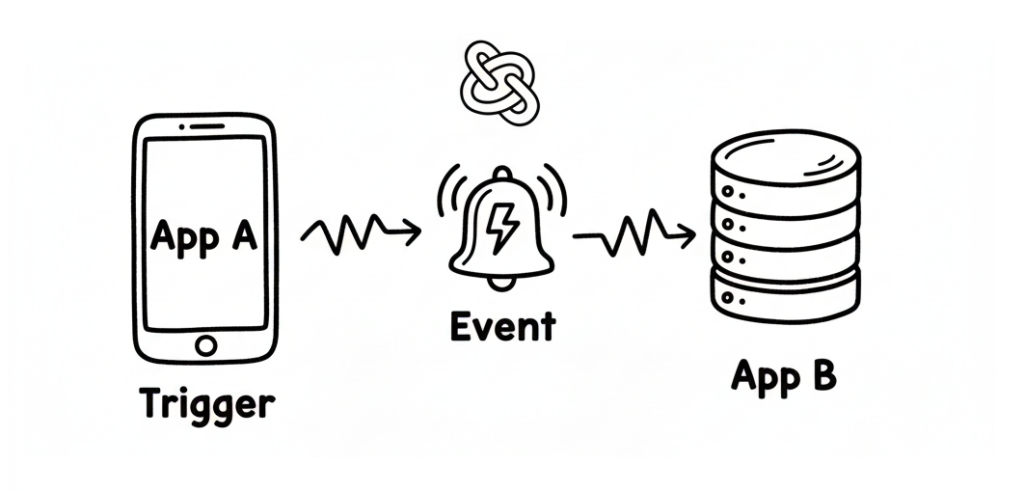
A webhook is basically a way for one application to instantly tell another application that “something just happened.”
Think of it like a push notification for apps: instead of checking every few seconds whether something’s new, the app just gets a ping when there’s an update.
For example, when someone creates a new pull request on GitHub, GitHub can send a webhook to your app — saying, “Hey, there’s a new PR, do something with it!”
Then your app (in our case, the GPT wrapper) can catch that webhook, process the data, and reply with a response powered by AI.
That’s how we connect the dots between the outside world and our AI logic.
Without webhooks, our GPT wrapper would just sit there, waiting forever — like a genius with no one to talk to.
Finally, now let’s talk about LangChain — the framework that makes working with AI a little less chaotic (and a lot more structured).
I haven’t mentioned it earlier, but this project will be built using LangChain as one of its core components.
Why? Because while you can totally call the ChatGPT API (or any other AI model) directly, things can quickly get messy once your app starts doing more than a single request-response task.
LangChain is an AI framework that helps organize all of that chaos.

It provides tools to manage prompts, connect external data sources, store context or memory, and build complex workflows that talk to different AI models — all in a clean, modular way.
So why did I choose it for this project?
Well, first — my boss recently introduced me to LangChain, and I figured this was the perfect opportunity to actually use it in a real project instead of just watching another tutorial. 😄
But beyond that, it also makes the project easier to expand in the future.
If one day I decide to switch from ChatGPT to another model like Gemini or Claude, LangChain makes that transition smooth — because it abstracts away a lot of the model-specific details.
So yes, you could write everything from scratch using raw API calls.
But with LangChain, you’re not just coding — you’re building a flexible foundation that can evolve as fast as the AI world does.
Alright, I think that’s enough mystery for our first AI project.
We’ve gone through the confusing terms, made things clearer, and now it’s time for the fun part — let’s start building!
From Theory to Practice

Enough talk — let’s start making the real thing!
First of all, let’s set up our project.
Since I decided to use the LangChain framework, I’ll go with FastAPI, which is one of the best matches for it.
Of course, if you’re more comfortable with Node.js, feel free to use it — but as I mentioned earlier, Python is still the best practice for this kind of project.
To start, we’ll set up a FastAPI project with a few recommended libraries:
fastapi[standard]
PyGithub
pydantic_settings
langchain[openai]
In this project, I use PyGithub to interact with the GitHub API and LangChain (which in turn connects to OpenAI as the AI provider).
Of course, LangChain supports many providers like OpenAI, Anthropic, Azure, and more.
You can check the official LangChain documentation for the full list.
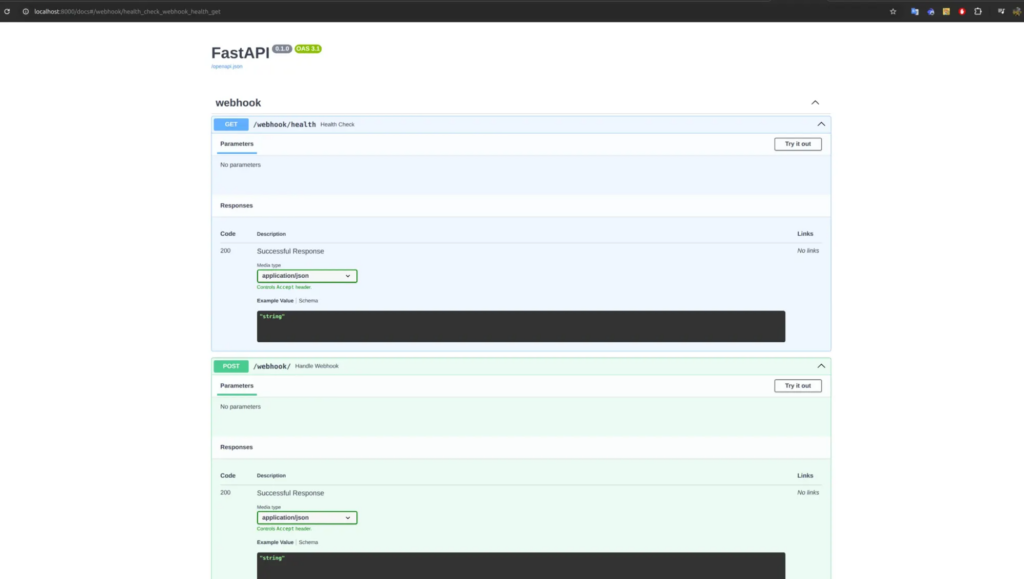
Next, we can start our FastAPI app using uvicorn, and define some basic routes.
After that, your project should look something like this:
Making It Public
There’s one problem before we move forward: right now, our project only runs in a local environment.
That means your http://localhost URL won’t work when you try to set it as a GitHub webhook callback — because GitHub can’t access your local machine.
So, we need a way to make the project public.
You can deploy it, of course — but if you just want to test things out, there’s a simpler way.
Thanks to the magic of the internet (and some late-night Googling 😅), I found a great tool called ngrok.
It’s a super popular way to expose your local FastAPI app to the outside world — perfect for testing webhooks.
If you’ve never tried it before, you can ask ChatGPT to help you set it up — a little debugging challenge will boost your dopamine levels when it finally works 😄
But if you’re already familiar with ngrok (or just want something even simpler), you can also use the built-in Port Forwarding feature in Visual Studio Code (VSCode).
In my case, I run FastAPI on port 8000, so that’s the one I’ll forward.
Here’s how to do it:
- Press
CTRL + SHIFT + Pin VSCode to open the Command Palette. - Search for
Focus on Port. - Click on Forward a Port.
- Enter the port number (for example,
8000). - By default, VSCode sets your forwarded port as private — which means it still won’t be accessible from GitHub. So make sure to switch it to public.
And that’s it — your local project is now publicly accessible!
Listening for Webhook Events
Now that your app is public, we can create a route to listen for incoming webhook call from GitHub.
This route will handle the “pull request review” action whenever a new PR is created.
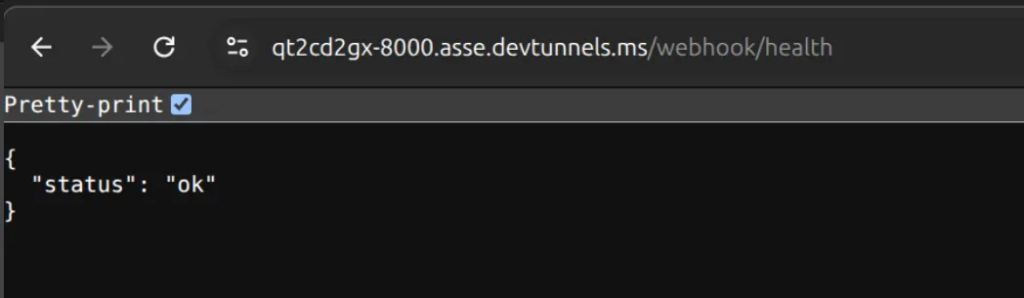
In my setup, I use the /webhook endpoint to receive the callback:
@app.post("/webhook")
async def handle_webhook(request: Request):
	# process pull request event here
	return {"status": "ok"}
Setup webhook
Now that we’ve got our public URL ready, the next step is to set up the GitHub Webhook.
To do that, first we need a target repository on GitHub. This repository will be responsible for sending webhook events.
Whenever someone creates a pull request that targets this repo, GitHub will trigger a POST request to our FastAPI project (the one we set up earlier), specifically to the /webhook route.
In my case, I already have a target repository called test-webhook.

It’s just a simple repo containing some PHP code in the dev branch.
Creating the Webhook
We can set up a webhook in several ways, but for this example, I’ll use the GitHub UI — it’s straightforward and perfect for a small demo project.
To get started, go to your repository and navigate to: Settings → Webhooks → Add webhook
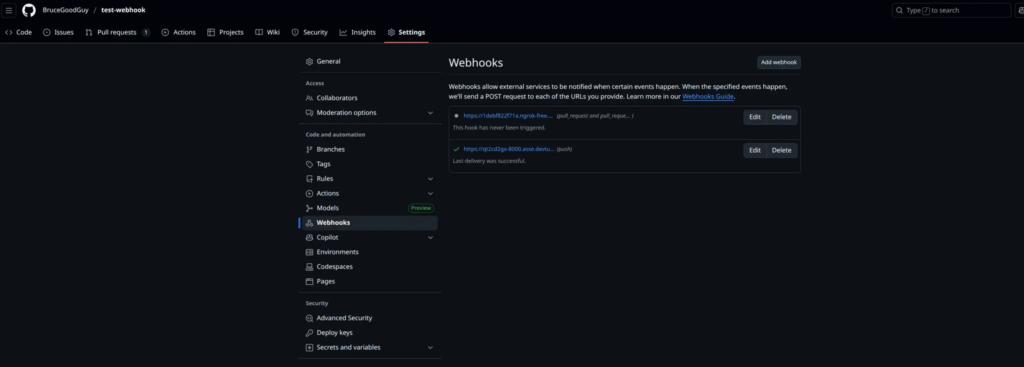
You should see a screen like this:
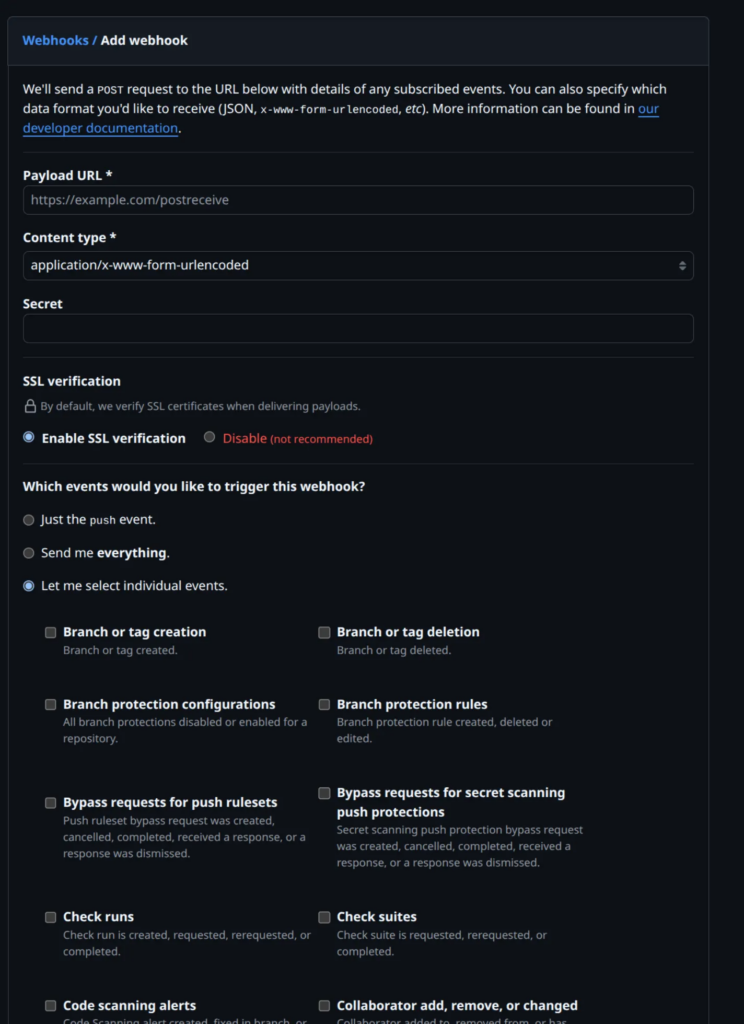
To keep things simple, we only need to change three fields:
- Payload URL: This is where GitHub will send the webhook data. You should enter the public URL of your FastAPI project followed by the /webhook route you created earlier. For example: https://qt2cd2gx-8000.asse.devtunnels.ms/webhook/ (It really necessary to have the / at the end of URL)
- Secret: Think of this as a password for your webhook endpoint. It ensures that your /webhook route only accepts requests that truly come from GitHub. Later in our FastAPI code, we’ll verify this secret to confirm that the request is legitimate.
- Which events would you like to trigger this webhook? Select the option “Let me select individual events.” Then check the box “Pull requests.”. This tells GitHub to trigger the webhook only when a new pull request is created.
All other fields can be kept as default — no need to touch them for now.
To verify that your repository is successfully connected to your app, open the “Recent Deliveries” tab inside the webhook settings.
Right after creating a webhook, GitHub automatically sends a test request to your app to confirm that the connection works.
If everything’s set up correctly, you’ll see a delivery record with a green check mark status like this (Please ignore the other red marks 😃):
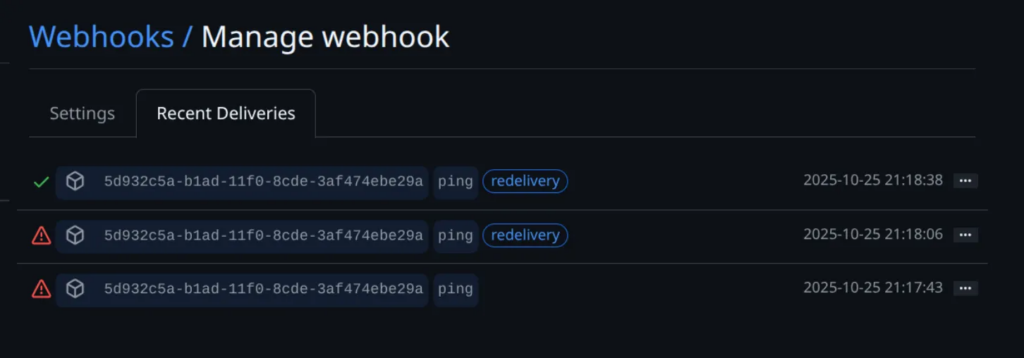
You can also manually trigger the webhook anytime by clicking the “Redeliver” button — handy when you want to test changes without creating a new pull request.
And that’s it — all the setups done!
Enough with the forms and buttons — now it’s time for the fun part.
Let’s dive into some real code and see how our FastAPI app handles those webhook events!
Back to Our FastAPI App
Alright, back to our FastAPI app!
Earlier, we created the /webhook route to handle incoming calls from GitHub.
Besides the main request body, GitHub also sends a few important headers with every webhook request — the two most important ones are:
- x-github-event
This header tells us what type of event GitHub is sending. In our case, since we configured the webhook to trigger on pull request creation, this value will be “pull_request”.
- x-hub-signature-256
This one is the signature used to verify that the webhook request actually comes from GitHub, not from someone pretending to be it.
Remember that Secret you set when creating the webhook?
GitHub uses that secret to generate a SHA-256 hash of the request body, then attaches that hash to this header.
On our FastAPI side, we’ll use the same secret to recalculate the hash and make sure both match — if they do, the request is legit.
Verifying the Webhook Request
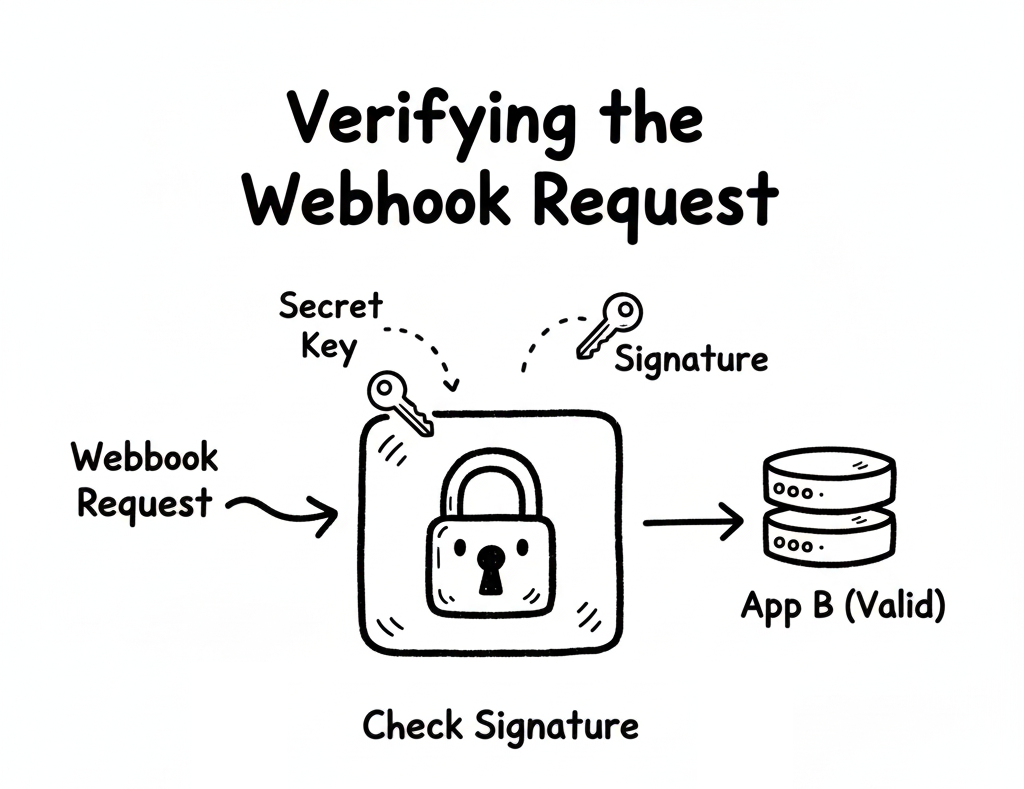
Alright, now that GitHub can talk to our FastAPI app, it’s time to make sure we’re not talking to a stranger pretending to be GitHub 😅.
In other words, before we let any incoming request touch our logic, we need to verify that it’s actually coming from GitHub — not from someone spamming our endpoint for fun.
This is where those two little headers come in handy:
x-github-event and x-hub-signature-256.
Let’s see them in action
async def validate_webhook(request, x_hub_signature_256: str, x_github_event: str):
    if not x_hub_signature_256:
        raise HTTPException(
            status_code=403, detail="x-hub-signature-256 header is missing!"
        )

    if x_github_event != "pull_request":
        return {"ok": True, "ignored": x_github_event}

    raw = await request.body()

    if not verify_signature(raw, x_hub_signature_256):
        raise HTTPException(status_code=403, detail="Request signatures didn't match!")

def verify_signature(raw: bytes, sig: str):
    hash_object = hmac.new(settings.GITHUB_WEBHOOK_SECRET.encode('utf-8'), msg=raw, digestmod=hashlib.sha256)
    expected_signature = "sha256=" + hash_object.hexdigest()
    return hmac.compare_digest(expected_signature, sig)
What’s Happening Here?
Let’s walk through this like we’re debugging together.
The Signature Checkpoint
The first thing we do is make sure the x-hub-signature-256 header even exists.
If not, we stop right there and throw a 403 Forbidden error.
No signature, no trust — simple as that.
(Think of it as refusing to open an unsealed package from a stranger.)
Only Care About Pull Requests
Next, we check what event GitHub is actually sending us through x-github-event.
Since we only care about pull request events, we skip everything else.
No offense to other event types — just not today 😎.
So if it’s something like push or issues, we politely respond:
“Thanks GitHub, but I’ll pass.”
The Real Security Magic
Once we know the event type, it’s time to verify the signature itself.
We grab the raw body of the request and run it through our verify_signature() helper.
This is where the cryptography magic happens:
- GitHub takes your webhook secret, hashes the request body with SHA-256, and includes that hash in the
x-hub-signature-256header. - Your app does the same thing — using the same secret — and compares the two results.
If they match → you can trust the request.
If not → something fishy is going on, and FastAPI throws an error faster than you can say “CSRF.”
Why This Matters
It might feel like overkill for a small demo, but this is what separates a proof of concept from a production-ready system.
You don’t want your AI bot reacting to fake PRs or spammy payloads from the wild.
A few lines of HMAC verification here? Totally worth it.
So now we have a verified, secure webhook handler — no impostors allowed.
In the next step, we’ll make this route actually do something useful — like passing the PR data to our AI (via LangChain + OpenAI) and letting it work its magi
Handling Pull Request Events
Alright, our webhook is verified, our gatekeeper is happy — now let’s finally do something useful with those pull requests!
When GitHub sends a webhook event, it includes a payload in JSON format — this payload contains everything we need to know:
who opened the PR, what files were changed, and more.
Let’s start by parsing that payload and deciding what to do next
payload = await request.json()
action = payload.get("action")

if action not in {"opened", "synchronize", "ready_for_review"}:
    return {"ok": False, "ignored_action": action}

repo = payload["repository"]
owner = repo["owner"]["login"]
name = repo["name"]

pr = payload["pull_request"]
pr_number = pr["number"]

print(f"Processing PR #{pr_number} in {owner}/{name} with action {action}")

fetch_diff_data_result = await fetch_files(owner, name, pr_number)

if not fetch_diff_data_result:
    return {"ok": False, "error": "Failed to fetch diff data"}

if len(fetch_diff_data_result) > 10000:
    return {"ok": False, "error": "Diff data is too large"}
What’s Happening Here? Let’s break it down in plain English — no docs, just dev talk.
Get the Payload
We start by pulling the JSON data out of the request:
payload = await request.json()This payload is basically the PR story — who did what, on which repo, and what changed.
Only Handle Certain Actions
We’re not interested in every pull request event GitHub sends — just a few specific ones:
"opened"→ when someone creates a PR"synchronize"→ when they push new commits to an existing PR"ready_for_review"→ when a draft PR becomes ready
If it’s anything else (like “closed” or “labeled”), we just smile politely and move on.
if action not in {"opened", "synchronize", "ready_for_review"}:
    return {"ok": False, "ignored_action": action}
Because let’s be honest — we don’t want our AI reviewing closed PRs 😆
Extract PR Information
Now we pull out the essentials: The repo owner, repo name, PR number.
repo = payload["repository"]
owner = repo["owner"]["login"]
name = repo["name"]
pr = payload["pull_request"]
pr_number = pr["number"]
With this info, we can call the GitHub API to fetch all the changed files for this PR.
You’ll see why that matters in just a second.
Fetching the PR Diff Data
Okay, so now we know which PR we’re dealing with.
Next, let’s fetch the actual diff data — the list of changed files and their patches.
Here’s the helper function that does it:
async def fetch_files(owner: str, repo: str, pr_number: int) -> list[dict]:
    token = settings.GITHUB_API
    GITHUB_API = "https://api.github.com"
    headers = {
        "Authorization": f"token {token}",
        "Accept": "application/vnd.github+json",
        "User-Agent": "ai-review-bot",
    }

    url = f"{GITHUB_API}/repos/{owner}/{repo}/pulls/{pr_number}/files?per_page=100"
    items = []

    async with httpx.AsyncClient(timeout=60, follow_redirects=True) as client:
        while url:
            r = await client.get(url, headers=headers)
            r.raise_for_status()
            items.extend(r.json())
            url = r.links.get("next", {}).get("url")

    return items
How It Works
- We call the GitHub REST API to list all the files changed in a pull request.
- The
while url:loop handles pagination — because GitHub only gives you 100 files per page. - The
User-AgentandAuthorizationheaders make sure GitHub knows who we are and that we’re allowed to be here. - Finally, we return a clean list of all changed files and patches.
And that’s it — we’ve officially connected the dots between GitHub, FastAPI, and real pull request data!
Next up: we’ll feed this diff data into LangChain + OpenAI to make our AI review the code — just like a teammate who never sleeps.
Let the AI Review the Code (for Real!)
Alright — we’ve fetched the PR diff, filtered out the noise, and verified that everything’s legit. Now comes the fun part — let’s hand the baton to our AI reviewer.
This is where our little project finally feels alive. Instead of us manually scrolling through dozens of changed files, the AI will read the diff, analyze it, and return a list of comments just like a real senior engineer would. Cool, right?
Let’s see how it works
def review_changes(diff: str):
    model = init_chat_model(
        "gpt-5-nano",
        model_provider="openai",
        api_key=settings.OPEN_AI_API_KEY,
    )

    prompt_string = """
    You are a senior software engineer reviewing a GitHub Pull Request.
    You will be given file changes in unified diff format (`patch`).

    Your tasks:
    1. Review **all code changes** (added, deleted, or modified).
    2. Identify issues such as:
    - Bugs or syntax errors
    - Security issues
    - Performance problems
    - Style/PSR-4 violations
    - Maintainability concerns
    3. Suggest a short, clear fix or improvement.

    ⚠️ STRICT OUTPUT RULES:
    - Return a JSON array only.
    - Each element must be in this shape:
    {{
        "filename": "<string>",
        "line": <integer>,
        "content": "<string>",
        "category": "<string>"
    }}
    - `category` must be one of: ["bug", "security", "performance", "style", "maintainability", "documentation"].
    - `line` should be the line number in the **new file version** where the comment applies.
    - If no issues, return `[]`.

    Here are the file changes to review:

    {file_changes}
    """

    prompt_template = ChatPromptTemplate.from_messages(
        [("system", prompt_string)]
    )

    prompt = prompt_template.invoke({"file_changes": diff})
    response = model.invoke(prompt)

    return response.content
This function takes the diff text and sends it to our AI model with a clear, structured prompt.
The model reads those changes and returns a JSON array of potential issues — each one tagged by category and line number.
Basically, we’ve just built our own mini “AI Code Reviewer.”
How It Works Step-by-Step
Pick Your AI Model
At the top, we initialize our model:
model = init_chat_model("gpt-5-nano", model_provider="openai", ...)This is like choosing which “AI teammate” to bring into the review.
Do you want the smart senior (more accurate but expensive)? Or the junior intern (cheaper, faster, but sometimes confused)?
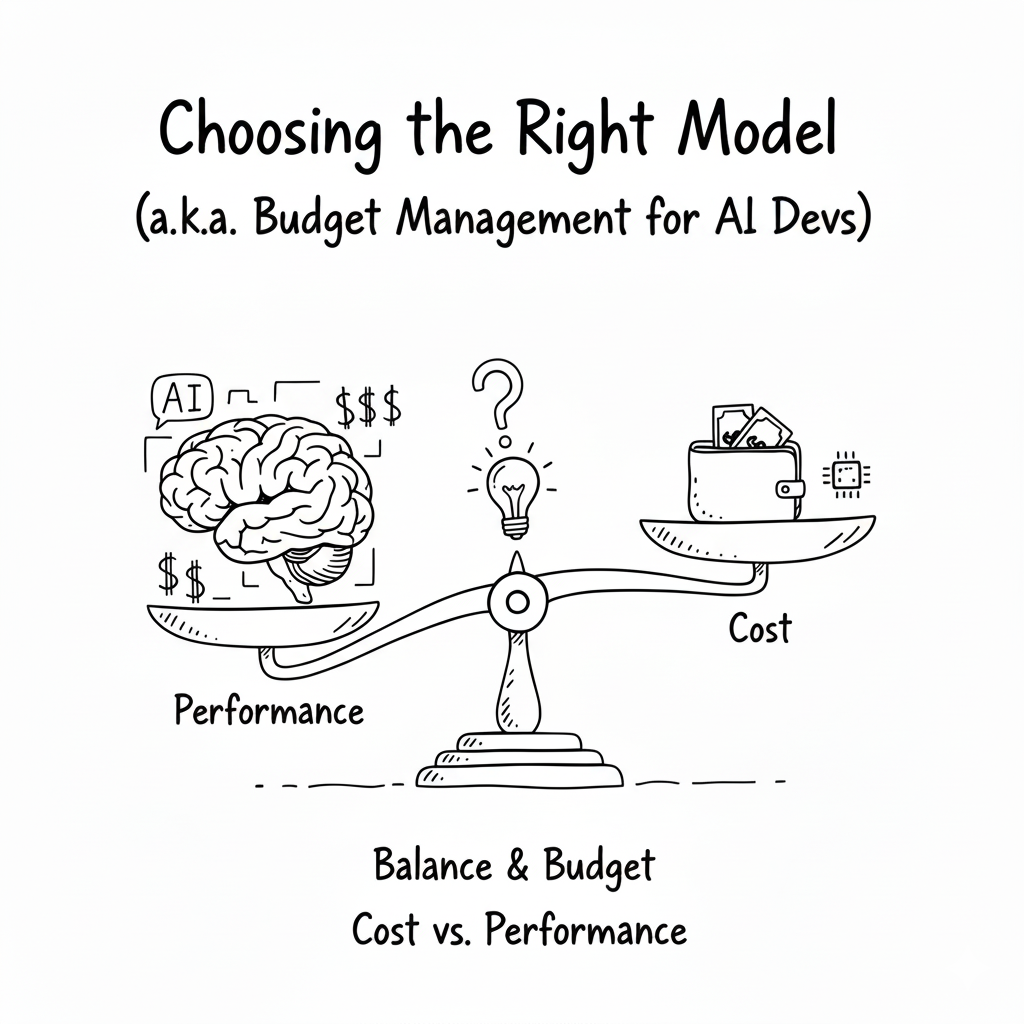
Choosing the Right Model (a.k.a. Budget Management for AI Devs)
Here’s where things get real: AI models don’t charge by character or word — they charge by tokens.
Think of tokens as small chunks of text.
Roughly speaking, 1,000 tokens ≈ 750 words in English.
Every request includes two parts:
- Prompt tokens → your instructions + the diff you send
- Response tokens → what the model replies
So, a big diff = more tokens = higher cost.
If you’re just testing things out:
- Try a lightweight model first (
gpt-4o-mini,gpt-5-nano, etc.) - Save the bigger models (
gpt-4-turbo,gpt-5) for tricky reviews or production-quality feedback
Pro tip: If your PR has a lot of changed files, split the review into smaller chunks. It’s easier on the wallet and the model’s brain.
Build a “Smart but Strict” Prompt
The prompt_string is basically your AI reviewer’s job description.
We make it super clear what to do, and just as importantly — what not to do.
That’s why we say:
“Return a JSON array only.”
This ensures the AI responds with a format we can parse directly, no fluff, no paragraphs, no emojis (unfortunately).
Inject the Diff and Fire the Request
Once the prompt is ready, we plug in the diff and send it off to the model:
prompt = prompt_template.invoke({"file_changes": diff})
response = model.invoke(prompt)
The response comes back as JSON (if everything goes well), ready to be parsed and displayed later.
Why This Is Cool? We’ve just turned a boring, repetitive task — reading through diffs — into a smart automated process.
Next up: we’ll take this AI feedback and post it back to GitHub as real comments — so it feels like a human reviewer left them there.
That’s where it starts to get really fun.
Bringing AI Feedback Back to GitHub
So, our AI reviewer has done its job — scanned the diff, spotted some potential issues, and returned them nicely in a JSON list.
Now it’s time for the magic trick: send those comments back to GitHub so they show up right inside the Pull Request.
Yep, you read that right — the AI will leave real code review comments just like your human teammates.
Here’s how it works
feedbacks = review_changes(fetch_diff_data_result)
repo_config = {"name": f"{owner}/{name}", "pr_number": pr_number}

feedback_clear = []
feedbacks = json.loads(feedbacks)
for fb in feedbacks:
    feedback_clear.append({
        "filename": fb["filename"],
        "line": fb["line"],
        "content": format_body(fb["content"]),
        "category": fb["category"]
    })
await add_feedbacks(feedback_clear, repo_config)
Parse and Clean the Feedback
We call review_changes() — the method we built earlier — to get the AI-generated feedback.
The result is a JSON array like this:
[
  {
    "filename": "app/routes.py",
    "line": 42,
    "content": "Possible security issue: user input not validated.",
    "category": "security"
  }
]
But before sending it to GitHub, we do a little cleaning up:
- Parse the JSON safely using
json.loads() - Run each message through
format_body()to make sure it’s clean and readable - Store it in a list called
feedback_clear
Basically, we’re turning the AI’s “raw thoughts” into polished GitHub comments.
Posting the Comments to GitHub
Once the feedback is clean, we pass it to this helper:
async def add_feedbacks(feedbacks: list[dict], repo_config: dict):
    if len(feedbacks) == 0:
        # Means there are no feedbacks to add.
        return

    gh = get_github_client()
    repo = gh.get_repo(repo_config["name"])
    pr = repo.get_pull(repo_config["pr_number"])

    last_commit = pr.get_commits()[pr.commits - 1]

    comments = [
        {
            "path": feedback["filename"],
            "line": feedback["line"],
            "side": "RIGHT",
            "body": feedback["content"],
        }
        for feedback in feedbacks
    ]

    pr.create_review(
        commit=last_commit,
        body="AI Code Review",
        event="COMMENT",
        comments=comments,
    )
Let’s break down what’s happening here:
- Early exit if no feedbacks — Because there’s nothing worse than leaving an empty “AI Review” comment 😅.
- Connect to GitHub using your access token (
get_github_client()is a PyGithub helper). - Grab the target PR and fetch its latest commit, since reviews need to attach to a specific commit.
- Format the comments — each feedback item becomes a GitHub comment with:
path: which fileline: which lineside:"RIGHT"(the new file side)body: what the AI wants to say
- Create the review via
pr.create_review()with a title ("AI Code Review") and your AI-generated comments.
When this runs successfully, GitHub adds a shiny “AI Code Review” section to your Pull Request, filled with the model’s feedback
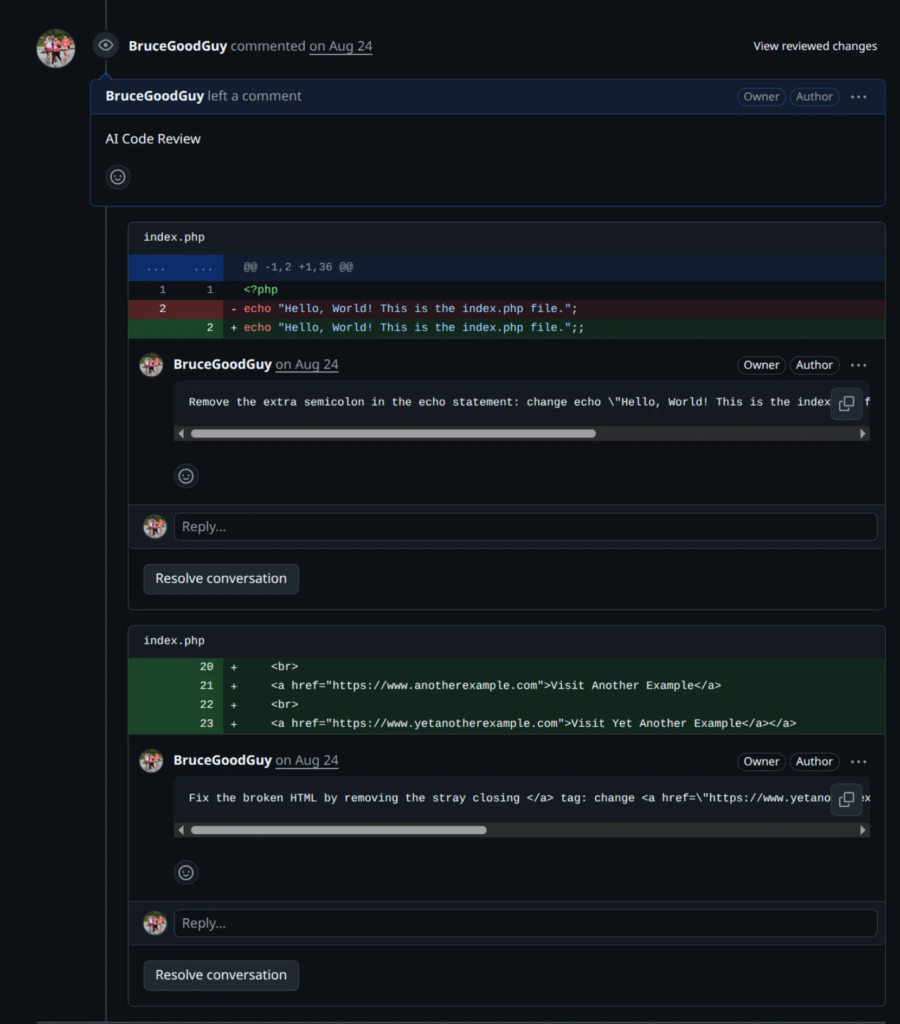
And just like that, your PR feels like it was reviewed by an extra teammate (except this one works 24/7 and never complains about meetings). 😄
The Full Circle
At this point, your workflow looks like this:
- Developer opens a Pull Request
- GitHub sends a webhook to your FastAPI app
- FastAPI validates it
- LangChain + OpenAI review the code
- AI feedback is posted back to GitHub
That’s it — a complete AI code review pipeline, from webhook to comment.
The loop is closed, the bot is alive, and your project just got a new “colleague” who doesn’t sleep.
And BOOM! — just like that, we’ve finished our first AI project.
I know this post was a bit long (thanks for staying with me!), but I really wanted to share every part of the journey — not just the code, but the thought process behind it.
It might not be perfect yet — and that’s totally fine.
It just means there’s still room to grow, to build something even better next time.
If you want to dig a little deeper, play with the code, or see how everything ties together in a real project, I’ve pushed the sample code to my repository here:
https://github.com/BruceGoodGuy/ai-webhook-reviewer
Feel free to clone it, break it, fix it, or remix it into your own version — that’s how real learning happens.
So let’s keep experimenting, keep learning, and keep creating cool stuff together. 💪
What You’ve Learned
By now, you’ve touched on a bunch of modern concepts:
- How to handle webhooks in FastAPI
- How to secure them with signatures
- How to talk to the GitHub API with PyGithub
- How to use LangChain to manage structured AI prompts
- And, most importantly, how to turn an idea into a working AI tool that fits into your dev workflow
That’s a lot of ground for one project — so seriously, well done 👏
Where to Go Next
If you’re feeling inspired (and you should be), here are a few cool directions you can take this project further:
Internal code-review rules (RAG enhancement)
– Every project has its own code review culture and rules — naming conventions, architecture patterns, or forbidden functions that only make sense within your team. To handle that, you can combine this AI workflow with a Retrieval-Augmented Generation (RAG) setup.
That means before the AI starts its review, it retrieves relevant snippets from your internal documentation, style guides, or best-practice notes and uses that as extra context. This gives you the best of both worlds:
- General-purpose intelligence from the model
- Project-specific consistency from your internal rules
With this hybrid approach, your AI reviewer won’t just check for syntax or performance — it’ll review based on your team’s DNA.
Custom model logic
– Use different AI models for different languages or frameworks (e.g., Python → GPT, PHP → Gemini, Java → Claude).
Final Thoughts

I know this has been a long (and maybe slightly confusing) blog post — but I truly hope it gave you a clearer picture of what GPT wrapper projects are all about.
More than just building a tool that calls ChatGPT or LangChain APIs, this project shows how we can blend AI with real developer workflows and turn ideas into something that actually helps people.
If this post sparks even a small curiosity or inspires you to start your own side project — that’s already a huge win for me.
And hey, if you ever build something from this idea, don’t be shy — show me!
Nothing makes me happier than seeing someone take these messy notes and turn them into something awesome.
At the end of the day, that’s what coding (and writing) is about — learning, experimenting, failing a bit, fixing a lot, and building something that matters.
So go ahead — open your editor, break something, fix it again, and let’s keep making cool things together.