


Introduction
Welcome to this tutorial on how to load and query sample data using SQL in Snowflake. We’ll use a fictitious food truck brand named Tasty Bytes to demonstrate these tasks. You’ll complete the tutorial using a pre-loaded worksheet in Snowsight, a Snowflake’s user interface.
In this tutorial, you will learn how to:
– Use a role to access functionalities from granted privileges.
– Use a warehouse to access resources.
– Create a database and schema.
– Create a table.
– Load data into the table.
– Query the data in the table.
Prerequisites
This tutorial assumes the following:
– You have a Snowflake’s trial account. If not, sign up for a free trial from here: https://signup.snowflake.com
– Your user is the account administrator and is granted the ACCOUNTADMIN system role.
Step 1: Sign in Using Snowsight
To access Snowsight over the public Internet, do the following:
1. In web browser, navigate to https://app.snowflake.com/.
2. Provide your account identifier or account URL. If you’ve previously signed in to Snowsight, you might see an account name that you can select and then Sign in using your Snowflake account credentials.

Step 2: Opening the SQL Worksheet for Loading and Querying Data
You can use worksheets to write and run SQL commands on your Snowflake database. Your trial account includes access to a pre-loaded worksheet for this tutorial. The worksheet contains the SQL commands needed to create a database, load data into it, and query the data.
To open the pre-loaded tutorial worksheet:
1. go to Projects » Worksheets to open the list of worksheets.
2. Open Load sample data with SQL from S3 bucket worksheet.

Step 3: Set the Role and Warehouse to Use
The role you use determines the privileges you have. In this tutorial, use the ACCOUNTADMIN system role to view and manage objects in your account. A warehouse provides the resources needed to create and manage objects and run SQL commands, including CPU, memory, and temporary storage. Your trial account includes a virtual warehouse (compute_wh) for this tutorial.
To set the role and warehouse:
1. In the open worksheet, place your cursor in the `USE ROLE` line.
USE ROLE accountadmin;
2. In the upper-right corner of the worksheet, select Run.

3. Place your cursor in the `USE WAREHOUSE` line, then select Run
USE WAREHOUSE compute_wh;
Step 4: Create a Database, Schema, and Table
A database stores data in tables that you can manage and query. A schema is a logical grouping of database objects, such as tables and views. In this tutorial, we will create a database named `tasty_bytes_sample_data`, a schema named `raw_pos`, and a table named `menu`.
To create the database, schema, and table:
1. In the open worksheet, place your cursor in the `CREATE OR REPLACE DATABASE` line, then select Run.
CREATE OR REPLACE DATABASE tasty_bytes_sample_data;
2. Place your cursor in the `CREATE OR REPLACE SCHEMA` line, then select Run.
CREATE OR REPLACE SCHEMA tasty_bytes_sample_data.raw_pos;
3. Place your cursor in the `CREATE OR REPLACE TABLE` lines, then select Run.
CREATE OR REPLACE TABLE tasty_bytes_sample_data.raw_pos.menu
(
menu_id NUMBER(19,0),
menu_type_id NUMBER(38,0),
menu_type VARCHAR(16777216),
truck_brand_name VARCHAR(16777216),
menu_item_id NUMBER(38,0),
menu_item_name VARCHAR(16777216),
item_category VARCHAR(16777216),
item_subcategory VARCHAR(16777216),
cost_of_goods_usd NUMBER(38,4),
sale_price_usd NUMBER(38,4),
menu_item_health_metrics_obj VARIANT
);
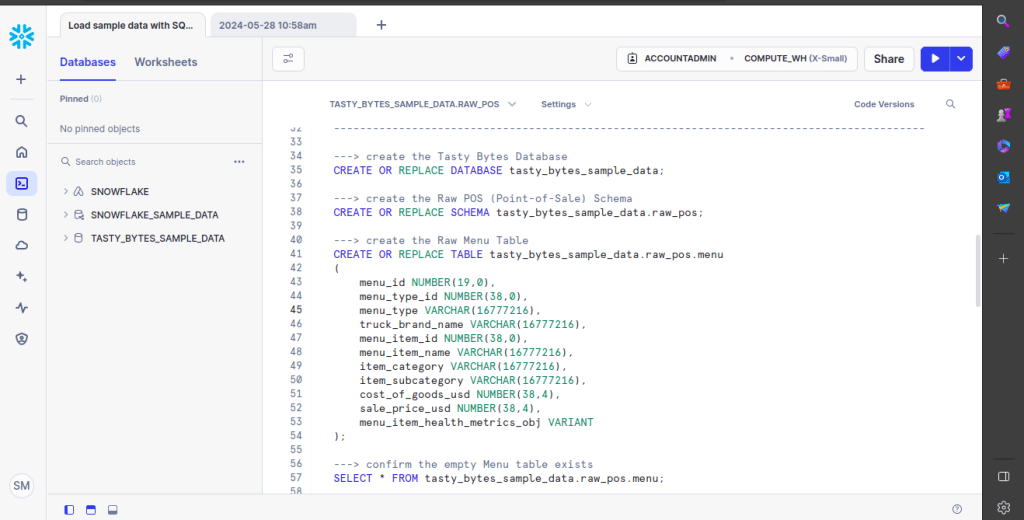
4. To confirm that the table was created successfully, place your cursor in the `SELECT` line, then select Run.
SELECT * FROM tasty_bytes_sample_data.raw_pos.menu;
Your output will show the columns of the table you created. At this point, the table does not have any rows.
Step 5: Create a Stage and Load the Data
A stage is a location that holds data files to load into a Snowflake database. This tutorial creates a stage that loads data from an Amazon S3 bucket. This tutorial uses an existing bucket with a CSV file that contains the data, ofcourse this will work same for existing bucket with a other CSV files. You load the data from this CSV file into the table you created previously.
To create a stage and load the data:
1. In the open worksheet, write the following command to create or replace stage and then select Run.
CREATE OR REPLACE STAGE tasty_bytes_sample_data.public.blob_stage
url = 's3://sfquickstarts/tastybytes/'
file_format = (type = csv);
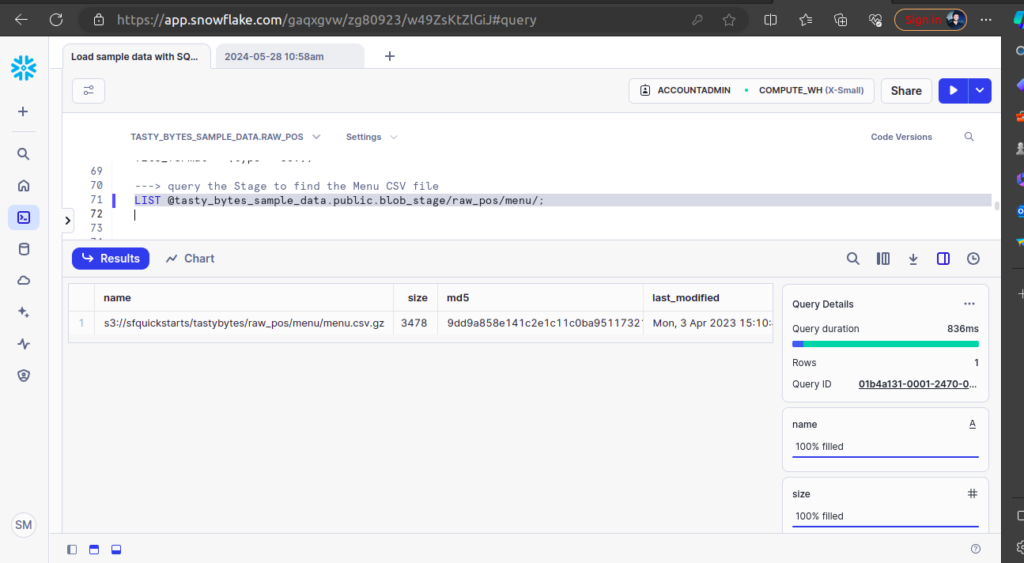
2. To confirm that the stage was created successfully, execute the below command.
LIST @tasty_bytes_sample_data.public.blob_stage/raw_pos/menu/;
Your output should look like following.
3. To load the data into the table, run the given command.
COPY INTO tasty_bytes_sample_data.raw_pos.menu
FROM @tasty_bytes_sample_data.public.blob_stage/raw_pos/menu/;
Step 6: Query the Data
Now that the data is loaded, you can run queries on the `menu` table. To run a query in the open worksheet, select the line or lines of the `SELECT` command, and then select Run.
For example, to return the number of rows in the table, run the following query:
SELECT COUNT(*) AS row_count FROM tasty_bytes_sample_data.raw_pos.menu;
Your output should show the number of rows in the table.

To return the top ten rows in the table, run this query:
SELECT TOP 10 * FROM tasty_bytes_sample_data.raw_pos.menu;
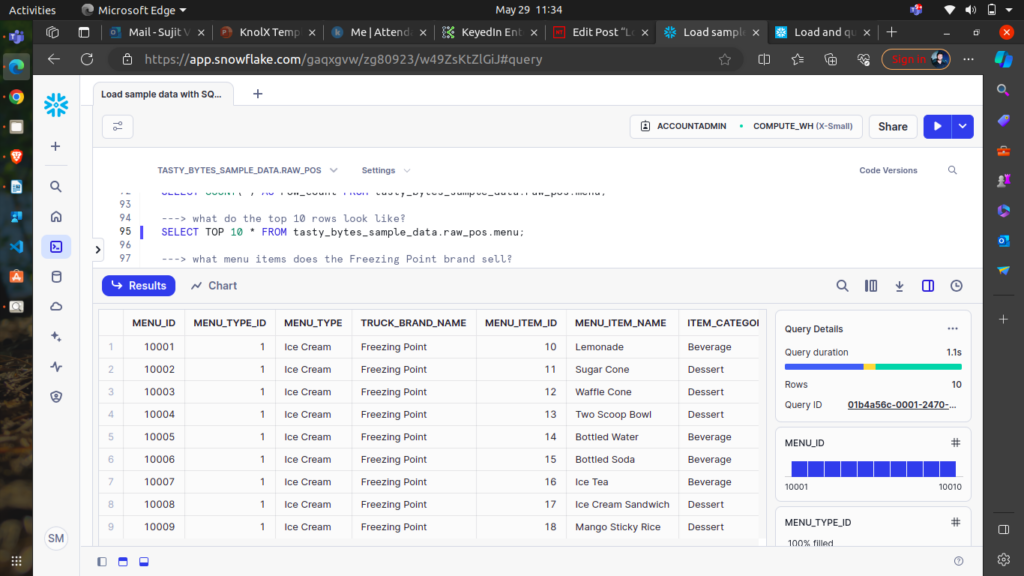
menu table.Step 7: Clean Up, Summary, and Additional Resources
Clean Up Tutorial Objects (Optional)
If the objects you created are no longer needed, you can remove them from the system with `DROP <object>` commands. To remove the database you created, run the following command:
DROP DATABASE IF EXISTS tasty_bytes_sample_data;
Summary and Key Points
In summary, you used a pre-loaded worksheet in Snowsight to complete the following steps:
1. Set the role and warehouse context.
2. Create a database, schema, and table.
3. Create a stage and load the data from the stage into the database.
4. Query the data.
Conclusion
This tutorial guided you through the process of loading and querying sample data using SQL in Snowflake. By following the steps, you learned how to set roles and warehouses, create a database and schema, load data from a CSV file, and run queries on the data. Now you have a foundational understanding of managing and querying data in Snowflake, which enables you to further explore and utilize its capabilities for your data projects.